Table of Contents
Advertisement
Advertisement
Table of Contents

Related Manuals for NetComm N150


Summary of Contents for NetComm N150
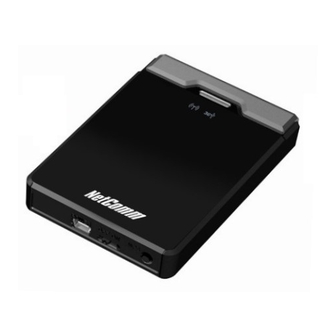
- Page 1 NETCOMM LIBERTY™ SERIES 3G Wireless N150 Mini Router m1 USER GUIDE...
-
Page 2: Important Safety Instructions
Copyright©2010 NetComm Limited. All rights reserved. The information contained herein is proprietary to NetComm Limited. No part of this document may be translated, transcribed, reproduced, in any form, or by any means without prior written consent of NetComm Limited NOTE:This document is subject to change without notice. -
Page 3: Table Of Contents
3G Network Settings ........................................11 Further Configuration and Reset .....................................12 Connecting to your NetComm m1 Wireless Network from Mac OS X ..........................12 Connecting to your NetComm m1 Wireless Network from a Windows PC ........................14 Settings in the NetComm m1 Web Configuration Wizard ..............................16 Basic Settings �������������������������������������������������������������������������������������������������������������������������������������������������������������������������������������������18... - Page 4 OVERVIEW...
-
Page 5: Overview
Overview 3G Wireless N150 Mini Router m1; this product is specifically designed for the mobile user who needs to have internet access beyond his home and office. It provides a complete solution for Internet surfing and broadband sharing. Instructions for installing and configuring this product can be found in this manual. - Page 6 Getting Started...
-
Page 7: Getting Started
It is highly recommended that the NetComm m1 must be kept at least 20cm distances away from human body. This is a regulatory requirement and applies to all 3G / WiFi capable devices meeting standard regulatory compliance –... -
Page 8: Avoid Obstacles And Interferences
If your phone supports channel selection, change the channel on the phone to the farthest channel from your wireless network. For example, change the phone to channel 1 and set your NetComm m1 to channel 11. See your phone user manual for detailed instructions. - Page 9 Getting Online in 5 minutes...
-
Page 10: Getting Online In 5 Minutes
Slide the power switch to the ON position and wait around 2 minutes to allow the device to power up. Connect a compatible 3G USB Modem to the 3G USB port of the NetComm m1. If you are unsure whether your 3G USB Modem is compatible with the NetComm m1, please check the compatibility list on the NetComm website. - Page 11 NetComm Liberty Series - 3G Wireless N150 Mini Router m1 Note: Your APN (Access Point Name) is the 3G mobile network name that is used to identify your 3G mobile broadband service provider. If you don’t have this information ready, please contact your service provider to obtain this information.
-
Page 12: Network Settings
Further Configuration and Reset The NetComm m1 has been designed to work with minimal user configuration. However if you would like to set any advanced options this can be done using the “Advanced” section of the web browser based user interface. - Page 13 Make sure your NetComm m1 is turned on. You should see a wireless network called ‘NetComm Wireless’ Click on network ‘NetComm Wireless’ Enter the password which is ‘“a1b2c3d4e5“ You are now connected to your NetComm m1. Open your browser and type in http://192.168.1.1 to access your device YMLM1WN 3G Wireless N150 Mini Router m1-User Guide...
-
Page 14: Connecting To Your Netcomm M1 Wireless Network From A Windows Pc
Connecting to your NetComm m1 Wireless Network from a Windows PC The following steps have been performed on a computer running the Windows 7 operating system. For other operating systems refer to the Appendix at the end of this document. - Page 15 Search for a wireless network named ‘NetComm Wireless’ from the selection and click on it to connect. Click on the ‘Connect’ button. Your computer will then try to connect to the NetComm m1. You should then be prompted to enter the Security key.
-
Page 16: Settings In The Netcomm M1 Web Configuration Wizard
After choosing 3G, you need to enter the information supplied by your 3G provider. Click Apply Settings once you have finished. After several minutes the NetComm m1 will save all the settings and the wizard is complete. Click Finish to go back to the Status page. - Page 17 Basic Settings...
-
Page 18: Basic Settings
The Basic Settings page allows you to configure a number of basic settings on the unit. This section deals with those features. Click on any of the menu items on the left to configure the associated settings. 3G Wireless N150 Mini Router m1-User Guide YMLM1WN... -
Page 19: Basic Settings >Network Setup
NetComm Liberty Series - 3G Wireless N150 Mini Router m1 Basic Settings >Network Setup This page allows you to change the LAN (Local Area Network) and WAN (Wide Area Network) connection settings on your NetComm m1. LAN Setup • LAN IP Address: the local IP address of this device. - Page 20 If required, you can enter the Wireless security for the remote wireless network. Click the “Save” button to save your selected settings. Step 4: Click the “Reboot” button to restart device so that the new settings take effect. 3G Wireless N150 Mini Router m1-User Guide YMLM1WN www.netcomm.com.au...
- Page 21 DHCP Server...
-
Page 22: Dhcp Server
Press “More…” for more options. DHCP Clients List The list of DHCP clients is shown here. DHCP Fixed Mapping The DHCP Server will reserve a specific IP for a specific MAC address, shown below. 3G Wireless N150 Mini Router m1-User Guide YMLM1WN www.netcomm.com.au... - Page 23 Wireless...
- Page 24 WEP (Wired Equivalent Privacy). Enabling this security will protect your data while it is transferred from the computer to the NetComm m1 router. Select the WEP Encryption (64bit or 128bit) and enter the WEP key in Key 1 field. Please note that a WEP Encryption key can only use numbers from 0 to 9 and letters from A to F.
-
Page 25: Wps (Wifi Protected Setup)
NetComm Liberty Series - 3G Wireless N150 Mini Router m1 b) WPA-PSK/WPA2-PSK : A newer type of security is WPA-PSK-TKIP and WPA-PSK2-AES. This type of security gives a more secure network compared to WEP. Use TKIP Encryption type for WPA-PSK and AES for WPA2-PSK. Please enter the key in the Passphrase field. -
Page 26: Basic Settings > Change Password
Basic Settings > Change Password On this page you can change the NetComm m1 web based user configuration password. Please type in your old password (The factory default password is “admin”) and then type in the new password. Type the same new password in the Reconfirm field. - Page 27 Security Settings...
-
Page 28: Security Settings
For each direction, you can specify up to 48 rules. For each rule you will need to define the following: • Source IP address • Source port • Destination IP address • Destination port • Protocol: TCP or UDP or both. • Use Schedule Rule# 3G Wireless N150 Mini Router m1-User Guide YMLM1WN www.netcomm.com.au... -
Page 29: Security Settings > Url Blocking
NetComm Liberty Series - 3G Wireless N150 Mini Router m1 For source or destination IP address, you can define a single IP address (192.168.1.1) or a range of IP addresses (192.168.1.100-192.168.1.200). Empty fields imply all IP addresses. For source or destination port, you can also define a single port (80) or a range of ports (1000-1999). Use the prefix “T” or “U” to specify either the TCP or UDP protocol e.g. -
Page 30: Security Settings > Mac Control
MAC addresses that are not in the list to associate to the wireless LAN Click the “Next Page” or the “Previous Page” buttons to see the entire list. Click “Save” to save the settings or “Undo” to cancel. 3G Wireless N150 Mini Router m1-User Guide YMLM1WN www.netcomm.com.au... -
Page 31: Security Settings > Miscellaneous
NetComm Liberty Series - 3G Wireless N150 Mini Router m1 Security Settings > Miscellaneous This page allows you to change various miscellaneous security settings on the unit. Administrator Time-out The period of time with no activity in the web based user configuration page to logout automatically, you may set it to zero to disable this feature. - Page 32 Advanced Settings Placement...
-
Page 33: Advanced Settings
NetComm Liberty Series - 3G Wireless N150 Mini Router m1 Advanced Settings The Advanced Settings page allows you to configure the advanced settings on the router such as the System log and System time . Click on any of the menu items on the left to configure the associated settings. -
Page 34: Advanced Settings > System Time
Advanced Settings > System Time This page allows you to change the System time setting on the NetComm m1. Time Zone Select the time zone where this device is located. Auto-Synchronization Click the “Enable” checkbox to enable this function. Time Server... - Page 35 Tool Box...
-
Page 36: Tool Box
From this page you can view the system log and the routing table information for the router. Tool Box> Firmware Upgrade You can upgrade the router firmware by clicking the “Upgrade” button 3G Wireless N150 Mini Router m1-User Guide YMLM1WN www.netcomm.com.au... -
Page 37: Tool Box > Backup Setting
NetComm Liberty Series - 3G Wireless N150 Mini Router m1 Tool Box > Backup Setting You can backup your current settings by clicking the “Backup Setting” button then and save it as a bin file. When you want to restore these settings, click the “Firmware Upgrade”... - Page 38 Troubleshooting Placement...
-
Page 39: Troubleshooting
Are you having trouble connecting wirelessly? Make sure that the WiFi device you are using to connect to the NetComm m1 is turned ON. For example, most laptops have a manual WiFi ON/OFF button that is typically located to the front or the side of the laptop, depending on the brand. Please contact your laptop or wireless device manufacturer for more information regarding this. - Page 40 Legal and Regulatory Information...
-
Page 41: Legal & Regulatory Information
The power supply that is provided with this unit is only intended for use with this product. Do not use this power supply with any other product or do not use any other power supply that is not approved for use with this product by NetComm. Failure to do so may cause damage to this product, fire or result in personal injury. -
Page 42: Product Warranty
Payment of the cost of having the Goods repaired. All NetComm ACN 002 490 486 products have a standard 12 months warranty from date of purchase. However some products have an extended warranty option (refer to packaging). To be eligible for the extended warranty you must supply the requested warranty information to NetComm within 30 days of the original purchase by registering on-line via the NetComm web site at www�netcomm�com�au... - Page 43 Note: NetComm Technical Support for this product only covers the basic installation and features outlined in the Quick Start Guide. For further information regarding the advanced features of this product, please refer to the configuring sections in the User Guide or contact a Network Specialist.
Need help?
Do you have a question about the N150 and is the answer not in the manual?
Questions and answers