Table of Contents
Advertisement
Advertisement
Table of Contents

Related Manuals for CONSTRUCTA CF431350


Summary of Contents for CONSTRUCTA CF431350
- Page 1 Instruction manual CF431350...
- Page 3 In the unlikely event of a fault, look here for information on how to rectify minor faults yourself. A detailed table of contents will help you to find your way around quickly. Enjoy your meal! Instruction manual CF431350 9000493206 C-260590-02...
-
Page 4: Table Of Contents
Important information ......Before installation ........Safety information . - Page 5 Table of contents Meat, poultry, fish ........Tips for roasting and grilling .
-
Page 6: Important Information
Important information Before installation Disposing in an environmentally responsibl e manner ó Transport damage Electrical connection Safety information... - Page 7 Children may prepare meals only if they have been properly Children instructed. They must be able to operate the appliance correctly. They must understand the hazards indicated in the instruction manual. Children must be supervised when using the appliance, to ensure that they do not play with it. Hot oven Open the oven door carefully.
-
Page 8: Reasons For Damage
Reasons for damage Baking tray, aluminium foil Do not place the baking tray on the oven floor. Do not cover or dishes on the oven floor it with aluminium foil. Do not place dishes on the oven floor. This will cause heat accumulation. The baking and roasting times will no longer be correct and the enamel will be damaged. -
Page 9: Your New Cooker
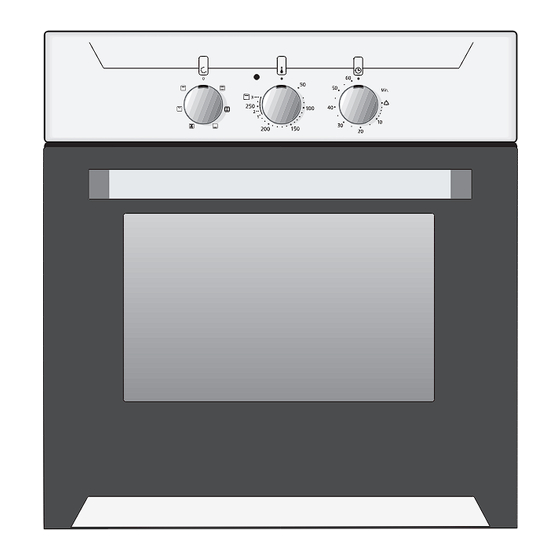
Your new cooker Here you will learn more about your new oven. The control panel and its switches and indicators are explained here. The heating modes and the accessories included with your oven will be explained here. Control panel Details vary according to the appliance model. Function selector Timer Temperature... -
Page 10: Oven
Oven Function selector You can use the function selector dial to set the heating mode for the oven. The function selector dial can be turned clockwise or anti clockwise. Settings t Top/bottom heating Only one shelf level; for sponge cakes in tins, joints of beef, veal and game. -
Page 11: Temperature Selector
Temperature Use the temperature selector to set the temperature or grill selector setting. Temperature 50 270 Temperature range in ºC Grill x Low grill Medium grill High grill The indicator light by the temperature selector comes on while the oven is heating up. It goes out during pauses in heating. -
Page 12: Oven And Shelving Accessories
Oven and shelving accessories The shelf can be inserted at 4 different heights in the oven. You can remove the shelf two thirds of the way without it tipping. This makes it easier to take food out of the oven. Accessories Accessories may be purchased at a later date from the after sales service or from specialist shops. -
Page 13: Before Using For The First Time
Before using for the first time This section will tell you everything you need to do before using the cooker for the first time. Heat the oven and clean the accessories. Read the safety instructions in the Important information" section. Removing You must remove the packaging material before using the packaging material... -
Page 14: Setting The Oven
Setting the oven You can easily set the oven using the function selector and the temperature selector. The correct type of heating and temperature for many dishes can be found in the Tables and tips section. Setting procedure Example: Top/bottom heating t, 200 ºC Select the desired type of heating using the function selector. - Page 15 Note: To prevent moisture from forming on the control panel, do not leave cooked food standing in the appliance after it has been switched off. Saving energy If you wish to switch off the appliance before the end of the cooking in order to save energy: Turn the temperature selector back to the Ú...
-
Page 16: Care And Cleaning
Care and cleaning Do not use high pressure cleaners or steam jets. There is a danger of short circuiting. Do not use caustic or abrasive cleaning agents. The surface could be damaged. If an abrasive substance comes into contact with the frontage, wash it off immediately with water. Cleaning agents Appliance exterior: Stainless steel surfaces... - Page 17 Aluminium baking tray (optional) Do not wash in the dishwasher. On no account use oven cleaner. The surface should not be touched with a knife or other similar sharp objects. Risk of scratching. Wipe the surfaces horizontally and without applying pressure with soapy water and a soft window cloth or a lint free microfibre cloth.
-
Page 18: Detaching And Attaching The Oven Door
Detaching and attaching the oven For cleaning purposes and to remove the door panels, you door can detach the oven door. The oven door hinges each have a locking lever. When the locking levers are closed (Fig. A), the oven door is secured in place. - Page 19 Attaching the door Reattach the oven door in the reverse sequence to removal. When attaching the oven door, ensure that both hinges are inserted straight into the opening (Fig. A). The notch on the hinge must engage on both sides (Fig. Close both locking levers again (Fig.
-
Page 20: Removing And Installing The Door Panels
Removing and installing the door To facilitate cleaning, you can remove the glass panels from the oven door. panels 1. Detach the oven door and lay on a cloth with the handle facing down. 2. Unscrew the cover on top of the oven door. To do this, undo the right and left hand screws. -
Page 21: Cleaning The Shelf Frames
Cleaning the shelf The shelf frames can be removed for cleaning. frames To remove the shelf frames: Hold the shelf frames from underneath and pull slightly forward. Pull out the projections at the bottom from the apertures they are inserted in. Then remove the complete frame by first pulling it downward and then forward. - Page 22 Caution. Incorrect assembly: never move the rail before the two hooks are secured fully in the upper holes. The enamel can become damaged and break. . Correct assembly: the two hooks must be inserted fully into the upper holes. Now move down the rail slowly and carefully and insert into the lower holes.
-
Page 23: Troubleshooting
Troubleshooting Should a malfunction occur, it is often only due to a minor fault. Please read the following instructions before calling the after sales service: Problem Possible cause Comments/remedy The oven oes not work. Blown fuse. Look in the fuse box and check that the fuse is in working order. -
Page 24: Replacing The Oven Light On The Ceiling Of The Oven
Replacing the oven If the oven light fails, it must be replaced. 25 watt light on the ceiling heat resistant replacement bulbs can be obtained from the of the oven after sales service or specialist shops. Please specify the E number and FD number of your appliance. -
Page 25: After Sales Service
After sales service Our after sales service is there for you if your oven needs repairing.You will find the address and telephone number of your nearest after sales service centre in the phone book. The after sales service centres listed will also be happy to advise you of a service point in your local area. -
Page 26: Tables And Tips
Tables and tips This table contains a selection of dishes and the optimum settings at which to cook them. You can find out which type of heating and temperature is best for your dish, which accessories to use, and at which oven level the dish should be inserted. - Page 27 Cake in a mould Cake mould placed Level Heating Tempe Cooking on a wire shelf mode rature ºC time,minute á Simple cake mixture Rectangular cake mould/tin Cakes on trays Level Type of Temperature Baking heating ºC time, mins á...
- Page 28 Bread and rolls Level Type of Temperature Cooking heating ºC time, mins Yeast Small baked products Level Type of Temperature Baking time, heating ºC mins á á á á á...
-
Page 29: Baking Tips
Baking tips You wish to cook to your own recipe. Refer to the instructions in the tables for similar types of food. How to check that a sponge cake is Approximately 10 minutes before the end of the baking time given in the cooked properly. -
Page 30: Meat, Poultry, Fish
Meat, poultry, fish Ovenware You may use any heat resistant dishes. The universal pan is also suitable for larger roasts. Always place the dishes in the centre of the wire grill. Hot glass dishes should be placed on a dry kitchen towel after being removed from the oven. - Page 31 Meat Weight Ovenware Level Type of Temperature Cooking heating ºC, grill time, mins Pot-roasted...
- Page 32 Poultry The values in the table apply to dishes placed in a cold oven. The weights indicated in the table are for unstuffed poultry that is ready for roasting. If you are grilling directly on the wire rack, you should also insert the universal pan at level 1.
-
Page 33: Tips For Roasting And Grilling
Tips for roasting and grilling The table does not contain specifications for the weight of the roast. How can you tell when the roast is ready. The roast is too dark and the crackling is partly burnt. The roast looks good, but the sauce is burnt. -
Page 34: Frozen Foods
Frozen foods Please observe the instructions on the packaging. The values in the table apply to dishes placed in a cold oven. Meal Level Type of Temperature in Cooking time in heating ºC minutes á Fruit strudel* Universal pan 180 200 40 50 French fries* Universal pan... -
Page 35: Drying
Drying Only use perfectly fresh fruit and vegetables, and wash them thoroughly. Allow the food to drain well and dry it yourself. Line the universal pan and wire rack with baking paper or greaseproof paper. Meal Level Type of Temperature in Cooking time in heating ºC... - Page 36 Setting procedure Place the universal pan on level 2. Place the jars inside the pan so that they do not come into contact with each other. Pour ½ litre of hot water (approx. 80 °C) into the universal pan. Close the oven door. Switch the function selector to s.
-
Page 37: Special Dishes
Never place the hot jars on a cold or wet surface as this Remove the jars could cause the glass to crack. Special dishes Your appliance can be set to temperatures between 50 and 270 ºC. 50 ºC is equally useful for producing creamy yoghurt as it is for light yeast dough. -
Page 38: Energy Saving Tips
Energy saving tips Only preheat the oven if it specifies in the recipe or in the table in the instruction manual that you should do so. Use non stick, black painted or enamelled tins. They absorb the heat especially well. If you have several cakes to bake it is best to bake them one after the other. -
Page 39: Test Dishes
Test dishes In accordance with DIN 44547 and EN 60350 standard Cakes and pastries The values in the table apply to dishes placed in a cold oven. Dish Accessories and notes Level Type of Temperature Baking time, heating ºC mins á... - Page 40 Grill The values in the table apply to dishes placed in a cold oven. Dish Accessories Level Type of Grill setting Cooking time, heating mins Toasting bread Wire rack (preheat for 10 minutes) Beefburgers, 12 pieces* Wire rack 25 30 Turn after C of the time.
- Page 41 Notes...
- Page 42 Notes...
- Page 44 Constructa GmbH Carl Wery Straße 34 81739 München 9000493206 GERMANY 260590-02...
Need help?
Do you have a question about the CF431350 and is the answer not in the manual?
Questions and answers