Movincool Movin Cool PC 7 Operation Manual
Hide thumbs
Also See for Movin Cool PC 7:
- Operation manual (22 pages) ,
- Limited warranty (1 page) ,
- Specifications (2 pages)
Table of Contents
Advertisement
Advertisement
Chapters
Table of Contents

Related Manuals for Movincool Movin Cool PC 7


Summary of Contents for Movincool Movin Cool PC 7
- Page 1 SECCIÓN EN ESPAÑOL SECTION EN FRANÇAIS AVAILABLE AT WWW.MOVINCOOL.COM...
-
Page 4: Table Of Contents
Foreword Congratulations on purchasing the MovinCool portable air conditioner. This manual explains how to install and operate the MovinCool PC 7 portable air conditioning unit. Please read this operation manual thoroughly to familiarize yourself with the features of the unit and to ensure years of reliable operation. -
Page 5: Attention
INTRODUCTION Mobile Air Conditioner The PC7 is a small unit, which can adjust the temperature and humidity in a room making it easy to use in different occasions. It also has multiple functions, included Cooling, Dehumidifying, and Fan Modes. This unit was designed especially to be used in a family house, office, etc. It has a compact design compared to others with the same coolig capacity. -
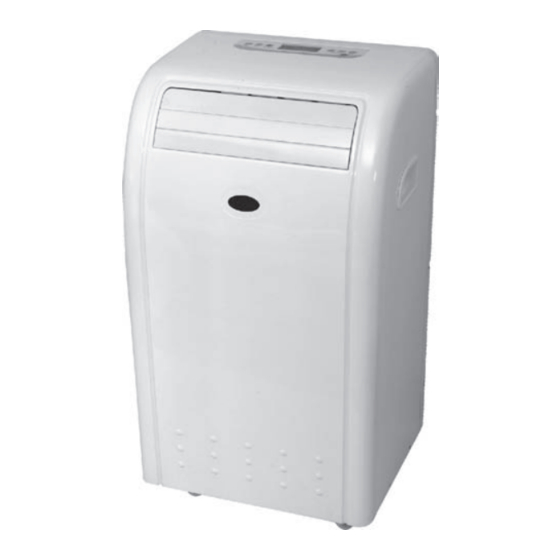
Page 6: Unit Description And Function
UNIT DESCRIPTION AND FUNCTION FRONT Control panel Left/right air swinging fins Up/down air louver Air outlet Handle Left/right air direction control tab Caster Note: Open the up/down air louver to the highest position before the unit is turned on. BACK Air-return grill Air inlet Power cord holders... - Page 7 DESCRIPTION AND FUNCTION (cont.) UNIT CONTROL PANEL MODE Button TIMER Button TEMP Button FAN SPEED Button Press this button to select Press this button to set the Press this button to Press these buttons to the modes of cooling, time for switch-on, switch-off choose high, medium or change the set point dry or fan mode.
-
Page 8: Remote Control
OPERATON AND INDICATORS OF REMOTE CONTROL Remote Control Install the supplied batteries (type AAA 1.5V) to the remote controller. Set temperature indicator Fan speed indicator Cooling indicator Drying indicator Lock key indicator Fan Mode indicator Air flow indicator Timer time or present time indicator Temperature setting button Each presing of the button, the MODE button... -
Page 9: Operation And Indicators Or Remote Control
OPERATION AND INDICATORS OF REMOTE CONTROL (cont.) Present Time Setting Procedure When batteries are inserted,time is automatically set to 00:00. Set the present time as follows. Example:Set time to 10:30 Continuously press the HOUR button for 2 seconds . The time indicator is blinking and can set the HOUR time. Press the HOUR button. -
Page 10: Use Of Control Panel
USE OF CONTROL PANEL Dehumidifying and Cooling Operation The operating ranges for cooling operation and dehumidifying are 63ºF-88ºF(17ºC-31ºC). Power Source WARNING The AC outlet (115 VAC,Single Phase,60Hz) must be rated at 15A or higher. The AC socket must be firm and reliable. Do not connect the unit to a multiple socket outlet which is also being used for other electrical appliances. -
Page 11: Water Drainage Methods
USE OF CONTROL PANEL (cont.) Timer Set Function To set time to start the unit with the unit off (stand by power), press Timer button, the LCD window shows" , repeatedly press the HOUR button, set the time to start as you like. -
Page 12: Maintenance/Service
MAINTENANCE/SERVICE Pull the power plug out of the socket before cleaning. Make sure there is no power to the unit before maintenance or repair to prevent accident caused by electrical shock. CLEANING OF AIR FILTER If the air filter is blocked with a lot of dust, the air flow volume will reduce. Clean the air filter once every two weeks. -
Page 13: Safety Cautions
MAINTENANCE/SERVICE (cont.) AFTER OPERATIONAL SEASONS 1. Turn off the unit, and disconnet the power source. 2. Make proper maintenance to the air filter and other parts. 3. Open the base stopper to drain out the condensed water in the condensate pan, then operate the unit in fan mode for half a day to let the condensate pan dry. -
Page 14: Troubleshooting
TROUBLESHOOTING Check the following items before calling your MovinCool reseller or a qualified technician. Condition Check Area Remedy Is there power? Plug into the wall socket. Is it plugged in? Is the fuse or circuit breaker switch turned off? Change the fuse or turn switch on. Unit does not operate at all. -
Page 15: Installation
INSTALLATION Selection of Installation Location Put the unit on a flat location where the air outlets are not covered up, place the unit no less than 20 inch (500 mm) away from a wall or other obstacle. Power cord holder installation Install the supplied power cord holders with the supplied two self-tapping screws to the unit. - Page 16 INSTALLATION (cont.) Mounting through the wall 1) Shrink the exhaust air duct. 2) Insert the duct into the square adapter. Rotate the duct (2-3 rounds). 3) Insert the other end of the duct into the window exhaust adapter 1. Rotate the duct (2-3 rounds). Attach the window exhaust adapter 2. 4) Fix the square end of the duct to the exhaust terminal of the unit.
- Page 17 INSTALLATION (cont.) If the exhaust air duct requires bending, see figures below. Incorrect duct mounting Fig. 4 (Bending the duct sharply can easily cause malfunction.)
-
Page 18: Screw
INSTALLATION (cont.) Window Slider Kit Installation The window slider kit is designed to fit most standard "vertical" and "horizontal" widow applications.However, It may be necessary for you to improve/modify some aspects of the installation procedures for certain types of windows. Please refer to Fig.5 & Fig. -
Page 19: Installation Accessories
INSTALLATION (cont.) Installation Accessories Fig. 7 Description Exhaust air duct with adapters...4/set Stretches from 19-1/2" (500 mm) up to 78-3/4" (2000 mm) Adjustable window slider kit......2/set Stretches from 26-5/8" (675 mm) up to 48-3/8" (1230 mm) Power cord holder..2/set Screw......2 pcs Self-tapping screw..4 pcs (2 pcs are extra.) Nut......2 pcs Washer.......4 pcs... -
Page 20: Lcdi Power Cord
LCDI POWER CORD WARNING The LCDI device is a non-serviceable part. Attempting to open the device may expose the user to hazardous electric shock, and voids any warranties and performance claims. Manufacturer’s liability is limited to the replacement of the device. CAUTION 1. -
Page 21: Warranty
DENSO SALES CALIFORNIA, INC.( “DENSO”) warrants its MOVINCOOL Products only to the extent stated in its official written warranties. Unless otherwise specifically provided in writing by DENSO, DENSO warrants to end-user that the Products shall be free of defects in materials or workmanship and will function in accordance with DENSO’s published specifications under ordinary intended use and service for a period of twelve(12) months after delivery to the enduser. - Page 22 DENSO SALES CALIFORNIA, INC. Long Beach CA,90810 www.movincool.com P/N: 484007- 3290EN First lssue: March 2010...
Need help?
Do you have a question about the Movin Cool PC 7 and is the answer not in the manual?
Questions and answers