Table of Contents
Advertisement
Quick Links
Advertisement
Chapters
Table of Contents

Related Manuals for Microscan HS-1


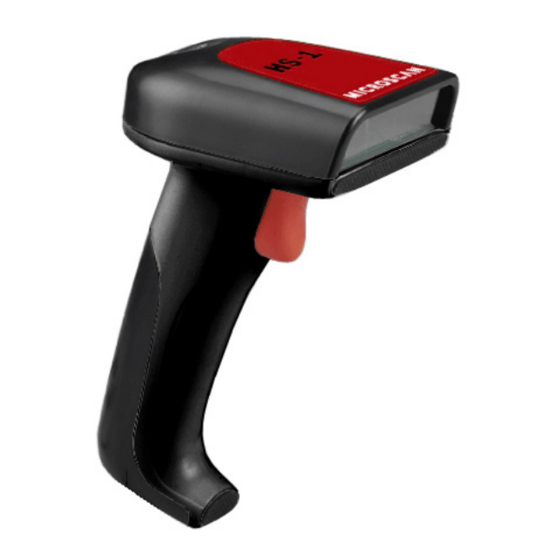
Summary of Contents for Microscan HS-1
- Page 1 HS-1 Handheld Scanner User Manual P/N 84-100001 Rev A...
-
Page 2: Technical Support
All rights reserved. The information contained herein is proprietary and is provided solely for the purpose of allowing customers to operate and/or service Microscan manufactured equipment and is not to be released, reproduced, or used for any other purpose without written permission of Microscan. - Page 3 Check Hardware..................1-2 Connect the System ................1-3 Install ESP....................1-6 Select Model.................... 1-7 Select Protocol and Connect to Scanner ..........1-8 Configure the HS-1................1-10 Save Configuration in ESP ..............1-11 Chapter 2 Using ESP Application Mode ..................2-2 Menu Toolbar ..................
- Page 4 Introduction Plessey Code ..................5-34 Industrial 2 of 5 ..................5-37 UPC/EAN....................5-43 China Postal Code................. 5-53 PDF417 ....................5-56 Symbology Identifier ................5-57 Chapter 6 Terminal Terminal Window ..................6-2 Find......................6-3 Send ......................6-4 Macros..................... 6-5 Terminal Window Menus ................. 6-6 Chapter 7 Utilities Serial Utility Commands ................
-
Page 5: How To Use This Manual
How To Use This Manual This manual provides complete information on setting up, integrating, and configuring the HS-1. The sections are presented in the order in which the HS-1 might be set up and made ready for operation. If you choose to configure the HS-1 using the configuration symbols provided, be sure to follow this process every time: 1. -
Page 6: Statement Of Agency Compliance
Introduction Statement of Agency Compliance The HS-1 has been tested for compliance with FCC (Federal Communications Commission) regulations and has been found to conform to all applicable FCC Rules and Regulations. To comply with FCC RF exposure compliance requirements, this device must not be co-located or operate in conjunction with any other antenna or transmitter. - Page 7 The information provided in this certification notice is correct to the best of Microscan’s knowledge at the date of publication. This notice is not to be considered a warranty or quality specification. Users are responsible for determining the applicability of any RoHS legislation or regulations based on their individual use of the product.
-
Page 8: Table Of Contents
This section is designed to get your HS-1 up and running quickly. Following these steps will allow you to get a sense of the HS-1’s capabilities and to test symbol decode performance. Detailed setup information for installing the HS-1 into your application can be found in the subsequent sections. -
Page 9: Check Hardware
USB Virtual Comm Cable 98-000112-01 Mounting Stand (optional; not shown) 98-000108-01 RS-232 Hardware Required Caution: Be sure that all cables are connected BEFORE applying power to the system. Always power down BEFORE disconnecting any cables. HS-1 Handheld Scanner User’s Manual... -
Page 10: Connect The System
• Attach the USB end of the cable to a USB port on the host computer. • Read the symbols below in the order provided to set the scanner to USB Native (HID) Communications Mode. Bar Code Configuration Mode USB Native (HID) Mode Save Settings HS-1 Handheld Scanner User’s Manual... - Page 11 • Attach the USB end of the cable to a USB port on the host computer. The host computer will detect the device and prompt you to install drivers. • Download drivers from the Microscan Download Center at www.microscan.com follow the installation instructions included with the drivers.
- Page 12 • Read the symbols below in the order provided to set the scanner to RS-232 Communications Mode. Bar Code Configuration Mode RS-232 Mode Save Settings Caution: Be sure that all cables are connected BEFORE applying power to the system. Always power down BEFORE disconnecting any cables. HS-1 Handheld Scanner User’s Manual...
-
Page 13: Install Esp
Install ESP Install ESP ESP Software can be found on the Microscan Tools Drive that is packaged with the HS-1. • Follow the prompts to install ESP from the Tools Drive. • Click on the ESP icon to run the program. -
Page 14: Select Model
If you need to select another model later, click Switch Model at the top of the screen. • Click the HS-1 button and then click OK. If you do not want to make this selection every time you start ESP, uncheck “Show this dialog at startup”. -
Page 15: Select Protocol And Connect To Scanner
You are now ready to configure your scanner using ESP. Subsequent sections provide more detailed information about ESP’s configuration options. HS-1 Handheld Scanner User’s Manual... - Page 16 If the connection attempt fails, enable a different communications port, check your port connections, and try again. You are now ready to configure your scanner using ESP. Subsequent sections provide more detailed information about ESP’s configuration options. HS-1 Handheld Scanner User’s Manual...
-
Page 17: Configure The Hs-1
Configure the HS-1 Configure the HS-1 • Click the Connect button to establish communications between ESP and the HS-1. • Click the Send/Recv button to send or receive commands. • Click the Switch Model button to open the model menu, or to return to a previous model. -
Page 18: Save Configuration In Esp
HS-1. Saving Options • Send, No Save. Changes will be lost when power is re-applied to the HS-1. • Send and Save. This activates all changes in current memory and saves to the HS-1 for power-on. 1-11... - Page 19 Save Configuration in ESP 1-12 HS-1 Handheld Scanner User’s Manual...
-
Page 20: Using Esp
Mode) where you can access three configuration menus (Communications, Read Cycle, and Symbologies), a Terminal interface, and a Utilities interface. ESP can be used to configure the HS-1 in three main ways: • Tree Controls: Each configuration menu contains a list of all option settings that pertain to that specific element of HS-1 operation. -
Page 21: Application Mode
Menu toolbar. to the scanner. Utilities views. Click the Parameters icon to return to full App Mode view from Terminal or Utilities. Click on these tabs to access configuration trees like the one shown below. HS-1 Handheld Scanner User’s Manual... -
Page 22: Menu Toolbar
Important: When you save menu changes to your hard drive, these changes are not saved to the HS-1. The illustration below shows how settings can be saved and received between ESP and the HS-1, and ESP and the host hard drive. (Save to Scanner) (Receive Reader Settings) Import/Export Import converts the ASCII settings from a text file to ESP configuration settings. - Page 23 To connect to another model, select New Model, choose a new model from the pop-up menu that appears, and click OK. Note: When you save an ESP file, you are saving the settings of all the models defined in that file. HS-1 Handheld Scanner User’s Manual...
- Page 24 At startup, displays the Would you like to connect to the HS-1? prompt. Receive After Connect At startup, loads the HS-1’s settings into ESP. (This is not recommended if you want to preserve your ESP settings for future use.) HS-1 Handheld Scanner User’s Manual...
- Page 25 Note: The F1 key is reserved for opening ESP Help and the F3 key is reserved for the Find Next function. Change Font Allows you to modify the font used for decode data received from the HS-1 on the Terminal screen. Change Echo Font Allows you to modify the font used for command characters typed into the Terminal view.
- Page 26 Sets the bar width or module width (in mils, or thousandths of an inch) of user-created symbols. Example: A bar width of 14 is 0.014 inches. Caption Allows you to define and position a human-readable caption for the symbol you create. HS-1 Handheld Scanner User’s Manual...
- Page 27 Menu Toolbar Preferences > Advanced Tab Send XON with Autoconnect Sends an XON (Begin Transmission) command to the HS-1 before starting the Autoconnect routine. Ask to Save ESP File when Quitting When enabled, prompts the user to save a .esp file when ending a session.
- Page 28 When enabled, shows an Ethernet option on the Select Protocol dialog. Note: This option should only be selected if you intend to connect using an Ethernet adapter. Use Default Storage Location When enabled, automatically stores data in ESP’s Application Data folder. HS-1 Handheld Scanner User’s Manual...
- Page 29 Note: Memos must be saved in a .esp file if you want them to available in your next session. If you do not save your current session, any memos that you have entered during the session will be discarded, and will be unavailable in your next session. 2-10 HS-1 Handheld Scanner User’s Manual...
-
Page 30: Autoconnect
Autoconnect • If your RS-232 connection attempt fails, you can use Autoconnect to establish a connection between the HS-1 and the host. • If your communications port is not the default COM1, use the dropdown menu to change your port. - Page 31 Autoconnect (cont.) Autoconnect (cont.) If your RS-232 host settings cannot be changed to match the HS-1’s settings: • Click Connect on ESP’s menu toolbar, and then select Connect on the dropdown menu. • When the Connection Settings dialog appears, check the Force Connect box and click Connect.
-
Page 32: View
The symbol you create will be displayed in the field at the bottom of the Bar Code Dialog. 2-13 HS-1 Handheld Scanner User’s Manual... -
Page 33: Navigating In Esp
4. Left-click again on the open screen to complete the selection. 5. Right-click on the open screen and select Save to Reader to implement the command in the HS-1. You can send the command without saving it, or you can send and save the command simultaneously. -
Page 34: Send/Receive Options
HS-1, these settings would be lost by choosing Yes. This is useful if you want to receive (upload) the HS-1’s settings and save them as a file for future use. For example, if your HS-1 has settings that you do not want to change, choos- ing Yes would allow you to load those settings to ESP and save them in an ESP file for later retrieval. -
Page 35: Advanced Options
This is the same as Save to Reader > Send No Save except that only the commands in the current tree control are sent. Send Current Command Saves only the command that is currently selected in the tree control. 2-16 HS-1 Handheld Scanner User’s Manual... - Page 36 This section explains how to set up communications between the HS-1 and a host. With Microscan’s ESP (Easy Setup Program), configuration changes can be made in the ESP tree controls and then sent and saved to the HS-1. The user can also send serial commands to the HS-1 via ESP’s Terminal.
-
Page 37: Communications By Esp
Communications by ESP Communications by ESP To open nested options, single-click the +. To change a setting, double-click the setting and use your cursor to scroll through the options. HS-1 Handheld Scanner User’s Manual... -
Page 38: Communications Serial Commands
Communications Communications Serial Commands Host Port Connections <K100,baud rate,parity,stop bits,data bits> Keyboard Mapping <K116,keyboard mapping,caps lock mode,numeric key> Communications Mode <K117,communications mode> Host Port Protocol <K140,protocol> Preamble <K141,status,preamble character(s)> Postamble <K142,status,postamble character(s)> HS-1 Handheld Scanner User’s Manual... -
Page 39: Communications Mode
• The USB HID interface requires a USB cable. • The USB Virtual Comm interface requires an RS-232 cable or USB Virtual Comm cable (98-000112-01). Bar Code Configuration Mode RS-232 USB HID (Default) USB Virtual Comm Save Settings HS-1 Handheld Scanner User’s Manual... -
Page 40: Host Port Connections
Baud Rate, Host Port Usage: Can be used to transfer data faster or to match host port settings. Definition: The rate at which the HS-1 and host transfer data back and forth. Serial Cmd: <K100,baud rate,parity,stop bits,data bits> Default:... - Page 41 Serial Cmd: <K100,baud rate,parity,stop bits,data bits> Default: Even Options: 0 = None 1 = Even 2 = Odd Bar Code Configuration Mode None Even (Default) Save Settings HS-1 Handheld Scanner User’s Manual...
- Page 42 One or two bits added to the end of each character to indicate the end of the character. Serial Cmd: <K100,baud rate,parity,stop bits,data bits> Default: Options: 0 = One 1 = Two Bar Code Configuration Mode One (Default) Save Settings HS-1 Handheld Scanner User’s Manual...
- Page 43 One or two bits added to the end of each character to indicate the end of the character. Serial Cmd: <K100,baud rate,parity,stop bits,data bits> Default: Seven Options: 0 = Seven 1 = Eight Bar Code Configuration Mode Seven (Default) Eight Save Settings HS-1 Handheld Scanner User’s Manual...
-
Page 44: Host Port Protocol
Save Settings Point-to-Point with RTS/CTS Usage: An HS-1 initiates a data transfer with an RTS (request-to-send) transmission. The host, when ready, responds with a CTS (clear-to-send) and the data is transmitted. RTS and CTS signals are transmitted over two dedicated wires as defined in the RS-232 standard. -
Page 45: Keyboard Mapping
5 = Spanish 6 = Italian 7 = Universal 8 = Swiss 9 = Czech UK English Bar Code Configuration Mode U.S. English (Default) German French Japanese Spanish Italian Universal Save Settings Swiss Czech 3-10 HS-1 Handheld Scanner User’s Manual... - Page 46 Allows the user to turn Caps Lock on or off. Serial Cmd: <K116,keyboard mapping,caps lock mode,numeric key> Default: Options: 0 = Off 1 = On 2 = Free Bar Code Configuration Mode Off (Default) Free Save Settings 3-11 HS-1 Handheld Scanner User’s Manual...
- Page 47 Allows the user to select numeric or alphanumeric characters. Serial Cmd: <K116,keyboard mapping,caps lock mode,numeric key> Default: Alphanumeric Key Options: 0 = Numeric Key 1 = Alphanumeric Key Bar Code Configuration Mode Numeric Alphanumeric (Default) Save Settings 3-12 HS-1 Handheld Scanner User’s Manual...
-
Page 48: Preamble
To enter control characters within a serial command, hold down the Ctrl key while typing the desired character. Example: <K141,1,CTRL-m> to enter the control character ^M. Bar Code Configuration Mode Carriage Return (Default) Save Settings 3-13 HS-1 Handheld Scanner User’s Manual... -
Page 49: Postamble
To enter control characters within a serial command, hold down the Ctrl key while typing the desired character. Example: <K142,1,CTRL-m CTRL-j> to enter ^M^J. Bar Code Configuration Mode Carriage Return Line Feed (Default) Save Settings 3-14 HS-1 Handheld Scanner User’s Manual... -
Page 50: Read Cycle By Esp
Hand Presentation Timing ......................4-5 No Read Message ........................4-6 Beeper Volume ..........................4-7 After you’ve established communications you will need to address the timing and output parameters associated with your application. This section explains those parameters. HS-1 Handheld Scanner User’s Manual... -
Page 51: Read Cycle By Esp
Read Cycle by ESP Read Cycle by ESP To open nested options, single-click the +. To change a setting, double-click the setting and use your cursor to scroll through the options. HS-1 Handheld Scanner User’s Manual... -
Page 52: Read Cycle Serial Commands
Read Cycle Read Cycle Serial Commands Trigger Mode <K203,trigger mode> Hand Presentation Timing <K205,time between identical decodes> No Read Message <K714,status,No Read message> Beeper Volume <K752,beeper mode> HS-1 Handheld Scanner User’s Manual... -
Page 53: Hand Presentation Timing
A read cycle is initiated by activating the handle trigger. The read cycle ends and illumination turns off when the trigger is released or when a symbol is decoded. Save Settings Bar Code Configuration Mode Triggered Mode (Default) HS-1 Handheld Scanner User’s Manual... -
Page 54: Hand Presentation Timing
When set to 0, the reader will output every decode, as fast as possible, with no delay. Serial Cmd: <K205,time between identical decodes> Default: Options: 0 – 65535 (0.1 second increments) Bar Code Configuration Mode 0 (Default) Save Settings HS-1 Handheld Scanner User’s Manual... -
Page 55: No Read Message
Definition: Any combination of ASCII characters can be defined as the No Read message. Serial Cmd: <K714,status,No Read message> Default: NOREAD Options: 1 to 20 ASCII characters. Bar Code Configuration Mode NOREAD (Default) Save Settings HS-1 Handheld Scanner User’s Manual... -
Page 56: Beeper Volume
Beeper Volume Definition: Allows the user to determine beeper volume. Serial Cmd: <K752,beeper mode> Default: High Options: 0 = Off 1 = Medium 2 = High Bar Code Configuration Mode Medium High (Default) Save Settings HS-1 Handheld Scanner User’s Manual... - Page 57 Beeper Volume HS-1 Handheld Scanner User’s Manual...
- Page 58 UPC/EAN ........................... 5-43 China Postal Code ........................5-53 PDF417 ............................5-56 Symbology Identifier........................5-57 This section describes the various symbol types that can be decoded by the HS-1. See the following sites for additional symbology information: http://www.aimglobal.org/standards/aimpubs.asp http://barcodes.gs1us.org/dnn_bcec/Default.aspx?tabid=82 HS-1 Handheld Scanner User’s Manual...
-
Page 59: Symbologies By Esp
Symbologies by ESP Symbologies by ESP To open nested options, single-click the +. To change a setting, double-click the setting and use your cursor to scroll through the options. HS-1 Handheld Scanner User’s Manual... -
Page 60: Symbologies Serial Commands
#1,symbol length #2> UPC/EAN <K489,UPC-A status,UPC-E status,EAN-8 status,EAN-13 status, supplementals required,supplemental 2 status,supplemental 5 status, UPC-A as EAN-13,UPC-E as UPC-A,EAN-8 as EAN-13> China Postal Code <K498,status,check digit mode,min length,max length> Symbology Identifier <K753,0,symbology identifier status> HS-1 Handheld Scanner User’s Manual... -
Page 61: Code 39
9 black and white elements per character, 3 of which are wide. Serial Cmd: <K470,status,check character status,check character output status,0,0, minimum symbol length,full ASCII set> Default: Enabled Options: 0 = Disabled 1 = Enabled Disabled Bar Code Configuration Mode Enabled (Default) Save Settings HS-1 Handheld Scanner User’s Manual... - Page 62 Symbologies Check Character Status (Code 39) Definition: When enabled, the HS-1 will verify a Modulus 10 check character in order to identify the decode as successful. Serial Cmd: <K470,status,check character status,check character output status, 0,0,minimum symbol length,full ASCII set> Default:...
- Page 63 No Read message to be transmitted at the end of the read cycle. Serial Cmd: <K470,status,check character status,check character output status, 0,0,minimum symbol length,full ASCII set> Default: Disabled Options: 0 = Disabled 1 = Enabled Bar Code Configuration Mode Disabled (Default) Enabled Save Settings HS-1 Handheld Scanner User’s Manual...
- Page 64 Definition: Specifies the exact number of characters that the HS-1 will recognize (this does not include start and stop characters and check characters). The HS-1 ignores any symbology that is less than the specified length.
- Page 65 “Z”, minus symbol, plus symbol, forward slash, space, decimal point, dollar sign, and percent symbol. When Full ASCII Set is enabled, the HS-1 can read the full ASCII character set, from 0 to 255. Serial Cmd: <K470,status,check character status,check character output status,0,0,minimum...
-
Page 66: Codabar
+, and –) with start/stop codes and at least two distinctly different bar widths. Serial Cmd: <K471,status,0,start/stop output status,0,symbol length status,symbol length,check character status,check character output> Default: Enabled Options: 0 = Disabled 1 = Enabled Bar Code Configuration Mode Disabled Enabled (Default) Save Settings HS-1 Handheld Scanner User’s Manual... - Page 67 Serial Cmd: <K471,status,0,start/stop output status,0,symbol length status,symbol length,check character status,check character output> Default: Enabled Options: 0 = Disabled 1 = Enabled Bar Code Configuration Mode Disabled Enabled (Default) Save Settings 5-10 HS-1 Handheld Scanner User’s Manual...
- Page 68 Symbologies Symbol Length Status (Codabar) Definition: When set to Any/Minimum, any symbol length is considered valid. When set to Fixed, the HS-1 will check the symbol length against the Symbol Length Status parameter. Serial Cmd: <K471,status,0,start/stop output status,0,symbol length status,symbol length,check character status,check character output>...
- Page 69 Codabar Symbol Length (Codabar) Definition: Specifies the number of characters that the HS-1 will recognize, including start and stop check characters. The Note: When setting Symbol Length to any value other than 0, add 2 to account for reserved spaces. For example, if your symbol has 3 characters, set Symbol Length to 5.
- Page 70 When disabled, the HS-1 will not perform any character checking calculations on decoded Codabar symbols. When set to Modulus 16, the HS-1 will perform a Modulus 16 check character calculation on the symbol. If the symbol does not pass this calculation, it will not be decoded.
- Page 71 Definition: When this field is disabled and a check character calculation is enabled, the HS-1 will strip the verified check character from the symbol data output. This condition must be accounted for if a minimum length is also being used.
-
Page 72: Interleaved 2 Of 5
Interleaved 2 of 5 has been popular because it is the most dense symbology for printing numeric characters less than 10 characters in length; however, Microscan does not recommend this symbology for any new applications because of inherent problems such as truncation. - Page 73 An error correcting routine in which the check character is added. Serial Cmd: <K472,status,check character status,check character output status,symbol length #1,symbol length #2,guard bar,range mode status> Default: Disabled Options: 0 = Disabled 1 = Enabled Bar Code Configuration Mode Disabled (Default) Enabled Save Settings 5-16 HS-1 Handheld Scanner User’s Manual...
- Page 74 Serial Cmd: <K472,status,check character status,check character output status,symbol length #1,symbol length #2,guard bar,range mode status> Default: Disabled Options: 0 = Disabled 1 = Enabled Disabled (Default) Bar Code Configuration Mode Enabled Save Settings 5-17 HS-1 Handheld Scanner User’s Manual...
- Page 75 Serial Cmd: <K472,status,check character status,check character output status,symbol length #1,symbol length #2,guard bar,range mode status> Default: Options: 0 to 128 Bar Code Configuration Mode 16 (Default) Save Settings 5-18 HS-1 Handheld Scanner User’s Manual...
- Page 76 Length 1 < or = required length < or = Length 2 >0 and not the Enable >0 same as Length 1 Length 2 < or = required length < or = Length 1 5-19 HS-1 Handheld Scanner User’s Manual...
- Page 77 <K472,status,check character status,check character output status,symbol length #1,symbol length #2,guard bar,range mode status> Default: Disabled Options: 0 = Disabled 1 = Enabled Bar Code Configuration Mode Disabled (Default) Enabled Save Settings Guard Bar Example 5-20 HS-1 Handheld Scanner User’s Manual...
- Page 78 Interleaved 2 of 5. Symbols that fall outside this range are rejected. Either length can form the start or end of the range. Bar Code Configuration Mode Save Settings Enabled (Default) 5-21 HS-1 Handheld Scanner User’s Manual...
-
Page 79: Code 128/Ean 128
• If Symbology ID output is enabled, the symbology identifier always follows the AIM standard. • Function 1 parameters only take effect if an EAN/UCC-128 symbol is decoded. They apply optional formatting to EAN/UCC-128 symbols by outputting the specified character wherever an identifier separator is found. 5-22 HS-1 Handheld Scanner User’s Manual... - Page 80 The scanner ignores any symbol longer than the specified length. Serial Cmd: <K464,status,min length,max length,function 1 output status,function 1 output character> Default: Options: 1 to 48 48 (Default) Bar Code Configuration Mode Save Settings 5-23 HS-1 Handheld Scanner User’s Manual...
- Page 81 Disabled Enabled (Default) Save Settings Function 1 Output Character Serial Cmd: <K464,status,min length,max length,function 1 output status,function 1 output character> Default: Options: Any ASCII character Bar Code Configuration Mode , (comma) (Default) Save Settings 5-24 HS-1 Handheld Scanner User’s Manual...
-
Page 82: Code 93
Each Code 93 character has nine modules that may be either black or white. Each character contains three bars and three spaces. Serial Cmd: <K475,status,0,minimum symbol length> Default: Enabled Options: 0 = Disabled 1 = Enabled Disabled Bar Code Configuration Mode Enabled (Default) Save Settings 5-25 HS-1 Handheld Scanner User’s Manual... - Page 83 Definition: Specifies the minimum number of characters that the HS-1 will recognize, not including the start and stop check characters. The HS-1 ignores any symbol smaller than the specified length. Note: When setting Minimum Symbol Length to any value other than 0, add 1 to account for a reserved space.
-
Page 84: Gs1 Databar (Rss)
It can be stacked in two rows, it can read omnidirectionally if printed in full height, or horizontally if height-truncated for small marking. Serial Cmd: <K482,status> Default: Disabled Options: 0 = Disabled 1 = Enabled Bar Code Configuration Mode Disabled (Default) Enabled Save Settings 5-27 HS-1 Handheld Scanner User’s Manual... -
Page 85: Gs1 Databar (Rss)
Definition: Encodes a smaller 14-digit symbol (74 modules wide) that is not omnidirectional. Serial Cmd: <K483,status> Default: Disabled Options: 0 = Disabled 1 = Enabled Bar Code Configuration Mode Disabled (Default) Enabled Save Settings 5-28 HS-1 Handheld Scanner User’s Manual... - Page 86 14-digit EAN item identification number and is capable of encoding up to 74 numeric or 41 alphabetic characters. Serial Cmd: <K484,status> Default: Disabled Options: 0 = Disabled 1 = Enabled Disabled (Default) Bar Code Configuration Mode Enabled Save Settings 5-29 HS-1 Handheld Scanner User’s Manual...
-
Page 87: Msi Code
Serial Cmd: <K486,status,check character mode,check character output status, 0,minimum symbol length> Default: Disabled Options: 0 = Disabled 1 = Enabled Bar Code Configuration Mode Disabled (Default) Enabled Save Settings 5-30 HS-1 Handheld Scanner User’s Manual... - Page 88 <K486,status,check character mode,check character output status, 0,minimum symbol length> Default: Modulus 10 Options: 1 = Modulus 10 2 = Double Modulus 10 Modulus 10 (Default) Bar Code Configuration Mode Double Modulus 10 Save Settings 5-31 HS-1 Handheld Scanner User’s Manual...
- Page 89 MSI Code Check Character Output Status (MSI Code) Definition: When this field is enabled, the HS-1 will output the check digit with symbol data. When disabled, the HS-1 will not output the check digit with symbol data. Serial Cmd: <K486,status,check character...
- Page 90 Symbologies Minimum Symbol Length (MSI Code) Definition: This field specifies the minimum number of characters the HS-1 will recognize, including a check character. Serial Cmd: <K486,status,check character mode,check character output status, 0,minimum symbol length> Default: Options: 0 to 32 Bar Code Configuration Mode...
-
Page 91: Plessey Code
12, define hexadecimal characters. Serial Cmd: <K487,status,check character output status,0,minimum symbol length> Default: Disabled Options: 0 = Disabled 1 = Enabled Disabled (Default) Bar Code Configuration Mode Enabled Save Settings 5-34 HS-1 Handheld Scanner User’s Manual... - Page 92 When disabled, the check character will not be output with symbol data. Serial Cmd: <K487,status,check character output status,0,minimum symbol length> Default: Disabled Options: 0 = Disabled 1 = Enabled Bar Code Configuration Mode Disabled (Default) Enabled Save Settings 5-35 HS-1 Handheld Scanner User’s Manual...
- Page 93 Plessey Code Minimum Symbol Length (Plessey Code) Definition: This field specifies the minimum number of characters the HS-1 will recognize, including a check character. Serial Cmd: <K487,status,check character output status,0,minimum symbol length> Default: Options: 0 to 32 Bar Code Configuration Mode...
-
Page 94: Industrial 2 Of 5
Microscan recommends that Industrial 2 of 5 always be used with fixed symbol length settings in any application. Symbol Length # 1 and Symbol Length # 2 can both be set to 0 to allow the HS-1 to decode Industrial 2 of 5 symbols of varying lengths. - Page 95 When this field is enabled, a check character is added. Serial Cmd: <K488,status,check character status,check character output status,format, symbol length #1,symbol length #2> Default: Disabled Options: 0 = Disabled 1 = Enabled Bar Code Configuration Mode Disabled (Default) Enabled Save Settings 5-38 HS-1 Handheld Scanner User’s Manual...
- Page 96 When disabled, the check character will not be output with symbol data. Serial Cmd: <K488,status,check character status,check character output status,format, symbol length #1,symbol length #2> Default: Disabled Options: 0 = Disabled 1 = Enabled Bar Code Configuration Mode Disabled (Default) Enabled Save Settings 5-39 HS-1 Handheld Scanner User’s Manual...
- Page 97 3 start / 3 stop Options: 0 = 3 start / 3 stop 1 = 2 start / 2 stop 3 start / 3 stop (Default) Bar Code Configuration Mode 2 start / 2 stop (Default) Save Settings 5-40 HS-1 Handheld Scanner User’s Manual...
- Page 98 Symbol Length # 1 (Industrial 2 of 5) Definition: This field specifies the number of characters that the HS-1 will recognize, including start and stop characters and check characters. The HS-1 ignores any symbol with fewer than the specified number of characters. Because Industrial 2 of 5 is a continuous symbology, it is prone to substitution errors.
-
Page 99: Minimum Length
To set for minimum length, both Symbol Length # 1 and Symbol Length # 2 must be equal to each other and be any number other than zero. Fixed Length To set for a fixed length, Symbol Length #1 and Symbol Length #2 must not be equal to each other. 5-42 HS-1 Handheld Scanner User’s Manual... -
Page 100: Upc/Ean
EAN is the European version of the UPC symbology and is used in European market applications. When enabled, the HS-1 will read UPC-A symbols. Serial Cmd: <K489,UPC-A status,UPC-E status,EAN-8 status,EAN-13 status,supplementals required,supplemental 2 status,supplemental 5 status,UPC-A as EAN-13, UPC-E as UPC-A,EAN-8 as EAN-13>... - Page 101 2 status,supplemental 5 status,UPC-A as EAN-13, UPC-E as UPC-A,EAN-8 as EAN-13> Default: Enabled Options: 0 = Disabled 1 = Enabled Bar Code Configuration Mode Disabled Enabled (Default) Save Settings 5-44 HS-1 Handheld Scanner User’s Manual...
- Page 102 <K489,UPC-A status,UPC-E status,EAN-8 status,EAN-13 status,supplementals required,supplemental 2 status,supplemental 5 status,UPC-A as EAN-13, UPC-E as UPC-A,EAN-8 as EAN-13> Default: Enabled Options: 0 = Disabled 1 = Enabled Disabled Bar Code Configuration Mode Enabled (Default) Save Settings 5-45 HS-1 Handheld Scanner User’s Manual...
- Page 103 <K489,UPC-A status,UPC-E status,EAN-8 status,EAN-13 status,supplementals required,supplemental 2 status,supplemental 5 status,UPC-A as EAN-13, UPC-E as UPC-A,EAN-8 as EAN-13> Default: Enabled Options: 0 = Disabled 1 = Enabled Bar Code Configuration Mode Disabled Enabled (Default) Save Settings 5-46 HS-1 Handheld Scanner User’s Manual...
- Page 104 Supplementals Required (UPC/EAN) Definition: A supplemental is a 2 or 5-character symbol appended to the main symbol. When enabled, the HS-1 decodes supplemental symbol data that has been appended to the standard UPC or EAN symbol. Serial Cmd: <K489,UPC-A status,UPC-E status,EAN-8 status,EAN-13...
- Page 105 <K489,UPC-A status,UPC-E status,EAN-8 status,EAN-13 status,supplementals required,supplemental 2 status,supplemental 5 status,UPC-A as EAN-13, UPC-E as UPC-A,EAN-8 as EAN-13> Default: Disabled Options: 0 = Disabled 1 = Enabled Bar Code Configuration Mode Disabled (Default) Enabled Save Settings 5-48 HS-1 Handheld Scanner User’s Manual...
- Page 106 <K489,UPC-A status,UPC-E status,EAN-8 status,EAN-13 status,supplementals required,supplemental 2 status,supplemental 5 status,UPC-A as EAN-13, UPC-E as UPC-A,EAN-8 as EAN-13> Default: Disabled Options: 0 = Disabled 1 = Enabled Bar Code Configuration Mode Disabled (Default) Enabled Save Settings 5-49 HS-1 Handheld Scanner User’s Manual...
- Page 107 <K489,UPC-A status,UPC-E status,EAN-8 status,EAN-13 status,supplementals required,supplemental 2 status,supplemental 5 status,UPC-A as EAN-13, UPC-E as UPC-A,EAN-8 as EAN-13> Default: Disabled Options: 0 = Disabled 1 = Enabled Bar Code Configuration Mode Disabled (Default) Enabled Save Settings 5-50 HS-1 Handheld Scanner User’s Manual...
- Page 108 <K489,UPC-A status,UPC-E status,EAN-8 status,EAN-13 status,supplementals required,supplemental 2 status,supplemental 5 status,UPC-A as EAN-13, UPC-E as UPC-A,EAN-8 as EAN-13> Default: Disabled Options: 0 = Disabled 1 = Enabled Disabled (Default) Bar Code Configuration Mode Enabled Save Settings 5-51 HS-1 Handheld Scanner User’s Manual...
- Page 109 <K489,UPC-A status,UPC-E status,EAN-8 status,EAN-13 status,supplementals required,supplemental 2 status,supplemental 5 status,UPC-A as EAN-13, UPC-E as UPC-A,EAN-8 as EAN-13> Default: Disabled Options: 0 = Disabled 1 = Enabled Bar Code Configuration Mode Disabled (Default) Enabled Save Settings 5-52 HS-1 Handheld Scanner User’s Manual...
-
Page 110: China Postal Code
Symbologies China Postal Code Serial Cmd: <K498,status,check digit mode,min length,max length> Default: Disabled Options: 0 = Disabled 1 = Enabled Bar Code Configuration Mode Disabled (Default) Enabled Save Settings 5-53 HS-1 Handheld Scanner User’s Manual... - Page 111 Serial Cmd: <K498,status,check digit mode,min length,max length> Default: Disabled Options: 0 = Disabled 1 = Enable, No Output 2 = Enable, Output Bar Code Configuration Mode Disabled (Default) Enable, No Output Enable, Output Save Settings 5-54 HS-1 Handheld Scanner User’s Manual...
- Page 112 1 – 48 11 (Default) Bar Code Configuration Mode Save Settings Maximum Symbol Length Serial Cmd: <K498,status,check digit mode,min length,max length> Default: Options: 1 – 48 48 (Default) Bar Code Configuration Mode Save Settings 5-55 HS-1 Handheld Scanner User’s Manual...
-
Page 113: Pdf417
PDF417 PDF417 Note: The HS-1 may make a “grinding” sound while attempting to decode PDF417 symbols. This is normal, and does not cause damage to the scanner. Usage: Used in applications where a large amount of information (over 32 characters) needs to be encoded within a symbol, typically where the symbol is transported from one facility to another. -
Page 114: Symbology Identifier
The Symbology Identifier is a standard prefix set of characters that identifies the symbol type. When enabled, the HS-1 analyzes and identifies the symbology and adds a three-character identifying prefix to the data: • ] (closed bracket character) indicating the presence of a symbology identifier. - Page 115 Output enabled and Full ASCII conversion performed. Explanation of Modifiers for Other Symbologies • For Code 128/EAN-128, a 1 indicates EAN-128; otherwise the modifier is 0. • For all other symbologies, the modifier is 0. 5-58 HS-1 Handheld Scanner User’s Manual...
- Page 116 6 Terminal Contents Terminal Window.......................... 6-2 Find .............................. 6-3 Send ............................. 6-4 Macros............................6-5 Terminal Window Menus......................6-6 This section describes the Terminal window and Macro functions in ESP. HS-1 Handheld Scanner User’s Manual...
-
Page 117: Terminal Window
Click on arrows to Add Macro, Remove Macro, or Edit Macro. The Terminal allows you to send serial commands to the HS-1 by typing commands in the Send text field or directly in the Terminal screen, by copying and pasting, or by using Macros. -
Page 118: Find
• Type “ABC” into the Find field. • Press Enter. The first instance of “ABC” will be highlighted in the Terminal window. • Click the Find button to the left of the text field to locate additional instances of “ABC”. HS-1 Handheld Scanner User’s Manual... -
Page 119: Send
Send Send The Send function allows you to enter serial commands and then send them to the HS-1. • Type the command into the Send box. • Press Enter to send the command to the HS-1. • Click the Send button to the left of the text field to send the command again. -
Page 120: Macros
When you click on the macro name, the macro is executed in the Terminal window. If the macro is a command, it is sent to the HS-1 at the same time that it is displayed. Editing a Macro... -
Page 121: Terminal Window Menus
• Find Next searches for a user-defined section of text in the Terminal. • Find Previous operates in the same way as Find Next, but searches backward through Terminal text. HS-1 Handheld Scanner User’s Manual... - Page 122 Scanner Status Request....................... 7-6 Bar Code Configuration Mode ...................... 7-7 Utility commands are generally commands that can be sent during HS-1 operations to perform miscellaneous operations on HS-1 hardware. Serial utility commands are not prefaced with a ”K” and a numeric value, nor do they require an initialization command (<A>...
-
Page 123: Serial Utility Commands
Configuration Command Status Trigger <char> Serial Trigger Character Bar Code Utility Commands Bar Code Configuration Mode Reset (Does Save Current Recall Microscan Default Not Save for Settings for Parameters and Save for Power-On) Power-On Power-On HS-1 Handheld Scanner User’s Manual... -
Page 124: Differences From Default
• To save the Differences from Default report, either as plain text or as a tab-delimited text file, click Save As. • Click Send and Save to send the settings to the HS-1 and save them, or Send to Reader to send the settings without saving them. -
Page 125: Firmware
Firmware Firmware Firmware Verification ESP allows you to send a request to the HS-1 for the application code part number. • Click the Firmware tab. • Click the Request Part No. button. • The application code part number will be displayed in the text field to the right of the Request Part No. -
Page 126: Default/Reset/Save
When you right-click in a menu tree and select Default Current Menu Settings or Default All ESP Settings, it is important to note that only ESP settings are defaulted. To save these defaults to the HS-1 itself, you need to follow up with a Save to Reader, Send and Save command. -
Page 127: Scanner Status Request
<K?> Configuration Command Status This is the fastest way to learn the HS-1’s current configuration. Sending this request will return the current settings of all commands, starting with the lowest K command value and ending with the highest K command value. -
Page 128: Bar Code Configuration Mode
<Zrd> (Reset, Save Current Settings for Power-On, or Recall Microscan Default Parameters and Save for Power-On) command, or receives one of these commands from the communication port. While in Bar Code Configuration Mode, the reader decodes symbols and processes the symbol data as if they were serial commands. - Page 129 Bar Code Configuration Mode HS-1 Handheld Scanner User’s Manual...
- Page 130 Contents Appendix A General Specifications ....................A-2 Appendix B Electrical Specifications .................... A-5 Appendix C Serial Configuration Commands................A-8 Appendix D Communications Protocol..................A-11 Appendix E ASCII Table......................A-12 Appendix F Glossary of Terms....................A-13 HS-1 Handheld Scanner User’s Manual...
-
Page 131: Appendix A General Specifications
Depth of Field: 2.8 to 3.5” (70 to 90 mm) Ambient Light Immunity: Sunlight: up to 278 ft. candles (3,000 lux) Indicators Status Indicators: Audible tones, visible feedback with multi-color LED Electrical Power: 5VDC Typical: 240mA Peak: 750mA Idle: 95mA HS-1 Dimensions HS-1 Handheld Scanner User’s Manual... - Page 132 1.18 to 8.66” (30 to 220 mm) Note: All read range values based on a Grade A Code 39 symbols except the 15.6 mil read range value, which is based on a Grade A EAN 128 symbol. HS-1 Handheld Scanner User’s Manual...
-
Page 133: General Specifications
Product specifications are given for typical performance at 25°C (77°F) using grade A labels. Performance characteristics may vary at high temperatures or other environmental extremes. Warranty–One year limited warranty on parts and labor. Extended warranty available. HS-1 Handheld Scanner User’s Manual... -
Page 134: Appendix B Electrical Specifications
Appendices Appendix B — Electrical Specifications Power: 5VDC Typical: 240mA Peak: 750mA Idle: 95mA USB Cable Pinouts HS-1 Handheld Scanner User’s Manual... - Page 135 Electrical Specifications USB Virtual Comm Cable Pinouts HS-1 Handheld Scanner User’s Manual...
- Page 136 Appendices RS-232 Cable Pinouts HS-1 Handheld Scanner User’s Manual...
-
Page 137: Appendix C Serial Configuration Commands
#1,symbol length #2> UPC/EAN <K489,UPC-A status,UPC-E status,EAN-8 status,EAN-13 status, supplementals required,supplemental 2 status,supplemental 5 status,UPC-A as EAN-13,UPC-E as UPC-A,EAN-8 as EAN-13> China Postal Code <K498,status,check digit mode,min length,max length> Symbology Identifier <K753,0,symbology identifier status> HS-1 Handheld Scanner User’s Manual... - Page 138 HS-1’s memory and saves for power-on; an <A> initializes the HS-1’s memory but does not save for power-on. For example, to enable UPC and save the change for power-on, send <K473,1><Z>. To change Baud Rate and reset without saving changes for power-on, send <K100,3><A>.
- Page 139 Entering Control Characters in Serial Commands To enter control characters within a serial command, hold down the Ctrl key while typing the desired character. Example: To enter a carriage return and line feed (^M^J), enter <K141,1,CNTL-m CNTL-j> A-10 HS-1 Handheld Scanner User’s Manual...
-
Page 140: Appendix D Communications Protocol
Control Characters Protocol Command (Entered in menu or Effect of Command (Mnemonic displayed on menu) Value serial command) Reset Request Reset Start of Text End of Text Acknowledge Negative Acknowledge Begin Transmission XOFF Stop Transmission A-11 HS-1 Handheld Scanner User’s Manual... -
Page 141: Appendix E Ascii Table
ASCII Table Appendix E — ASCII Table Ctrl “ & < > A-12 HS-1 Handheld Scanner User’s Manual... -
Page 142: Appendix F Glossary Of Terms
Decode — A Good Read. The successful interpretation and output of the information encoded in a symbol. Default — Restores ROM or flash settings and initializes serial commands. A-13 HS-1 Handheld Scanner User’s Manual... - Page 143 Focus — Any given point in an image at which light converges; the focal point. FPGA — See Field-Programmable Gate Array. Full Duplex — A communications system in which signals can travel simultaneously between devices. A-14 HS-1 Handheld Scanner User’s Manual...
- Page 144 Random Access Memory (RAM) — A data storage system used in computers, composed of integrated circuits that allow access to stored data in any sequence without movement of physical parts. A-15 HS-1 Handheld Scanner User’s Manual...
- Page 145 Trigger — A signal, transition, or character string that initiates a read cycle. Very Large-Scale Integration (VLSI) — The creation of integrated circuits by combining thousands of transistor-based circuits on a single chip. VLSI — See Very Large-Scale Integration. A-16 HS-1 Handheld Scanner User’s Manual...
Need help?
Do you have a question about the HS-1 and is the answer not in the manual?
Questions and answers