
Related Manuals for TechniSat DIGIT MF4-K


Summary of Contents for TechniSat DIGIT MF4-K
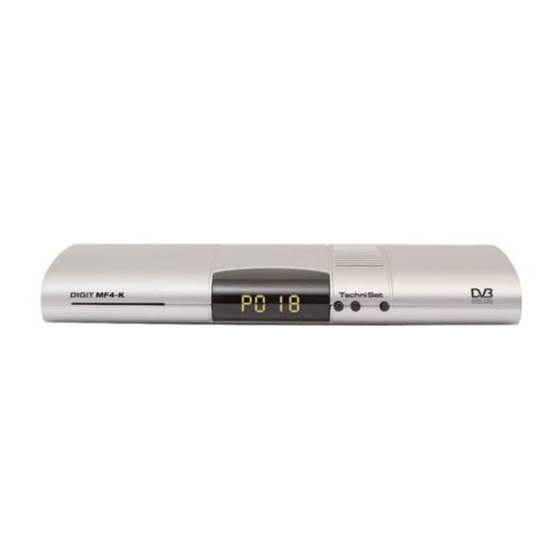
- Page 1 DIGIT MF4-K With integrated CONAX decoding system and PCMCIA interface for insertion of a CI module. For reception of unencrypted and encrypted (e.g. CONAX, VIACCESS, IRDETO, SECA etc.) cable programmes.
-
Page 2: Table Of Contents
1 Contents Contents ....2 Illustrations ....5 Please read this first . - Page 3 7.3.2 CONAX PIN code ....22 Volume control .....22 TV/Radio switching .
- Page 4 For daily use ....58 Your unit carries the CE logo, and complies with all relevant EU standards. Subject to change without notice, subject to printing errors.Correct as at 11/04 TechniSat and DIGIT MF4-K are registered trademarks of TechniSat Digital GmbH Postfach 560 D-54541 Daun, Germany www.technisat.de...
-
Page 5: Illustrations
2 Illustrations Remote control On/Stand-by Sound On/Off Numeric keys Option* in TV mode: Select sound/sub-titles, special functions in Radio mode: Select stations by switching Multi-function keys sound sub-carriers Arrow key up Programme list On/Off Programme + Arrow key right Arrow key left Volume + Volume - Arrow key down... - Page 6 LED display Programme select On/Stand-by up/down Card reader for CONAX Smartcard: > Insert the CONAX Smartcard (gold-coloured chip at the bottom, and in the direction of insertion) carefully into the card reader as far as it will go. Cable SCART socket SCART socket Audioausgang Cable...
- Page 7 Dear customer, congratulations on your decision to purchase the TechniSat DIGIT MF4-K digital receiver. The operating manual you are reading is designed to help you gain optimum use and enjoyment from the comprehensive functions of your new digital receiver. We have designed the operating manual to be as comprehen- sive as necessary, and as simple as possible.
-
Page 8: Please Read This First
3 Please read this first > Before you begin operating your receiver, please first check whether the package contains all the compo- nents that should be included. The following are supp- lied: 1 digital receiver, 1 mains power cable, 1 remote control, 1 operating manual, 1 guarantee card, 2 batteries (1,5V micro-cell) 1 SCART cable. -
Page 9: Disposal Advice
Help: Where available in the menues, pressing the blue function key will cause a help text to be displayed, pressing again will remove the text from the screen. Disposal advice The packaging for your unit consists entirely of recyclable material. Please sort the items appropriately, and sort them for disposal via your local waste disposal system. - Page 10 Connecting the DVB receiver to the cable socket a. Connect the Cable input of the DVB receiver to the antenna socket of the cable network. b. Scart connection of the DVB receiver with the television set. c. Scart connection of a video player with the VCR Scart socket of the DVB receiver.
-
Page 11: Connections
4 Connections The references mentioned below, i.e. a b c etc. refer to the illustration on page 10. 4.1 Connecting to the cable network Use a suitable co-axial cable to connect the Cable input of the receiver with the connecting socket of the cable connection. -
Page 12: Digital
4.4.2 Digital If your amplifier is equipped with a suitable electrical or optical input, connect the socket AUDIO OUT DIGI- TAL electrical resp. AUDIO OUT DIGITAL optical with the electrical resp. optical input of your amplifier. Depending on the station selected, sampling rates of 32, 44.1 and 48 kHz are available. - Page 13 The initial installation procedure described here serves mere- ly as an example. The exact initial installation procedure will depend on the settings you select. Please therefore follow the instructions displayed on screen closely. Operating language Press the OK key to open the display window for the >...
- Page 14 Updating Software When you have completed the programme scan, the digital receiver will check whether a new version of the operating software is available via cable. In case new software is avai- lable, you can perform an automatic software update. Use the arrow keys left/right to select the field >...
-
Page 15: Settings
6 Settings You have now made all the necessary connections and com- menced operation of your new digital receiver. If necessary, you can now proceed to optimise the settings of the digital receiver according to your preferences. 6.1 Operating language This menu item gives you the opportunity to set the menu language according to your personal preference. -
Page 16: Time Difference Gmt (Hours)
6.2.1 Time difference to GMT (hours) Your unit is equipped with a clock. This is synchronised via satellite with Greenwich Mean Time. If in the category Country (Point 6.2.2) you have selected the setting None, then you must simply correct the clock time corresponding to your local time using the arrow keys left/right. -
Page 17: Picture Format
Confirm by pressing OK. > The sub-menu Settings will be displayed. (Fig. 6-4) Now use the arrow keys up/down to mark the line > Audio/Video Settings. Confirm by pressing OK. The menu Audio/Video > Settings will be displayed. (Fig. 6-5) Use the arrow keys up/down to move the marker >... -
Page 18: Dolby Digital (Ac3)
6.3.6 Dolby Digital (AC3) Various movies are broadcast in Dolby Digital format. This is indicated by display of the Dolby logo in the information window, once the programme has been selected. If you have a Digital 5.1 channel amplifier, you can, where available, enjoy 5.1 channel Dolby Digital sound with specific movies. -
Page 19: Using The Numeric Keys
7.2.2 Using the numeric keys You may use the numeric keys to enter the desired > programme number. For example: for programme slot 1 then 4 for programme slot 14 then 3, then 4 for programme slot 234 When entering prtogramme numbers consisting of several digits, you have approximately 3 seconds after pressing a key to complete the entry. -
Page 20: Calling Up Blocked Programmes
Confirm by pressing OK. > The alphabetically sorted Total list will be displayed, containing all programmes. (Fig. 7-3) Use the arrow keys up/down to mark the pro- > gramme you wish to view. Confirm by pressing OK. > 7.2.4 Calling up blocked programmes (Fig. -
Page 21: Special Functions
> Insert the Smartcard in the card slot of the CI module. Ensure that the gold-coloured chip of the Smartcard is located uppermost on the card in the direction of insertion. > If an encrypted programme is now selected, your digi- tal receiver will automatically check the card reader as well as the interface, and will display the programme in unencrypted form provided the appropriate valid... -
Page 22: Conax Pin Code
> To select one of the starting times available, press the Option key. A selection window will open, displaying the available starting times. (Fig. 7-9) Use the arrow keys up/down to select the desired > starting time, and confirm by pressing OK. Provided the programme has been validated for the (Fig. -
Page 23: Tv/Radio Switching
7.5 TV/Radio switching The pre-programmed settings include both radio and TV pro- grammes. Press the TV/Radio key to switch the digital receiver > to radio mode. The receiver will now switch to the radio programme last selected. Press the TV/Radio key again to revert to the TV >... -
Page 24: Return To Last Programme Selected
Confirm by pressing OK. > You can now enjoy Dolby Digital sound for this programme. If you would like your receiver to reproduce Dolby Digital bro- adcasts automatically, proceed to make the settings as des- cribed in Point 6.3.6 for automatic AC3 reproduction. 7.7 Return to last programme selected Pressing the Back key on the remote control will take >... -
Page 25: Sleep Timer
7.11 Sleep timer Press the Sleep Timer key repeatedly to set the > switch-off time of the receiver in the range of 15 minutes to 2 hours. When the selected time has elapsed, the receiver will switch automatically to Stand-by mode. 7.12 Channel information Press the green function key (Channel information) >... -
Page 26: Sub-Titles
Once you have entered the desired video text page, the receiver will search for the desired page automati- cally. As not all video text pages can be transmitted simulta- neously, it may take a few seconds for your receiver to find the correct page, and to display it on the television screen. -
Page 27: Electronic Programme Guide Sfi
Confirm by pressing OK. The sub-titles will now be > displayed. Please note that these functions are only available when sub- titles are actually being transmitted. This setting will not be retained after switching programmes. 7.15 Electronic Programme Guide SFI (S S iehF F ern I I nfo) Your digital receiver is equipped with an electronic program- me guide. -
Page 28: Interrupting Download Procedure
7.15.2 Interrupting the download procedure The download procedure may be interrupted by switching on the digital receiver (On/Standby key). The SFI data downlo- aded at the previous download will then still be available. 7.15.3 Display electronic programme guide > Switch on both the digital receiver and your television set. -
Page 29: More
> All the SFI function s are available (Point 7.15.3). Press the yellow function key to go to the SFI table > “More” (Point 7.15.6) Press either the green function key or the Back key > to return to the previous SFI table “Now” (Fig. -
Page 30: Sfi Information
7.15.7.1 SFI Information Use the SFI Info to obtain brief information on the marked channel or programme. If SFI information is available, this is indicated by a next to the appropriate programme. Use either the arrow keys or the function keys to >... -
Page 31: Sfi Programme Overview
Press the red function key Timer to open a selection > window. Use the arrow keys up/down to mark the line > Delete Timer. Confirm by pressing OK. > > To abort an active timer, switch off the digital receiver using the On/Standby key. -
Page 32: Sfi Overview By Programme Type (Genre)
7.15.7.4 SFI overview by programme type (genre) If you are interested in specific types of programmes, you can view programme information sorted by specific categories, or genres, e.g. movies, news, etc.. Press the SFI key. The SFI table “Now” will be >... - Page 33 1. Video recorder timer When you use a video recorder timer, your digital receiver will be switched on resp. off for the programme selected, so that it may be recorded on an external recording devicer, e.g. on a video recorder, in your absence. Please note that you must programme your video recorder appropriately to record the programme.
- Page 34 Now use the arrow keys to mark the desired pro- > gramme. Use the arrow keys up/down to move the marker > around the list one line at a time. Use the arrow keys left/right to move around the > list one page at a time.
-
Page 35: Timer Overview
If under the heading Programme you have selected a programme that is blocked in terms of Point 8.3, you will first have to enter the PIN code before the data can be transferred to memory. Press the TV/Radio key to return to normal opera- >... -
Page 36: Changing Basic Settings
7.16.5 Programming a new timer event To programme a new timer event, use the arrow > keys up/down to mark a blank line in the menu Timer overview. Press the yellow function key New to go to the entry > window allowing you to programme a new timer event. -
Page 37: Calling Up Programme List Management
In addition, this chapter describes how you can delete pro- grammes, block access to programmes via the parental con- trol function, or accept programmes into the EPG. When cal- ling up the programme list via the OK key, the Favourites programme list will be displayed. -
Page 38: Adding Programmes To Favourites List
Now, depending on your selection, a programme list contai- ning e.g. all programmes, all new or all English-language pro- grammes will be displayed. Programmes already included in the Favourites list are indicated by a check-mark. Press the red function key Programmes >... -
Page 39: Deleting Programmes
8.1.3 Deleting programmes 8.1.3.1 Removing (deleting) from the Favourites list To remove programmes from the Favourites list, call up the programme list management as described in Point 8.1.1. The Favourites list will be displayed and active. Press the blue function key Functions. >... -
Page 40: Sorting Programmes
8.1.4 Sorting programmes To sort the order of programmes in the Favourites list accor- ding to your preferences, call up the programme list manage- ment as described in Point 8.1.1. The Favourites list will be displayed and active. Press the blue function key Functions. A win dow >... -
Page 41: Programming The Electronic Programme Guide
8.2 Programming the electronic programme guide Your receiver is equipped with the facility of receiving a data channel with additional SFI data via cable. This gives you a preview of SFI data of up to a week in advance. Press the Menu key to call up the Main Menu. >... -
Page 42: Start Category
Use the arrow keys to mark a programme you wish > to include in the electronic programme guide. Press the yellow function key SFI to include the > marked programme in the electronic programme guide. > To include several programmes in the electronic pro- gramme guide simultaneously, proceed as described in 8.1.2 (Marking blocks of programmes). -
Page 43: Updating Time
In this line, use the arrow keys left/right to select > the form of presentation to be used whenever the electronic programme guide is called up. If you select Genres,you can then proceed to use the > arrow keys to select your preferred genre (e.g. movies, news, shows, sport, etc.). -
Page 44: Selecting Channels
Confirm by pressing OK. > The sub-menu Settings will be displayed. Use the arrow keys up/down to mark the line > Parental control. Confirm by pressing OK. > The menu Parental control will be displayed. (Fig. 8-10) Use the arrow keys up/down to move the marker >... -
Page 45: Changing Unit Pin
8.3.2 Changing the unit PIN The unit PIN is set to a default setting of 0000 at the factory. Press the OK key. The menu used for changing the > unit PIN code will be displayed. (Fig. 8-12) Now use the numeric keys to enter the current unit >... -
Page 46: Automatic Scan
When the scan has been completed, a message will be displayed on your TV screen, indicating the number of pro- grammes your digital receiver has found, how many of these are ne, and how many of them are encrypted programmes. New programmes are stored in the Total list,and can then be included in the Favourites list in accordance with Point 8.1. - Page 47 Use the arrow keys up/down to select the type of > scan youi wish to perform. Confirm by pressing OK. > Use the arrow keys up/down to mark the fields > Start channel resp. Start frequency (only in the case of a frequency or channel scan). Please note that the figure given for the start channel resp.
-
Page 48: Manual Scan
You can abort the scan by pressing the red function > key. The scan may take more than 15 minutes. Please also note any messages displayed on the screen. 8.4.3 Manual scan You may choose to scan a specific frequency (see Point 9, Technical terms) for programmes (Fig. -
Page 49: After The Scan
8.4.4 After the scan While the scan is still in progress, you can follow the trans- ponder scan on your screen. When the scan is completed, the number of transponders found, the number of program- mes and of new programmes found will be displayed. In addition a prompt will be displayed, (Fig. -
Page 50: Service Settings
8.5 Service settings You can revert to the original default settings pre-programmed at the factory at any stage. In addition, if you find that the pro- gramme list is outdated because of changes made by the programme providers, you may delete the programme list completely, and then perform a new programme scan. -
Page 51: Update Software
Use the arrow keys left/right to select either Yes > or Abort. Confirm by pressing OK. > 8.5.3 Update software In addition, your digital receiver is equipped to receive upda- tes of its operating software via cable. Press OK to go to the sub-menu Update software >... -
Page 52: Copy Settings
8.5.4 Copying the settings You have the facility to copy all the settings, such as pro- gramme list, antenna settings, etc. of your digital receiver (sender) to another digital receiver (receiver) of the same type, and using the same version of the operating software. (Fig. -
Page 53: Technical Terms
9 Technical terms Antenna cable: Connecting cable between the modulator of the cable recei- ver and the antenna input of the television set, used as an alternative if no SCART socket is available. AV: see SCART Cable receiver: The television set cannot process the digital signals received via the cable network. -
Page 54: Technical Data
Encryption: Encryption of programmes is a technical procedure that ensu- res only a limited audience of listeners or viewers has access to these programmes. Various systems are used to achieve this, including Irdeto, Cryptoworks, Seca, Viaccess etc.. Frequency: Physical measurement, indicates the number of cycles or oscillations per second, the unit of measurement is the Hertz (Hz). -
Page 55: Video Decoding
Video decoding: Video compression MPEG-2 and MPEG-1 compatible Up to MP@ML (main profile @ main level) Video standard PAL / 25 Hz Active picture area 720 pixels x 576 lines Picture format 4 : 3 / 16 : 9 Picture material 16:9 Automatic adaptation for 16:9 TV sets (via SCART) Letterbox filtering for 4:3 TV sets... -
Page 56: Power Requirement
VCR SCART: Input: FBAS; RGB or S-Video Output: FBAS or S-Video Display: 4-digit, 7-segment display Serial interface RS 232: Type RS 232, bidirectional Bit rate 115,2 kBit/s max. Connector D-SUB socket, 9 pin Function Update f. operating software and pre-programming Programme memory: No. -
Page 57: Troubleshooting Guide
11 Troubleshooting guide Problem Possible cause Solution Various programmes not shown in Incorrect programme list selected Select another programme list programme list (see Point 7.2.3.1) Sound OK, no TV picture Radio mode selected Switch to TV mode Receiver cannot be operated Defective data stream -->receiver Disconnect mains plug for approx. -
Page 58: For Daily Use
For daily use Switching on and off > Switch the digital receiver on by pressing the On/Standby key, either on the unit or on the remote control. > Press this key again to switch the receiver off again. Programme selection Using the programme up/down keys Use the Programme keys up/down either on the >...
Need help?
Do you have a question about the DIGIT MF4-K and is the answer not in the manual?
Questions and answers