Advertisement
Available languages
Available languages
Quick Links
Advertisement

Related Manuals for TechniSat TECHNISTAR S5


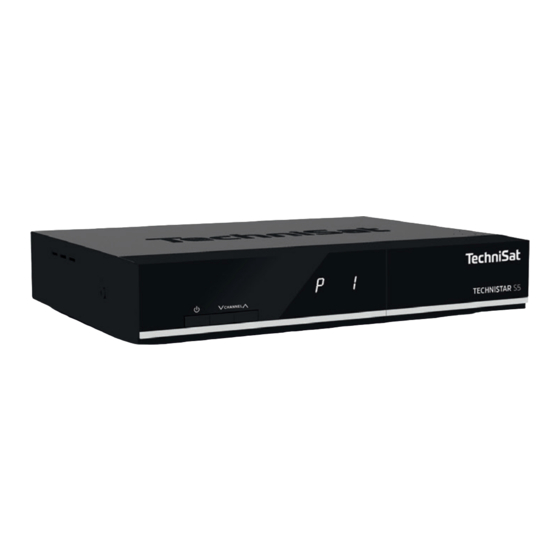
Summary of Contents for TechniSat TECHNISTAR S5
- Page 1 Quick start manual TECHNISTAR S5...
- Page 2 As such, you should occasionally visit the TechniSat homepage, to download the latest version of the quick start manual or instruction manual.
- Page 3 1 Illustrations On / Stand-by Sleep/Timer Remote control code Mute on/off Number buttons Recording TV/RADIO - Mode Stop / DVR Fast forward Rewind Pause / Play Arrow buttons Page up Page down Info Return Options Channel + / - Volume +/- Function selection Function buttons Zoom / Format...
- Page 4 Front On/Standby Programme - Programme + Display Front flap (CI/CI+ module slot and smart card reader)
- Page 5 HDMI output A/V output (Video/Audio analogue)* S/PDIF output (Audio Digital) Power supply unit connection (DC 12V, 2A) *For TechniSat- specific adapter set, article number 0000/3649 Front flap open (grip on side and open downwards): Smart card CI/CI+ module Eject button...
- Page 6 2 Please read this first Before connecting and using the device, first check that everything has been supplied and familiarise yourself with the safety advice. The scope of delivery for the TECHNISTAR S5 includes: 1 Digital receiver, 1 Quick start manual, 1 Remote control, batteries (2 pcs.
- Page 7 Do not expose the device to water droplets or water spray, and do not place any objects filled with liquid, such as vases, on top of it. If water gets into the unit, immediately disconnect the mains plug and inform the service department.
- Page 8 Before handing your receiver to your supplier for maintenance purposes, we recommend that you remove all USB storage media. The recovery of data is not part of the maintenance and repair work. TechniSat assumes no warranty for the loss or damage of data during the repair.
- Page 9 2.7 Disposal advice The packaging material used for your device consists entirely of recyclable materials. Please sort these appropriately, and dispose of them in line with your local waste disposal regulations. At the end of its useful life, this product may not be disposed of in your regular domestic refuse.
- Page 10 IsiZapper (Item No. 0000/3773) is an optional remote control which is specially designed for the operation of the ISI mode (see Section 13). TechniSat A/V adapter set To connect analogue audio/video playback devices, please use the TechniSat specific adapter set (Item No. 0000/3649). TechniSat WLAN dongle TELTRONIC ISIO USB WLAN adapter (Item No.
- Page 11 3.4.2 Analogue > To do this, connect the optionally available TechniSat specific adapter set to the AV OUT (12) socket on the receiver and the audio input on your Hi- Fi / surround amplifier. (e.g. CD or AUX; attention - the phono input is not suitable!) 3.5 USB port...
- Page 12 3.7 Analogue Audio/Video connection You can also operate the receiver on a TV or an external recording device with analogue audio/video input. To do so, use the optionally available TechniSat specific adapter set and connect it to the AV OUT (12).
- Page 13 4.1 Switching the device on and off > When the device is on standby, you can switch it on by pressing the On/ Standby button on the remote control. > When operating normally you can switch the device to standby mode by pressing the On/Standby button.
- Page 14 > Use the up/down arrows buttons to highlight the Picture settings item. > Then press the OK button to confirm and open the Picture settings menu.
- Page 15 You can also highlight the individual menu items in the same way as you highlight an item on a submenu to open them and alter the respective settings. The menu items in some menus have to be highlighted by moving sideways. This is done by pressing the right/left arrow buttons.
- Page 16 > Use the right/left arrow buttons to highlight Yes or No and confirm using the OK button. Depending on your selection, the changes will now be saved or rejected and you return to the next menu level up. Alternatively: > Press the Menu button to directly leave the menu.
- Page 17 4.4.2 Selection list > If this is shown on the right next to the set value , the value is altered via the selection list. As an example below, the OSD font size is changed from "normal" to "small". > Move the highlight onto the corresponding item and press the OK, button to open the selection list: >...
- Page 18 4.4.3 Entering numbers > Use the number buttons to enter the new setting you want if a question mark or a numeric value is displayed. 4.4.4 Virtual keyboard is shown on the right next to the set value, the value is altered using the virtual keyboard.
- Page 19 / Red function button: Pressing/holding down deletes the character in front of the blue highlight/the whole entry. / Green function button: The entered term is accepted. / Blue function button: The keyboard switches to the alternative characters. / Arrows: Moves the blue highlight within the term. The SMS keyboard is operated using the numeric keypad on both the alphabetical and the QWERTY keyboard and can be used at any time.
- Page 20 Once you have reached the field you want with the highlight, you can then begin selecting the next character immediately since, in this case, the character is added directly to the term. If you wish to continue directly selecting a character from the same numeric pad, you can add the previously highlighted character to the term by pressing the right arrow key.
- Page 21 > You can use the up/down arrow buttons within the options group to highlight one of the options listed there. By pressing the up/down arrow buttons it is possible to move the highlight from line to line and to move upwards and downwards page by page using the page up/down buttons.
- Page 22 Operating language > When the installation wizard starts, you will first of all see a window for selecting the operating language. > Use the arrow buttons to highlight the desired operating language. The preferred audio language will be set automatically according to this selection.
- Page 23 In order to use the Internet-based functions on your device there must be an active connection to the Internet. Select on, to allow connection to the Internet. In order to take full advantage of the TechniSat additional services corresponding to your receiver, you must also agree to the data protection stipulations in the window which then appears.
- Page 24 Picture format > Use the right/left arrow buttons to set the picture format for the connected TV. The picture format on the TV will be automatically adjusted according to your selection. > Press the OK button to open the selection list. Antenna configuration In this step of the installation you can adapt your digital receiver setup to the configuration of your antenna.
- Page 25 Network configuration In this step the TV automatically checks the network configuration. > If you do not want to run the network configuration check, press the Info button. > If you wish to check or change the network settings, press the Option button: >...
- Page 26 Software update The digital receiver will now check whether a new version of the software is available for the device. > If you do not want to wait for a search for new software, you can skip this step by pressing the Info button. If the search for a new software version has been skipped, your device will now perform another test according to the time set in the menu, provided you have the function enabled and the device is on standby at this precise...
- Page 27 > To download the available current channel list, use the up/down arrow buttons to highlight the ISIPRO channel list update line and start the process by pressing the OK button. The current channel list will now be downloaded via satellite. Please pay attention to subsequent screen displays.
- Page 28 > To accept the selected regional channels, use the arrow buttons to highlight the Accept field. > Press the OK button to move on to the next step of the installation. Loading SFI data Your digital receiver features an electronic programme information service (Electronic Programme Guide).
- Page 29 Exiting the installation wizard Confirm the final message from the installation assistant by pressing the OK button. 6 Operation 6.1 Switching on > Switch the digital receiver on by pressing the On/Standby button either on the device or on the remote control. 6.2 Off >...
- Page 30 6.3.2 Using the number buttons > Use the number buttons to enter the number of the desired channel. Example: for channel slot 1 1, then 4 for channel slot 14 2, then 3, then 4 for channel slot 234 1, then 5, then 6 then 7 for channel slot 1567 When entering channel numbers with multiple digits, you have approx.
- Page 31 6.3.5 Selecting the list To make it easier for you to find channels, your device provides several channel lists. You can select one of your favourites lists (TV list - TV list 16) and sort or filter the channels according to the various criteria. >...
- Page 32 6.3.5.2 Filter By setting one or more filters, you can limit the display to certain channels that fulfil the desired criteria. > Highlight the Filter option and press the OK button. > Now select the desired filter option from the list that appears and confirm the selection using the OK button.
- Page 33 If global parental control is enabled, the device PIN code will be requested again when the blocked channel is switched on. To make things easier for you, you only need enter the PIN code once during each operating phase. To do so, it is essential that you also observe the instructions and settings regarding the global user-dependent parental controls (TechniFamily) in your instruction manual.
- Page 34 The progress bars are coloured yellow according to the amount of transmission time already expired for the current programme. If the beginning of the progress bar is coloured red, the transmission started too early, and if the end of the progress bar is coloured red the current programme has overrun.
- Page 35 6.6 Volume control You have the option of adjusting the volume on your digital receiver. This facilitates operation of the receiver, as it means you can access all the major functions on a single remote control, and will only rarely have to resort to using the remote control for the TV.
- Page 36 > Using the Option selection feature you can select the language/sound option you want via the Sound option. Alternatively, you can also press the SOUND button (audio channel) on the remote control to immediately access the sound selection. 6.9 Freeze frame >...
- Page 37 7 SFI overview Viewing time > provides the time of the programmes being shown. Time line > a graphical display of the viewing time in the form of progress bars. Channel name with the corresponding channel slot within the active channel list.
- Page 38 8 Timer recordings Your device has the timer functions (timer type) listed below: 1. DVR timer This function is used to switch your digital receiver on and off for the selected broadcast to record the selected programme onto the recording medium while you are out.
- Page 39 In order to ensure that DVR timers are only automatically generated for the programmes you want, you must apply the settings with as much detail as possible. Otherwise the number of generated timers can become very high. With automatic DVR timer generation, there could be overlaps with other timers with the possible result that not all timers are executed.
- Page 40 10 Storage volume selection If a storage volume is inserted while using the TV or radio mode, a selection appears with possible operating options: > Select Play movies to switch to play movies for this storage volume. > Select Play Music to switch to play music for this storage volume. >...
- Page 41 11.1 DVR recording Before starting a DVR recording, please specify which storage medium should be used as a recording medium in Menu > Administer movies DVR/MUSIC/ Pictures > Recording media settings The following recording modes are available for DVR recording: 1.
- Page 42 > To continue playing back the programme from this point, press the Play / Pause button again. You are now watching the programme with a time delay to the live broadcast (Timeshift), while the programme continues to be recorded in the background.
- Page 43 11.1.1.3 Automatically end recording Option 1 > After pressing the On/Standby button a query appears as to what should happen to the ongoing recording. > Select the line with the desired action. If you select Finish recording, a query appears as to what should be done with the recording.
- Page 44 Option 2 > Pressing the Record button causes a window to open containing all available functions. > You can, for example, select +1 hour, whereby the receiver will continue to record the channel for this period and then automatically stop recording. 11.1.2 Timer recordings By using the DVR timer, you can automatically record programmes on an inserted recording volume while you are out.
- Page 45 Example: skipping advertising slots Do you want to see a programme without annoying commercial breaks? With the DVR you can simply skip recorded ad breaks. Time Prog- Prog- Prog- Prog- Commercial Break DVR Recording ramme ramme ramme ramme DVR Playback Programme Example: timeshifted playback You have missed the start of the Formula 1 race.
- Page 46 11.1.5 Setting tags while recording > By pressing the Record button during an ongoing recording, a window opens with the available functions. > By selecting the Set bookmarks a tag is set at the current position. Tags can also be set or edited manually or automatically during playback and in the Modify DVR recordings menu, where this is enabled in automatic programme tagging.
- Page 47 The broadcast information can be displayed and hidden by pressing the Info button repeatedly. > You can start to play back a recording by highlighting it and confirming with 11.2.1 When in TV mode > In TV mode press the Stop / DVR button to switch directly to the DVR Navigator.
- Page 48 > If you press the Fast Forward or rewind button again, the search speed will ▶▶▶▶ increase to 64x A message appears saying “Fast forward ” or “Rewind ◀◀◀◀ ”. > By pressing the Fast Forward or Rewind button again you can skip forwards and backwards in 10-minute steps.
- Page 49 CI Reset. 13 ISI mode The numerous functions and added value make watching television with TechniSat a wonderful and complex experience, with a wide range of possibilities. ISI mode cuts down the large number of options and is therefore ideal for children or older people who do not feel comfortable with the host of configuration options when operating the device.
- Page 50 13.1 Switching the device on/off (ISI mode) > When the device is on standby, you can switch it on by pressing the On/ Standby button on the remote control or on the device. > When operating normally you can switch the device to standby mode by pressing the On/Standby button.
- Page 51 > You can now highlight the desired channel using the up/down arrow buttons, the page up/down buttons and the number buttons. > Press the OK button to select the highlighted channel. 13.3 Switching between TV/Radio > Using the 0 button, retrieve the NAV menu. >...
- Page 52 Throughout the time that the volume is switched to mute, the symbol appears at the upper right of the screen. 13.5 Teletext (ISI mode) Your device can display Teletext information on channels that broadcast Teletext data. 13.5.1 Switching on Teletext >...
- Page 53 You have the option of updating the receiver's software via the USB interface. To be able to run the software update via the USB interface, you first need to download the current software version from the Technisat Homepage (www. technisat.de).
-
Page 54: Troubleshooting
15 Troubleshooting Fault Possible cause Solution Remote control Incorrect remote control Set the correct remote does not work code set control code Batteries are spent Replace batteries Various channels are not Incorrect channel list Select another channel shown in the channel list selected list Sound OK, no TV picture... - Page 55 The picture sometimes Heavy rain or snow Remove snow from has square blocks dish At times the device Dish incorrectly aligned Re-align dish switches to freeze frame image, no sound. At times Dish is too small at the Use larger dish the screen is black with reception location the message "no signal".
- Page 56 The device cannot be Faulty data stream --> Press and hold the On/ operated, or switched on Device blocked Standby button on the or off remote control for approx. 5 seconds. Remove the mains plug for approx. 5 seconds, then switch the device back on Perform flash reset: Caution!
- Page 57 Your TV bears the CE symbol and complies with all requisite EU standards. Changes and printing errors reserved. Version 08/23. Duplication and reproduction only with the publisher's approval. TechniSat and TECHNISTAR S5 are registered trademarks of TechniSat Digital GmbH TechniPark Julius-Saxler-Str. 3 D-54550 Daun/Eifel, Germany www.technisat.de...
- Page 58 TechniSat herewith declares that the radio system model TECHNISTAR S5 corresponds to Directive 2014/53/EU. The complete text of the EU declaration of conformity is available at the following website: http://konf.tsat.de/?ID=11563 The terms HDMI, HDMI High-Definition Multimedia Interface, and the HDMI Logo are trademarks or registered trademarks of HDMI Licensing Administrator, Inc.
-
Page 59: Démarrage Rapide
Guide de démarrage rapide TECHNISTAR S5... -
Page 60: Avant-Propos
La manipulation de fonctions existantes peut également changer. Pour cette raison, nous vous invitons à consulter de temps à autre le site Internet de TechniSat et d'y télécharger le guide de démarrage rapide ou le mode d'emploi le plus récent. - Page 61 1 Illustrations On / Stand-by Sleep/Timer Code de commande Son marche/arrêt Touches numériques Enregistrement TV/RADIO - Mode Stop / DVR Avance rapide Retour rapide Pause/lecture Touches fléchées Page haut Page bas Retour Info Options Programme + / - Volume +/- Choix de la fonction Touches de fonction Menu...
-
Page 62: Partie Frontale
Partie frontale ON/STAND-BY Programme - Programme + Écran Panneau frontal, fente d'insertion du module CI/CI+ et lecteur de carte à puce... - Page 63 Sortie A/V (analogique audio/vidéo)* Sortie S/PDIF (numérique audio) Raccord du bloc d'alimentation (CC 12 V, 2 A) * Pour l'adaptateur TechniSat spécifique portant la référence 0000/3649 Panneau avant ouvert (saisir latéralement et ouvrir vers le bas) : Insertion de la Insertion du Touche d'éjection...
- Page 64 Avant le branchement et la mise en service de l'appareil, vérifiez que le lot de livraison est complet et familiarisez-vous avec les consignes de sécurité. Contenu de la livraison du TECHNISTAR S5 : 1 récepteur numérique, 1 guide de démarrage rapide, 1 télécommande, des piles (2 piles, microcellules 1,5 V)
- Page 65 N’exposez pas l’appareil à des gouttes d’eau ou des éclaboussures. Ne placez pas d’objets contenant des liquides (p. ex. un vase) sur l’appareil. Si de l’eau pénètre dans l’appareil, débranchez immédiatement la fiche secteur et informez le service après-vente. N'utilisez pas l'appareil à proximité de sources de chaleur qui risqueraient de réchauffer encore l'appareil.
- Page 66 La restauration des données ne fait pas partie des travaux de maintenance et de réparation. TechniSat décline toute responsabilité en cas de perte ou de détérioration des données pendant la réparation. 2.6 Télécommande/remplacement des piles >...
- Page 67 2.7 Consigne de mise au rebut L’emballage de votre appareil est exclusivement composé de matériaux recyclables. Merci de les remettre dans le circuit du tri sélectif. Ce produit ne doit pas être jeté en fin de vie avec les déchets ménagers ordinaires, mais ramené...
- Page 68 ISI (voir point 13). Adaptateur A/V TechniSat Pour brancher des appareils de lecture audio/vidéo analogiques, veuillez utiliser l'adaptateur TechniSat spécifique portant la référence 0000/3649. Dongle Wi-Fi TechniSat Adaptateur USB/Wi-Fi TELTRONIC ISIO réf. 0002/3633 Adaptateur USB/Wi-Fi TELTRONIC ISIO TC réf. 0004/3633 Adaptateur Bluetooth USB Réf.
- Page 69 3.4.2 Analogique > Pour ce faire, connectez l'adaptateur spécifique TechniSat disponible en option au port AV OUT (12) du récepteur et avec l'entrée audio de votre amplificateur hi-fi/Surround. (p. ex. CD ou AUX ; attention, l’entrée Phono ne convient pas à...
- Page 70 Vous pouvez faire fonctionner le récepteur numérique sur un téléviseur ou un appareil d'enregistrement externe avec une entrée audio/vidéo. Pour ce faire, utilisez l'adaptateur TechniSat spécifique disponible en option et branchez-le à la sortie AV OUT (12). 4 Commandes de base Cher client, Les points suivants vous présentent les commandes de base, ainsi que les étapes...
- Page 71 4.1 Mise en marche et arrêt de l’appareil > Si l’appareil est en veille, vous pouvez le mettre en marche en appuyant sur la touche ON/STAND-BY de la télécommande. > Pour arrêter l’appareil, appuyez sur la touche ON/STAND-BY. Le mode de disponibilité...
- Page 72 > Sélectionnez à présent l'entrée Réglages de l'image au moyen des touches fléchées haut/bas. > Confirmez au moyen de la touche OK, le menu Réglages de l’image s’affiche.
- Page 73 De même que vous devez sélectionner une entrée d’un sous-menu pour l’ouvrir, vous pouvez également sélectionner des options de menu pour modifier les réglages correspondants. Dans certains menus, vous devez déplacer la sélection latéralement pour sélectionner les entrées. Pour ce faire, appuyez sur les touches fléchées gauche/droite.
- Page 74 > Utilisez les touches fléchées gauche/droite pour sélectionner Oui ou Non et confirmez avec OK. Selon votre choix, les modifications seront alors sauvegardées ou rejetées ; vous revenez ensuite au niveau supérieur du menu. Autre méthode : > Pour quitter directement le menu, validez en appuyant sur la touche Menu. Dans ce cas, les réglages à...
- Page 75 4.4.2 Liste de sélection > Si le symbole s'affiche à droite de la valeur du réglage, vous pouvez modifier celle-ci au moyen de la liste de sélection. Dans l'exemple ci-après, la taille des caractères OSD est modifiée de « normal » à « petit ». >...
- Page 76 4.4.3 Saisie numérique > Utilisez les touches numériques pour saisir le nouveau réglage souhaité si un point d'interrogation ou une valeur numérique est affiché(e) au sein de la sélection. 4.4.4 Clavier virtuel s'affiche à droite de la valeur du réglage, vous pouvez modifier la valeur au moyen du clavier virtuel.
- Page 77 / Touche de fonction rouge : Pour supprimer le caractère devant le curseur bleu, appuyez sur cette touche ; pour supprimer toute l’entrée, maintenez la touche enfoncée. / Touche de fonction verte : permet de valider le terme saisi. / Touche de fonction bleue : permet de passer aux caractères spéciaux.
- Page 78 Une fois parvenu au champ souhaité grâce au curseur, vous pouvez lancer directement la sélection du caractère suivant puisque, dans ce cas, le caractère s’ajoute directement au terme. Si vous souhaitez poursuivre la sélection d’un caractère affecté à la même touche numérique, appuyez sur la touche fléchée droite pour ajouter le caractère précédemment sélectionné...
- Page 79 > Au sein du groupe d’options, utilisez les touches fléchées haut/bas pour sélectionner une des options disponibles. Les touches fléchées haut/bas permettent de déplacer la sélection ligne par ligne et les touches Page haut/bas de déplacer le curseur page par page vers le haut ou le bas.
- Page 80 Langue des menus > Lors du démarrage de l’assistant d’installation, la fenêtre de sélection de la langue des menus s’affiche en premier. > Sélectionnez la langue des menus souhaitée à l’aide des touches fléchées. La langue audio privilégiée est automatiquement définie en fonction du choix effectué.
- Page 81 à Internet doit être active. Sélectionnez Oui pour autoriser la connexion à Internet. Pour pouvoir utiliser les services supplémentaires TechniSat de votre récepteur dans leur intégralité, vous devez également accepter les dispositions relatives à la protection des données dans la fenêtre suivante.
- Page 82 Format d'image > À l'aide des touches fléchées droite/gauche, réglez le format d'image du téléviseur raccordé. L’ajustement du format de l’image au téléviseur s’effectuera automatiquement conformément à votre sélection. > Confirmez avec la touche OK pour valider la sélection. Configuration d'antenne Durant cette étape de l'installation, vous pouvez adapter le réglage de votre récepteur numérique à...
- Page 83 Configuration du réseau Une vérification automatique de la configuration réseau s’effectue lors de cette étape. > Si vous souhaitez ignorer cette vérification de la configuration du réseau, appuyez sur la touche Info. > Si vous souhaitez vérifier ou modifier les réglages du réseau, appuyez sur le bouton d’option: >...
- Page 84 Actualisation du logiciel Le récepteur numérique contrôle à présent si une nouvelle version du logiciel est disponible pour l’appareil. > Si vous ne souhaitez pas attendre la recherche d’une nouvelle version du logiciel, vous pouvez ignorer cette étape en appuyant sur la touche Info. Si vous avez passé...
- Page 85 > Pour télécharger une liste de programmes à jour disponible, sélectionnez à l'aide des touches fléchées haut/bas la ligne ISIPRO - Actualisation de la liste des programmes et démarrez le processus en appuyant sur OK. La liste de programmes actuelle est à présent téléchargée par satellite. Veuillez tenir compte des affichages à...
- Page 86 > Pour valider les programmes régionaux sélectionnés, sélectionnez à l'aide des touches fléchées le champ Valider. > En confirmant avec la touche OK, vous accédez à l'étape d'installation suivante. Charger les données SFI Votre récepteur numérique est équipé d’un guide électronique des programmes appelé...
- Page 87 Fermeture de l'assistant d'installation Confirmez le message final de l'assistant d'installation en appuyant sur la touche OK. 6 Utilisation 6.1 Mise en marche > Mettez en marche le récepteur numérique en appuyant sur la touche ON/ STAND-BY de l'appareil ou de la télécommande. 6.2 Arrêt >...
- Page 88 6.3.2 À l'aide des touches numériques > Saisissez le numéro de la chaîne souhaitée à l’aide des touches numériques. Exemple : pour l'emplacement de chaîne n° 1 1, puis 4 pour l'emplacement de chaîne 14 2, puis 3, puis 4 pour l'emplacement de chaîne 234 1, puis 5, puis 6 puis 7 pour l'emplacement de chaîne 1567...
- Page 89 6.3.5 Sélection d'une liste Votre appareil dispose de différentes listes de programmes pour faciliter la recherche des programmes. Vous pouvez sélectionner une de vos listes de favoris (liste TV - liste TV 16) et classer ou filtrer les programmes selon différents critères. >...
- Page 90 6.3.5.2 Filtre En activant un ou plusieurs filtres, vous pouvez uniquement afficher uniquement certaines chaînes qui satisfont les critères souhaités. > Sélectionnez l’option Filtre et appuyez sur la touche OK. > Sélectionnez à présent dans la liste s'affichant une option de filtre et confirmez la sélection avec la touche OK.
- Page 91 Dans le cas où le contrôle parental global est activé, le code PIN de l'appareil vous sera demandé dès que vous passez à un programme verrouillé. Pour augmenter votre confort d’utilisation, vous n’aurez à saisir le code PIN de l’appareil qu’une seule fois durant une session de visionnage. Pour ce faire, veuillez également respecter les consignes et les paramètres relatifs au contrôle parental global et personnalisable (TechniFamily) dans votre mode d'emploi.
- Page 92 La barre de progression de couleur jaune indique la durée déjà écoulée de l’émission en cours. Si le début de la barre de progression est rouge, cela signifie que l’émission a commencé plus tôt que prévu. Si elle se termine en rouge, l’émission en cours a dépassé...
- Page 93 6.6 Réglage du volume Vous avez la possibilité de régler le volume de votre récepteur numérique. Cela facilite le maniement du récepteur, puisque vous pouvez commander toutes les fonctions importantes avec une télécommande et n'avez que rarement besoin de recourir à la télécommande de votre téléviseur. >...
- Page 94 > La sélection d’option vous permet de sélectionner la langue/option audio souhaitée sous l’option Son. Sinon, vous pouvez accéder directement à la sélection du son en appuyant sur la touche SON (canal audio) de la télécommande. 6.9 Arrêt sur image >...
- Page 95 7 Vue d'ensemble SFI Période d’affichage > indique l'heure d'affichage des émissions. Barre de temps > présentation graphique de la période d’affichage au moyen d’une barre de progression. Nom du programme avec son emplacement de chaîne au sein de la liste de programmes active.
- Page 96 8 Enregistrement par minuterie Votre appareil dispose des minuteries suivantes (type minuterie) : 1. Minuterie DVR Grâce à cette fonction, votre récepteur numérique se met en marche et s'arrête pour l'émission sélectionnée, afin d'enregistrer celle-ci en votre absence sur le support d'enregistrement sélectionné.
- Page 97 Vous devez entreprendre les réglages de manière aussi détaillée que possible pour générer automatiquement la minuterie DVR uniquement pour les émissions souhaitées. Sinon, le nombre de minuteries générées reste très élevé. La génération des minuteries DVR automatiques peut provoquer des recoupements, annulant éventuellement l'exécution de toutes les minuteries.
- Page 98 10 Sélection du support d'enregistrement Si un support d'enregistrement est inséré lorsque le mode TV ou radio est en cours, une sélection avec les options de commande possibles s'affiche : > Sélectionnez lecture de films pour basculer à la lecture de film pour ce support d'enregistrement.
- Page 99 11.1 Enregistrement DVR Avant de démarrer l'enregistrement DVR, définissez dans Menu > Gérer les films DVR/musique/images > Réglages des supports d'enregistrement quel support de données doit être utilisé comme support d'enregistrement. Les modes d’enregistrement suivants sont à votre disposition pour effectuer un enregistrement DVR : 1.
- Page 100 > Pour relancer la lecture de l’émission à partir de ce moment, appuyez une nouvelle fois sur la touche Pause/lecture. Vous voyez à présent l’émission en différé par rapport à la diffusion en cours (Timeshift), pendant que l’émission continue à être enregistrée en arrière- plan.
- Page 101 11.1.1.3 Arrêt automatique de l'enregistrement Possibilité n° 1 > Après avoir appuyé sur la touche ON/STAND-BY, une requête s'affiche vous demandant que faire de l'enregistrement en cours. > Sélectionnez la ligne mentionnant l'action souhaitée. Si vous sélectionnez Arrêter l'enregistrement, un message s'affiche vous demandant que faire avec l'enregistrement.
- Page 102 Possibilité n° 2 > Lorsque vous appuyez sur la touche Enregistrement, une fenêtre répertoriant les fonctions disponibles s'affiche. > Sélectionnez p. ex. +1 heure pour que l’appareil poursuive l’enregistrement de l’émission pendant une heure et qu’il s’arrête ensuite automatiquement. 11.1.2 Enregistrement par minuterie À...
- Page 103 Exemple : ignorer des blocs publicitaires Vous souhaitez voir une émission sans coupure publicitaire intempestive ? Avec le DVR, vous pouvez passer tout simplement les blocs publicitaires enregistrés. Temps Coupure publicitaire Enregistrement DVR Émission Émission Émission Émission Lecture DVR Émission Exemple : lecture décalée Vous avez manqué...
- Page 104 11.1.5 Ajouter des signets pendant un enregistrement > Appuyer sur la touche Enregistrement pendant un enregistrement en cours permet d'ouvrir une fenêtre avec les fonctions à votre disposition. > En sélectionnant l'entrée Ajouter un signet permet d'ajouter un signet à la position actuelle.
- Page 105 La touche Info vous permet d’afficher les informations sur l’émission et une nouvelle pression sur cette touche permet de les masquer à nouveau. > Vous démarrez la lecture d’un enregistrement en sélectionnant celui-ci et en confirmant ensuite avec OK. 11.2.1 À partir du mode TV >...
- Page 106 > En appuyant une nouvelle fois sur la touche Avance rapide ou Retour rapide, la vitesse de recherche devient 64 fois plus rapide. Les mentions « Avance ▶▶▶▶ ◀◀◀◀ rapide » ou « Retour rapide » s'affichent à l'écran. > En appuyant à...
- Page 107 13 MODE ISI De nombreuses fonctionnalités et valeurs ajoutées font de la télévision avec TechniSat une expérience complexe unique aux vastes possibilités. Le mode ISI réduit ce choix d'options. Il est par conséquent idéal pour les enfants ou les personnes âgées qui se sentent mal à l'aise du fait des nombreuses possibilités de réglage lors de l'utilisation de l'appareil.
- Page 108 13.1 Mise en marche et arrêt de l’appareil (mode ISI) > Si l’appareil est en veille, vous pouvez le mettre en marche en appuyant sur la touche ON/STAND-BY de la télécommande ou de l’appareil. > Pour arrêter l’appareil, appuyez sur la touche ON/STAND-BY. Le mode de disponibilité...
- Page 109 > Sélectionnez à présent le programme souhaité à l’aide des touches fléchées haut/bas, des touches Page haut/bas et des touches numériques. > Appuyez sur la touche OK pour régler le programme sélectionné. 13.3 Basculement mode TV/radio > À l'aide de la touche 0, accédez au menu NAV. >...
- Page 110 Le symbole s’affiche en haut à droite de l’écran, lorsque le son est temporairement arrêté. 13.5 Télétexte (mode ISI) Votre téléviseur peut afficher des informations de type télétexte sur les chaînes qui diffusent des données via télétexte. 13.5.1 Mise en marche du télétexte >...
- Page 111 Vous avez la possibilité d'actualiser le logiciel de l'appareil via l'interface USB. Pour effectuer la mise à jour du logiciel via l'interface USB, vous devez d'abord télécharger la version actuelle du logiciel sur le site Internet de TechniSat (www.technisat.de). La mise à jour peut être effectuée avec des clés USB courantes, formatées au format FAT32.
- Page 112 15 Aide à la recherche d'erreurs Erreur Cause possible Résolution La télécommande ne Mauvais réglage du code Régler le code de fonctionne pas de commande à distance commande à distance correct Les piles sont vides Remplacer les piles Divers programmes de la Mauvaise liste des Sélectionner une autre liste des programmes ne...
- Page 113 Des blocs carrés Forte pluie ou neige Libérer la apparaissent parabole de la neige parfois à l'écran. Parabole mal orientée Ajuster l'orientation de la L'appareil passe parfois parabole en image fixe, pas de Parabole trop petite pour Utiliser son. Écran parfois noir et le lieu de réception une parabole plus grande affichage du message...
- Page 114 Impossible de supprimer Le système de fichiers Vérifier le support des enregistrements du support d’enregistrement d'enregistrement est endommagé Impossible d'afficher Le support de stockage Connecter le support les enregistrements DVR sélectionné n'est pas d'enregistrement connecté. paramétré Corriger le réglage du support d'enregistrement Impossible d'utiliser Flux de données...
- Page 115 L’appareil s’éteint La fonction Veille Vérifier la mise en veille tout seul après un automatique automatique certain temps est activée et le cas échéant l'arrêter.
- Page 116 Votre appareil porte la marque CE et répond à toutes les normes européennes requises. Sous réserve de modifications et d’erreurs typographiques. Actualisation 08/23. Toutes copies et reproductions sont soumises à l’autorisation de l’éditeur. TechniSat et TECHNISTAR S5 sont des marques déposées de la société TechniSat Digital GmbH TechniPark Julius-Saxler-Str. 3 54550 Daun/Eifel, Allemagne www.technisat.de...
- Page 117 Par la présente, TechniSat déclare que l’installation radioélectrique TECHNISTAR S5 est conforme à la directive 2014/53/UE. Le texte intégral de la déclaration de conformité européenne est disponible à l’adresse Internet suivante : http://konf.tsat.de/?ID=11563 The terms HDMI, HDMI High-Definition Multimedia Interface, and the HDMI Logo are trademarks or registered trademarks of HDMI Licensing Administrator, Inc.
- Page 118 Beknopte gebruiksaanwijzing TECHNISTAR S5...
- Page 119 Ga daarom van tijd tot tijd naar de homepagina van TechniSat om de geactualiseerde snelstartgids of handleiding te downloaden. Wij wensen u veel plezier met uw...
- Page 120 1 Afbeeldingen Aan/Stand-by Sleep/Timer Afstandsbedieningscode Geluid aan/uit Cijfertoetsen Opname TV/RADIO - Modus Stop / DVR Vooruitspoelen Terugspoelen Pauze/weergeven Pijltoetsen Pagina omhoog Pagina omlaag Terug Info Optie Programma +/- Volume +/- Functies kiezen Functietoetsen Zoom / Format Menu Audiokanaal Timer Teletekst HDMI Stilstaand beeld / jogshuttle...
- Page 121 Voorkant Aan/Stand-by Programma - Programma + Display Voorklep CI/CI+ modulesleuf en smartcardlezer...
- Page 122 LNB-ingang (DC 13/18 V, max. 600 mA) Ethernetaansluiting USB-ingang HDMI-uitgang A/V-uitgang (video/audio-analoog)* S/PDIF-uitgang (audio-digitaal) Voedingsaansluiting (DC 12 V, 2 A) * Voor TechniSat-specifieke adapterset met artikelnummer 0000/3649 Voorklep open (aan zijkanten beetpakken en naar beneden klappen): Smartcard- CI/CI+ module Uitwerpknop sleuf sleuf...
- Page 123 2 Lees dit eerst Controleer eerst voordat u het apparaat aansluit en gebruikt of de levering compleet is en maak u vertrouwd met de veiligheidsinstructies. Bij de TECHNISTAR S5 wordt het volgende meegeleverd: 1 digitale ontvanger, 1 snelstartgids, 1 afstandsbediening, batterijen (2 stuks 1,5 V microcellen) 1 voedingsadapter.
- Page 124 Stel het apparaat niet bloot aan vocht en spatwater en plaats er geen met vloeistof gevulde voorwerpen op, zoals bijv. een vaas. Als er water in het apparaat is gekomen, moet onmiddellijk de stekker uit het stopcontact worden gehaald en contact met de klantenservice worden opgenomen. Plaats geen hittebronnen die het apparaat extra zouden kunnen verwarmen in de buurt van het apparaat.
- Page 125 Het wordt aanbevolen om voordat u uw ontvanger voor onderhoud aan uw dealer afgeeft, alle opslagmedia te verwijderen. Het herstellen van gegevens maakt geen deel uit van de onderhouds- en reparatiewerkzaamheden. TechniSat aanvaardt geen verantwoordelijkheid voor het verlies of de beschadiging van gegevens tijdens de reparatie.
- Page 126 2.7 Informatie voor afvoer De verpakking van uw apparaat bestaat uitsluitend uit recyclebare materialen. Voer deze gesorteerd af naar de afvalverwijdering. Aan het einde van zijn levensduur mag dit product niet worden weggegooid als normaal huishoudelijk afval, maar moet het worden ingeleverd bij een verzamelpunt voor het recyclen van elektrische en elektronische apparatuur.
- Page 127 IsiZapper (art. nr. 0000/3773) is een optionele afstandbediening, die speciaal voor de bediening van de ISI-modus (zie paragraaf 13) is ontworpen. TechniSat A/V-adapterset Gebruik voor de aansluiting van analoge audio-/videospelers de speciale TechniSat adapterset met het art. nr. 0000/3649. TechniSat WLAN Dongle TELTRONIC ISIO USB-WLAN-adapter artnr.: 0002/3633...
- Page 128 Dolby Digital-signaal beschikbaar. 3.4.2 Analoog > Sluit hiervoor de optioneel verkrijgbare speciale TechniSat-adapterset aan op de AV OUT-aansluiting (12) van de ontvanger en op de audio-ingang van uw HiFi/Surround-versterker. (bijv. CD of AUX; let op, de phono-ingang is hiervoor niet geschikt!) 3.5 USB-aansluiting...
- Page 129 Raadpleeg hiervoor ook de paragraaf Netwerk configureren in uw handleiding. 3.7 Analoge audio-/video-aansluiting U kunt de ontvanger ook met een tv of een extern opname-apparaat met analoge audio-/video-ingang gebruiken. Gebruik hiervoor de speciale TechniSat-adapterset (optioneel) en sluit deze aan op AV OUT (12). 4 Basisbediening...
- Page 130 4.1 Toestel aan-/uitzetten > Als het apparaat in stand-by staat, kunt u het met behulp van de toets Aan/ Stand-by van de afstandsbediening of van het apparaat inschakelen. > Als het toestel in werking is, kunt u het in stand-by zetten door op de toets Aan/stand-by te drukken.
- Page 131 > Markeer nu met de pijltoetsen Omhoog/Omlaag de regel Beeldinstellingen. > Bevestig vervolgens de keuze met de toets OK waarna het menu Beeldinstellingen wordt geopend.
- Page 132 Op dezelfde manier als u de regel van een submenu markeert om dit te openen, kunt u ook de afzonderlijke menuopties markeren om de betreffende instellingen te wijzigen. In sommige menu's moeten de menu-opties worden gemarkeerd door de cursor zijwaarts te verplaatsen. Dit doet u met behulp van de pijltoetsen Naar rechts/Naar links.
- Page 133 > Markeer met de pijltoetsen Naar rechts/Naar links Ja of Nee en bevestig met de toets OK. Afhankelijk van uw keuze worden de wijzigingen nu opgeslagen of verworpen en keert u terug naar het vorige, hogere menuniveau. Alternatief: > Als u het Menu rechtstreeks wilt afsluiten, drukt u op de menutoets. In dit geval worden de beginwaarden van de instellingen die handmatig moeten worden opgeslagen hersteld.
- Page 134 4.4.2 Keuzelijst > Wordt rechts naast de ingestelde waarde weergegeven, na het wijzigen van een waarde via de keuzelijst. Als voorbeeld wordt hierna de OSD- lettertypegrootte gewijzigd van "normaal" naar "klein". > Verplaats de markering naar de juiste invoer en druk op de knop OK om de keuzelijst te openen: >...
- Page 135 4.4.3 Met cijfertoetsen invoeren > Voer met behulp van de cijfertoetsen de gewenste nieuwe instelling in wanneer binnen de markering vraagtekens of een getalswaarde weergegeven wordt. 4.4.4 Virtueel toetsenbord Wordt rechts naast de ingestelde waarde weergegeven, dan gebeurt de wijziging van een waarde via het virtuele toetsenbord.
- Page 136 / Rode functietoets: Indrukken/vasthouden wist het teken voor de blauwe markering/de hele invoer. / Groene functietoets: Het ingevoerde begrip wordt overgenomen. / Blauwe functietoets: Het toetsenbord wisselt naar alternatieve tekens. / Pijl: verplaatsen van de blauwe markering binnen het begrip. De bediening van het sms-toetsenbord gebeurt via de cijfertoetsen van het alfabetische toetsenbord en het QWERTY-toetsenbord en kan op elk moment worden gedaan.
- Page 137 Als u het gewenste veld met de markering hebt bereikt, kunt u direct het volgende teken kiezen omdat het teken nu direct aan het begrip wordt toegevoegd. Wilt u direct doorgaan met het kiezen van een teken van dezelfde cijfertoets, dan kunt u het ervoor gemarkeerde teken door het indrukken van de pijltoets rechts aan het begrip toevoegen.
- Page 138 Met de pijltoetsen Omhoog/Omlaag kunt u de markering per regel verplaatsen en met de toetsen Pagina omhoog/omlaag kunt u deze per pagina omhoog of omlaag verschuiven. > Door de toets OK in te drukken, wordt de gemarkeerde optie gekozen en Optie selecteren afgesloten.
- Page 139 Menutaal > Bij het starten van de installatieassistent verschijnt als eerste het keuzevenster voor de menutaal. > Markeer met de pijltoetsen de gewenste menutaal. Op basis van deze keuze wordt automatisch de voorkeurstaal ingesteld. U kunt deze instellingen ook op een later tijdstip aanpassen via het menu. >...
- Page 140 Om de internetfuncties van uw apparaat te kunnen gebruiken moet de internetverbinding actief zijn. Selecteer Aan om de verbinding met internet toe te staan. Om de extra services van TechniSat van uw ontvanger volledig te kunnen gebruiken, moet u in het volgende venster ook akkoord gaan met de privacyverklaring.
- Page 141 Beeldformaat > Stel met behulp van de pijltoetsen Naar links/Naar rechts het beeldformaat van het aangesloten televisietoestel in. Afhankelijk van uw keuze wordt het beeldformaat automatisch aan het televisietoestel aangepast. > Bevestig de keuze met de toets OK om deze vast te leggen. Configuratie van de antenne In deze installatiestap kunt u de instelling van uw digitale ontvanger aan de configuratie van uw antenne aanpassen.
- Page 142 Netwerkconfiguratie In deze stap wordt een automatische controle van de netwerkconfiguratie uitgevoerd. > Als u de controle van de netwerkconfiguratie niet wilt uitvoeren, druk dan op de toets Info. > Als u de netwerkconfiguratie wilt controleren of wijzigen, druk dan op de Optietoets: >...
- Page 143 Software actualiseren Nu controleert de digitale ontvanger of er nieuwe software voor het apparaat beschikbaar is. > Als u het zoeken naar nieuwe softwareversies niet wilt afwachten, kunt u deze stap overslaan door op de toets Info te drukken. Als het zoeken naar nieuwe software wordt overgeslagen, voert het apparaat op het in het menu ingestelde tijdstip opnieuw een test uit mits deze functie geactiveerd blijft en het apparaat op dat tijdstip in stand-by staat.
- Page 144 > Markeer om een bijgewerkte programmalijst te downloaden met behulp van de pijltoetsen Omhoog/Omlaag de regel ISIPRO - update programmalijst en druk op OK om deze procedure te starten. De bijgewerkte programmalijst wordt nu via de satelliet gedownload. Volg de aanvullende instructies en verklaringen die in beeld komen op.
- Page 145 > Markeer om het gekozen regionale programma op te slaan, met behulp van de pijltoetsen het veld Bevestigen. > Als u de keuze met OK bevestigt, gaat u door naar de volgende stap van het installatieproces. SFI-gegevens laden Uw digitale ontvanger beschikt over een elektronische SFI-programmagids (SiehFernInfo).
- Page 146 De installatieassistent afsluiten Bevestig het laatste bericht van de installatieassistent door op de OK-knop te drukken. 6 Bediening 6.1 Aanzetten > Zet de digitale ontvanger aan door op de knop Aan/Stand-by van het apparaat of van de afstandsbediening te drukken. 6.2 Uitgeschakeld worden >...
- Page 147 6.3.2 Met behulp van de cijfertoetsen > Voer met behulp van de cijfertoetsen het gewenste programmanummer in. Voorbeeld: voor programmaplaats 1 1, dan 4 voor programmaplaats 14 2, dan 3, dan 4 voor programmaplaats 234 1, dan 5, dan 6 dan 7 voor programmaplaats 1567 Als u meercijferige programmanummers invoert, hebt u steeds nadat u een toets indrukt ongeveer 3 seconden de tijd om de invoer te voltooien.
- Page 148 6.3.5 Lijst kiezen Om het terugvinden van programma's te vergemakkelijken, beschikt uw apparaat over verschillende programmalijsten. U kunt een van uw favorietenlijsten selecteren (tv-lijst - tv-lijst 16) en de programma's op basis van verschillende criteria sorteren of filteren. > Druk op de toets OK. De actieve programmalijst verschijnt. >...
- Page 149 6.3.5.2 Filters Door een of meer filters in te stellen, kunt u alleen bepaalde kanalen laten weergeven die aan de gewenste criteria voldoen. > Markeer de optie Filter en druk op OK. > Selecteer nu een gewenste filteroptie in de weergegeven lijst en bevestig de selectie met de OK-knop.
- Page 150 Als het algemene kinderslot actief is, wordt u bij het inschakelen van een geblokkeerd programma om de pincode van het apparaat gevraagd. Om het bedieningscomfort te vergroten, hoeft u de pincode van het apparaat in een gebruikscyclus maar een keer in te voeren. Bekijk hiervoor in ieder geval de aanwijzingen en instellingen voor het algemene en gebruikersafhankelijke kinderslot (TechniFamily) in uw bedieningshandleiding.
- Page 151 De voortgangsbalk wordt naarmate de tijd van de lopende uitzending verstrijkt steeds verder geel ingekleurd. Als het begin van de voortgangsbalk rood is gekleurd, is de uitzending te vroeg begonnen en bij een rood gekleurd einde is de tijd van de lopende uitzending overschreden. Bovendien worden ook andere programmakenmerken weergegeven: Bijvoorbeeld: Voor teletekst...
- Page 152 6.6 Volume instellen U hebt de mogelijkheid om het volume van de digitale ontvanger te regelen. Dit vereenvoudigt het gebruik van de ontvanger, omdat u zo alle belangrijke functies met een afstandsbediening kunt bedienen en zelden de afstandsbediening van uw tv hoeft te gebruiken.
- Page 153 > Met behulp van de Optie selecteren kunt u onder de optie Geluids de gewenste taal/geluidsoptie kiezen. U kunt ook op de knop GELUID (audiokanaal) van de afstandsbediening drukken om direct toegang te krijgen tot de Geluidsoptie kiezen. 6.9 Stilstaand beeld >...
- Page 154 7 SFI-overzicht Weergavetijd > geeft het tijdstip van de weer te geven uitzendingen aan. Tijdbalk > grafische voorstelling van de weergavetijd door een voortgangsbalk. Programmanaam met bijbehorende programmaplaats binnen de actieve programmalijst. Voortgangsbalk resp. start-/stoptijd van de weergegeven uitzending. Huidige datum en tijd. Uitzendingen van de weergegeven programma's.
- Page 155 8 Met timer opnemen Uw apparaat beschikt over de volgende timerfuncties (type timer): 1. DVR-timer Met deze functie wordt de digitale ontvanger voor de geselecteerde uitzending in- en uitgeschakeld om tijdens uw afwezigheid op het geselecteerde opslagmedium op te nemen. Als het apparaat door de DVR-timer is ingeschakeld, wordt dit op het display aangegeven.
- Page 156 Om ook daadwerkelijk alleen automatische DVR-timers voor de gewenste uitzendingen te genereren, moet u de instellingen zo gedetailleerd mogelijk maken. Anders kan het aantal gegenereerde timers erg groot worden. Door de automatische generatie van de DVR-timers kunnen deze met andere timers overlappen, waardoor niet alle timers kunnen worden uitgevoerd.
- Page 157 10 Opslagmedium kiezen Als tijdens de lopende tv- of radiomodus een opslagmedium wordt aangesloten, verschijnt een selectievenster met mogelijke bedieningsopties: > Selecteer Films afspelen om over te schakelen naar het afspelen van films voor dit opslagmedium. > Selecteer Muziek afspelen om over te schakelen naar het afspelen van muziek voor dit opslagmedium.
- Page 158 11.1 DVR-opname Voordat u met een DVR-opname begint, moet u onder Menu> Films DVR/ MUZIEK/Foto's beheren> Instellingen opnamemedium vastleggen welk opslagapparaat moet worden gebruikt als opnamemedium. Voor DVR-opnamen zijn de volgende opnamemodi beschikbaar: 1. Onmiddellijk opnemen Kies dit type opname om de nu lopende uitzending met een druk op de knop onmiddellijk op te nemen.
- Page 159 > Druk nogmaals op de toets Pauze/weergeven om de weergave van de uitzending op dit punt weer te hervatten. U ziet de uitzending nu met een tijdsverschil t.o.v. de live-uitzending (timeshift), terwijl de lopende uitzending op de achtergrond nog steeds wordt opgenomen.
- Page 160 11.1.1.3 Opnemen automatisch beëindigen Mogelijkheid 1 > Na drukken op de toets Aan/Stand-by verschijnt een keuzevenster waarin u wordt gevraagd wat er met de lopende opname moet gebeuren. > Selecteer de regel met de gewenste actie. Als u Opname beëindigen hebt geselecteerd, wordt u nu gevraagd wat er met de opname moet gebeuren.
- Page 161 Mogelijkheid 2 > Door op de toets Opnemen te drukken wordt een venster met de beschikbare functies geopend. > Kies bijv. +1 uur om de ontvanger gedurende deze tijd het programma te laten opnemen waarna vervolgens het opnemen automatisch wordt gestopt. 11.1.2 Met timer opnemen Met de DVR-timers kunt u tijdens uw afwezigheid programma's automatisch op een aangesloten opnamemedium opnemen.
- Page 162 Voorbeeld: reclameblokken overslaan U wilt een programma bekijken zonder vervelende onderbrekingen door reclame? Met de DVR kunt u eenvoudig de opgenomen reclameblokken overslaan. Tijd Uitzen- Uitzen- Uitzen- Uitzen- DVR-opname Onderbrekingen door reclame ding ding ding ding DVR-weergave Uitzending Voorbeeld: getimede weergave U hebt de start van de Formule 1-race gemist.
- Page 163 11.1.5 Markeringen aanbrengen tijdens een opname > Door tijdens een opname op de toets Opnemen te drukken wordt een venster met de ter beschikking staande functies geopend. > Als u de optie Merkteken instellen selecteert, wordt op de huidige positie een markering gezet.
- Page 164 Met de toets Info kunt u de uitzendingsinformatie weergeven en door nogmaals indrukken weer verbergen. > De weergave van een opname wordt gestart door deze te markeren en vervolgens met OK te bevestigen. 11.2.1 Vanuit de tv-modus > Druk terwijl u de tv gebruikt, op de toets Stop/DVR om direct naar de DVR- navigator te gaan.
- Page 165 > Als u opnieuw op Vooruitspoelen of Terugspoelen drukt, wordt de ▶▶▶▶ snelheid tot 64-voudig verhoogd. De tekst “Vooruitspoelen ” of ◀◀◀◀ “Terugspoelen ” verschijnt. > Door opnieuw op de toets Vooruitspoelen of Terugspoelen te drukken, kunt u in stappen van 10 minuten vooruit of terug springen. >...
- Page 166 CI/CI+ modules handmatig worden geïnitialiseerd. 13 ISI-mode Talloze functies en veel toegevoegde waarde maken televisie met TechniSat een tot fantastische en complexe beleving met uitgebreide mogelijkheden. De ISI-modus vermindert deze verscheidenheid aan opties en is daarom ideaal voor kinderen of ouderen die zich onzeker voelen over de vele aanpassingsmogelijkheden bij het bedienen van het apparaat.
- Page 167 13.1 Toestel aan-/uitzetten (ISI-modus) > Als het toestel in stand-by staat, kunt u het aanzetten met behulp van de toets Aan/Stand-by van de afstandsbediening of van het apparaat. > Als het toestel in werking is, kunt u het in stand-by zetten door op de toets Aan/Stand-by te drukken.
- Page 168 > Nu kunt u met de pijltoetsen Omhoog/Omlaag, met de toetsen Pagina omhoog/omlaag of met de cijfertoetsen het gewenste programma markeren. > Door op de toets OK te drukken, wordt het gemarkeerde programma ingesteld. 13.3 Tussen tv/radio schakelen > Druk op de 0-toets om het NAV-menu te openen. >...
- Page 169 Gedurende de tijd dat het geluid uit staat, wordt het symbool rechtsboven in het beeldscherm weergegeven. 13.5 Teletekst (ISI-modus) Uw toestel kan teletekstinformatie weergeven van programma's die teletekstdata meezenden. 13.5.1 Teletekst inschakelen > Door op de toets Teletekst te drukken, wordt de teletekst ingeschakeld. 13.5.2 Pagina kiezen >...
- Page 170 14 Software-update via USB-interface U kunt de software van het apparaat via de USB-aansluiting bijwerken. Om de software-update via de USB-interface te kunnen realiseren, moet u eerst de geactualiseerde software van de TechniSat-homepage (www. technisat.de) worden gedownload. De update kan worden uitgevoerd met normale USB-flashsticks, die in FAT32- indeling zijn geformatteerd.
- Page 171 15 Problemen oplossen Storing Mogelijke oorzaak Oplossing afstandsbediening Onjuiste Correcte werkt niet Afstandsbedieningscode afstandsbedieningscode ingesteld instellen Batterijen zijn leeg Batterijen verwisselen Div. programma's worden Onjuiste programmalijst Andere programmalijst niet in de programmalijst gekozen kiezen getoond Geluid OK, geen beeld Radio-modus opgeroepen Instelling controleren en radio- achtergrondbeeld...
- Page 172 In het beeld ontstaan Hevige regen of sneeuw Schotel van sneeuw af en toe vierkante vrijmaken blokjes. Schotel verkeerd gericht Schotel opnieuw uitrichten Af en toe schakelt het apparaat over op Schotel op de Grotere schotel stilstaand beeld, geen ontvangstlocatie te klein gebruiken geluid.
- Page 173 DVR-opnamen worden Gekozen opslagmedium is ingestelde opslagmedium niet getoond niet aangesloten. aansluiten Instelling van het opslagmedium corrigeren Het apparaat kan niet Defecte gegevensstroom Aan/Stand-byknop op de worden bediend, niet in- -> apparaat geblokkeerd afstandsbediening of uitgeschakeld worden ongeveer 5 seconden ingedrukt houden.
- Page 174 Uw toestel draagt het CE-keurmerk en voldoet aan alle vereiste EU-normen. Wijzigingen en drukfouten voorbehouden. Laatste wijziging: 08/23. Kopiëren en reproductie uitsluitend met toestemming van de uitgever. TechniSat en TECHNISTAR S5 zijn geregistreerde handelsmerken van TechniSat Digital GmbH TechniPark Julius-Saxler-Str. 3 D-54550 Daun/Eifel www.technisat.de...
- Page 175 TechniSat verklaart hierbij dat de radio-installatie TECHNISTAR S5 aan de richtlijn 2014/53/EU voldoet. De volledige tekst van de EU-conformiteitsverklaring is op het volgende webadres beschikbaar: http://konf.tsat.de/?ID=11563 The terms HDMI, HDMI High-Definition Multimedia Interface, and the HDMI Logo are trademarks or registered trademarks of HDMI Licensing Administrator, Inc.
-
Page 176: Návod K Použití
Návod k použití TECHNISTAR S5... - Page 177 Vážená zákaznice, vážený zákazníku, Srdečně Vám blahopřejeme, že jste se rozhodli pro satelitní digitální přijímač TECHNISTAR od TechniSat. Předkládaný návod k použití Vám má pomoci poznat a optimálně využívat rozsáhlé funkce Vašeho nového digitálního přijímače. Pomohou Vám při účelu přiměřeném bezpečném používání...
- Page 178 1 Vyobrazení Zapnutí/Standby Časovač vypnutí Kód DO Vypnutí zvuku Číselná tlačítka Záznam Provoz TV / Radio Stop / DVR Přetáčení vpřed Přetáčení zpět Pauza/Přehrávání Tlačítka šípek O stránku nahoru O stránku dolu Info Zpět Opční volby Program + / - Hlasitost +/- Volba funkce Funkční...
- Page 179 Čelní panel Zapnuto / Standby Program - Program + Displej Čelní odklápěcí dvířka pro štěrbinu modulu CI/CI+ a čtečku karet Smart...
- Page 180 Zadní panel Vstup LNB (DC 13/18 V, max. 600 mA) připojení sítě (Ethernet) USB vstup Výstup HDMI Výstup A/V (analogové audio a video)* Výstup S/PDIF (digitální audio) Připojení napájení (DC 12 V, 2 A) * Specifická adaptérová sada čísla výrobku 0000/3649 Otevřená...
- Page 181 2 . Prosím přečíst jako první Předtím než přístroj připojíte a uvedete do provozu, překontrolujte napřed dodávku na úplnost a seznamte se s bezpečnostními pokyny. V rozsahu dodávky TECHNISTAR je obsaženo: 1 digitální přijímač, 1 krátký návod , 1 dálkové ovládání, baterie (2 ks 1,5 V mikročlánky) 1 zásuvkový...
- Page 182 Nevystavujte přístroj kapající, nebo stříkající vodě a nepokládejte na něj kapalinou naplněné předměty, např. vázy. Jestliže do přístroje vnikla voda, okamžitě vytáhněte zástrčku sítě a uvědomte servis. Neprovozovat v blízkosti přístroje žádné tepelné zdroje, které by jej dodatečně oteplovaly. Nezasouvat žádné předměty do větracích štěrbin. Nikdy přístroj neotevírejte.
- Page 183 Doporučujeme Vám odstranit před předáním přijímače do opravy Vašemu prodejci všechna datová média respektive datové nosiče. TObnova dat není součástí provedení opravy ani údržbových prací. TechniSat nepřebírá žádnou záruku za ztrátu, nebo poškození dat během opravy. 2.6 Dálkové ovládání – výměna baterií...
- Page 184 2.7 Pokyn k ekologické likvidaci Balení Vašeho přístroje sestává výlučně z recyklovatelných materiálů. Prosím odstraňte tyto, vytříděné odpovídajícím způsobem, do systému tříděného odpadu. Tento výrobek nesmí být po ukončení své životnosti odstraněn do odpadu z domácností, nýbrž musí být předán do sběrného místa pro recyklaci elektrických a elektronických přístrojů.
- Page 185 ISI módu (viz bod 13). Adaptérová sada A/V TechniSat TPro připojení analogových reprodukčních přístrojů audio/video, použijte specifickou adaptérovou sadu TechniSat s číslem Art. Nr. 0000/3649.. TechniSat WLAN Single TELTRONIC ISIO USB WLAN Adapter (Art. Nr. 0002/3633) TELTRONIC ISIO TC USB-WLAN Adapter (Art. Nr. 0004/3633) USB Bluetooth adaptér...
- Page 186 3.2 Satelitní anténa > Propojte vstup LNB (8) digitálního přijímače vhodným koaxiálním kabelem s Vaší venkovní jednotkou.. Není možno přijímat analogovou televizi! INení možno přijímat analogovou televizi! 3.3 3 Připojení TV přijímače > Propojte přijímač (výstup HDMI 11) a televizor (vstup HDMI) pomocí HDMI kabelu (je součástí...
- Page 187 3.7 Analogové připojení Audio/Video Můžete též přijímač provozovat s televizorem nebo jiným záznamovým zařízením s analogovým vstupem audia a videa. Použijte k tomu opčně dostupnou specifickou adaptérovou sadu TechniSat a připojte tuto na AV OUT (12). 4 Základní ovládán Vážený zákazníku, V následujících bodech Vám vysvětlíme zprvu základní...
- Page 188 4.1 Zapnutí a vypnutí přístroje > Nachází-li se přístroj v pohotovostním stavu (Standby) můžete jej zapnout stiskem tlačítka Zapnutí/Standby na dálkovém ovládání. > Z provozního stavu vypnete přístroj stiskem tlačítka Zapnutí/Standby do pohotovostního stavu. Vezměte v potaz též další pokyny v Návodu k použití, ohledně zapnutí a vypnutí...
- Page 189 > Stiskem tlačítka OK se otevře menu Nastavení. > Označte pomocí tlačítka šipek nahoru/dolu položku Nastavení obrazu. > Potom co stlačením tlačítka OK volbu potvrdíte, otevře se menu Nastavení obrazu.
- Page 190 Stejným způsobem, když označíte nějakou položku z podmenu, abyste ji otevřeli můžete též označit jednotlivé body menu za účelem změny příslušných nastavení. V některých menu musíte jeho položky označovat posuvem do stran. Toho dosáhnete stisky tlačítek šipek doprava/doleva. Stlačením tlačítek šipek nahoru/dolu můžete posunovat označení po řádcích, tlačítky O stránku nahoru/dolu po celých stránkách.
- Page 191 > Označte pomocí šipek doprava/doleva Ano, případně Ne, potvrďte tlačítkem OK. Odpovídaje Vaší volbě budou změny uloženy, respektive zamítnuty a vrátíte se do nejbližší vyšší úrovně menu. Alternativně: > Abyste menu přímo opustili, stiskněte tlačítko Menu. V tomto případě budou nastavení...
- Page 192 4.4.2 Nabídka voleb – funkcí > Je-li vpravo vedle nastavené hodnoty zobrazen symbol podtržené šipky dolu , uskuteční se změna této hodnoty pomocí volby z nabídky funkcí. Jako příklad bude následovně změněna velikost písma OSD z „normálního“ na „malé“. > Posunujte označením na odpovídající...
- Page 193 4.4.3 Zadání číslic > Zadejte číselnými tlačítky požadované nové nastavení, když je zobrazen uvnitř zvýraznění otazník nebo číselná hodnota 4.4.4 Virtuální klávesnice Je-li zobrazen vpravo vedle nastavené hodnoty symbol , pak se uskutečňuje změna této hodnoty prostřednictvím virtuální klávesnice. Při této metodě vkládání dat máte k dispozici tři různé...
- Page 194 / Červené funkční tlačítko: Stisk / Podržení maže znak před modrým označením / celý výraz. / Zelené funkční tlačítko: Zadaný výraz se převezme (potvrzení). / Modré funkční tlačítko: Klávesnice se přepne na alternativní symbol. . / Šipky: Pohybují modrým zvýrazněním uvnitř výrazu. Ovládání...
- Page 195 Pokud jste dosáhli označení zamýšleného políčka, můžete ihned začít s volbou dalšího znaku, poněvadž v tomto případě je znak připojen přímo k výrazu. Hodláte-li přímo pokračovat volbou znaku téhož číselného tlačítka, můžete předtím označený znak přidat k výrazu stiskem šipky doprava. 4.5 Volba možností...
- Page 196 > Uvnitř skupiny voleb si můžete označit jednu zde uspořádanou volbu pomocí tlačítek šipek nahoru / dolu. Ovládáním tlačítky šipek nahoru / dolu můžete posunovat označení po řádcích a tlačítky stránka nahoru / dolu po stránkách výše a níže. > Stiskem tlačítka OK je označená...
- Page 197 Jazyk menu > Při startu asistenta instalace se zprvu objeví okno pro volbu jazyka menu. > Označte tlačítky šipek požadovaný jazyk. TOdpovídaje této volbě bude nastaven automaticky jazyk zvuku. Toto nastavení můžete kdykoliv v pozdější době upravit přes menu. > Potvrďte nyní...
- Page 198 Připojení k internetu > Abyste mohli využívat na internetu založené funkce Vašeho přístroje,musí být připojení k internetu aktivní. Zvolte připojit, abyste povolili připojení k internetu. Abyste mohli využívat doplňkové služby Vašeho přijímače v plném rozsahu, musíte dodatkem souhlasit v následujícím okně s ustanoveními ohledně...
- Page 199 Formát obrazu > Nastavte tlačítky šipek napravo / nalevo formát obrazu připojeného televizního přijímače. Odpovídaje Vaší volbě dojde k automatickému přizpůsobení formátu obrazu k televiznímu přijímači. > Stiskněte tlačítko OK, abyste volbu přijali. Konfigurace antény V tomto bodu asistenta instalace můžete přizpůsobit nastavení Vašeho digitálního přijímače ke konfiguraci Vaší...
- Page 200 Konfigurace sítě V tomto kroku se vykoná automatická kontrola konfigurace sítě. > Nechcete-li provést kontrolu konfigurace sítě, pak stiskněte tlačítko INFO. > Když konfiguraci sítě chcete přezkoušet, nebo ji změnit, pak stiskněte tlačítko OPT: > Zvolte tlačítky šipek napravo / nalevo, zda chcete konfigurovat síť LAN nebo WLAN a stiskněte tlačítko OK.
- Page 201 Aktualizace software Nyní přezkouší digitální přijímač, je-li pro přístroj k dispozici nový software. > Nechcete-li vyčkat na vyhledání nového software, pak můžete tento krok přeskočit stlačením tlačítka INFO. Přeskočí-li se vyhledání nového software, provede přístroj v době nastavené v menu znovu nový test, pokud je tato funkce aktivována a přístroj se v tento čas nachází...
- Page 202 > Spusťte tento proces stiskem tlačítka OK. Aktuelní programová nabídka se nyní stáhne přes satelit. Prosím respektujte další překrývání na obrazovce. > Hodláte-li provést, místo aktualizace programové nabídky přes satelit, vyhledávání vysílačů, tak označte tlačítky šipek nahoru / dolu pole Všechny vysílače, případně...
- Page 203 Loading SFI data Váš digitální přijímač má k dispozici elektronický programový časopis SFI (SiehFern Info). Aby mohl zobrazit data z tohoto programového časopisu, musí Váš přijímač předem stáhnout SFI data ze satelitu. Pro to startuje Váš přijímač, potom co ukončil aktualizaci programové...
- Page 204 Ukončení asistenta instalace Potvrďte zakončující pokyn instalačního asistenta stiskem tlačítka OK. 6 Ovládán 6.1 Zapnutí > Zapněte digitální přijímač stisknutím tlačítka Zapnutí / Standby na přístroji, nebo na dálkovém ovládání. 6.2 Vypnutí > Stisknutím tlačítka Zapnutí / Standby na přístroji, nebo dálkovém ovládání, se přístroj zase vypnete.
- Page 205 6.3.2 Pomocí číselných tlačítek > Zadejte číslo žádaného programu číselnými tlačítky: pro program č. 1 1, potom 4 pro program č. 14 2, potom 3, potom 4 pro program č. 234 1, potom 5, potom 6 potom 7 pro program č. 1567 Při zadávání...
- Page 206 6.3.5 Volba nabídky Aby se vyhledání programu ulehčilo, disponuje přístroj různými programovými nabídkami. Můžete si zvolit jednu z nabídek oblíbených programů (Nabídka TV – Nabídka TV 16), nebo si programy nechat setřídit nebo filtrovat dle různých kritérií. > Stiskněte tlačítko OK. Objeví se aktivní programová nabídka. >...
- Page 207 6.3.5.2 Filtr Nasazením jednoho nebo více filtrů si můžete nechat zobrazit pouze určité vysílače, které splňují požadovaná kritéria > Označte opci Filtr a stiskněte tlačítko OK. > Nyní si zvolte ze zobrazené nabídky požadovanou opci filtru a potvrďte volku tlačítkem OK. Nabídka programů...
- Page 208 Je-li aktivní globální dětská ochrana, bude vyžádán přístrojový PIN kód při zapnutí blokovaného programu. Aby se zvýšil komfort obsluhy, musíte přístrojový kód zadávat pouze jednou v jedné fázi provozu. Dbejte přitom bezpodmínečně též pokynů a upozornění pro globální a uživatelem podmíněnou dětskou pojistku (TechniFamily) ve Vašem Návodu k použití.
- Page 209 Proužek postupu je žlutě zbarven odpovídaje již uběhlému času právě probíhajícího vysílání. Jestli je začátek tohoto proužku postupu zbarven červeně, tak toto vysílání začalo dříve a při červeně zbarveném konci tohoto proužku se vysílání protáhlo. Mimo to se zobrazují další vlastnosti programu: Například: pro videotext pro vysílání...
- Page 210 6.6 Řízení hlasitosti Máte možnost regulovat hlasitost Vašeho digitálního přijímače. Toto ulehčuje provoz přijímače, neboť tím můžete ovládat všechny důležité funkce pomocí jediného dálkového ovládání, a jen zřídka musíte použít ovladač Vašeho televizoru. > Regulujte hlasitost Vašeho TV přijímače pomocí kolébkového tlačítka Hlasitost + na vyšší...
- Page 211 > Pomocí tlačítka opční volby si můžete vybrat mezi opcemi zvuku požadovanou řeč nebo jinou opci zvuku. Alternativně můžete též stisknout tlačítko TON (Audiokanál) na dálkovém ovládání, abyste okamžitě dospěli k volbám zvuku. 6.9 Zastavení obrazu > Stiskem tlačítka Zastavení obrazu docílíte, že aktuelní televizní snímek je opakovaně...
- Page 212 7 Přehled SFI Čas zobrazení > udává čas představených pořadů. Časová lišta > grafické znázornění času zobrazování lištou postupu. Jméno programu s odpovídajícím umístěním programu v nabídce programů. Sloupec postupu resp. čas začátku a konce zobrazeného pořadu. Aktuální datum a čas. Pořady představených programů.
- Page 213 8 Časovače - nahrávání Váš přístroj obsahuje níže uvedené časovače: 1. Časovač DVR Touto funkcí se Váš digitální přijímač zapíná a vypíná pro zvolený pořad proto, aby jej nahrál za Vaší nepřítomnosti na zvolené nahrávací medium. Zapne-li se přístroj působením časovače DVR, zobrazí se toto na displeji. Některé...
- Page 214 IAby se generovaly automaticky DVR časovače jen pro požadované pořady, musíte provést nastavení tak detailní, jak je to jen možné. jinak by se počet generovaných časovačů velmi navýšil. Vlivem automatického generování časovačů DVR může dojít ke kolizi s jinými časovači, takže eventuelně ne všechny časovače mohou být vykonány. Při generování...
- Page 215 10 Volba záznamového media Pokud za běžícího provozu TV nebo radia zasuneme záznamové medium objeví se okno volby s možnými opcemi obsluhy: > Zvolte Reprodukovat filmy, abyste přešli u tohoto media na přehrávání filmů. > Zvolte Reprodukovat hudbu, abyste přešli u tohoto media na přehrávání hudby. >...
- Page 216 11.1 1 Záznam DVR Dříve než spustíte DVR záznam, stanovte prosím pod Menu >Správa Filmů / DVR / Hudby / Obrázků > Nastavení záznamových medií, která datová paměť se má použít jako datové medium. Pro DVR záznam máte k dispozici následující režimy záznamu: 1.
- Page 217 > Za účelem opětovného zahájení přehrávání vysílání z tohoto místa, stiskněte opětovně tlačítko Pauza / Přehrávání. Uvidíte nyní vysílání s časovým přesazením vzhledem k živému vysílaní (TimeShift), zatímco běžící vysílání se i nadále zaznamenává na pozadí. Možnost 2 > Pokud musíte sledování nějakého pořadu přerušit (např. pro přijmutí nějakého telefonického hovoru), pak můžete stiskem tlačítka Pauza / Přehrávání...
- Page 218 11.1.1.3 Automatické ukončení nahrávání Možnost 1 > Zvolte si řádek s požadovanou akcí. V případě, že jste zvolili Ukončit záznam objeví dotaz, co se má udát se záznamem. IZvolili-li jste titul pořadu, nebo jeden z pevně daných časů, zaznamená přijímač aktuelní vysílání kompletně, případně až do konce zvoleného časového intervalu a nakonec se přepne do pohotovostního stavu (Standby), obrazovka se přímo po volbě...
- Page 219 Možnost 2 > Po stisku tlačítka Záznam se objeví okno s funkcemi, které jsou k dispozici. > Zvolíte-li např. +1 hodina, pak přijímač po dobu tohoto intervalu zaznamenává dále program a po jeho ukončení záznam automaticky vypíná. 11.1.2 Nahrávání s použitím časovače Použitím časovače DVR můžete zaznamenávat automaticky pořady za Vaší...
- Page 220 Příklad: Přeskočení bloků reklamy Chcete shlédnout nějaké vysílání bez obtěžujících bloků reklamy? Pomocí DVR můžete zaznamenané bloky reklam zcela jednoduše přeskočit. Příklad: Přehrávání posunuté v čase Promeškali jste start formule 1 To není problém. DVR Vám ukáže závod v čase posunutém termínu, zatím co jeho záznam ještě běží.
- Page 221 11.1.5 Označování během záznamu > Stiskem tlačítka Záznam v průběhu běžícího nahrávání se otevře okno s funkcemi, které máte k dispozici. > Zvolením si položky Umístit značku, nasadíte na aktuelní pozici značku. Značky se mohou ručně zpracovávat i během přehrávání a v menu DVR záznamu, manuelně...
- Page 222 Pomocí tlačítka Info si můžete zobrazit informace o vysílání a opětovným stiskem tyto opět skrýt. > Přehrávání záznamu spustíte, když tento označíte a potvrdíte tlačítkem OK. 11.2.1 Za provozu TV > Stiskněte tlačítko Stop/DVR, abyste přepnuli přímo do DVR Navigátoru. nebo >...
- Page 223 > Stiskněte ještě jednou tlačítko Převíjení vpřed případně Převíjení vzad, rychlost ▶▶▶▶ se zvýší na 64 x. Objeví se symboly pro „převíjení vpřed“ nebo ◀◀◀◀ „převíjení vzad“ šedesátičtyřnásobnou rychlostí. > Dalším stiskem tlačítka Převíjení vpřed případně Převíjení vzad, můžete v záznamu přeskakovat po desetiminutových krocích dopředu a dozadu.
- Page 224 Autostart CAM-MHEG Je-li pro některý vysílač dostupná aplikace CAM-MHEG, může se tato spouštět automatick. > Nastavte proto položku CAM-MHEG Autostart na zapnuto nebo tuto funkci vypněte. Zadání PIN Zde můžete uložit PIN pro příslušnou šachtu CI nebo Smartkartu. PIN se požaduje, pro podporu záznamů...
- Page 225 13.1 Zapnutí a vypnutí přístroje (mód ISI) > Nachází-li se přístroj ve Standby, můžete jej zapnout stisknutím tlačítka Zapnutí / Standby na přístroji, nebo na dálkovém ovládání. > Při běžícím provozu vypněte přístroj stiskem tlačítka Zapnutí / Standby do pohotovostního stavu. 13.2 2 Volba programu (mód ISI) 13.2.1 1 Pomocí...
- Page 226 > Nyní si můžete označit požadovaný program tlačítky šipek nahoru / dolu, O stránku nahoru / dolu nebo číselnými tlačítky. > Stiskem tlačítka OK se nastaví označený program. 13.3 Přepnutí TV / Radio > Stiskem tlačítka 0 vyvoláte Menu NAV – navigátoru. >...
- Page 227 Během celé doby, po kterou je zvuk vypnut se zobrazuje symbol vypnutí zvuku vpravo při horním okraji obrazovky. 13.5 Videotext – teletext Váš přístroj může zobrazovat videotexové informace programů, které obsahují videotexová data. 13.5.1 1 Zapnutí videotextu > Stiskem tlačítka Videotext zapnete zobrazení videotextu. 13.5.2 Volba stránky >...
- Page 228 Máte možnost aktualizovat software přístroje přes rozhraní USB. Abyste mohli provést aktualizaci přes rozhraní USB, nebo čtečku karet SD / MMC, musíte si nejprve aktuální software stáhnout z domovské stránky Technisatu (www.technisat.de). Aktualizace může být prováděna s obvyklými Flash paměťmi USB, formátovanými systémem souborů FAT32.
- Page 229 15 Hledání a odstraňování závad Závada Možná příčina Odpomoc Dálkové ovládání Nastaven nesprávný kód Nastavit korektní mód nefunguje dálkového ovládání dálkového ovládání Baterie jsou vybité Vyměnit baterie Některé programy se Zvolena nesprávná Zvolit jinou programovou nezobrazují v programové programová nabídka nabídku nabídce Zvuk OK, není...
- Page 230 V obraze se čas od času Silný déšť nebo sníh Zrcadlo očistit od sněhu objevují čtyřhranné špalíčky, občasně se obraz Anténa je nevhodně Nově nasměrovat anténu zastavuje, občas není nasměrovaná zvuk, obrazovka je čas od Zrcadlo na místě příjmu je Použít větší...
- Page 231 Přístroj nelze ovládat, Defektní proud dat → Tlačítko Zap/Standby na nelze zapnout nebo Přístroj je zablokován přístroji nebo dálkovém vypnout ovládání držet po dobu cca 5 sekund Vytáhnout zástrčku napájení ze zásuvky sítě na cca 5 sec, poté opětovně přístroj zapnout Provést Flash-Reset Pozor! Přitom se ztratí...
- Page 232 Váš přístroj nese značku CE a splňuje všechny požadované normy EU. Změny a tiskové chyby jsou vyhrazeny. Stav 008/23. Opisy a rozmnožování jen se souhlasem vydavatele. TechniSat a TECHNISTAR S5 jsou zapsané ochranné známky TechniSat Digital GmbH TechniPark Julius-Saxler-Str. 3 D-54550 Daun/Eifel, Germany www.technisat.de...
- Page 233 Tímto prohlašuje TechniSat, že radiová zařízení typů TECHNISTAR S5 odpovídají Směrnici 2014/53/EU. Úplný text EU-Prohlášení o konformitě je dostupný pod následujícími internetovými adresami http://konf.tsat.de/?ID=11563 The terms HDMI, HDMI High-Definition Multimedia Interface, and the HDMI Logo are trademarks or registered trademarks of HDMI Licensing Administrator, Inc.
Need help?
Do you have a question about the TECHNISTAR S5 and is the answer not in the manual?
Questions and answers