GE IM4A Owner's Manual And Installation Instructions
Icemaker accessory kit
Hide thumbs
Also See for IM4A:
- Owner's manual and installation instructions (136 pages) ,
- Installation instructions manual (8 pages) ,
- Owner's manual and installation instructions (74 pages)
Table of Contents
Advertisement
Available languages
Available languages
GEAppliances.com
Safety Information
. . . . . . . . . 2
Operating Instructions
Before You Call For Service . .4–6
Normal Sounds You May Hear . .3
Preparing for Vacation . . . . . . .3
When You Should Set the
Icemaker Power Switch
to O (Off) . . . . . . . . . . . . . . . . .3
Installation Instructions
Cold Water Line . . . . . . . . .38–41
Fill Tube Templates . . . . . . . . .42
Fill Tube Extension
Templates . . . . . . . . . . . . . . . .42
L
Icemaker
. . . . . . . . . . .10–13
M
Icemaker
. . . . . . . . . . .14–17
N
Icemaker
. . . . . . . . . . .18–21
P
Icemaker
. . . . . . . . . . .22–25
Q
Icemaker
. . . . . . . . . . .26–29
R
Icemaker
. . . . . . . . . . .30–33
S
Icemaker
. . . . . . . . . . .34–37
Parts List . . . . . . . . . . . . . . . .8, 9
Consumer Support
Consumer Support . . Back Cover
Warranty . . . . . . . . . . . . . . . . . 43
Which instructions should
you follow?
Look for a label on the back of the
refrigerator that will tell you which
instructions to use:
L
M
N
P
Q
R
or
. . . . . .3
Machine à glaçons
Máquina de Hielos
S
162D4614P012
Owner's Manual and
Installation Instructions
Manuel d'utilisation
et d'installation
La section française commence à la page 44
Equipo de Accesorios
Manual del propietario
e instalación
La sección en español empieza en la página 92
49-60283
08-03 JR
Trousse
#
Advertisement
Table of Contents

Related Manuals for GE IM4A


Summary of Contents for GE IM4A
- Page 1 GEAppliances.com Safety Information ..2 Operating Instructions ..3 Before You Call For Service . .4–6 Normal Sounds You May Hear . .3 Preparing for Vacation ..3 When You Should Set the Icemaker Power Switch to O (Off) .
-
Page 2: Important Safety Information
IMPORTANT SAFETY INFORMATION. READ ALL INSTRUCTIONS BEFORE USING. SAFETY PRECAUTIONS FOR YOUR SAFETY: Do not place fingers or hands in the automatic icemaking mechanism while the refrigerator is plugged in. This will help protect you from possible injury. READ AND FOLLOW THIS SAFETY INFORMATION CAREFULLY. READ AND SAVE THESE INSTRUCTIONS It will also prevent interference with moving parts of the ejector mechanism and the heating... - Page 3 About the automatic icemaker. A newly-installed refrigerator may take 12 to 24 hours to begin making ice. Automatic Icemaker Power Switch Icemaker The icemaker will produce seven cubes per cycle---approximately 100–130 cubes in a 24-hour period, depending on freezer compartment temperature, room temperature, number of door openings and other use conditions.
-
Page 4: Before You Call For Service
Before you call for service… Troubleshooting Tips Save time and money! Review the following chart first and you may not need to call for service. Problem Possible Causes Automatic icemaker Freezer compartment does not work/’not too warm. Icemaker is not turned on. Icemaker is not plugged in correctly. - Page 5 Problem Possible Causes Leaking water around Foam in the fill cup from the fill cup installing the fill tube. Fill tube not correctly seated in the fill cup. Leaking water behind House supply not properly the refrigerator connected to the water valve. Water line not connected to the water tube inlet.
- Page 6 Before you call for service… Troubleshooting Tips Save time and money! Review the following chart first and you may not need to call for service. Problem Possible Causes Ice cubes have Ice storage bin needs cleaning. odor/taste Food transmitting odor/taste to ice cubes.
-
Page 7: Installation Instructions
Installation Instructions Questions? Call 800.GE.CARES (800.432.2737) In Canada, call 1.800.361.3400 BEFORE YOU BEGIN Read these instructions completely and carefully. IMPORTANT – • instructions for local inspector’s use. IMPORTANT – • governing codes and ordinances. Note to Installer – • Be sure to leave these instructions with the Consumer. -
Page 8: Ice Maker
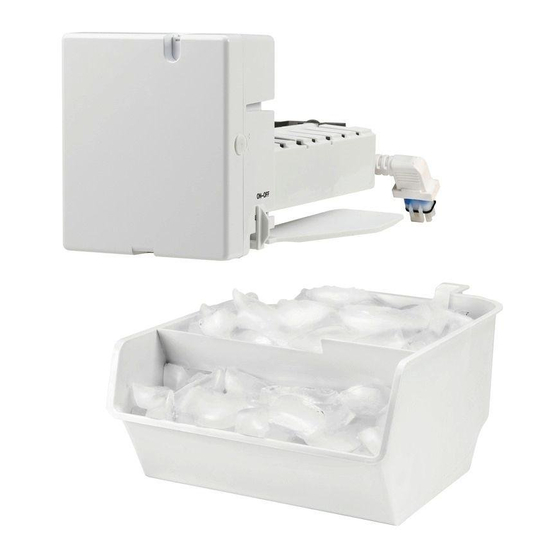
Installation Instructions CONTENTS OF KIT IM-4A Icemaker Owner’s Manual & Installation Instructions Water Valve and Tube Assembly Adhesive-Backed Water Tube Fasteners, to secure plastic water tube (4) Hex-Head Screw for Water Line Clamp Water Line Clamp (strain relief), for house water line ICEMAKER WARRANTY VERIFICATION Date Installed... - Page 9 Installation Instructions Parts List Icemaker Owner’s Manual and Installation Instructions Water Valve and Tube Assembly Adhesive-Backed Water Tube Fasteners Hex-Head Screw for Water Line Clamp Water Line Clamp (strain relief) Warranty Label Fill Tube Extension (3/4″ O.D.) Ice Bucket 10 Hex-Head Screw 11 Phillips Head Screw (2) 12 Water Tube Inlet 13 Fill Tube (5/8″...
-
Page 10: Before You Begin
ICEMAKER INSTALLATION INSTRUCTIONS L Are these the right instructions for your model? Follow the Installation Instructions indicated by the label on the back of the refrigerator --- BEFORE YOU BEGIN Read each step thoroughly before proceeding. CAUTION – • Unplug the Refrigerator. - Page 11 Installation Instructions SET POWER SWITCH TO O (off) Set the icemaker power switch to O (off). Leave the power switch in the O (off) position until the refrigerator is connected to the water supply to prevent premature operation. Power Switch INSTALL THE ICEMAKER FILL CUP Install the icemaker fill cup (side-mounted) (15) into the icemaker as shown.
-
Page 12: Tools You Will Need
WATER VALVE ASSEMBLY INSTALLATION INSTRUCTIONS L Are these the right instructions for your model? Follow the Installation Instructions indicated by the label on the back of the refrigerator --- BEFORE YOU BEGIN Read each step thoroughly before proceeding. CAUTION – •... - Page 13 Installation Instructions CONNECT WATER TUBE TO EXISTING INLET • Squeeze the ends of the hose clamp (16) from the kit with pliers and slide the clamp over the inlet, located in the top right corner of the refrigerator. • While still squeezing the clamp, insert the free end of the water tube (3) into the inlet as far as it will go.
- Page 14 ICEMAKER INSTALLATION INSTRUCTIONS M Are these the right instructions for your model? Follow the Installation Instructions indicated by the label on the back of the refrigerator --- BEFORE YOU BEGIN Read each step thoroughly before proceeding. CAUTION – • Unplug the Refrigerator.
- Page 15 Installation Instructions INSTALL FILL TUBE EXTENSION For models with one temperature control (refrigerator) only: • Cut the fill tube extension (8) to the (refer to the template on page 42) with a sharp knife or a single-edge razor blade and slide it onto the fill tube against the stop.
- Page 16 WATER VALVE ASSEMBLY INSTALLATION INSTRUCTIONS M Are these the right instructions for your model? Follow the Installation Instructions indicated by the label on the back of the refrigerator --- BEFORE YOU BEGIN Read each step thoroughly before proceeding. CAUTION – •...
- Page 17 Installation Instructions CONNECT WATER TUBE TO INLET Squeeze the ends of the hose clamp (16) from the • kit with pliers and slide the clamp over the inlet, located in the top right corner of the refrigerator. • While still squeezing the clamp, insert the free end of the water tube (3) into the inlet as far as it will go.
- Page 18 ICEMAKER INSTALLATION INSTRUCTIONS N Are these the right instructions for your model? Follow the Installation Instructions indicated by the label on the back of the refrigerator --- BEFORE YOU BEGIN Read each step thoroughly before proceeding. CAUTION – • Unplug the Refrigerator.
- Page 19 Installation Instructions SET POWER SWITCH TO O (off) Set the icemaker power switch to O (off). Leave the power switch in the O (off) position until the refrigerator is connected to the water supply to prevent premature operation. Power Switch INSTALL THE ICEMAKER FILL CUP Install the icemaker fill cup (side-mounted) (15) into the icemaker as shown.
- Page 20 WATER VALVE ASSEMBLY INSTALLATION INSTRUCTIONS N Are these the right instructions for your model? Follow the Installation Instructions indicated by the label on the back of the refrigerator --- BEFORE YOU BEGIN Read each step thoroughly before proceeding. CAUTION – •...
- Page 21 Installation Instructions CONNECT WATER TUBE TO INLET Squeeze the ends of the hose clamp (16) from the • kit with pliers and slide the clamp over the inlet, located in the top right corner of the refrigerator. • While still squeezing the clamp, insert the free end of the water tube (3) into the inlet as far as it will go.
-
Page 22: Prepare For Installation
ICEMAKER INSTALLATION INSTRUCTIONS P Are these the right instructions for your model? Follow the Installation Instructions indicated by the label on the back of the refrigerator --- BEFORE YOU BEGIN Read each step thoroughly before proceeding. CAUTION – • Unplug the Refrigerator. - Page 23 Installation Instructions INSTALL THE ICEMAKER FILL CUP Install the icemaker fill cup (side-mounted) (15) into the icemaker as shown. PLUG IN THE ICEMAKER Holding the icemaker in place, insert the icemaker power cord plug into the socket on the rear wall. Press the plug firmly into the socket.
- Page 24 WATER VALVE ASSEMBLY INSTALLATION INSTRUCTIONS P Are these the right instructions for your model? Follow the Installation Instructions indicated by the label on the back of the refrigerator --- BEFORE YOU BEGIN Read each step thoroughly before proceeding. CAUTION – •...
- Page 25 Installation Instructions CONNECT WATER TUBE TO INLET • Squeeze the ends of the hose clamp (16) from the kit with pliers and slide the clamp over the inlet, located in the top right corner of the refrigerator. • While still squeezing the clamp, insert the free end of the water tube (3) into the inlet as far as it will go.
- Page 26 ICEMAKER INSTALLATION INSTRUCTIONS Q Are these the right instructions for your model? Follow the Installation Instructions indicated by the label on the back of the refrigerator --- BEFORE YOU BEGIN Read each step thoroughly before proceeding. CAUTION – • Unplug the Refrigerator.
- Page 27 Installation Instructions INSTALL THE ICEMAKER FILL CUP Install the icemaker fill cup (side-mounted) (15) into the icemaker as shown. PLUG IN THE ICEMAKER Holding the icemaker in place, insert the icemaker power cord plug into the socket on the rear wall, making sure the prongs and holes are matched.
- Page 28 WATER VALVE ASSEMBLY INSTALLATION INSTRUCTIONS Q Are these the right instructions for your model? Follow the Installation Instructions indicated by the label on the back of the refrigerator --- BEFORE YOU BEGIN Read each step thoroughly before proceeding. CAUTION – •...
- Page 29 Installation Instructions CONNECT WATER TUBE TO INLET • Squeeze the ends of the hose clamp (16) from the kit with pliers and slide the clamp over the inlet, located in the top right corner of the refrigerator. (It may be necessary to remove the screw from the top right condenser mounting clip for better access to the inlet.) While still squeezing the clamp, insert the free end...
- Page 30 Installation Instructions ICEMAKER INSTALLATION INSTRUCTIONS R Are these the right instructions for your model? Follow the Installation Instructions indicated by the label on the back of the refrigerator --- BEFORE YOU BEGIN Read each step thoroughly before proceeding. CAUTION – •...
- Page 31 Installation Instructions INSTALL THE MOUNTING BLOCK • Inside the freezer, remove the two small white plug buttons from the side wall. • Using the Phillips head screws that are with the mounting block, attach the mounting block to the refrigerator by driving the screws through the outer holes on the block and into the holes that the plug buttons were in.
- Page 32 WATER VALVE ASSEMBLY INSTALLATION INSTRUCTIONS R Are these the right instructions for your model? Follow the Installation Instructions indicated by the label on the back of the refrigerator --- BEFORE YOU BEGIN Read each step thoroughly before proceeding. CAUTION – •...
- Page 33 Installation Instructions CONNECT WATER TUBE TO INLET • Squeeze the ends of the hose clamp (16) from the kit with pliers and slide the clamp over the inlet, located on the right side of the refrigerator. • While still squeezing the clamp, insert the free end of the water tube (3) into the inlet as far as it will go.
- Page 34 Installation Instructions ICEMAKER INSTALLATION INSTRUCTIONS S Are these the right instructions for your model? Follow the Installation Instructions indicated by the label on the back of the refrigerator— BEFORE YOU BEGIN Read each step thoroughly before proceeding. CAUTION – • Unplug the Refrigerator.
- Page 35 Installation Instructions INSTALL THE MOUNTING SCREWS • Skip to Step 5 if screws are already in place in the freezer side wall. • Install two self-tapping Phillips head screws (11) from the kit in the holes in the side wall. The screw heads should extend about 1/2″...
- Page 36 WATER VALVE ASSEMBLY INSTALLATION INSTRUCTIONS S Are these the right instructions for your model? Follow the Installation Instructions indicated by the label on the back of the refrigerator— BEFORE YOU BEGIN Read each step thoroughly before proceeding. CAUTION – • Unplug the Refrigerator.
- Page 37 Installation Instructions ATTACH THE WATER VALVE • Clip the end of the ground wire to the refrigerator cabinet. IMPORTANT: To ensure a proper ground, the end of the ground wire MUST be secured to the refrigerator cabinet. CONNECT WATER TUBE TO INLET •...
-
Page 38: Installing The Water Line
WX08X10015 and WX08X10025). When connecting your refrigerator to a GE Reverse Osmosis Water System, the only approved installation is with a GE RVKit. For other reverse osmosis water systems, follow the manufacturer’s recommendations. If the water supply to the refrigerator is from a Reverse Osmosis Water Filtration System AND the refrigerator also has a water filter, use the refrigerator’s filter bypass... - Page 39 • Two 1/4 ″ outer diameter compression nuts and 2 ferrules (sleeves)---to connect the copper tubing to the shutoff valve and the refrigerator water valve. • If you are using a GE SmartConnect Tubing kit, the necessary fittings are preassembled to the tubing.
- Page 40 Make sure the tubing is fully inserted into the valve. Tighten the compression nut securely. For plastic tubing from a GE SmartConnect Refrigerator Tubing kit, insert the molded end of the tubing into the shutoff valve and tighten compression nut until it is hand tight, then tighten one additional turn with a wrench.
- Page 41 CONNECT THE TUBING TO THE REFRIGERATOR (CONT.) Place the compression nut and ferrule (sleeve) onto the end of the tubing as shown. On GE SmartConnect ™ Refrigerator Tubing kit, the nuts are already assembled to the tubing. Insert the end of the tubing into the water valve connection as far as possible.
- Page 42 Refer to the appropriate fill tube template indicated by the label on the back of the refrigerator--- or R FILL TUBE TEMPLATES FILL TUBE EXTENSION Refer to the appropriate fill tube extension template indicated by the label on the back of the refrigerator --- Cut the fill tube extension (8) to this length Cut the fill tube extension (8) to...
- Page 43 Any part of the icemaker which fails due to a defect in materials or workmanship. From the date of the During this full one-year warranty, GE will provide, free of charge, replacement parts original purchase for any defective part in your icemaker kit.
-
Page 44: Pour Votre Sécurité
Mesures de sécurité ..44 Instructions de fonctionnement ....45 Avant d’appeler un réparateur ....46–48 Bruits normaux que vous pouvez entendre . - Page 45 La machine à glaçons automatique. Un réfrigérateur nouvellement installé peut prendre de 12 à 24 heures pour commencer à produire des glaçons. Machine à glaçons automatique Commutateur Machine de marche à glaçons La machine à glaçons produit sept glaçons par cycle, soit environ 100 à 130 glaçons par 24 heures, selon la température du compartiment congélation, la température de la pièce, le nombre de...
- Page 46 Avant d’appeler un réparateur… Liste de vérifications préventives Économisez votre temps et votre argent! Consultez le tableau suivante; vous éviterez peut-être d’appeler un réparateur. Votre problème Causes possibles La machine à glaçons Le compartiment congélation automatique ne est trop chaud. fonctionne pas/ produit pas de glaçons La machine à...
- Page 47 Votre problème Causes possibles L’eau fuit autour de la Il y a de la mousse dans la tasse tasse de remplissage de remplissage resultant de l’installation de la conduite de remplissage. La conduite de remplissage ne repose pas bien dans la tasse de remplissage.
- Page 48 Avant d’appeler un réparateur… Liste de vérifications préventives Économisez votre temps et votre argent! Consultez le tableau suivante; vous éviterez peut-être d’appeler un réparateur. Votre problème Causes possibles Les glaçons ont une Le bac à glaçons doit être nettoyé. •Videz et lavez le bac à glaçons. Jetez les vieux glaçons. odeur ou un goût Les aliments donnent de l’odeur ou du goût aux glaçons.
-
Page 49: Instructions D'installation
Instructions d’installation Vous avez des questions? Au Canada, appelez au numéro 1.800.361.3400 electromenagersge.ca Web à l’adresse AVANT DE COMMENCER Lisez ces instructions complètement et attentivement. IMPORTANT – • instructions pour votre inspecteur local. IMPORTANT – • codes et les ordonnances en vigueur. Note à... -
Page 50: Ice Maker
Instructions d’installation CONTENU DE LA TROUSSE IM-4 Machine à glaçons Manuel du propriétaire et instructions d’installation Ensemble de robinet et de conduite d’eau Dispositifs de fixation de conduite d’eau avec envers adhésif, pour attacher la conduite d’eau en matière plastique (4) Vis à... - Page 51 Instructions d’installation Liste de pièces Machine à glaçons Manuel du propriétaire et instructions d’installation Ensemble de robinet et de conduite d’eau Dispositifs de fixation de conduite d’eau avec envers adhésif Vis à tête hexagonale pour collier de serrage de conduite d’eau Collier de serrage de conduite d’eau (collier de serrage) Étiquette de garantie Rallonge de conduite d’alimentation (diam.
- Page 52 Instructions d’installation INSTRUCTIONS D’INSTALLATION DE LA MACHINE Est-ce que ce sont les bonnes instructions pour votre modèle? Suivez les instructions d’installation indiquées sur l’étiquette placée à l’arrière de votre réfrigérateur — AVANT DE COMMENCER Lisez soigneusement chaque étape avant de commencer.
- Page 53 Instructions d’installation METTEZ LE COMMUTATEUR DE MARCHE EN POSITION O (arrêt) Mettez le commutateur de marche de la machine à glaçons en position O (arrêt). Laissez le commutateur de marche en position O (arrêt) tant que vous n’avez pas branché le réfrigérateur à l’alimentation d’eau, pour éviter toute mise en marche prématurée.
- Page 54 Instructions d’installation MONTEZ LA MACHINE À GLAÇONS • Soulevez la machine à glaçons de manière à ce que la rallonge de conduite d’alimentation (8) entre dans l’ouverture du récipient de remplissage (C). Accrochez la machine à glaçons aux deux vis de montage (A).
- Page 55 Instructions d’installation INSTRUCTIONS D’INSTALLATION DE L’ENSEMBLE DE Est-ce que ce sont les bonnes instructions pour votre modèle? Suivez les instructions d’installation indiquées sur l’étiquette placée à l’arrière de votre réfrigérateur — AVANT DE COMMENCER Lisez soigneusement chaque étape avant de commencer.
- Page 56 Instructions d’installation BRANCHEZ LA CONDUITE D’EAU À L’ENTRÉE DE CONDUITE EXISTANTE • Serrez les extrémités du collier de serrage (16) de la trousse avec des pinces et faites glisser le collier de serrage sur l’entrée, située en haut et à droite du réfrigérateur.
- Page 57 Instructions d’installation INSTRUCTIONS D’INSTALLATION DE LA MACHINE Est-ce que ce sont les bonnes instructions pour votre modèle? Suivez les instructions d’installation indiquées sur l’étiquette placée à l’arrière de votre réfrigérateur — AVANT DE COMMENCER Lisez soigneusement chaque étape avant de commencer.
- Page 58 Instructions d’installation INSTALLEZ LA RALLONGE DE CONDUITE D’ALIMENTATION D’EAU Pour les modèles avec un seul bouton de réglage de température (compartiment réfrigération) : • Coupez la rallonge de conduite d’alimentation d’eau (8) à la longueur (consultez le gabarit , page 89) avec un couteau aiguisé ou une simple lame de rasoir et faites-la glisser dans la conduite d’alimentation d’eau jusqu’à...
- Page 59 Instructions d’installation MONTEZ LA MACHINE À GLAÇONS • Soulevez la machine à glaçons de manière à ce que la conduite d’alimentation (13) ou la rallonge de conduite d’alimentation d’eau (8) (selon le modèle) entre dans l’ouverture du récipient de remplissage (D). Accrochez la machine à glaçons aux deux vis de montage (B).
- Page 60 Instructions d’installation INSTRUCTIONS D’INSTALLATION DE L’ENSEMBLE DE Est-ce que ce sont les bonnes instructions pour votre modèle? Suivez les instructions d’installation indiquées sur l’étiquette placée à l’arrière de votre réfrigérateur — AVANT DE COMMENCER Lisez soigneusement chaque étape avant de commencer.
- Page 61 Instructions d’installation BRANCHEZ LA CONDUITE D’EAU À L’ENTRÉE DE CONDUITE • Serrez les extrémités du collier de serrage (16) de la trousse avec des pinces et faites glisser le collier de serrage sur l’entrée, située en haut et à droite du réfrigérateur.
- Page 62 Instructions d’installation INSTRUCTIONS D’INSTALLATION DE LA MACHINE Est-ce que ce sont les bonnes instructions pour votre modèle? Suivez les instructions d’installation indiquées sur l’étiquette placée à l’arrière de votre réfrigérateur — AVANT DE COMMENCER Lisez soigneusement chaque étape avant de commencer.
- Page 63 Instructions d’installation INSTALLEZ LA CONDUITE D’ALIMENTATION • Faites glisser la conduite d’alimentation garnie du revêtement d’eau (14) dans l’entrée de conduite d’eau (12) en vous assurant de bien orienter vers le haut l’extrémité ouverte de la conduite d’alimentation. • À l’arriere du réfrigérator, du côté...
- Page 64 Instructions d’installation BRANCHEZ LA MACHINE À GLAÇONS En tenant la machine à glaçons en place, insérez la fiche de cordon d’alimentation électrique de la machine à glaçons dans la prise située sur la paroi arrière, en vous assurant de mettre les bonnes broches dans les bons trous.
- Page 65 Instructions d’installation INSTRUCTIONS D’INSTALLATION DE L’ENSEMBLE DE Est-ce que ce sont les bonnes instructions pour votre modèle? Suivez les instructions d’installation indiquées sur l’étiquette placée à l’arrière de votre réfrigérateur — AVANT DE COMMENCER Lisez soigneusement chaque étape avant de commencer.
- Page 66 Instructions d’installation BRANCHEZ LA CONDUITE D’EAU À L’ENTRÉE DE CONDUITE • Serrez les extrémités du collier de serrage (16) de la trousse avec des pinces et faites glisser le collier de serrage sur l’entrée, située en haut et à droite du réfrigérateur.
-
Page 67: Outils Nécessaires
Instructions d’installation INSTRUCTIONS D’INSTALLATION DE LA MACHINE Est-ce que ce sont les bonnes instructions pour votre modèle? Suivez les instructions d’installation indiquées sur l’étiquette placée à l’arrière de votre réfrigérateur — AVANT DE COMMENCER Lisez soigneusement chaque étape avant de commencer. - Page 68 Instructions d’installation INSTALLEZ LA CONDUITE D’ALIMENTATION • Coupez la conduite d’alimentation (13) à la longueur (consultez le gabarit , page 89) avec un couteau aiguisé ou une simple lame de rasoir. • Faites glisser la conduite d’alimentation (13) dans l’entrée de conduite d’eau (12). •...
- Page 69 Instructions d’installation BRANCHEZ LA MACHINE À GLAÇONS En tenant la machine à glaçons en place, insérez la fiche de cordon d’alimentation électrique de la machine à glaçons dans la prise située sur la paroi arrière. Pressez fort la fiche dans la prise. Fixez la fiche en place en agrafant les dispositifs de retenue des deux côtés de la fiche.
- Page 70 Instructions d’installation INSTRUCTIONS D’INSTALLATION DE L’ENSEMBLE DE Est-ce que ce sont les bonnes instructions pour votre modèle? Suivez les instructions d’installation indiquées sur l’étiquette placée à l’arrière de votre réfrigérateur — AVANT DE COMMENCER Lisez soigneusement chaque étape avant de commencer.
- Page 71 Instructions d’installation BRANCHEZ LA CONDUITE D’EAU À L’ENTRÉE DE CONDUITE Serrez les extrémités du collier de serrage (16) de • la trousse avec des pinces et faites glisser le collier de serrage sur l’entrée, située en haut et à droite du réfrigérateur.
- Page 72 Instructions d’installation INSTRUCTIONS D’INSTALLATION DE LA MACHINE Est-ce que ce sont les bonnes instructions pour votre modèle? Suivez les instructions d’installation indiquées sur l’étiquette placée à l’arrière de votre réfrigérateur — AVANT DE COMMENCER Lisez soigneusement chaque étape avant de commencer.
- Page 73 Instructions d’installation BRANCHEZ LA MACHINE À GLAÇONS En tenant la machine à glaçons en place, insérez la fiche de cordon d’alimentation électrique de la machine à glaçons dans la prise située sur la paroi arrière, en vous assurant de mettre les bonnes broches dans les bons trous.
- Page 74 Instructions d’installation INSTRUCTIONS D’INSTALLATION DE L’ENSEMBLE DE Est-ce que ce sont les bonnes instructions pour votre modèle? Suivez les instructions d’installation indiquées sur l’étiquette placée à l’arrière de votre réfrigérateur — AVANT DE COMMENCER Lisez soigneusement chaque étape avant de commencer.
- Page 75 Instructions d’installation BRANCHEZ LA CONDUITE D’EAU À L’ENTRÉE DE CONDUITE • Serrez les extrémités du collier de serrage (16) de la trousse avec des pinces et faites glisser le collier de serrage sur l’entrée, située en haut et à droite du réfrigérateur.
- Page 76 Instructions d’installation INSTRUCTIONS D’INSTALLATION DE LA MACHINE Est-ce que ce sont les bonnes instructions pour votre modèle? Suivez les instructions d’installation indiquées sur l’étiquette placée à l’arrière de votre réfrigérateur — AVANT DE COMMENCER Lisez soigneusement chaque étape avant de commencer.
- Page 77 Instructions d’installation METTEZ LE COMMUTATEUR DE MARCHE EN POSITION O (arrêt) Mettez le commutateur de marche de la machine à glaçons en position O (arrêt). Laissez le commutateur de marche en position O (arrêt) tant que vous n’avez pas branché le réfrigérateur à l’alimentation d’eau, pour éviter toute mise en marche prématurée.
- Page 78 Instructions d’installation BRANCHEZ LA MACHINE À GLAÇONS En tenant la machine à glaçons en place, insérez la fiche de cordon d’alimentation électrique de la machine à glaçons dans la prise située sur la paroi arrière, en vous assurant de mettre les bonnes broches dans les bons trous.
- Page 79 Instructions d’installation INSTRUCTIONS D’INSTALLATION DE L’ENSEMBLE Est-ce que ce sont les bonnes instructions pour votre modèle? Suivez les instructions d’installation indiquées sur l’étiquette placée à l’arrière de votre réfrigérateur — AVANT DE COMMENCER Lisez soigneusement chaque étape avant de commencer. MISE EN GARDE –...
- Page 80 Instructions d’installation BRANCHEZ LA CONDUITE D’EAU À L’ENTRÉE DE CONDUITE • Serrez les extrémités du collier de serrage (16) de la trousse avec des pinces et faites glisser le collier de serrage sur l’entrée, située en haut et à droite du réfrigérateur.
- Page 81 Instructions d’installation INSTRUCTIONS D’INSTALLATION DE LA MACHINE Est-ce que ce sont les bonnes instructions pour votre modèle? Suivez les instructions d’installation indiquées sur l’étiquette placée à l’arrière de votre réfrigérateur — AVANT DE COMMENCER Lisez soigneusement chaque étape avant de commencer.
- Page 82 Instructions d’installation INSTALLATION DES VIS DE MONTAGE • Passez à l’étape 5 si les vis sont déjà placée dans la paroi de côté du compartiment congélation. • Mettez deux vis auto-taraudeuses à tête Phillips (11) de la trousse dans la paroi de côté.
- Page 83 Instructions d’installation INSTRUCTIONS D’INSTALLATION DE L’ENSEMBLE Est-ce que ce sont les bonnes instructions pour votre modèle? Suivez les instructions d’installation indiquées sur l’étiquette placée à l’arrière de votre réfrigérateur — AVANT DE COMMENCER Lisez soigneusement chaque étape avant de commencer. MISE EN GARDE –...
- Page 84 Instructions d’installation FIXEZ LE ROBINET D’EAU • Agrafez l’extrémité du fil de mise à la terre à l’armoire du réfrigérateur. IMPORTANT : Pour assurer une bonne mise à la terre, vous DEVEZ bien fixer le fil de mise à la terre à...
-
Page 85: Ce Dont Vous Aurez Besoin
WX08X10006, WX08X10015 et WX08X10025). Si vous installez un système d’eau GE Reverse Osmosis dans votre réfrigérateur, la seule installation approuvée est celle de la trousse GE RVKIT. Pour les autres systèmes d’osmose de l’eau, suivez les recommandations du fabricant. Si le réfrigérateur est alimenté en eau à partir d’un système de filtration d’eau par osmose inversée, et si... - Page 86 OU BIEN • Si vous utilisez une trousse GE SmartConnect Refrigerator Tubing, les garnitures nécessaires sont déjà montées au tuyau. • Si votre canalisation d’eau actuelle a un raccord évasé...
- Page 87 Assurez-vous que le tuyau soit bien inséré dans le robinet. Serrez fort l’écrou de compression. Pour le tuyau en matière plastique d’une trousse GE SmartConnect l’extrémité moulée du tuyau dans le robinet d’arrêt Tuyau vertical et serrez l’écrou de compression à la main, puis d’eau froide...
- Page 88 Installez-le sur la conduite d’eau près de votre réfrigérateur. Si vous utilisez une trousse GE SmartConnect Refrigerator Tubing, vous aurez besoin d’un tuyau additionnel (WX08X10002) pour brancher le filtre.
- Page 89 GABARITS DE CONDUITE D’ALIMENTATION Trouvez le gabarit de conduite d’alimentation d’eau sur l’étiquette placée à l’arrière du réfrigérateur — ou R GABARITS DE RALLONGE DE CONDUITE D’ALIMENTATION Trouvez le gabarit de rallonge de conduite d’alimentation d’eau sur l’étiquette placée à l’arrière du réfrigérateur —...
- Page 90 Toute pièce de la machine à glaçons qui tombe en panne à la suite d’un vice de matériel ou Á partir de la date de main-d’œuvre. Pendant cette année de garantie complète, GE fournira, gratuitement, d’achat original pièces de remplacement pour remplacer toute pièce défectueuse dans la trousse de la machine à...
- Page 91 Moncton, N.B. E1C 9M3 Prolongation de garantie Achetez un contrat d’entretien GE avant que votre garantie n’expire et bénéficiez d’un rabais substantiel. Ainsi le service après-vente GE sera toujours là après expiration de la garantie. Visitez notre site Web ou appelez-nous au 1.800.461.3636.
-
Page 92: Por Su Seguridad
Información de seguridad ..92 Instrucciones de operación ..93 Antes de llamar a solicitar servicio ....94–96 Cómo prepararse para las vacaciones . - Page 93 Sobre la máquina automática de hielos. Un refrigerador recién instalado puede tomar desde 12 hasta 24 horas para empezar a hacer hielo. Máquina automática de hielos Interruptor de Máquina de hielos corriente La máquina de hielos producirá siete cubos por ciclo, aproximadamente entre 100–130 cubos en un período de 24 horas, dependiendo de la temperatura en el compartimiento del congelador, la...
- Page 94 Antes de llamar a solicitar servicio… Consejos para la solución de averías. ¡Ahorre tiempo y dinero! Revise primero la siguiente tabla primero y quizás no necesite llamar a solicitar servicio. Problema Posibles causas La máquina automática El compartimento del de hielos no funciona/ congelador está...
- Page 95 Problema Posibles causas Fuga de agua alrededor Espuma adquirida durante la de la copa de llenado instalación del tubo de llenado. El tubo de llenado no está sentado correctamente en la copa de llenado. Fuga de agua detrás El suministro de la casa no está del refrigerador conectado apropiadamente a la válvula de agua.
- Page 96 Antes de llamar a solicitar servicio… Consejos para la solución de averías. ¡Ahorre tiempo y dinero! Revise primero la siguiente tabla primero y quizás no necesite llamar a solicitar servicio. Problema Posibles causas Los cubos de hielo El recipiente de almacenamiento tienen olor / sabor necesita limpieza.
- Page 97 Instrucciones para a instalación ¿Preguntas? Llame 800.GE.CARES (800.432.2737) o GEAppliances.com ANTES DE EMPEZAR Lea estas instrucciones completa y cuidadosamente. IMPORTANTE – • instrucciones para el uso del inspector local. IMPORTANTE – • todos los códigos y ordenanzas gubernamentales. Nota para el instalador –...
- Page 98 Instrucciones para la instalación CONTENIDO DEL KIT IM-4 Máquina de hielos Manual del propietario e instrucciones para la instalación Ensamble de válvula y de tubo del agua Sujetadores del tubo del agua con adhesivo posterior, para sujetar el tubo del agua plástico Tornillo de cabeza hexagonal, para la abrazadera para la...
- Page 99 Instrucciones para la instalación Lista de partes Máquina de hielos Manual del propietario e instrucciones para la instalación Ensamble de válvula y de tubo del agua Sujetadores del tubo del agua con adhesivo posterior Tornillo de cabeza hexagonal, para la abrazadera para la tubería del agua Abrazadera para la tubería del agua (alivio de presión) Etiqueta de garantía...
-
Page 100: Antes De Empezar
Instrucciones para la instalación INSTRUCCIONES PARA LA INSTALACIÓN DE LA MÁQUINA DE HIELOS L ¿Son estas las instrucciones correctas para su modelo? Siga las Instrucciones para la instalación indicadas por la etiqueta en la parte posterior del refrigerador ANTES DE EMPEZAR Lea cada paso completamente antes de proceder. - Page 101 Instrucciones para la instalación FIJE EL INTERRUPTOR EN LA POSICIÓN DE O (apagado) Fije el interruptor de corriente de la máquina de hielos en la posición de O (apagado) hasta que el refrigerador se conecte al suministro de agua para evitar la operación prematura de la misma.
- Page 102 Instrucciones para la instalación INSTRUCCIONES PARA LA INSTALACIÓN DEL ENSAMBLE DE ¿Son estas las instrucciones correctas para su modelo? Siga las Instrucciones para la instalación indicadas por la etiqueta en la parte posterior del refrigerador ANTES DE EMPEZAR Lea cada paso completamente antes de proceder. PRECAUCIÓN –...
- Page 103 Instrucciones para la instalación CONECTE EL TUBO DEL AGUA A LA ENTRADA EXISTENTE • Presione los extremos de la abrazadera de la manguera (16) del kit, usando los alicates y deslice la abrazadera por encima de la entrada, localizada en la esquina superior derecha del refrigerador.
- Page 104 Instrucciones para la instalación INSTRUCCIONES PARA LA INSTALACIÓN DE LA MÁQUINA DE HIELOS M ¿Son estas las instrucciones correctas para su modelo? Siga las Instrucciones para la instalación indicadas por la etiqueta en la parte posterior del refrigerador ANTES DE EMPEZAR Lea cada paso completamente antes de proceder.
- Page 105 Instrucciones para la instalación INSTALE LA EXTENSIÓN DEL TUBO DE LLENADO Para modelos con un control de temperatura (refrigerador) solamente: • Corte la extensión del tubo de llenado (8) a la longitud (consulte la guía la página 133) con un cuchillo afilado o con una cuchilla de un solo filo y deslícela en el tubo de llenado contra el tope.
- Page 106 Instrucciones para la instalación INSTRUCCIONES PARA LA INSTALACIÓN DEL ENSAMBLE DE ¿Son estas las instrucciones correctas para su modelo? Siga las Instrucciones para la instalación indicadas por la etiqueta en la parte posterior del refrigerador ANTES DE EMPEZAR Lea cada paso completamente antes de proceder. PRECAUCIÓN –...
- Page 107 Instrucciones para la instalación CONECTE EL TUBO DEL AGUA A LA ENTRADA • Presione los extremos de la abrazadera de la manguera (16) del kit, usando los alicates y deslice la abrazadera por encima de la entrada, localizada en la esquina superior derecha del refrigerador.
- Page 108 Instrucciones para la instalación INSTRUCCIONES PARA LA INSTALACIÓN DE LA MÁQUINA DE HIELOS N ¿Son estas las instrucciones correctas para su modelo? Siga las Instrucciones para la instalación indicadas por la etiqueta en la parte posterior del refrigerador ANTES DE EMPEZAR Lea cada paso completamente antes de proceder.
- Page 109 Instrucciones para la instalación FIJE EL INTERRUPTOR EN LA POSICIÓN DE O (apagado) Fije el interruptor de corriente de la máquina de hielos en la posición de O (apagado) hasta que el refrigerador se conecte al suministro de agua para evitar la operación prematura de la misma.
- Page 110 Instrucciones para la instalación INSTRUCCIONES PARA LA INSTALACIÓN DEL ENSAMBLE DE ¿Son estas las instrucciones correctas para su modelo? Siga las Instrucciones para la instalación indicadas por la etiqueta en la parte posterior del refrigerador ANTES DE EMPEZAR Lea cada paso completamente antes de proceder. PRECAUCIÓN –...
- Page 111 Instrucciones para la instalación CONECTE EL TUBO DEL AGUA A LA ENTRADA • Presione los extremos de la abrazadera de la manguera (16) del kit, usando los alicates y deslice la abrazadera por encima de la entrada, localizada en la esquina superior derecha del refrigerador.
- Page 112 Instrucciones para la instalación INSTRUCCIONES PARA LA INSTALACIÓN DE LA MÁQUINA DE HIELOS P ¿Estas son las instrucciones correctas para su modelo? Siga las Instrucciones para la instalación indicadas por la etiqueta en la parte posterior del refrigerador ANTES DE EMPEZAR Lea cada paso completamente antes de proceder.
- Page 113 Instrucciones para la instalación INSTALE LA TAZA DE LLENADO DE LA MÁQUINA DE HIELOS Instale la taza de llenado de la máquina de hielos (montada al costado) (15) en la máquina de hielos como se muestra. CONECTE LA MÁQUINA DE HIELOS Sosteniendo la máquina de hielos en su lugar, conecte el enchufe del cable de corriente de la máquina de hielos en el orificio en la pared posterior.
- Page 114 Instrucciones para la instalación INSTRUCCIONES PARA LA INSTALACIÓN DEL ENSAMBLE ¿Estas son las instrucciones correctas para su modelo? Siga las Instrucciones para la instalación indicadas por la etiqueta en la parte posterior del refrigerador ANTES DE EMPEZAR Lea cada paso completamente antes de proceder. PRECAUCIÓN –...
- Page 115 Instrucciones para la instalación CONECTE EL TUBO DEL AGUA A LA ENTRADA • Presione los extremos de la abrazadera de la manguera (16) del kit, usando los alicates y deslice la abrazadera por encima de la entrada, localizada en la esquina superior derecha del refrigerador.
- Page 116 Instrucciones para la instalación INSTRUCCIONES PARA LA INSTALACIÓN DE LA MÁQUINA DE HIELOS Q ¿Son estas las instrucciones correctas para su modelo? Siga las Instrucciones para la instalación indicadas por la etiqueta en la parte posterior del refrigerador ANTES DE EMPEZAR Lea cada paso completamente antes de proceder.
- Page 117 Instrucciones para la instalación INSTALE LA TAZA DE LLENADO Instale la taza de llenado de la máquina de hielos (montada al costado) (15) en la máquina de hielos como se muestra. CONECTE LA MÁQUINA DE HIELOS Sosteniendo la máquina de hielos en su lugar, conecte el cable de corriente de la máquina de hielos en el orificio en la pared posterior, asegurándose de que las patas y los orificios se ajusten.
- Page 118 Instrucciones para la instalación INSTRUCCIONES PARA LA INSTALACIÓN DEL ENSAMBLE DE ¿Son estas las instrucciones correctas para su modelo? Siga las Instrucciones para la instalación indicadas por la etiqueta en la parte posterior del refrigerador ANTES DE EMPEZAR Lea cada paso completamente antes de proceder. PRECAUCIÓN –...
- Page 119 Instrucciones para la instalación CONECTE EL TUBO DEL AGUA A LA ENTRADA • Presione los extremos de la abrazadera de la manguera (16) del kit, usando los alicates y deslice la abrazadera por encima de la entrada, localizada en la esquina superior derecha del refrigerador.
- Page 120 Instrucciones para la instalación INSTRUCCIONES PARA LA INSTALACIÓN DE LA MÁQUINA DE HIELOS R ¿Son estas las instrucciones correctas para su modelo? Siga las Instrucciones para la instalación indicadas por la etiqueta en la parte posterior del refrigerador ANTES DE EMPEZAR Lea cada paso completamente antes de proceder.
- Page 121 Instrucciones para la instalación INSTALE EL BLOQUE DE MONTAJE • Al interior del congelador, retire los dos botones blancos pequeños de la pared lateral. • Con los tornillos de cabeza Phillips (con el bloque de montaje), una el bloque de montaje al refrigerador introduciendo los tornillos a través de los orificios externos...
- Page 122 Instrucciones para la instalación INSTRUCCIONES PARA LA INSTALACIÓN DEL ENSAMBLE DE ¿Son estas las instrucciones correctas para su modelo? Siga las Instrucciones para la instalación indicadas por la etiqueta en la parte posterior del refrigerador ANTES DE EMPEZAR Lea cada paso completamente antes de proceder. PRECAUCIÓN –...
- Page 123 Instrucciones para la instalación CONECTE EL TUBO DEL AGUA A LA ENTRADA • Presione los extremos de la abrazadera de la manguera (16) del kit, usando los alicates y deslice la abrazadera por encima de la entrada, localizada en la esquina superior derecha del refrigerador.
- Page 124 Instrucciones para la instalación INSTRUCCIONES PARA LA INSTALACIÓN DE LA MÁQUINA DE HIELOS S ¿Son estas las instrucciones correctas para su modelo? Siga las Instrucciones para la instalación indicadas por la etiqueta en la parte posterior del refrigerador ANTES DE EMPEZAR Lea cada paso completamente antes de proceder.
- Page 125 Instrucciones para la instalación INSTALE LOS TORNILLOS DE MONTAJE • Pase al Paso 5 si los tornillos ya están en su lugar en la pared del congelador. • Instale dos tornillos de cabeza Phillips (11) que se encuentran en el kit en los agujeros en la pared lateral.
- Page 126 Instrucciones para la instalación INSTRUCCIONES PARA LA INSTALACIÓN DEL ENSAMBLE DE ¿Son estas las instrucciones correctas para su modelo? Siga las Instrucciones para la instalación indicadas por la etiqueta en la parte posterior del refrigerador ANTES DE EMPEZAR Lea cada paso completamente antes de proceder. PRECAUCIÓN –...
- Page 127 Installation Instructions INSTALE LA VÁLVULA DE AGUA • Engrape el extremo del cable de conexión a tierra al gabinete del refrigerador. IMPORTANTE: Para garantizar una conexión apropiada a tierra, el extremo del cable DEBE estar conectado y asegurado al gabinete del refrigerador. CONECTE LA TUBERÍA DEL AGUA A LA ENTRADA •...
-
Page 128: Antes De Iniciar
Al conectar su refrigerador a un Sistema de Agua de Ósmosis Inversa de GE, la única instalación aprobada es con un kit de Ósmosis Inversa de GE. Para otros sistemas de agua de ósmosis inversa, siga las instrucciones del fabricante. - Page 129 No corte el extremo formado de la tubería para el refrigerador SmartConnect de GE. • Válvula de cierre para conectar a la línea del agua fría. La válvula de cierre deberá tener una entrada de agua con un diámetro interno mínimo de 5/32″...
- Page 130 Cierre el agua en la válvula después de que un cuarto (1 litro) de agua se haya eliminado por la tubería. ™ de GE, inserte el extremo Tuerca de compresión Tubería SmartConnect ™ Férula (manga)
- Page 131 Para tubería de plástico de un kit de tubería para el refrigerador SmartConnect de GE, inserte el extremo moldeado de la tubería en la conexión del refrigerador y apriete la tuerca de compresión hasta que esté...
- Page 132 GUÍAS DEL TUBO DE LLENADO Consulte la guía apropiada del tubo de llenado indicada por la etiqueta en la parte posterior del refrigerador —...
- Page 133 GUÍAS DE LA EXTENSIÓN DEL TUBO DE LLENADO Consulte la guía apropiada de la extensión del tubo de llenado indicada por la etiqueta en la parte posterior del refrigerador— Corte la extensión del tubo de llenado (8) a esta longitud para Corte la extensión del tubo de llenado (8) a esta longitud para...
- Page 134 Cualquier parte de la máquina de hielos que falle debido a un defecto de materiales o de mano A partir de la fecha de obra. Durante esta garantía completa de un año, GE ofrecerá, sin costo, las partes de repuesto compra original para cualquier parte defectuosa en el kit de la máquina de hielos.
- Page 135 Programación de servicio El servicio experto de reparaciones de GE está tan solo a un paso de distancia de su puerta. ¡Conéctese en línea y programe el servicio a su conveniencia 24 horas cualquier día del año! O llame al 800.GE.CARES (800.432.2737) durante horas normales de atención.
- Page 136 Customers in Canada should consult the yellow pages for the nearest Camco service center, or call 1.888.261.3055. Contact Us If you are not satisfied with the service you receive from GE, contact us on our Website with all the details including your phone number, or write to: General Manager, Customer Relations In Canada: geappliances.ca, or write to:...
Need help?
Do you have a question about the IM4A and is the answer not in the manual?
Questions and answers