Dell 3110CN Owner's Manual
Color laser printer
Hide thumbs
Also See for 3110CN:
- User manual (451 pages) ,
- Features list (2 pages) ,
- Service manual (621 pages)
Table of Contents

Related Manuals for Dell 3110CN


Summary of Contents for Dell 3110CN
- Page 1 Dell™ Color Laser Printer 3110cn Owner’s Manual Look Inside For: • Print Media Guidelines • Loading Paper • Setting Up for Local and Network Printing • Installing Printer Driver • Using Your Printer • Maintenance • Contacting Dell...
- Page 2 Order Printer Supplies Dell™ Printer Supplies are available only through Dell. You can order Printer Supplies online at www.dell.com/supplies or by phone. 877-INK-2-YOU Malaysia 1800 88 0553 Algeria Contact your distributor. Mexico 866-851-1754 Argentina Contact your distributor. Netherlands 020-674-4881 Australia...
-
Page 3: Dell™ Color Laser Printer 3110Cn
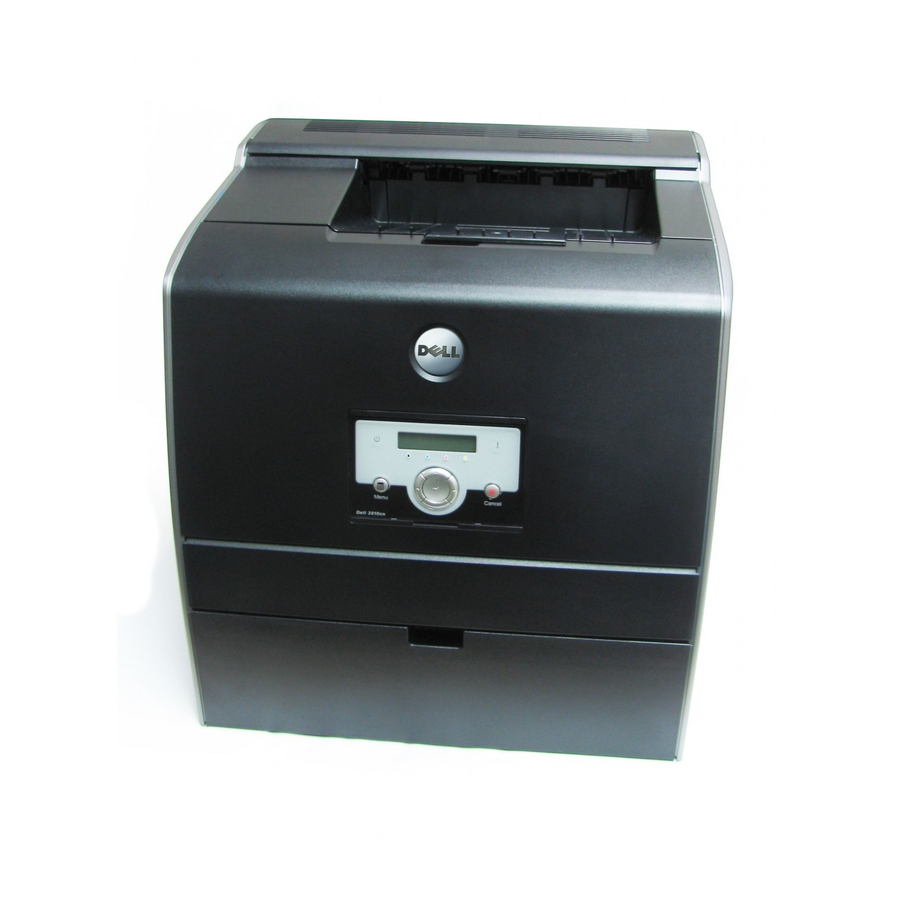
Dell™ Color Laser Printer 3110cn Operator panel Optional Duplexer Front cover Power cable connector Standard 250-sheet tray USB port Optional 550-sheet feeder Parallel port Multipurpose feeder Optional wireless printer adapter Side button Ethernet port Belt unit Power switch Center output tray... - Page 4 Other trademarks and trade names may be used in this document to refer to either the entities claiming the marks and names of their products. Dell Inc. disclaims any proprietary interest in trademarks and trade names other than its own.
-
Page 5: Table Of Contents
Contents Dell™ Color Laser Printer 3110cn ..................3 1 Print Media Guidelines ...............11 Paper ............................11 Paper Characteristics ....................11 Recommended Paper ....................12 Unacceptable Paper ....................12 Selecting Paper ......................13 Selecting Preprinted Forms and Letterhead ............14 Printing on Letterhead .....................14 Selecting Pre-punched Paper ................15 Transparencies ........................15... - Page 6 Determining the Wireless Network Settings ............32 Wireless Installation using USB connection ............32 Wireless Installation using wireless connection ..........34 Wireless Installation using Dell Printer Configuration Web Tool .....38 Wireless Setting through Dell Printer Configuration Web Tool - Advanced setup ......................44 5 Installing the PPD File on Macintosh Computers ....51 Installing the PPD File ......................51...
- Page 7 Contacting Dell ........................82 U.S. Terms and Conditions of Sale ................100 Limited Warranties and Return Policy ................102 Limited Warranty for Dell-Branded Hardware Products (U.S. Only) .....102 Dell Return Policy (U.S. Only) ................106 Limited Warranty Terms for Dell-Branded Hardware Products (Canada Only) ......................107 Total Satisfaction Return Policy (Canada Only) ..........110...
- Page 8 Dell™ Printer Consumables Limited Warranties ............111 Consumables Limited Warranty (U.S. and Canada Only) .........111 Consumables Limited Warranty (Latin America Only) ........111 1-Year End-User Manufacturer Guarantee (Latin America and the Caribbean Only) .............112 Angreskjema For Norske Forbrukere ..............113 Export Regulations ......................116 Dell Software License Agreement ................116...
- Page 9 • This product is designed to meet safety standards with the use of specific Dell- authorized components. The safety features of some parts may not always be obvious. Dell disclaims liability associated with use of non-Dell-authorized components.
-
Page 11: Print Media Guidelines
See "Loading Print Media in Standard and Optional Trays" and "Loading the Multipurpose Feeder" for detailed loading instructions. Paper Characteristics The following paper characteristics affect print quality and reliability. Dell recommends that you follow these guidelines when evaluating new paper stock. Weight The tray automatically feeds paper weights from 60 to 216 g/m (16 to 60 lb bond) grain long. -
Page 12: Recommended Paper
Smoothness The degree of paper smoothness directly affects print quality. If the paper is too rough, the toner does not fuse to the paper properly, resulting in poor print quality. If the paper is too smooth, it can cause paper feeding problems. Smoothness between 150 and 250 Sheffield points produces the best print quality. -
Page 13: Selecting Paper
In some cases, you can adjust registration with your software program to successfully print on these forms. • Coated papers (erasable bond), synthetic papers, thermal papers • Rough-edged, rough or heavily textured surface papers or curled papers • Recycled papers containing more than 25% post-consumer waste that do not meet DIN 19 •... -
Page 14: Selecting Preprinted Forms And Letterhead
Selecting Preprinted Forms and Letterhead When selecting preprinted forms and letterhead paper for the printer: • Use grain long papers for best results. • Use only forms and letterhead printed using an offset lithographic or engraved printing process. • Select papers that absorb ink, but do not bleed. •... -
Page 15: Selecting Pre-Punched Paper
Weight guidelines for pre-punched paper are the same as non-punched paper. Transparencies You can load up to 75 sheets of transparencies in the multipurpose feeder for a single print job. Before buying large quantities of any print media, Dell recommends trying a sample first. When printing on transparencies: •... -
Page 16: Selecting Transparencies
Depending on the choice of envelopes, it is possible to expect variable levels of light wrinkling. Before buying large quantities of any print media, Dell recommends trying a sample first. See "Loading the Multipurpose Feeder" for instructions on loading an envelope. -
Page 17: Labels
Your printer can print on many labels designed for use with laser printers. Label adhesives, face sheet (printable stock), and topcoats must be able to withstand temperatures of 205°C (401°F) and pressure of 25 pounds per square inch (psi). Before buying large quantities of any print media, Dell recommends trying a sample first. -
Page 18: Storing Print Media
• Do not use label sheets that have adhesive to the edge of the sheet. Dell recommends zone coating of the adhesive at least 1 mm (0.04 in.) away from edges. Adhesive material contaminates your printer and could void your warranty. -
Page 19: Print Media Supported
Multipurpose feeder Standard 250-sheet tray Optional 550-sheet Optional duplexer feeder COM-10 Envelope Monarch Yokei size2 Yokei size3 Yokei size4 Yochokei size3 Chokei size3 Japanese Post Card User-specified print size *1 The tray supports user-specified print media that are 76.2 mm (3.00 in.) to 220 mm (8.66 in.) wide and 98.4 mm (3.87 in.) to 355.6 mm (14.00 in.) long. -
Page 20: Setup Paper Type
Multipurpose feeder Standard 250-sheet Optional 550-sheet Optional duplexer tray feeder Covers Thick -Side2 (164–216 gsm) Transparency Label Coated (106–163 gsm) Coated -Side2 (106 –163 gsm) Coated Thick (164–216 gsm) Coated Thick -Side2 (164 –216 gsm) JPN Coated S2 (95-105 gsm) Envelope Japanese Post Card Recycled... -
Page 21: Loading Paper
Loading Paper Loading the Standard 250-Sheet Tray Load the print media used for the majority of your print jobs in the standard 250-sheet tray. Pull the 250-sheet tray out of the printer until it stops. Hold the tray with both hands, lift the front slightly, and remove it from the printer. - Page 22 Slide the tray to the size of the paper to be loaded by using the length guide. NOTE: When loading user-specified print media, fully extend the tray by sliding the length guide to the back of the tray. Before loading the print media, flex the sheets back and forth, and then fan them. Straighten the edges of the stack on a level surface.
- Page 23 NOTE: When loading user-specified print media, adjust the width guides and slide the extendable part of the tray by squeezing the length guide and sliding it until it rests lightly against the edge of the stack of paper. Insert the tray into the printer, and push until it stops. Select the paper type from the operator panel if any print media other than plain print media is loaded.
-
Page 24: Loading The Multipurpose Feeder
Loading the Multipurpose Feeder In addition to plain paper, the multipurpose feeder can use various other sizes and types of print media such as envelopes and transparencies. Gently pull open the multipurpose feeder cover. Slide the width guides to the edge of the tray. The width guides should be fully extended. Loading Paper... - Page 25 Insert all media face down and top edge first into the multipurpose feeder. NOTE: Do not force the print media. Slide both width guides until they rest lightly against the edge of the print media stack. NOTE: Be careful not to bend the print media. Make sure the size and type settings for the multipurpose feeder are set to the correct value for the print media you have loaded.
-
Page 26: Loading Envelopes
Loading Envelopes To load envelopes in the multipurpose feeder, insert the envelopes with the flaps closed and the short-edge of the envelopes facing into the printer. Orientate the print side facing down and slide the envelopes into the entry slot. You can load envelopes up to the maximum fill line in the tray at one time. -
Page 27: Setting Up For Local Printing
29. Installing Printer Drivers NOTE: For Vista compatible drivers, consult http://www.support.dell.com. After the printer driver has been installed, you need to specify the Installable Options settings in the printer properties dialog box according to the options you have installed. - Page 28 Insert the drivers and utilities CD into your computer. Select Personal Installation, and then click Next. On the Add Printer screen, select the port name from the Port Name combo box, and then set the printer's options under Printer Configuration. Then, click Next. Select either Typical Installation or Custom Installation from the installation wizard, and then click Install.
-
Page 29: Setting Up Network Printing
Dell™ printer installation software. To prevent this situation, disable the Windows XP firewall before you install the Dell printer software. To disable or enable your XP firewall, perform the following steps. -
Page 30: Printer Setup
Under the TCP/IP heading, verify the IP address. If the IP address is 0.0.0.0, wait for a few minutes to resolve the IP address automatically, and then print the Printer Settings page again. Printer Setup Drivers and Utilities Insert the CD into your computer to launch the installation software. - Page 31 Web browser, and the printer configuration appears on the screen. Refer to your more information. You can set up the Dell Printer Configuration Web Tool to send you an email when the printer needs supplies or intervention. To set up e-mail alerts: Launch the Dell Printer Configuration Web Tool.
-
Page 32: Determining The Wireless Network Settings
Determining the Wireless Network Settings You need to know the settings for the wireless network to set up the wireless printer. For details of the settings, contact your network administrator. Wireless SSID Specifies the name () that identifies the wireless network. Up to 32 Settings alphanumeric characters. - Page 33 On the Printer Software screen, specify the software that you want to install and installation path, and then click Next. At this point, the wireless setting specified on the Enter Wireless Network Settings screen is sent to the printer. On the Wireless configuration is now complete screen, click Next. Since wireless setting is already made to your computer, no operation is necessary on this screen.
-
Page 34: Wireless Installation Using Wireless Connection
Use the Dell Printer Configuration Web Tool to monitor the status of your network printer without leaving your desk. You can view and/or change the printer configuration settings, monitor toner level, and when it is time to order replacement consumables, just click the Dell supplies link right from your Web browser. - Page 35 NOTE: If the CD does not automatically launch, click Start → Run, and then type D:\setup.exe (where D is the drive letter of your CD), and then click OK. Select the Network Installation option button, and then click Next. Select the Configure Wireless Printer using a wireless connection (Advanced) option button, and then click Next.
- Page 36 On the Printer Software screen, specify the software that you want to install and installation path, and then click Next. At this point, the wireless setting specified on the Enter Wireless Network Settings screen is sent to the printer. On the Wireless configuration is now complete screen, change the wireless setting of your computer to the same as that sent to the printer, and then click Next.
- Page 37 Reset the wireless setting of the printer following the steps on the Reset Wireless Setting screen. Create the wireless setting of your computer following the steps shown on the Enable Communication with Printer screen, and then click Next. The steps are as follows. Select Network Connections from Control Panel.
-
Page 38: Wireless Installation Using Dell Printer Configuration Web Tool
Use the Dell Printer Configuration Web Tool to monitor the status of your network printer without leaving your desk. You can view and/or change the printer configuration settings, monitor toner level, and when it is time to order replacement consumables, just click the Dell supplies link right from your Web browser. - Page 39 Check that the IP address on your computer is assigned by DHCP. Open Dell Printer Configuration Web Tool using WEB browser. e.g.: http://168.254.1.1/ Change the wireless setting of the printer on Dell Printer Configuration Web Tool. Reboot the printer. Restore the wireless setting on your computer.
- Page 40 Select Computer to Computer (ad hoc) networks only and close the Advanced dialog box. When wireless infrastructure mode is set to the printer: Select Access point (Infrastructure) networks only and close the Advanced dialog box. Select the setting that you send to the printer in the list in Preferred Network group. Click Move up to move the setting to the top of the list.
- Page 41 1.2.3.5 Open Dell Printer Configuration Web Tool using WEB browser. e.g.: http://1.2.3.5/ Change the wireless setting of the printer on Dell Printer Configuration Web Tool. Reboot the printer. Restore the wireless setting on your computer. Select Network Connections from Control Panel.
- Page 42 Check that the IP address on your computer is assigned by DHCP. Open Dell Printer Configuration Web Tool using WEB browser. e.g.: http://168.254.1.1 Create wireless setting of the printer on Dell Printer Configuration Web Tool. Reboot the printer. Restore the wireless setting on your computer.
- Page 43 Select Access point (Infrastructure) networks only and close the Advanced dialog box. Click Add to display Wireless network properties. Enter the setting that you send to printer and click OK. Click Move up to move the setting to the top of the list. Click OK to close the Property dialog box.
-
Page 44: Wireless Setting Through Dell Printer Configuration Web Tool - Advanced Setup
1.2.3.5 Open Dell Printer Configuration Web Tool using WEB browser. e.g.: http://1.2.3.5 Change the wireless setting of the printer on Dell Printer Configuration Web Tool. Reboot the printer. Restore the wireless setting on your computer. Select Network Connections from Control Panel. - Page 45 Scroll down and select IP Address. xxx.yyy (Default IP address range: 169.254. Access Dell Printer Configuration Web Tool on your computer browser. Assign the PC IP address by DHCP mode (Change the TCP/IP properties to obtain the IP address automatically).
- Page 46 169.254. Access the Dell Printer Configuration Web Tool using the WEB browser, and then type printer wireless adapter settings in the address field of the browser. e.g. http://169.254.xxx.yyy/ (Your wireless adapter IP address) Change wireless settings (SSID/ communication mode) from Dell Printer Configuration Web Tool.
- Page 47 Access point (Infrastructure, Fixed IP network) Ensure that the addresses of your computer and access point is in the same IP range. Match the subnet mask and gateway addresses of your computer to the access point settings. Create new wireless settings of your computer by following the steps below. Select Network Connections from Control Panel.
- Page 48 Restart the printer. Open Dell Printer Configuration Web Tool using the WEB browser. e.g.: http://:192.168.1.2 Change wireless settings of the printer from Dell Printer Configuration Web Tool. Click Print server setting on the left navigational bar. Click Print server setting tab.
- Page 49 Click Move up to move the setting to the top of the list. Click OK to close the Property dialog box. NOTE: When your operating system is earlier than Windows 2000, create settings according to the manual of the wireless setting tool provided by your wireless device manufacturer. Setting up Network Printing...
- Page 50 Setting up Network Printing...
-
Page 51: Installing The Ppd File On Macintosh Computers
Insert the drivers and utilities CD into your computer. Launch the drivers and utilities CD. Double-click the Mac OS X folder, and then double-click the Dell 3110cn Installer icon. Type the administrator’s name and password, and then click OK. Read the Dell software license agreement, and then click Continue. - Page 52 Select IP Printing from the menu, and type the IP address for the printer being used in Printer Address. Select Dell from Printer Model, and confirm Dell Laser Printer 3110cn is selected for the Model Name. If it is not selected, select it.
-
Page 53: Adding A Printer On Mac Os X 10.3 Or Earlier Version(S)
When Using USB Select USB from the menu, and then select your printer from the list. For Mac OS X 10.2.8, select Dell from Printer Model. For Mac OS X 10.3 or later, your printer model is automatically selected for Printer Model. -
Page 54: Configure Settings
Select Dell from Printer Model, and confirm Dell Laser Printer 3110cn is selected for the Model Name. If it is not selected, select it. NOTE: When printing is set up using IP printing, the queue name is displayed as blank. You do not need to specify it. - Page 55 Mac OS X 10.2.8 Start Print Center. The Printer List screen appears. Select the printer you want to use. Click Printers on the Print Center menu bar, and select Show Info. Select Installable Options, and select the options that have been installed on the printer, then click Apply Changes.
- Page 56 Installing the PPD File on Macintosh Computers...
-
Page 57: Using Your Printer
Using Your Printer Changing Printer Settings NOTE: For detailed explanations of the menus, see the User’s Guide. You can select menu items and corresponding values from the operator panel. When you first enter the printer menus from the operator panel, you see an asterisk (*) next to a value in the menus. This asterisk indicates the factory default menu setting. -
Page 58: Resetting Defaults
To continue setting other items, select the desired menu. To quit setting new values, press Cancel. User default menu settings remain in effect until you save new settings or restore the factory defaults. Settings you choose from your software program can also change or override the user default menu settings you select from the operator panel. -
Page 59: Canceling A Job From The Printer Operator Panel
Canceling a Job From the Printer Operator Panel To cancel a print job after it has started printing: Press Cancel. Printing is canceled. Canceling a Job From a Computer Canceling a Job From the Taskbar User’s Guide For more information, see "Canceling a Job From the Taskbar" in the Canceling a Job From the Desktop Minimize all programs to reveal the desktop. -
Page 60: Dell Supplies Management System
• Install in advance the Dell Color Laser Printer 3110cn printer driver in the computer on which the setup disk is to be created. •... -
Page 61: Maintenance
If the front cover remains open for more than 5 minutes, print quality may deteriorate. Dell print cartridges are available only through Dell. You can order more toner online at http://www.dell.com/supplies or by phone. To order by phone, see "Order Printer Supplies" on page 2. -
Page 62: Installing A New Print Cartridge
Grasp the handles at both ends of the print cartridge that you want to replace and pull it out. Installing a New Print Cartridge Select the new print cartridge which color matches the color of the handles on the printer cartridge to be replaced and shake it 5 or 6 times to distribute the toner evenly. - Page 63 Completely remove the seal from the print cartridge by pulling the tab on the end of the print cartridge. NOTE: Pull the seal out straight. Pulling the seal diagonally may tear it. Grasp both handles of the print cartridge with the label facing up and slide the cartridge into the same color slot.
- Page 64 Remove the orange protective cover of the installed print cartridge and discard. Close the front cover. Maintenance...
-
Page 65: Replacing The Fuser
Remove any print jobs from the center output tray, and close the multipurpose feeder cover before opening the front cover. Dell fuser are available only through Dell. To order by phone, see "Order Printer Supplies" on page 2. Dell recommends Dell fuser for your printer. Dell does not provide warranty coverage for problems caused by using accessories, parts, or components not supplied by Dell. - Page 66 Lift the chute gate to its upright position. Release the levers at both ends of the fuser. Hold both sides of the installed fuser, pull it towards the front of the printer to release the connection on the right side, then lift upward to remove. Maintenance...
-
Page 67: Installing A New Fuser
Installing a New Fuser Unpack a new fuser and hold both sides of the fuser with both hands. With the connector of the fuser toward the slot, push the connector into the slot firmly. NOTE: Make sure the fuser connector is firmly seated. Lock both levers at the ends of the fuser. - Page 68 Lower the chute gate to its horizontal position. Close the front cover. Maintenance...
-
Page 69: Replacing Separator Rollers
NOTE: For information on when to replace rollers, see "Print Cartridge and Printer Life" in User's Guide. Dell separator rollers are available only through Dell. To order by phone, see "Order Printer Supplies" on page 2. Dell recommends Dell separator rollers for your printer. Dell does not provide warranty coverage for problems caused by using accessories, parts, or components not supplied by Dell. - Page 70 Push back the handles on each side of the separator roller cover as shown in the following illustration and open the cover. Turn the separator roller until the roller hook can be seen. Maintenance...
-
Page 71: Installing The New Separator Roller In The Tray
Pull the separator roller hook out of the groove in the axle, and then slide the separator roller to the right. Installing the New Separator Roller in the Tray Align the hole of the new separator roller with the axle. Maintenance... - Page 72 Slide the separator roller along the axle so the protrusions fit completely into the slots and the roller hook re-seats into the groove on the axle. Close the separator roller cover until both sides click into place. Maintenance...
-
Page 73: Removing The Used Separator Roller Inside The Printer
Load paper into the tray and replace it into the printer. Removing the Used Separator Roller Inside the Printer Pull the tray out of the printer until it stops. Hold the tray with both hands, lift the front slightly, and remove it from the printer. Maintenance... - Page 74 Turn the separator roller until the roller hook can be seen. NOTE: The roller is located approximately 165 mm (6.5 in.) inside the machine as measured from the face of the paper tray opening. Pull the separator roller hook out of the groove on the axle, and then slide the separator roller to the left.
- Page 75 Repeat steps 2 and 3 to remove the other separator roller from the inside of the printer. Maintenance...
-
Page 76: Installing The New Separator Roller Inside The Printer
Installing the New Separator Roller Inside the Printer Align the hole of the new separator roller with the axle. Slide the separator roller along the axle so the protrusions fit completely into the slots and the roller hook re-seats into the groove on the axle. Maintenance... -
Page 77: Replacing The Belt Unit
For information on when to replace belt units, see "Print Cartridge and Printer Life" in User's Guide. Dell belt units are available only through Dell. To order by phone, see "Order Printer Supplies" on page 2. Dell recommends Dell belt units for your printer. Dell does not provide warranty coverage for problems caused by using accessories, parts, or components not supplied by Dell. - Page 78 Push the side button and open the front cover. Pull up on the belt release levers and rotate the belt unit up as shown in the illustration. CAUTION: Do not touch the inside of the printer. Some parts may be hot. Allow time for the printer to cool before attempting to remove parts in this area.
-
Page 79: Installing A New Belt Unit
Hold both sides of the belt unit with both hands and pull up the left side of the unit until the peg on the left side comes out of the groove. Then, shift the belt unit to the right and remove the unit from the printer. - Page 80 Close the belt unit by pulling it down until it clicks. Remove the film cover from the installed belt unit and discard. Close the front cover. Maintenance...
-
Page 81: Appendix
Appendix Technical Assistance If you need help with a technical problem, Dell is ready to assist you. Call technical support from a telephone near or at the printer so that technical support can assist you with any necessary procedures. When calling Dell, use your Express Service Code to help expedite the routing of your call to the proper support personnel. -
Page 82: Automated Order-Status Service
Automated Order-Status Service To check on the status of any Dell™ products that you have ordered, you can go to support.dell.com, or you can call the automated order-status service. A recording prompts you for the information needed to locate and report on your order. See "Contacting Dell" on page 82 for the telephone number to call for your region. - Page 83 0820 240 530 14 Preferred Accounts/Corporate Customer Care 0820 240 530 16 Support for XPS portable computers only 0820 240 530 81 Home/Small Business Support for all other Dell 0820 240 530 14 computers Preferred Accounts/Corporate Support 0660 8779 Switchboard...
- Page 84 Website and E-Mail Address Local Numbers, and Country Code Toll-Free Numbers City Code Belgium (Brussels) Website: support.euro.dell.com International Access Code: 00 Hardware And Warranty Support for XPS 02 481 92 96 portable computers only Country Code: 32 Hardware And Warranty Support for all other...
- Page 85 Website and E-Mail Address Local Numbers, and Country Code Toll-Free Numbers City Code Canada (North York, Ontario) Online Order Status: www.dell.ca/ostatus International Access Code: 011 AutoTech (automated Hardware and Warranty toll-free: 1-800-247-9362 Support) Customer Service (Home Sales/Small Business) toll-free: 1-800-847-4096 Customer Service (med./large business,...
- Page 86 City Code: 592 cn_support@dell.com Customer Care E-mail: customer_cn@dell.com Hardware and Warranty Support Fax 592 818 1350 Hardware and Warranty Support (Dell™ toll-free: 800 858 2968 Dimension™ and Inspiron) Hardware and Warranty Support (OptiPlex™, toll-free: 800 858 0950 Latitude™, and Dell Precision™)
- Page 87 International Access Code Website and E-Mail Address Local Numbers, and Country Code Toll-Free Numbers City Code Czech Republic (Prague) Website: support.euro.dell.com International Access Code: 00 E-mail: czech_dell@dell.com Country Code: 420 Hardware and Warranty Support 22537 2727 Customer Care 22537 2707...
- Page 88 Website and E-Mail Address Local Numbers, and Country Code Toll-Free Numbers City Code France (Paris) (Montpellier) Website: support.euro.dell.com International Access Code: 00 Home and Small Business Country Code: 33 Hardware and Warranty Support for XPS 0825 387 129 portable computers only...
- Page 89 Country Code: 852 Hardware and Warranty Support (Dimension 2969 3188 and Inspiron) Hardware and Warranty Support (OptiPlex, 2969 3191 Latitude, and Dell Precision) Hardware and Warranty Support (PowerApp™, 2969 3196 PowerEdge™, PowerConnect™, and PowerVault™) Customer Care 3416 0910 Large Corporate Accounts...
- Page 90 International Access Code Website and E-Mail Address Local Numbers, and Country Code Toll-Free Numbers City Code Ireland (Cherrywood) Website: support.euro.dell.com International Access Code: 16 E-mail: dell_direct_support@dell.com Country Code: 353 Hardware and Warranty Support for XPS 1850 200 722 portable computers only...
- Page 91 Hardware And Warranty Support (Dell toll-free:0120-198-433 Precision, OptiPlex, and Latitude) Hardware And Warranty Support outside of 81-44-556-3894 Japan (Dell Precision, OptiPlex, and Latitude) Hardware And Warranty Support (PDAs, toll-free: 0120-981-690 projectors, printers, routers) Hardware And Warranty Support outside of 81-44-556-3468...
- Page 92 Area Codes, International Access Code Website and E-Mail Address Local Numbers, and Country Code Toll-Free Numbers City Code Korea (Seoul) E-mail: krsupport@dell.com International Access Code: 001 Support toll-free: 080-200-3800 Country Code: 82 Support (Dimension, PDA, Electronics and toll-free: 080-200-3801 Accessories)
- Page 93 Country Code Toll-Free Numbers City Code Malaysia (Penang) Website: support.ap.dell.com International Access Code: 00 Hardware And Warranty Support (Dell toll-free: 1 800 880 193 Precision, OptiPlex, and Latitude) Country Code: 60 Hardware And Warranty Support (Dimension, toll-free: 1 800 881 306...
- Page 94 Website and E-Mail Address Local Numbers, and Country Code Toll-Free Numbers City Code Netherlands (Amsterdam) Website: support.euro.dell.com International Access Code: 00 Hardware and Warranty Support for XPS 020 674 45 94 portable computers only Country Code: 31 Hardware and Warranty Support for all other...
- Page 95 1800 394 7430 Inspiron, and Electronics and Accessories) Country Code: 65 Hardware and Warranty Support (OptiPlex, toll-free: 1800 394 7488 Latitude, and Dell Precision) Hardware and Warranty Support (PowerApp, toll-free: 1800 394 7478 PowerEdge, PowerConnect, and PowerVault) Customer Care...
- Page 96 International Access Code Website and E-Mail Address Local Numbers, and Country Code Toll-Free Numbers City Code Slovakia (Prague) Website: support.euro.dell.com International Access Code: 00 E-mail: czech_dell@dell.com Country Code: 421 Hardware and Warranty Support 02 5441 5727 Customer Care 420 22537 2707...
- Page 97 0848 33 88 57 City Code: 22 portable computers only Hardware and Warranty Support (Home and 0844 811 411 Small Business) for all other Dell products Hardware and Warranty Support (Corporate) 0844 822 844 Customer Care (Home and Small Business) 0848 802 202...
- Page 98 City Code Thailand Website: support.ap.dell.com International Access Code: 001 Hardware and Warranty Support (OptiPlex, toll-free: 1800 0060 07 Latitude, and Dell Precision) Country Code: 66 Hardware and Warranty Support (PowerApp, toll-free: 1800 0600 09 PowerEdge, PowerConnect, and PowerVault) Customer Care...
- Page 99 1-888-798-7561 Software and Peripherals Sales toll-free: 1-800-671-3355 Spare Parts Sales toll-free: 1-800-357-3355 Extended Service and Warranty Sales toll-free: 1-800-247-4618 toll-free: 1-800-727-8320 Dell Services for the Deaf, Hard-of-Hearing, or toll-free: 1-877-DELLTTY Speech-Impaired (1-877-335-5889) U.S. Virgin Islands General Support 1-877-673-3355 Appendix...
-
Page 100: U.s. Terms And Conditions Of Sale
Payment terms are within Dell's sole discretion, and, unless otherwise agreed to by Dell, payment must be made at the time of purchase. Payment for Product may be made by credit card, wire transfer, or some other prearranged payment method. - Page 101 You are responsible for risk of loss, shipping and handling fees for returning or exchanging Product. Additional fees may apply. If you fail to follow the return or exchange instructions and policies provided by Dell, Dell is not responsible whatsoever for Product that is lost, damaged, modified or otherwise processed for disposal or resale. At Dell's discretion, credit for partial returns may be less than invoice or individual component prices due to bundled or promotional pricing.
-
Page 102: Limited Warranties And Return Policy
United States. You agree and represent that you are buying only for your own internal use only, and not for resale or export. Dell has separate terms and conditions governing resale of Product by third parties and transactions outside the United States. - Page 103 CONSEQUENTIAL DAMAGES, SO THE ABOVE LIMITATION OR EXCLUSION MAY NOT APPLY TO YOU. How long does this limited warranty last? This limited warranty lasts for the time period indicated on your packing slip or invoice, except for the following Dell- branded hardware: •...
- Page 104 The limited warranty on all Dell-branded products begins on the date of the packing slip or invoice. The warranty period is not extended if we repair or replace a warranted product or any parts. Dell may change the availability of limited warranties, at its discretion, but any changes will not be retroactive.
- Page 105 We are not responsible for lost or corrupted data. What if I purchased a service contract? If your service contract is with Dell, service will be provided to you under the terms of the service agreement. Please refer to that contract for details on how to obtain service.
-
Page 106: Dell Return Policy (U.s. Only)
Restocking Fees: Unless the product is defective or the return is a direct result of a Dell error, a restocking fee of 15% may be charged on hardware, accessories, peripherals, parts and unopened software still in its/their sealed package. -
Page 107: Limited Warranty Terms For Dell-Branded Hardware Products (Canada Only)
Limited Warranty Terms for Dell-Branded Hardware Products (Canada Only) Dell-branded hardware products purchased in Canada come with either a 90-day, 1-year, 2-year, 3-year, or 4-year limited warranty depending on the product purchased. To determine which warranty came with your hardware product(s), see your packing slip or invoice. - Page 108 What do I do if I need warranty service? Before the warranty expires, please call us at the relevant number listed in the following table. Please also have your Dell Service Tag or order number available Web Support http://support.dell.com/support/index.aspx?c=...
- Page 109 What if I purchased a service contract? If your service contract is with Dell, service will be provided to you under the terms of the service contract. Please refer to that contract for details on how to obtain service. Dell's service contracts can be found online at www.dell.ca or by calling Customer Care at 1-800-847-4096.
-
Page 110: Total Satisfaction Return Policy (Canada Only)
While Dell offers a wide selection of software and peripheral products, we do not specifically test or guarantee that all of the products we offer work with any or all of the various models of Dell computers, nor do we test or guarantee all of the products we sell on the hundreds of different brands of computers available today. -
Page 111: Dell™ Printer Consumables Limited Warranties
If this product proves defective in either material or workmanship, it will be replaced without charge during the limited warranty period if returned to Dell. You must first call our toll-free number to get your return authorization. In the U.S., call 1-800-822-8965; in Canada, call 1-800-387-5757. If we are not able to replace the product because it has been discontinued or is not available, we will either replace it with a comparable product or reimburse you for the cartridge purchase cost, at Dell’s sole option. -
Page 112: 1-Year End-User Manufacturer Guarantee (Latin America And The Caribbean Only)
Guarantee will be the end user’s sole and exclusive remedy against Dell or any of its affiliates, and neither Dell nor any of its affiliates shall be liable for loss of profit or contracts, or any other indirect or consequential loss arising from negligence, breach of contract, or howsoever. -
Page 113: Angreskjema For Norske Forbrukere
This Guarantee does not impair or affect mandatory statutory rights of the end user against and/or any rights resulting from other contracts concluded by the end user with Dell and/or any other seller. Dell World Trade LP One Dell Way, Round Rock, TX 78682, USA Dell Computadores do Brasil Ltda (CNPJ No. - Page 114 Dell A/S Selgerens adresse Amager Strandvej 60-64, 2300 Kjøpenhavn, Danmark Telefonnr. 23 16 23 57 E-postadresse sales_internet_no@dell.com Kontrakt/ordre/bestilling nr. Indsæt fra ordrebekreftelse om vare(r) indsæt fra ordrebekreftelse ❏ Ordrebekreftelse er vedlagt dette skjemaet. Avtalen ble inngått Indsæt____________ (dato). Skjemaet er levert/sendt ved levering (dato).
- Page 115 Angrefristens Utgangspunkt Opplysningene i henhold til angrerettloven kapittel 3 er mottatt på foreskreven måte når kravene i § 9 jf. § 7 er oppfylt og dette skjemaet er mottatt ferdig utfylt med de opplysningene selgeren skal fylle ut. Se utdrag fra §§ 9 og 7 nedenfor. §...
-
Page 116: Export Regulations
Software. If you are a commercial customer of Dell or a Dell affiliate, you hereby grant Dell, or an agent selected by Dell, the right to perform an audit of your use of the Software during normal business hours, you agree to cooperate with Dell in such audit, and you agree to provide Dell with all records reasonably related to your use of the Software. -
Page 117: Open Source Software
Dell, at your cost and risk. This limited warranty is void if any disk damage has resulted from accident, abuse, misapplication, or service or modification by someone other than Dell. Any replacement disk is warranted for the remaining original warranty period or thirty (30) days, whichever is longer. -
Page 118: Recycling Information
You acknowledge that you have read this agreement, that you understand it, that you agree to be bound by its terms, and that this is the complete and exclusive statement of the agreement between you and Dell regarding the Software. - Page 119 Appendix...
- Page 120 Appendix...
-
Page 121: Regulatory Notices
Electromagnetic Compatibility classification for the intended environment. For parallel printers, a cable is available from Dell. If you prefer, you can order a cable from Dell on the World Wide Web at www.dell.com. Dell has determined that this product is a Class B harmonized product. The following sections provide country-specific EMC/EMI or product safety information. -
Page 122: Industry Canada (Canada Only)
Cet appareil numérique de la Classe B est conforme à la norme NMB-003 du Canada. NOTICE: The Industry Canada regulations provide that changes or modifications not expressly approved by Dell Inc. could void your authority to operate this equipment. Appendix... -
Page 123: Industry Canada (Canada Uniquement)
Directive), and amendments of the European Union. European Union, Class B This Dell device is classified for use in a typical Class B domestic environment. A "Declaration of Conformity" in accordance with the preceding directives and standards has been made and is on file at Dell Inc. - Page 124 Appendix...
- Page 125 Appendix...
- Page 126 Appendix...
-
Page 127: Información Para Nom (Únicamente Para México)
® ENERGY STAR Compliance ® Any Dell product bearing the ENERGY STAR emblem on the product or on a start-up screen is certified to comply ® with Environmental Protection Agency (EPA) ENERGY STAR requirements as configured when shipped by Dell. - Page 128 ® ENERGY STAR Emblem ® The EPA's ENERGY STAR program is a joint effort between the EPA and manufacturers to reduce air pollution by promoting energy-efficient products. You can help reduce electricity usage and its side effects by turning off your product when it is not in use for extended periods of time, particularly at night and on weekends.
-
Page 129: Index
Covers -Side2 Adjusting the Language Installing belt unit Covers Thick Installing fuser Covers Thick-Side2 Installing print cartridge Installing separator roller Belt unit Dell supplies management system Label Legal Duplexer Length guide Canceling a Job Letter From the desktop Loading 250-sheet tray... - Page 130 Curl Removing fuser Maintenance Fiber content Removing print cartridge Maximum fill line Grain direction Removing separator roller Monarch Moisture content Replacing belt unit Multipurpose feeder Smoothness Replacing fuser Weight Loading paper Replacing print cartridge Paper type Replacing separator roller Parallel port Resetting defaults Plain Paper Plain Paper -Side2...
- Page 131 Technical assistance Transparencies Transparency Unacceptable paper USB port User setup disk creating tool User-specified print size warranty When using AppleTalk When using Bonjour When using IP Printing When using Rendezvous When using USB When using USB connection Width guide...
Need help?
Do you have a question about the 3110CN and is the answer not in the manual?
Questions and answers