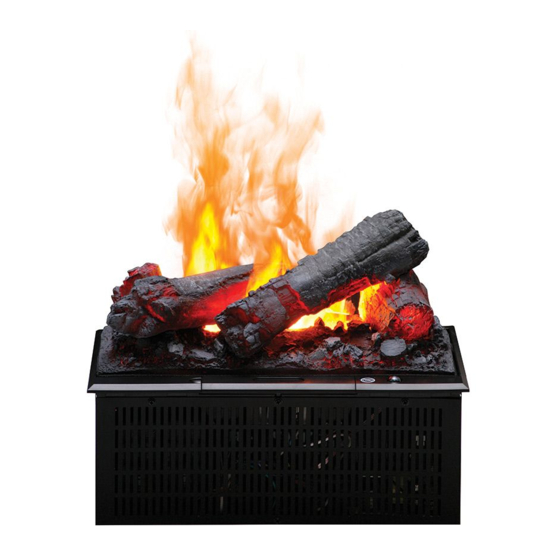
Table of Contents
Advertisement
Quick Links
IMPORTANT SAFETY INFORMATION: Always read this manual
first before attempting to install or use the Optimyst
your safety, always comply with all warnings and safety instructions
contained in this manual to prevent personal injury or property
damage.
To view the full line of Dimplex products, please visit
www.dimplex.com
Owner's Manual
Model
DFI400LH (6909050141)
DFI400RH (6909050142)
DFI600LH (6909050161)
cassette. For
®
7212780100R05
Advertisement
Table of Contents

Summary of Contents for Dimplex Optimyst DFI400LH
- Page 1 Optimyst cassette. For ® your safety, always comply with all warnings and safety instructions contained in this manual to prevent personal injury or property damage. To view the full line of Dimplex products, please visit www.dimplex.com 7212780100R05...
-
Page 2: Table Of Contents
CAUTION: Procedures and techniques which, if not carefully followed, will result in damage to the equipment. W ARNING: Procedures and techniques which, if not carefully followed, will expose the user to the risk of fire, serious injury, or death. www.dimplex.com... -
Page 3: Welcome & Congratulations
Welcome & Congratulations Thank you and congratulations for choosing to purchase an Optimyst ® cassette from Dimplex, the world leader in electric fireplaces. Please carefully read and save these instructions. CAUTION: Read all instructions and warnings carefully before starting installation. Failure to follow these instructions may result in a possible electric shock, fire hazard and will void the warranty. -
Page 4: Important Safety Instructions
IMPORTANT SAFETY INSTRUCTIONS THIS UNIT IS FOR HOUSEHOLD / dropped or damaged, or dropped RESIDENTAL USE ONLY. into water. Contact Dimplex Techni- cal Service at 1-888-346-7539 for THE ELECTRICAL RATING FOR replacement parts. THESE MODELS IS 120VAC, 60 HZ, 12 AMP. -
Page 5: Save These Instructions
⑳ Light bulb requirement: 45W, the manufacturer may cause fire, 12VAC halogen bulbs type MR 16. electric shock or injury to persons. Contact Dimplex Technical Service ⑬ To reduce the risk of electric at 1-888-346-7539 for replacement shock, this appliance has a three bulbs. -
Page 6: Installation
Check with a appliances on the same circuit qualified electrician or serviceman may exceed the current rating of the circuit breaker. Figure 1 Mantel Installation Install the fireplace into the mantel (refer to mantel assembly instructions). www.dimplex.com... - Page 7 (Figure 4), the plug above should be maintained: should be plugged directly into • Cassette Only: 12 in. (305 mm) a 15 A, 120 V outlet. • Cassette with Dimplex heater: CAUTION: During operation 19 in. (483 mm)
- Page 8 (Figure 4) CAUTION: The receptacle cord is intended for use only with the Dimplex heater 6909070159. If this receptacle is used with any other product, Dimplex will not be liable for any damage or issues that may arise. www.dimplex.com...
-
Page 9: Assembly
Assembly Carefully unpack all of the aligning the pins on the bulbs components from the box. and the fixture and pressing (Figure 5) down until they are fully inserted. (Figure 7) Remove top cover by turning the retaining tabs on both ends Install the transducer so that of the water reservoir. - Page 10 Make sure the On/Off switch is switched to Off (refer to Operating Instruction section). 10. Plug the unit into a 15 Amp/ 120 volt outlet. NOTE: Rock media shown, install log assembly in the same way. www.dimplex.com...
-
Page 11: Operation
Operation turn on immediately it will take 30 Figure 8 seconds before the flame effect starts. • Press again to give flame effect and heat*. This will be indicated by two “beeps”. • Press again to return to flame effect only. This will be indi- Remote Control Sensor cated by one “beep”. -
Page 12: Battery Replacement
Slide battery cover open on the turn on. remote control (Figure 9). * Only applicable when the Dimplex Install two 1.5 Volt (AAA) bat- heater has been plugged into the teries in the battery holder. -
Page 13: Maintenance
® 12VAC halogen bulbs type MR 16. as the tap water is not considered Contact Dimplex Technical Service to be hard water. In the event your at 1-888-346-7539 for replacement tap water is hard, you may use bulbs. - Page 14 A small brush has been included to assist in cleaning difficult items/areas, i.e. the trans- ducer. CAUTION: Do not put plastic components in the dishwasher. www.dimplex.com...
-
Page 15: Warranty
What Dimplex will do in the event of a purchaser assumes the entire cost of all defect necessary servicing or repair. - Page 16 TIAL, OR INCIDENTAL LOSS, COST, practicable or cannot be timely made, OR DAMAGE ARISING OUT OF OR Dimplex may, in lieu of repair or IN CONNECTION WITH THE SALE, replacement, choose to refund the MAINTENANCE, USE, OR INABILITY TO...
-
Page 17: Replacement Parts
Media Tray (DFI400RH) ........9600710100RP Log Set Assembly - DFI400LH ....... . . 9600720100RP - DFI600LH .


Need help?
Do you have a question about the Optimyst DFI400LH and is the answer not in the manual?
Questions and answers