Table of Contents
Advertisement
Quick Links
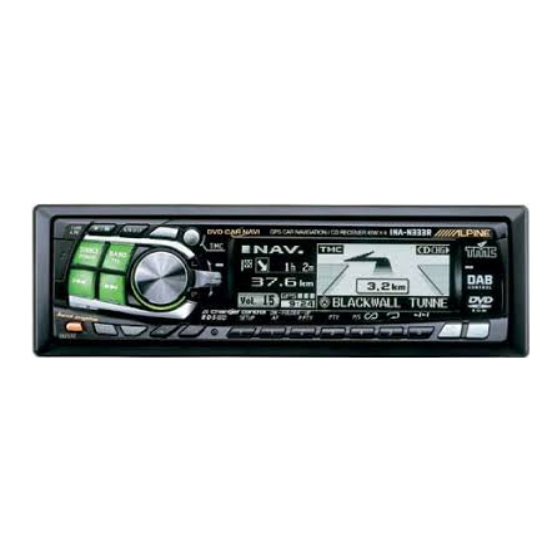
GPS Car Navigation/CD Receiver
ALPINE ELECTRONICS MARKETING, INC.
1-1-8 Nishi Gotanda,
Shinagawa-ku, Tokyo 141-0031, Japan
Phone 03-5496-8231
ALPINE ELECTRONICS OF AMERICA, INC.
19145 Gramercy Place, Torrance,
California 90501, U.S.A.
Phone 1-800-ALPINE-1 (1-800-257-4631)
1-888-NAV-HELP (1-888-628-4357)
ALPINE ELECTRONICS OF CANADA, INC.
7300 Warden Ave., Suite 203, Markham,
Ontario L3R 9Z6, Canada
Phone 1-800-ALPINE-1 (1-800-257-4631)
1-888-NAV-HELP (1-888-628-4357)
Sankei Kikaku Co., Ltd.
1-13-38, Hinodai, Hino, Tokyo, Japan
INA-N333R
• OWNER'S MANUAL
Please read before using this equipment.
• BEDIENUNGSANLEITUNG
Lesen Sie diese Bedienungsanleitung bitte vor
Gebrauch des Gerätes.
• MODE D'EMPLOI
Veuillez lire avant d'utiliser cet appareil.
• ISTRUZIONI PER L'USO
Si prega di leggere prima di utilizzare il
attrezzatura.
• MANUAL DE OPERACIÓN
Léalo antes de utilizar este equipo.
• GEBRUIKSAANWIJZING
Gelieve de gebruiksaanwijzing te lezen alvorens
met dit toestel te werken.
• ANVÄNDARHANDLEDNING
Innan du använder utrustningen bör du läsa
igenom denna användarhandledning.
• BRUGERVEJLEDNING
Læs venligst denne vejledning, før du tager
enheden i brug.
ALPINE ELECTRONICS OF AUSTRALIA PTY. LTD.
6-8 Fiveways Boulevarde Keysborough,
Victoria 3173, Australia
Phone 03-9769-0000
ALPINE ELECTRONICS GmbH
Kreuzerkamp 7, 40878 Ratingen,
Germany
Phone 02102-4550
ALPINE ELECTRONICS OF U.K. LTD.
Alpine House
Fletchamstead Highway,
Coventry CV4 9TW, U.K.
Phone 0870-33 33 763
R
ALPINE ELECTRONICS FRANCE S.A.R.L.
(RCS PONTOISE B 338 101 280)
98, Rue de la Belle Etoile, Z.I. Paris
Nord II, B.P. 50016, 95945 Roissy
Charles de Gaulle Cedex, France
Phone 01-48638989
ALPINE ITALIA S.p.A.
Viale C. Colombo 8, 20090 Trezzano
Sul Naviglio (MI), Italy
Phone 02-484781
ALPINE ELECTRONICS DE ESPAÑA, S.A.
Portal de Gamarra 36, Pabellón, 32
01013 Vitoria (Alava) - APDO 133,
Spain
Phone 945-283588
Designed by ALPINE Japan
Printed in Japan (S)
68P50520Y74-O
EN
DE
FR
IT
ES
NL
SE
DK
Advertisement
Table of Contents

Subscribe to Our Youtube Channel
Related Manuals for Alpine INA-N333R


Summary of Contents for Alpine INA-N333R
- Page 1 • BRUGERVEJLEDNING Læs venligst denne vejledning, før du tager enheden i brug. ALPINE ELECTRONICS MARKETING, INC. ALPINE ELECTRONICS OF AUSTRALIA PTY. LTD. ALPINE ELECTRONICS FRANCE S.A.R.L. 1-1-8 Nishi Gotanda, 6-8 Fiveways Boulevarde Keysborough, (RCS PONTOISE B 338 101 280)
- Page 2 CD-TEXT. Der CHA-1214 ist ein Ai-NET-Modell für 12 CDs. Der M-Bus-kompatible CHM-S630 ist ein superkompakter Wechsler für 6 CDs mit CD-R/RW-Wiedergabefunktion. Changeurs de CD Alpine : vous avez le choix! Plus de sélections musicales, plus de souplesse, plus de confort.
-
Page 3: Table Of Contents
ENGLISH Contents Other Functions Operating Instructions Displaying the Title/Text ........14 Titling Discs/Stations ........15 WARNING Erasing Disc Title/Station Title ......15 WARNING ..........3 Sound Setup Operation CAUTION ........... 3 Turning Loudness On/Off ........ 16 PRECAUTIONS ......... 3 Turning Defeat Mode On/Off ......16 Switching the Phase of the Subwoofer Output .. - Page 4 DAB Operation (Optional) Using DAB Receiver for the Ensemble Seek Tuning (Optional) ......... 25 Changing the Service ........25 Changing the Service Component ....25 Memorizing the Service ........25 Receiving the Memorized Service ....26 Memorizing the Ensemble Automatically ..26 PTY (Programme Type) Tuning ......
-
Page 5: Warning
DO NOT BLOCK VENTS OR RADIATOR PANELS. Doing so may cause heat to build up inside and may result in fire. Installation Location Make sure the INA-N333R will not be installed in a location DO NOT PLACE HANDS, FINGERS OR FOREIGN OBJECTS subjected to: IN INSERTION SLOTS OR GAPS. - Page 6 Use of special shape discs may cause damage to the mechanism. Transparent Sheet Disc Stabilizer Use only Alpine's exclusive Navigation Disc (not supplied) with this unit. You cannot use any other navigation discs. You also cannot play DVD/VIDEO CDs on this unit.
-
Page 7: Basic Operation
Controls If your vehicle has steering wheel controls for the radio, an optional steering wheel control interface may be available to connect your Alpine radio. For details, Detaching the Front Panel contact your Alpine dealer. Press and hold the SOURCE/POWER button at least 2 seconds to turn off the power. -
Page 8: Display Angle Adjustment
Basic Operation NOTES • If the MODE (Audio Control) knob is not rotated within 5 seconds after selecting the BALANCE, or FADER mode, the unit automatically returns to the VOLUME mode. •* When the NAVI MIX (page 20), subwoofer (page 19) is ON, NAV. -
Page 9: Radio Operation
Distance mode: Both strong and weak stations will be automatically tuned in (Automatic Seek Tuning). The INA-N333R incorporates the MAX TUNE Pro for the Local mode: highest quality tuner audio. Moreover, you can choose Only strong stations will be automatically tuned in between two settings to suit your own personal sound (Automatic Seek Tuning). -
Page 10: Automatic Memory Of Station Presets
Radio Operation Station Title Search Function TUNE/A.ME If titles for radio stations (radio frequency) are entered, SOURCE/ you can search for a radio station from its title. POWER BAND/TEL. MODE Flipper switch Press and hold the MODE knob for at least 2 seconds. The display changes to the station title search mode. -
Page 11: Rds Operation
RDS Operation Recalling Preset RDS Stations Press the F/SETUP button. The "FUNC" indicator will SOURCE/ illuminate. POWER MODE Flipper switch Press the 1/AF button to activate the RDS mode. The display shows the "AF" indicator when the RDS mode is activated. Press the F/SETUP button to activate the normal mode. -
Page 12: Pi Seek Setting
RDS Operation PTY (Programme Type) Tuning Press the F/SETUP button. The "FUNC" indicator will MODE Flipper switch illuminate. Press the 2/PTY button to activate the PTY mode, in the FM radio mode. The Programme Type of the station being currently received will be displayed for 5 seconds. -
Page 13: Receiving Traffic Information While Playing Cd Or Radio
NOTE Receiving Traffic Information While If no buttons are pressed within 5 seconds after pressing the 3/P. Playing CD or Radio PTY button, the PRIORITY PTY mode is automatically cancelled. Press the button or move the Flipper Press the T.INFO/ANNC. button repeatedly until the switch up or down within 5 seconds while "News"... -
Page 14: Cd Player Operation
CD Player Operation Insert a disc with the label side facing up. The disc will be pulled into the unit automatically. The SOURCE/ movable display will close and playback will begin. POWER When a disc is already inserted, press the SOURCE/ POWER button to switch to the CD mode. -
Page 15: Music Sensor (Skip)
Music Sensor (Skip) Momentarily press the button once during CD play to return to the beginning of the current track. If you wish to access the beginning of a track further back, repeatedly press until you reach the desired track. Press the button once to advance to the beginning of the next track. -
Page 16: Other Functions
Other Functions MP3 mode (When MP3 compatible changer is connected): MODE Flipper switch ID3 TAG DISPLAY FOLDER/FRAME DISPLAY FILE/FRAME DISPLAY TITLE DISPLAY TITLE ∗1 Displayed during playback of a disc with CD Text. Nothing will be displayed when the CD contains no Displaying the Title/Text text data. -
Page 17: Titling Discs/Stations
Titling Discs/Stations Erasing Disc Title/Station Title Press the TITLE button and select the title display Press the TITLE button to select the Title Display. mode. Then, press again and hold for at least 2 seconds. For details, see “Displaying the Title/Text” (see page •... -
Page 18: Sound Setup Operation
Sound Setup Operation Turning Defeat Mode On/Off By setting Defeat ON, all previously adjusted in the bass MODE Flipper switch engine mode (except subwoofer mode) settings will return to the factory defaults. Press the DEFEAT button for more than 2 seconds to turn Defeat on. -
Page 19: Setting The Bass Control
Setting the Bass Control Setting the Treble Control You can change the Bass Frequency emphasis to create You can change the Treble Frequency emphasis to your own tonal preference. create your own tonal preference. Press the bass engine button to change to the bass Press the bass engine button to change to the bass engine mode. -
Page 20: Setup Operation
SETUP Operation Sound (Beep) Guide Function This function will give audible feedback with varying MODE Flipper switch tones depending upon the button pressed. Press and hold the F/SETUP button for at least 2 seconds. The display changes to the SETUP screen. Move the Flipper switch up or down to select BEEP. -
Page 21: Setting Time
Setting Time Subwoofer On and Off Press and hold the F/SETUP button for at least 2 Press and hold the F/SETUP button for at least 2 seconds. The display changes to the SETUP screen. seconds. The display changes to the SETUP screen. Move the Flipper switch up or down to select CLOCK Move the Flipper switch up or down to select ADJUST. -
Page 22: Navigation Interruption And Adjusting Its Volume (Navi Mix)
SETUP Operation Auto Volume Setting This is a function that changes the Volume, Bass value SOURCE/ POWER MODE Flipper switch according to the car speed pulse for the compensation of hearing by noise. The desirable compensation amount can be selected from 6 patterns. Press and hold the F/SETUP button for at least 2 seconds. -
Page 23: Turning Mute Mode On/Off
Demonstration When the setting is completed, press the F/SETUP button to return to the normal mode. This unit has the Demonstration feature which simulates To adjust the volume, etc., first press the SOURCE/ the display functions on the display panel. POWER button and select the AUX mode, then make the necessary adjustment. -
Page 24: Changer Operation (Optional)
Press the BAND button on this unit or the Remote NOTES Control (optional) to activate the CD Changer Selection • The controls on the INA-N333R for CD Changer operation are mode. operative only when a CD Changer is connected. • The DVD changer (optional) is controllable from the INA- N333R as well as the CD changer. -
Page 25: Music Sensor (Skip)
Music Sensor ( Skip ) M.I.X. ( Random Play ) Momentarily press the button once during CD play Press the F/SETUP button. The "FUNC" indicator will to return to the beginning of the current track (file). If illuminate. you wish to access the beginning of a track (file) further back, repeatedly press until you reach the desired track Within 5 seconds, press the 4 ( ) button in the play... -
Page 26: Selecting Folders (Only For Mp3 Compatible Changer)
Changer Operation (optional) Setting the Range of MP3 File Selection (only for MP3 compatible changer) MODE Flipper switch When an MP3 compatible CD changer is connected, you can set the range of MP3 file selection to “entire disc contents” or “folder contents only.” Press and hold the F/SETUP button for at least 2 seconds. -
Page 27: Dab Operation (Optional)
DAB Operation (optional) Tips When you use DAB, you can select a desired ensemble which may contain one or more services, any of which can be received. SOURCE/ Furthermore, each service contains a Service Component, which POWER BAND/TEL. itself can contain any number of Primary or Secondary services, depending on the Service Component. -
Page 28: Receiving The Memorized Service
DAB Operation (optional) By selecting the mode in the “Changing the Display Mode” section (see page 27), the display shows the status of the broadcasting stations that have been TUNE/A.ME BAND/TEL. Flipper switch received as follows: Ensemble/Service Label Display: the Ensemble/ Service Label of received station is displayed. -
Page 29: Turning On/Off Traffic News Announcement
Turning ON/OFF Traffic News Press the button to set ON/OFF for the selected Announcement. Announcement Repeat Steps 3 and 4 to set more. When you set to ON, you can automatically receive the To set the Announcement Select mode OFF, press the Traffic News. -
Page 30: Receiving Announcement Information Of Dab Local Stations
DAB Operation (optional) Setting for Automatic Change from DAB to RDS MODE Flipper switch When the DAB reception is poor, you can set this selection ON to automatically change to the RDS station (a station that can be received) within the same broadcasting station until good reception is achieved. -
Page 31: Mobilehub Link Operation (Optional)
• Even if the power of the portable telephone is OFF, when INA-N333R is set to the telephone mode, the power of the portable telephone will be turned ON. • Even if the ACC power of the vehicle is turned OFF (even if... -
Page 32: Incoming Calls
MobileHub Link Operation (optional) Press the OK button or MODE knob to place a call. If you press and hold the Preset button selected in step 2 for at least 2 seconds, you can place the call directly. BAND/TEL. MODE Flipper switch Press and hold the BAND/TEL. -
Page 33: Dial Call (Only For Operation On Optional Remote Control)
SMS (Short Message Service) Press the BAND/TEL. button to select “DIALED” (outgoing history), “RECEIVED” (incoming history) or Operation “MISSED” (incoming history). • If no history is registered to any of the lists, NO You can receive short messages and display the MEMORY is displayed. -
Page 34: Remote Control Operation
Remote Control Operation The recommended remote control for this model is the RUE-4191. Operation is also possible from the RUE-4135; however, a portion of the functions will be limited. Operation on Remote Control RUE-4191 (Optional) You can operate it with the optional remote control (RUE-4191). Change the EXT DVD/AUDIO/NAV. Switch, on the side of the remote control, to AUDIO. -
Page 35: Operation On Remote Control Rue-4135 (Optional)
EXT DVD/AUDIO/NAV. Switch *2 This button is used in conjunction with an optional Ai-NET TV/MONI. Switch (Push) processor. Set to the “AUDIO” side to operate the INA-N333R of *3 When the optional Junction Box and cellular phone are Audio. connected. -
Page 36: Information
If the above-mentioned solution does Unable to tune stations in the seek mode. not solve the problem, consult your nearest ALPINE dealer. • You are in a weak signal area. - Make sure the tuner is in the DX mode. -
Page 37: Indication For Cd Player
• No CD is inserted. • Malfunction in the CD Changer. - Insert a CD. - Consult your Alpine dealer. Press the magazine eject button • Although a disc is inserted, “NO DISC” is displayed and the and pull out the magazine. -
Page 38: Specifications
Information Specifications FM TUNER SECTION GENERAL Tuning Range 87.5 – 108.0 MHz Power Requirement 14.4 V DC 0.7 µV Mono Usable Sensitivity (11–15 V allowable) 45 W × 4 Alternate Channel Selectivity 90 dB Maximum Power Output Signal-to-Noise Ratio 65 dB Maximum Pre-Output Voltage 2 V/10k ohms ±14 dB at 60 Hz... -
Page 39: Installation And Connections
When connecting the INA-N333R to the fuse box, make sure the fuse for the intended circuit of the INA-N333R DO NOT INSTALL IN LOCATIONS WHICH MIGHT HINDER has the appropriate amperage. Failure to do so may result in VEHICLE OPERATION, SUCH AS THE STEERING WHEEL damage to the unit and/or the vehicle. -
Page 40: Installation
INA-N333R When your vehicle has the Bracket, mount the long hex bolt onto the rear panel of the INA-N333R and put the Rubber Cap on the hex bolt. If your vehicle does not have the Mounting Support, reinforce the head unit with the metal mounting strap (not supplied). -
Page 41: Installing The Gps Antenna
Installing the GPS Antenna Speed Sensor Lead or Parking Brake Lead Connection Mount the antenna on the roof. Clean dust and oil at the mounting location and mount For leads which need branching to the supplied speed the antenna. sensor and parking brake, use the solderless NOTES connectors. -
Page 42: Connection
Installation and Connections Connection ISO Antenna Convertor Plug Antenna ISO Antenna Plug (Yellow/Blue) PARKING BRAKE To the parking brake signal line (Pink/Black) AUDIO INTERRUPT IN To vehicle phone (Blue/White) REMOTE TURN-ON To amplifier or equalizer (Orange) DIMMER To the instrument cluster illumination lead To power antenna (Red) -
Page 43: System Switch
• Connect the ground lead securely to a bare metal spot (remove any paint, dirt or grease if necessary) of the car chassis. • If you add an optional noise suppressor, connect it as far away from the unit as possible. Your Alpine dealer carries various noise suppressors, contact them for further information. - Page 44 Installation and Connections Connection with optional RDS-TMC Receiver Box TMC-001P <INA-N333R> TMC-001P ACC (Ignition) (Red) Attached antenna Ignition Key Battery lead (Yellow) Ground (Black) Battery TMC-001P TMC Receiver Box (Sold Separately) ∗ For further information about the connection and installation of TMC-001P, refer to the owner’s manual of TMC-001P.
- Page 45 Händlerstemple Tipps der Polizei: [ Stellen Sie Ihr Fahrzeug stets gut sichtbar ab. [ Verschließen Sie Türen, Fenster, Schiebedach und Kofferraum immer, auch bei nur kurzer Abwesenheit. [ Lassen Sie keine Wertsachen sichtbar im Auto liegen. [ Wird Ihr Fahrzeug aufgebrochen, wenden Sie sich sofort an die nächste Polizeidienststelle. [ Belassen Sie Ihr Fahrzeug nach einem Aufbruch im Originalzustand.
- Page 46 Car Audio and Navigation Systems GERÄTE-PASS AUDIO SYSTEME Fahrzeugmarke: Typ: Amtl. Kennzeichen: Name des Halters: Straße: Wohnort: Bitte füllen Sie diesen Pass vollständig aus und bewahren Sie ihn außerhalb des Fahrzeugs auf: Im Falle eines Diebstahls wird für Sie die Schadensabwicklung mit der Versicherung einfacher, und Sie erleichtern der Polizei die Fahndung nach den Tätern.
Need help?
Do you have a question about the INA-N333R and is the answer not in the manual?
Questions and answers