Table of Contents
Advertisement
Available languages
Available languages
Advertisement
Table of Contents

Related Manuals for Kenmore Elite Oasis 110.7705 Series


Summary of Contents for Kenmore Elite Oasis 110.7705 Series
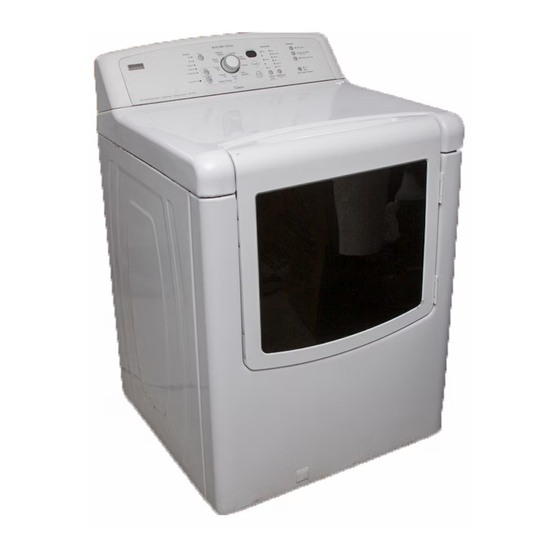
- Page 1 ® Oasis Canyon Capacity Gas Dryer Secadora a gas de capacidad colosal Models/Modelos 110.7705_, 7706_, 7707_, 7708_, 7709_ = color number/n_mero de color W10035120 Sears Roebuck and Co., Hoffman Estates, IL 60179 U.S.A. www.sears.com...
- Page 2 PROTECTION AGREEMENTS ............ DRYER USE ................. SERVICE NUMBERS ..........BACK COVER Starting Your Dryer ..............Stopping, Pausing or Restarting ..........KENMORE ELITE APPLIANCE WARRANTY ONE YEAR LIMITED WARRANTY DISCLAIMER OF IMPLIED WARRANTIES; LIMITATION OF REMEDIES When installed, operated and maintained according to all...
-
Page 3: Dryer Safety
DRYER SAFETY Your safety and the safety of others are very important. We have provided many important safety messages in this manual and on your appliance. Always read and obey all safety messages. This is the safety alert symbol. This symbol alerts you to potential hazards that can kill or hurt you and others. All safety messages will follow the safety alert symbol and either the word "DANGER"... -
Page 4: Tools And Parts
IMPORTANT SAFETY INSTRUCTIONS WARNING: To reduce the risk of fire, electric shock, or injury to persons when using the dryer, follow basic precautions, including the following: • Read all instructions before using the dryer. • Do not repair or replace any part of the dryer or attempt any servicing unless specifically recommended in this •... - Page 5 Installation s pacing for recessed area or closet installation The following spacing dimensions are recommended for this dryer. This dryer has been tested for spacing of 0" (0 cm) clearance on the sides and rear. Recommended spacing should be considered for the following reasons: •...
- Page 6 Electrical Shock Hazard Explosion Hazard Use a new CSA international approved gas supply line. Plug into a grounded 3 prong outleto install a shut-off valve, Do not remove ground prong. Securely tighten all gas connections. Do not use an adapter. if connected to LP, have a qualified person make sure Do not use an extension cord.
- Page 7 Must include a shutoff valve: Dryer Gas Pipe An individual manual shutoff valve must be installed within six (6) feet (1.8 m) of the dryer in accordance with the • The gas pipe that comes out through the rear of your dryer National Fuel Gas Code, ANSI Z223.1.
- Page 8 Exhaust 4" (10.2 cm) heavy metal exhaust vent and clamps must be used. DURASAFE venting products are recommended. Recommended hood styles are shown here, 4" (10.2cm) heavymetal exhaust vent (1_..4"cm) DURASAFE vent products can be purchased from your (10.2 cm) dealer.
- Page 9 Special provisions for mobile home installations Optional exhaust installations Venting systems come in many varieties. Select the type best for The exhaust vent must be securely fastened to a noncombustible your installation. portion of the mobile home structure and must not terminate beneath the mobile home.
-
Page 10: Plan Vent System
Examine the leveling legs. Find the diamond marking. Number of Type of Box or Angled 90 ° turns vent Louvered hoods or elbows hoods Rigid metal 64 ft (20 m) 58 ft (17.7 m) 4. Screw the legs into the leg holes by hand. Use a wrench to Flexible metal 36 ft (11 m) 28 ft (8.5 m) - Page 11 A combination of pipe fittings must be used to connect the dryer to the existing gas line. Shown is a recommended connection. Your connection may be different, according to 1. Using a 4" (10.2 cm) clamp, connect vent to exhaust outlet in the supply line type, size and location.
- Page 12 Reinstall the door 4. Remove the dryer door and the hinges by lifting upward on the door. Lay the door on a flat, protected surface, with the 1. Remove the 4 screws and 2 hinges from the dryer door. inside of the door facing up. Remove remaining 2 loose 2.
-
Page 13: Level Dryer
Install screws in the top hinge holes in the door. Do not tighten screws. Leave approximately 1A" (5 mm) of screw Compete exposed. 1. Check that all parts are now installed. If there is an extra part, go back through the steps to see which step was skipped. 2. -
Page 14: Options
DRYER USE STATUS MODIFIERS OPTIONS More F{_;_ Drum Ught bamp_ Medium Damp Dry S[tnal £'_I Down q Cle:_esDry < _ L0_, Wrinkle Guard W,hkl_Gua_ b ArO_ Dryness Temperature Cycle Signal Volume Fire Hazard Explosion Hazard No washer can completely remove oil. Keep flammable materials and vapors, such as... - Page 15 To make changes during an Auto Dry Cycle: © ing • PressSTOR Select the correct cycle and dryness level or temperature for your • Adjust Dryness Level. load. If an Auto Dry Cycle is running, the display shows the NOTE: Dryness Level selections can be made only while estimated cycle time when your dryer is automatically sensing using Auto Dry Cycles.
-
Page 16: Changing Cycles, Modifiers And Options
Damp Bulky/Bedding The Damp light illuminates in an Auto Dry Cycle when the laundry Use this cycle to get medium heat for drying large items that is approximately 80% dry. Damp Dry Signal beeps, if selected. require very long drying times such as jackets, comforters and See "Options."... - Page 17 EXPRESS Use this cycle for drying small loads or loads that need a short > Hgh drying time. MediumHigh Medium Touch Up Use this cycle to help smooth out wrinkles from such items as > Low clothes packed in a suitcase or items wrinkled from being left in ExtraLow the dryer too long.
- Page 18 The DAMP DRY SIGNAL is useful when drying bedsheets/linens Changing Modifiers and Options after pressing Start in a mixed load. When the signal goes off, open the door to stop You can change a Modifier or Option anytime before the selected the dryer, rearrange the load inside the dryer, close the door and Modifier or Option begins.
-
Page 19: Dryer Care
3. Place wet items on top of the rack. Allow space around items for air to circulate. The rack does not move, but the drum will DRYER CARE rotate. Make sure items do not hang over the edges or between rack grille. Keep dryer area clear and free from items that would obstruct the flow of combustion and ventilation ain... - Page 20 As needed cleaning Laundry detergent and fabric softener residue can build up on the Removing Acoumufs { d lint screen. This buildup can cause longer drying times for your clothes, or cause the dryer to stop before your load is completely From Inside the Dryer Cabinet dry.
-
Page 21: Troubleshooting
TROUBLESHOOTING First try the solutions suggested here and possibly avoid the cost of a service call... Dryer will not run Clothes are not drying satisfactorily, drying times are too long, or load is too hot Has a household fuse blown, or has a circuit breaker tripped? •... -
Page 22: Protection Agreements
Fabric softener sheets added to a partially dried load can stain your garments. Drum stains are caused by dyes in clothing (usually blue jeans). This will not transfer to other clothing. Loads are wrinkled • Was the load removed from dryer at the end of the cycle? Explosion Hazard •... -
Page 23: Table Of Contents
JNDICE GARANTIA ..................Sugerencias de ciclos y secado ..........Luces de estado ................. SEGURIDAD DE LA SECADORA ..........Ciclos ..................INSTRUCCIONES DE INSTALACION ......... Modificadores ................Herramientas y piezas ............... Opciones ..................Requisites de ubicaci6n ............SeSal de ciclo (Cycle Signal) ............Requisites electricos .............. -
Page 24: Seguridad De La Secadora
SEGURIDAD DE LA SECADORA Su seguridad y la seguridad de los demas es muy importante. Hemos incluido muchos mensajes importantes de seguridad en este manual yen su electrodomestico. Lea y obedezca siempre todos los mensajes de seguridad. Este simbolo le llama la atenci6n sobre peligros potenciales que pueden ocasionar la muerte o una lesi6n a usted y a los demas. - Page 25 INSTRUCCIONES IMPORTANTES DE SEGURIDAD ADVERTENClA: A fin de reducir el riesgo de incendio, descarga electrica o de daho alas personas que usen la secadora, deben seguirse las precauciones basicas, incluidas las siguientes: Lea todas las instrucciones antes de usar la secadora. No repare o reemplace ninguna pieza de la secadora ni trate de repararla a menos que esto se recomiende No coloque los objetos expuestos...
-
Page 26: Instrucciones De Instalacion
INSTRUCCIONES DE INSTALACION ReOna las herramientas y piezas necesarias antes de comenzar la instalaci6n. Lea y siga las instrucciones provistas con cualquiera de las herramientas enlistadas aquf. • Nivel Llave para tubes de 8"610" • Abrazaderas para ducto Llave de tuercas •... -
Page 27: Requisites De Ventilaci6N
Espacios para la Instalacibn La ubicaci6n debe ser Io suficientemente grande para poder abrir 3"* completamente la puerta de la secadora. (7,6ore) '48pulg. 2. (310 ¢m 2) - Dimensiones de la secadora (45,7 cm) 24pulg. 2. 31,, (l_cm_)- -I;_;_. (7,6cm) (73,66cm) (2,5cm) (2.5cm) (74.3cm) (12,7cm) A. - Page 28 Peligro de E×plosion Peligro de Choque Electrico Use una linea de suministro de gas nueva con Conecte a un contacto de pared de cone×i6n a tierra de 3 terminaJes. aprobacion CSA Internacional. Instale una valvula de cierre. No quite la terminal de cone×i6n a tierra.
- Page 29 • Debe incluir una valvula de cierre: Requisitos de entrada del quemador Debe instalarse una valvula de cierre individual a una distancia de no mas de 6 pies (1,8 m) de la secadora de acuerdo con el C6digo Nacional de Gas combustible Elevaciones superiores a 2.000 pies (610 m):...
- Page 30 Abrazaderas Si usa un sistema de ventilacibn existente • Utilice abrazaderas para sellar todas las juntas. No debe conectarse ni asegurarse el ducto de escape con • Limpie la pelusa que esta en toda la Iongitud del sistema y tornillos ni con ningQn otro dispositivo que se extienda hacia asegL_rese de que la capota de ventilaci6n no este obstruida el interior de dicho ducto.
- Page 31 Seleccione su tipo de instalacibn de escape Instalaciones recomendadas de escape Las instalaciones tipicas tienen la ventilaci6n en la parte posterior de la secadora. Otras instalaciones son posibles. J ....A. Instalacidn est4ndar con ventilacidn en la parte posterior y conexiones indirectas B.
- Page 32 Determinacibn delaviadelductodeescape 1. Instale la capota de ventilaci6n. Emplee una masilla de • Seleccione la via que proporcione el trayecto mas recto y calafateo para sellar la abertura de la pared externa alrededor directo al exterior. de la capota de ventilaci6n. •...
- Page 33 Para su uso en casas rodantes 3. Abra la valvula de cierre en la linea de suministro. La valvula esta abierta cuando la manija esta paralela al tubo de gas. Las secadoras a gas deben ser aseguradas al piso en el memento de la instalaci6n.
- Page 34 Usted puede invertir el cierre de la puerta de la apertura a la 5. Quite los 4 tapones de plastico ubicados fuera de la abertura derecha a la apertura a la izquierda, si Io desea. de la puerta de la secadora. 1.
- Page 35 Vuelva a instalar la puerta Coloque los tornillos en los orificios de bisagra superiores en la puerta, No apriete los tornillos, Deje aproximadamente 1. Quite los 4 tornillos y las 2 bisagras de la puerta de la 1A" (5 mm) de tornillo expuesto. secadora.
-
Page 36: Nivelaci6N De La Secadora
Lea "Uso de la secadora". 1. Revise para cerciorarse de que todas las piezas esten instaladas. Si hay alguna pieza extra, vuelva a revisar todos Limpie el interior del tambor de la secadora meticulosamente los pasos para ver cual se omiti6. con un paso hQmedo para quitar residuos de polvo. -
Page 37: Uso De La Secadora
USO DE LA SECADORA STATUS MODIFIERS OPTIONS Drum Light Damp Damp Signal C_ol D own Norr_al Clot h es_y Wri_kle G_r(i ×tfa Low Wr_nkl_ G uard Air Dr_ Ch_'klintSCreen_ [o#d Soft Dryness T_mperature Cycle Signal Volume Peligro de Incendio Peligro de Explosi6n Ninguna lavadora puede eliminar completamente Mantenga los materiales... -
Page 38: Sugerencias De Ciclos Y Secado
El ajuste de sequedad prefijado es Normal cuando se • Si usted no oprime puesta en marcha dentro de los selecciona un ciclo de secado automatico. Puede 5 minutos de haber seleccionado el ciclo, la secadora se seleccionar un nivel de sequedad diferente segQn la apaga automaticamente. -
Page 39: Opciones
• La temperatura de secado y el nivel de secado Revisar el filtro de pelusa (Check Lint Screen) automatico estan prefijados cuando usted elije un ciclo La luz de revisar el filtro de pelusa (Check Lint Screen) le de secado automatico. Usted puede seleccionar un nivel recuerda que debe controlar el filtro de pelusa. - Page 40 Secado expreso (EXPRESS Ajustes prefijados de ciclos Use este ciclo para secar cargas peque_as o cargas que automaticos necesitan un tiempo de secado corto. Siga las instrucciones de cuidado de la etiqueta. Retoque (Touch Up) Use este ciclo para alisar las arrugas de ropa que ha estado Ciclos de secado Temperatura Tiempo*...
- Page 41 Modiflcadores de los ciclos temporizados Usted puede personalizar sus ciclos al seleccionar opciones. Use el modificador de temperatura para seleccionar temperaturas para los ciclos temporizados. Presione OPTIONS Temperatura (TEMPERATURE) hasta que se ilumine el ajuste deseado de temperatura. Drum Light NOTA: Los modificadores de temperatura no se pueden usar con...
-
Page 42: Sesal De Ciclo (Cycle Signal)
3. Para seleccionar un nuevo ajuste de secado, presione nuevamente el bot6n de nivel de sequedad (Dryness Level) hasta que aparezca el ajuste de secado deseado. Se6al de ciclo (Cycle Signal) NOTA: Entre los ciclos de ajustes, el ajuste actual no La serial de ciclo emite un sonido audible una vez que el ciclo de destellar&... -
Page 43: Cuidado De La Secadora
5. Seleccione secado programado (TIMED DRY) y ajuste el tiempo (TIME ADJUST) mas tiempo (MORE TIME) o menos CUIDADO DE LA SECADORA tiempo (LESS TIME). Consulte el cuadro a continuaci6n. 6. Seleccione el ajuste deseado de temperatura para el tipo de telas en la carga presionando temperatura (TEMPERATURE). -
Page 44: Limpieza Del Filtro De Pelusa
Limpieza segt_n la necesidad Los residuos de detergente de lavanderia y suavizante de telas =.,_ .... _:,;+,s_2 i;l.,._ ,s..,_:¢_,.,. c..,, y _;= l]%IdSIq pueden acumularse en el filtro de pelusa. Esta acumulaci6n puede ocasionar tiempos de secado mas prolongados para su Cuidado para las vacaciones ropa, o hacer que la secadora se detenga antes de que su carga... -
Page 45: Solucion De Problemas
SOLUCION DE PROBLEMAS Pruebe primero las soluciones aqui sugeridas y posiblemente se evite el costo de una visita de servicio t_cnico... La secadora no funciona Las prendas no se secan satisfactoriamente, los tiempos de secado son demasiado largos, la carga est& demasiado caliente •... - Page 46 El tiempo del ciclo es demasiado corto Peligro de Peso IE×cesivo Use doe o rnas personas para mover e instalar Peligro de Explosibn la secadorao Mantenga los rnateriales y vapores inflarnables, come No eeguir esta instruceion puede ocasionar la gasolina, lejos de la secadorao lesion en la espalda u otro tipo de lesiones.
-
Page 47: Contratos De Proteccion
CONTRATOS DE PROTECCION Contratos Maestros de Proteccibn Una vez adquirido el Contrato, tan s61o tiene que Ilamar para fijar la visita de servicio tecnico. Usted puede Ilamar a cualquier hora, iFelicitaciones por su inteligente adquisici6n! Su nuevo producto de dfa o de noche, o fijar una visita tecnica en internet. Kenmore _ ha sido dise_ado y fabricado para brindarle aSos de funcionamiento confiable. - Page 48 Your Home For repair-in your home-of all major brand appliances, lawn and garden equipment, or heating and cooling systems, no matter who made it, no matter who sold it! For the replacement parts, accessories owner's manuals that you need to do-it-yourself. For Sears professional installation of home appliances and items like garage door openers and water heaters.
Need help?
Do you have a question about the Elite Oasis 110.7705 Series and is the answer not in the manual?
Questions and answers
Que sucede si aparece Check Lint Screen