Table of Contents
Advertisement
Service
This manual is to be used by qualified appliance
technicians only. Maytag does not assume any
responsibility for property damage or personal
injury for improper service procedures done by
an unqualified person.
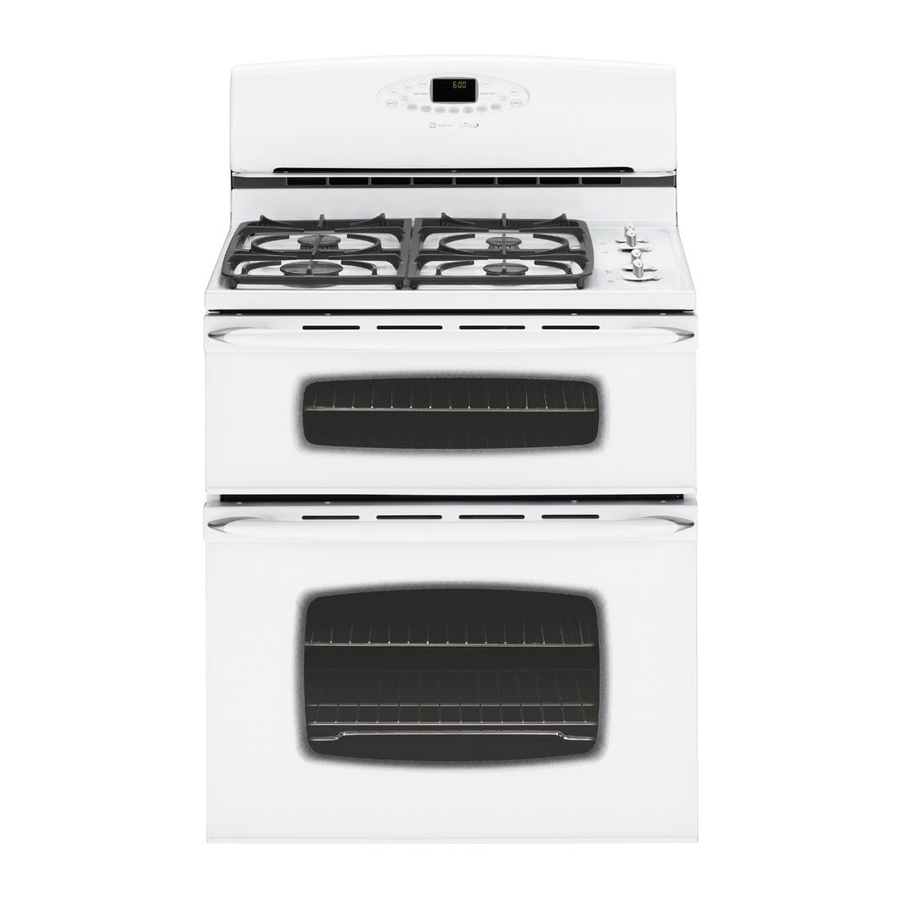
Freestanding
Double Oven
Gas Range
This Base Manual covers general information
Refer to individual Technical Sheet
for information on specific models
This manual includes, but is
not limited to the following:
MGR6775ADB/Q/S/W
MGR6875ADB/Q/S/W
16023415
August 2004
©
2004 Maytag Services
Advertisement
Table of Contents
Troubleshooting

Related Manuals for Maytag MGR6775ADB


Summary of Contents for Maytag MGR6775ADB
- Page 1 Service This manual is to be used by qualified appliance technicians only. Maytag does not assume any This Base Manual covers general information responsibility for property damage or personal Refer to individual Technical Sheet injury for improper service procedures done by an unqualified person.
-
Page 2: Important Information
For further assistance, please contact: Customer Service Support Center CAIR Center Web Site Telephone Number WWW.MAYTAG.COM ..........1-800-688-9900 CAIR Center in Canada ........... 1-800-688-2002 Recognize Safety Symbols, Words, and Labels DANGER DANGER—Immediate hazards which WILL result in severe personal injury or death. -
Page 3: Table Of Contents
Oven Cavity Components (Gas) ......29 Appendix A Installation Instructions ......... A-2 Appendix B Use and Care Model MGR6775AD* ...... B-2 Use and Care Model MGR6875AD* ....B-12 Care and Cleaning ..........B-23 Appendix C LP Conversion ............C-2 ©2004 Maytag Services 16023415... -
Page 4: Safety Practices For Servicer
Soap and water solution should be used for this purpose. Apply solution to suspected area and watch for air bubbles which indicates a leak. Correct leaks by tightening fittings, screws, connections, applying approved compound, or installing new parts. 16023415 ©2004 Maytag Services... -
Page 5: Receiving Oven
• Wear proper apparel. Loose fitting or hanging garments these items and become seriously injured. should never be worn when using oven. Flammable material could ignite if brought in contact with flame or hot oven surfaces which may cause severe burns. ©2004 Maytag Services 16023415... -
Page 6: Baking, Broiling, And Roasting
Regulator must be set for the type of gas being used Natural or LP. After servicing regulator, make certain it is set properly before completing service. 16023415 ©2004 Maytag Services... -
Page 7: General Information
Downdraft Cooktop or Warming Drawer Eyelevel Range Grill Range (20") Feature Content Range (36") 1000-3999 Brands Drop In (24") 4000-6999 Maytag/Amana Wall Oven (27") 7000-9999 Jenn Air Range, Free-Standing (30") Slide-In (30") Range Hood Wall Oven RV Range RV Top ©2004 Maytag Services 16023415... -
Page 8: Specifications
Placement of the Oven servicer: This freestanding range must be placed in the kitchen or • For Maytag product call 1-800-462-9824 or visit the comparable room. All safety guidelines must be followed Web Site at www.maytag.com (see Chapter 2) and free air flow around the range is •... -
Page 9: Grounding
UL listed adapter other lead to ground. Circuit tester should light. (available at most hardware stores). Larger slot on adapter must be aligned with larger slot in the wall receptacle to provide proper polarity. ©2004 Maytag Services 16023415... -
Page 10: Range Description
Range Description Electronic Oven Control Backguard Data Plate Oven Vent Surface Controls Broiler Surface Burners Bake Burner Oven Rack Oven Window Broiler Anti-Tip Bracket Leveling Leg Bake Burner Oven Racks Door Gasket 16023415 ©2004 Maytag Services... -
Page 11: Troubleshooting Procedures
– Control specific Diagnostic Code Display Mode may be activated by pressing and holding the AUTOSET pad for 3 seconds at power-up. Diagnostic Code Display Mode may be entered only when applying power to the control. ©2004 Maytag Services 16023415... - Page 12 Unlock switch not closed LOCK flashes Disables Clean and Lockout functions 9d31 Latch both locked and unlocked LOCK flashes Disables Clean and Lockout functions 9d32 Latch both locked and unlocked LOCK flashes Disables Clean and Lockout functions 16023415 ©2004 Maytag Services...
- Page 13 If the control is in a known good lock position and the unlock switch becomes faulted: • The control will not fault. • After the function is canceled and unlock is attempted, the control will attempt to unlock the latch according to the procedures in these notes. ©2004 Maytag Services 16023415...
-
Page 14: Component Troubleshooting
• Check 120 VAC to ignitor, if no No voltage from control ....... No oven operation in bake or broil. voltage, replace control. Loose wire connection or broken wire ..• Verify all connections are clean and tight, replace broken wire. 16023415 ©2004 Maytag Services... - Page 15 Fan motor does not operate. next step. Failed fan motor or winding/frozen shaft ..• Check motor winding for continuity. Check for a frozen motor shaft. Check for broken wiring between motor and neutral terminal block. ©2004 Maytag Services 16023415...
- Page 16 Oven door locked ........• Verify oven door is unlocked after a Part or all of the appliance does not work self-clean cycle Delayed cooking/cleaning......• Verify oven is not set for delayed cooking or cleaning program 16023415 ©2004 Maytag Services...
-
Page 17: Component Testing Procedures
Ignitor Test for voltage at terminals....120 VAC Test for the amount of amperage in the 3.2 − 3.6 Amps If not replace. circuit ........... (Ignitor may glow but not have sufficient amperage to open valve). ©2004 Maytag Services 16023415... -
Page 18: Testing Procedures
Approximately 28 to 33 Ω. Convection Element Remove wires, check resistance ..Convection Motor Check motor windings to ground ..No continuity. Approx. 900 RPM. Model MGR6875AD* Power cord 3-wire Verify resistance of wires to Continuity terminals. 16023415 ©2004 Maytag Services... - Page 19 Upper Bake 4 & 14 Continuity Timer 2 4 & 7 Continuity Cook & Hold 6 & 16 Continuity Upper Broil 14 & 15 Continuity Timer 1 4 & 16 Continuity Model MGR6775AD* Membrane and Overlay ©2004 Maytag Services 16023415...
- Page 20 The last 5 diagnostic codes will be stored Model MGR6875AD* Display Autoset pads for 3 seconds. in the non-volatile memory. See “Quick Test Mode.” Cycle through the codes using the See “Description of Error Codes” for number pads 1 through 5. explanation. 16023415 ©2004 Maytag Services...
- Page 21 The last 5 diagnostic codes will be stored Model MGR6775AD* Code Display for 3 seconds within 5 minutes of power up. in the non-volatile memory. See “Quick Test Mode.” Cycle through the codes. See “Description of Error Codes” for explanation. ©2004 Maytag Services 16023415...
-
Page 22: Quick Test Mode
Volume level 6 bars 1 to 8 bars Temp C/F Degrees F Degrees C Language English French, Spanish Default Press AUTO SET for Factory Settings Display On/Off Clock Clock Display is ON Clock Display is OFF 16023415 ©2004 Maytag Services... - Page 23 Oven can be adjusted from -35° to +35° F (-37.2° to + 1.6° C). To avoid over adjusting oven, move temperature -5° F (2.7° C) each time. Push OVEN CANCEL button. ©2004 Maytag Services 16023415...
-
Page 24: Disassembly Procedures
4. Remove bolt securing shut-off valve from manifold. 6. Reverse procedures to reassemble. 5. Disconnect tubing from manifold to the regulator. 6. Reverse procedures to reassemble. NOTE: Perform gas leak test. 16023415 ©2004 Maytag Services... -
Page 25: Oven Sensor
NOTE: The oven door on a new range may feel “spongy” hands or fingers. when closed. This is normal and will decrease Hold with a cloth or paper towel. with use. 5. Reverse procedures to reassemble. ©2004 Maytag Services 16023415... -
Page 26: Gasket And Door Disassembly
7. Remove screws securing door baffle to liner. 8. Remove screws securing door baffle to window pack. 9. Remove door baffle and insulation wrap. 10. Remove screws securing window pack to liner. (Window pack comes out as an assembly.) Lower Oven Door 16023415 ©2004 Maytag Services... -
Page 27: Lower Latch Assembly
6. Disconnect and label wiring from door lock switch and 5. Remove screws securing latch assembly and slide motor. assembly from range. 7. Remove screws securing latch assembly and slide 6. Reverse procedure to reassemble. assembly from range. 8. Reverse procedure to reassemble. ©2004 Maytag Services 16023415... -
Page 28: Oven Door Hinge
7. Disconnect and label wire terminals from heat and/or Replacing Range" procedure. element and assembly (connector block). 3. Remove screws securing bottom rear access panel to 8. Remove assembly from cavity. chassis. 9. Reverse procedures to reassemble. 16023415 ©2004 Maytag Services... -
Page 29: Oven Racks
It fits in the left, upper portion of the oven and provides space for a vegetable dish when a large roaster is on the lower rack. Contact your Maytag dealer for the "HALFRACK" Accessory Kit or call 1-800-688-8408. ©2004 Maytag Services... - Page 30 Appendix A A–1 16023415 ©2004 Maytag Services...
- Page 31 Installation Instructions Maytag Double Oven Gas Range Cuisinière à gaz à deux fours Maytag/Estufa a Gas de Horno Doble Maytag Installation Instructions/Instructions d’installation/Instrucciones de Instalación. MODEL SERIES: MGR6775, MGR6875/ SÉRIE DE MODÈLE : MGR6775, MGR6875/ SERIES DEL MODELO: MGR6775, MGR6875 INSTALLER: Leave these instructions with the appliance./INSTALLATEUR : Laissez ces instructions avec l’appareil./...
- Page 32 CSA Standard C22.1 - corner of backguard. User may experience occasional circuit tripping if Canadian Electrical Code Part 1. Ground Fault Circuit Interrupter (GFCI) outlet or breaker is in use. A–3 16023415 ©2004 Maytag Services...
-
Page 33: Installation Instructions
Installation Instructions ©2004 Maytag Services 16023415 A– 4... - Page 34 Installation Instructions A–5 16023415 ©2004 Maytag Services...
- Page 35 Installation Instructions ©2004 Maytag Services 16023415 A– 6...
- Page 36 Installation Instructions A–7 16023415 ©2004 Maytag Services...
- Page 37 Installation Instructions ©2004 Maytag Services 16023415 A– 8...
- Page 38 Installation Instructions A–9 16023415 ©2004 Maytag Services...
- Page 39 Installation Instructions ©2004 Maytag Services 16023415 A– 10...
- Page 40 Installation Instructions A–11 16023415 ©2004 Maytag Services...
- Page 41 Appendix B ©2004 Maytag Services 16023415 B–1...
-
Page 42: Use And Care Model Mgr6775Ad
Low to High. The knobs can be set on or between any of the settings. Graphics next to the knob identify which burner the knob controls. For example, the graphic at right shows the left front burner location. B–2 16023415 ©2004 Maytag Services... -
Page 43: Burner Grates
©2004 Maytag Services 16023415 B–3... -
Page 44: Oven Cooking
Bake, Clean, Delay or Cook & Hold. If more than 30 seconds elapse between touching a function pad and the More+ or Less- pad, the function will be canceled and the display will return to the previous display. B–4 16023415 ©2004 Maytag Services... -
Page 45: Fault Codes
A beep will sound and the current setting cannot be locked. (°F or °C) will appear in the display. The current time of day will remain in the display when the controls are locked. ©2004 Maytag Services 16023415 B–5... -
Page 46: Cook & Hold
Cook & Hold allows you to bake for a preset amount of time, followed by a one-hour Keep Warm cycle. To set Cook & Hold: 1. Press the Cook & Hold pad once for upper oven or twice for lower oven. cont. B–6 16023415 ©2004 Maytag Services... - Page 47 • Do not use delayed baking if oven is already hot. Delay time can be set from 10 minutes (10:00) to 11 hours, 59 minutes (11:59). ©2004 Maytag Services 16023415 B–7...
-
Page 48: Keep Warm
15 minutes more. - use only oven-safe plates, check with the manufacturer. - do not set warm dishes on a cold surface as rapid temperature changes could cause crazing or breakage. B–8 16023415 ©2004 Maytag Services... - Page 49 * When broiling fish, spray broil pan insert with cooking oil. Do not turn fish filets. ** Broiling times are approximate and may vary depending on the thickness of the food. Turn meat halfway through cooking times. ©2004 Maytag Services 16023415...
-
Page 50: Pilotless Ignition
Sabbath Mode. • If power fails, the ovens will power up in Sabbath Mode • When the Sabbath Mode is started, no preheat beep will with 72 hours remaining and no cycle active. sound. B–10 16023415 ©2004 Maytag Services... -
Page 51: Oven Racks
• Place rack on the rack support in the oven; tilt the front end is on the lower rack. Contact your up slightly; slide rack back until it clears the lock-stop Maytag dealer for the “HALFRACK” position; lower front and slide back into the oven. Accessory Kit or call 1-877-232- 6771 USA and Canada to order. -
Page 52: Use And Care Model Mgr6875Ad
Low to High. The knobs can be set on or between any of the settings. Graphics next to the knob identify which burner the knob controls. For example, the graphic at left shows the left front burner location. B–12 16023415 ©2004 Maytag Services... - Page 53 If this occurs, turn the knob to the OFF position, wait several seconds and relight the burner. • The flame should be adjusted so it does not extend beyond the edge of the pan. ©2004 Maytag Services 16023415 B–13...
- Page 54 When the clock display is canceled, press the number pads, the function will be canceled and the display Clock pad to briefly display the time of day. will return to the previous display. B–14 16023415 ©2004 Maytag Services...
- Page 55 °C. 3. Wait 4 seconds and the new setting will be accepted. 4. If the Autoset pad is not pressed within 30 seconds, the control will return to the existing setting. ©2004 Maytag Services 16023415 B–15...
- Page 56 1. Press the Convect Bake pad. • PREHEAT will turn off. • LOWER BAKE and FAN will flash • To recall set temperature during preheat, press Bake • 000 will flash in the display. pad. B–16 16023415 ©2004 Maytag Services...
-
Page 57: Roasting With Convection
• LOWER ROAST, the FAN icon and 00:00 • Refer to “Cooking Made Simple” booklet for suggested will flash in the display. roasting temperatures and times. • 000 lights in the display. ©2004 Maytag Services 16023415 B–17... - Page 58 * When broiling fish, spray broil pan insert with cooking oil. Do not turn fish filets. ** Broiling times are approximate and may vary depending on the thickness of the food. Turn meat halfway through cooking times. B–18 16023415 ©2004 Maytag Services...
- Page 59 * When broiling fish, spray broil pan insert with cooking oil. Do not turn fish filets. ** Broiling times are approximate and may vary depending on the thickness of the food. Turn meat halfway through cooking times. ©2004 Maytag Services 16023415...
- Page 60 15 minutes more. - use only oven-safe plates, check with the manufacturer. - do not set warm dishes on a cold surface as rapid temperature changes could cause crazing or breakage. B–20 16023415 ©2004 Maytag Services...
- Page 61 • If power fails, the ovens will power up in Sabbath Mode with 72 hours remaining and no cycle active. • If the oven light is desired while in Sabbath Mode, it must be turned on before the Sabbath Mode is started. ©2004 Maytag Services 16023415 B–21...
- Page 62 Contact your Maytag dealer for the RACK 1: Use for three-rack baking. Use for roasting large “HALFRACK”...
-
Page 63: Care And Cleaning
Note: Use a dry towel or cloth to wipe up spills, especially acidic or sugary spills. Surface may discolor or dull if soil is not immediately removed. This is especially important for white surfaces. ©2004 Maytag Services 16023415 B–23... -
Page 64: Cleaning Procedures
• Discoloration –– Using a damp sponge or soft cloth, wipe with Cameo Stainless Steel Cleaner*. Rinse immediately and dry. To remove streaks and restore luster, follow with Stainless Steel Magic Spray*. * Brand names are registered trademarks of the respective manufacturers. ** To order call 1-877-232-6771 USA or 1-800-688-8408 Canada. B–24 16023415 ©2004 Maytag Services... - Page 65 Appendix C ©2004 Maytag Services 16023415 C–1...
-
Page 66: Lp Conversion
LP Conversion Instructions C–2 16023415 ©2004 Maytag Services... -
Page 67: Lp Conversion Instructions
LP Conversion Instructions ©2004 Maytag Services 16023415 C–3... - Page 68 LP Conversion Instructions C–4 16023415 ©2004 Maytag Services...
- Page 69 LP Conversion Instructions ©2004 Maytag Services 16023415 C–5...
Need help?
Do you have a question about the MGR6775ADB and is the answer not in the manual?
Questions and answers