Table of Contents

Related Manuals for Ricoh FT3813, FT4615, FT4618


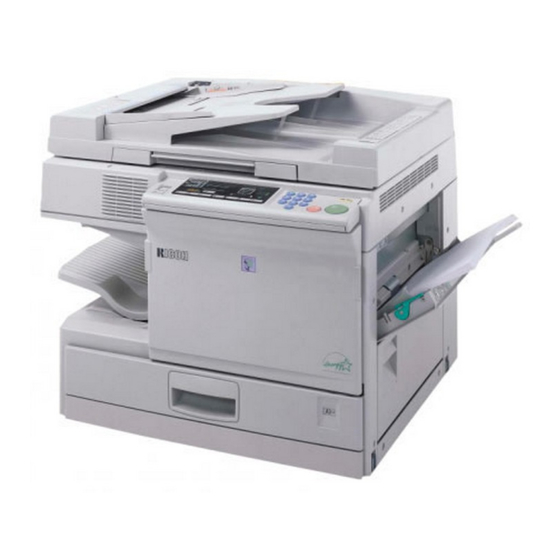
Summary of Contents for Ricoh FT3813, FT4615, FT4618
- Page 1 )76;46279482794; )76;46279482794; )76;46279482794; )76;46279482794; OPERATING INSTRUCTIONS Read this manual carefully before you use this product and keep it handy for future reference. For safety, please follow the instructions in this manual.
- Page 2 For good copy quality, Ricoh recommends that you use genuine Ricoh toner. Ricoh shall not be responsible for any damage or expense that might result from the use of parts other than genuine Ricoh parts in your Ricoh office product.
- Page 3 In accordance with IEC 60417, this machine uses the following symbols for the main power switch. a means POWER ON. c means STAND BY. Copyright © 1999 Ricoh Co., Ltd.
-
Page 4: Safety Information
Safety Information Safety Information When using your equipment, the following safety precautions should always be followed. Safety During Operation In this manual, the following important symbols are used: WARNING: Ignoring this warning could cause serious injury or even death. CAUTION: Ignoring this caution could cause injury or damage to property. - Page 5 Safety Information WARNINGS: Connect the power cord directly into a wall outlet and never use an extension cord. Disconnect the power plug (by pulling the plug, not the cable) if the power cable or plug becomes frayed or otherwise damaged. To avoid hazardous electric shock or laser radiation exposure, do not remove any covers or screws other than those specified in this manual.
- Page 6 Safety Information CAUTIONS: Protect the equipment from dampness or wet weather, such as rain, snow, and so on. Unplug the power cord from the wall outlet before you move the equipment. While moving the equipment, you should take care that the power cord will not be damaged under the equipment.
-
Page 7: Energy Star Program
ENERGY STAR PROGRAM ENERGY STAR PROGRAM As an ENERGY STAR Partner, we have determined that this machine model meets the ENERGY STAR Guidelines for energy efficiency. The ENERGY STAR Guidelines intend to established an international energy-saving system for developing and introducing energy-efficient office equipment to deal with environment issues, such as global warming. -
Page 8: Table Of Contents
TABLE OF CONTENTS TABLE OF CONTENTS WHAT YOU CAN DO WITH THIS COPIER ..........x WHERE IT IS & WHAT IT IS ................ 2 COPIER EXTERIOR AND INTERIOR ............2 OPERATION PANEL ..................4 BASICS STARTING THE COPIER ................10 When The Main Switch Is In The Standby Position ........10 When The Energy Saver Indicator Is On.............11 COPY PAPER AND TONER COPY PAPER .................... - Page 9 TABLE OF CONTENTS COPYING BASIC COPYING ..................26 BASIC FUNCTIONS ..................28 Adjusting Copy Image Density ..............28 Photo Mode ....................29 Copying From The Bypass Feed Table ............. 30 Entering Copy Job Settings During The Warm-up Period (Auto Start) ..33 REDUCING AND ENLARGING ..............34 Reducing And Enlarging Using Preset Ratios (Preset R/E) .......
- Page 10 TABLE OF CONTENTS CLEARING MISFEEDS ................52 Check The Misfeed Location Display ............52 When A,B Or C Is Lit ...................53 When R Is Lit ....................53 When P Is Lit....................54 CHANGING THE COPIER’S SETTINGS CHANGING PAPER SIZE ................56 How To Change The Paper Size Of Paper Tray.........56 USER TOOLS....................
- Page 11 TABLE OF CONTENTS REMARKS .....................76 Copier ......................76 10-bin Sorter (Option).................. 76 SPECIFICATIONS COPIER......................78 DOCUMENT FEEDER (OPTION) ..............82 10-BIN SORTER (OPTION) ................83 INDEX INDEX ......................86 TROUBLESHOOTING...................90 viii...
- Page 12 TABLE OF CONTENTS MACHINE TYPES There are three models of this machine. The main differences between them are copy speed and paper tray capacity. To make sure which model you have, see the inside front cover. Copy speed Type 1 : 13 copies / minutes(A4 , 8 1/2"...
-
Page 13: What You Can Do With This Copier
WHAT YOU CAN DO WITH THIS COPIER WHAT YOU CAN DO WITH THIS COPIER Sorting into sets (123, 123, 123)* See pages 38 ~ 39. Stacking together all copies of a page (111, 222, 333)* See pages 40 ~ 41. Making one-sided copies from facing pages See pages 36 ~ 37. - Page 14 The bypass feed table is Copying photographic open. You can copy from it. originals. See pages 30 ~ 32. See page 29. Enlarging using preset ratios Reducing using preset ratios See page 34. See page 34. Make enlarged copies of this facing pages and stick them on the wall.
-
Page 15: Where It Is & What It Is
WHERE IT IS & WHAT IT IS WHERE IT IS & WHAT IT IS COPIER EXTERIOR AND INTERIOR... - Page 16 WHERE IT IS & WHAT IT IS 1. Left scale Use to align originals on the exposure glass. 2. Main switch Switches the copier between on and standby conditions. ("standby" means that the optional anticondensation heater is on.) 3. Copy tray Completed copies are delivered here.
-
Page 17: Operation Panel
WHERE IT IS & WHAT IT IS OPERATION PANEL Keys 1. Sorter key 6. Full Size key (option of Type 2 See page 26. and 3) See pages 38 ~ 41 7. Select Paper Tray key 2. Series Copies key Press to select a tray for the See page 36 paper feed. - Page 18 WHERE IT IS & WHAT IT IS 10. Auto Image Density key 14. Clear Modes/Energy Saver See page 28. Press to clear the copier of 11. Number keys previously entered settings. Use to enter the desired num- Press this key for more than 1 ber of copies.
- Page 19 WHERE IT IS & WHAT IT IS Indicators Type 1 Type 2 Type 3...
- Page 20 WHERE IT IS & WHAT IT IS 1. Stack indicator (option of 9. Ready indicator Type 2 and 3) Lights when the machine is ready to make copies. See page 10. See page 40. 10. Wait indicators 2. Sort indicator (option of Type 2 and 3) It is lit during the warm-up period.
- Page 21 WHERE IT IS & WHAT IT IS...
-
Page 22: Basics
KF2Jr-AE-3 BASICS STARTING THE COPIER ..................10 When The Main Switch Is In The Standby Position............... 10 When The Energy Saver Indicator Is On ..................11... -
Page 23: Starting The Copier
KF2Jr-AE-3 STARTING THE COPIER STARTING THE COPIER When The Main Switch Is In The Standby Position Turn on the main switch. Wait for the copier to warm-up. During the warm-up period (less than 35 seconds for Type 1 and 2, less than 45 seconds for Type3), Wait indicator is on. -
Page 24: When The Energy Saver Indicator Is On
KF2Jr-AE-3 STARTING THE COPIER When The Energy Saver Indicator Is On The copier is in Energy Saver mode. Press the Clear Modes/Energy Saver key to return to the ready condition. For details about Energy Saver, see page 43. The following actions will also return the copier to the ready condition: Opening or closing the optional document feeder. - Page 25 STARTING THE COPIER...
-
Page 26: Copy Paper And Toner
COPY PAPER AND TONER COPY PAPER......................14 Available Paper Sizes ........................14 Non-recommended Copy Paper ....................14 Notes For Copy Paper........................15 Paper Storage ..........................15 TONER........................16 Notes For Toner..........................16 Toner Storage ........................... 16... -
Page 27: Copy Paper
COPY PAPER COPY PAPER Available Paper Sizes Metric Version Inch Version Paper tray 11" x 17" " x 11" , A4 , A5 , B4 , B5 " x 14" Bypass feed table Standard sizes , A4 , A5 , A6 , B4 , B5 , B6... -
Page 28: Notes For Copy Paper
COPY PAPER Notes For Copy Paper Load paper with the copy side down in the paper tray, and with the copy side up in the bypass feed table. If copies are curled, try turning the copy paper over in the tray or table. If there is no improvement, change to copy paper with less curl. -
Page 29: Toner
TONER TONER Note: If you want to add toner, see page 51 Notes For Toner R WARNING Do not incinerate used toner or toner containers. Toner dust might ignite when exposed to an open flame. Dispose of used toner con- tainers in accordance with local regulations for plastics. -
Page 30: Originals
ORIGINALS RECOMMENDED ORIGINALS AND NON-RECOMMENDED ORIGINALS ....18 Recommended Originals........................ 18 Non-recommended Originals For The Optional Document Feeder......... 18 SETTING ORIGINALS ON THE EXPOSURE GLASS ..........19 SETTING ORIGINALS IN THE OPTIONAL DOCUMENT FEEDER ......20 Setting A Stack Of Originals......................20 Setting One Original At A Time ....................22... -
Page 31: Recommended Originals And Non-Recommended Originals
RECOMMENDED ORIGINALS AND NON-RECOMMENDED ORIGINALS RECOMMENDED ORIGINALS AND NON-RECOMMENDED ORIGINALS Recommended Originals Regarding originals that the optional document feeder can handle, see page Non-recommended Originals For The Optional Document Feeder Note: The following types of originals are not recommended for use with the document feeder. -
Page 32: Setting Originals On The Exposure Glass
SETTING ORIGINALS ON THE EXPOSURE GLASS SETTING ORIGINALS ON THE EXPOSURE GLASS Set the original after correction fluid and ink has completely dried. Not taking this precaution could mark the exposure glass and cause marks to be copied. Lift the platen cover or the op- tional document feeder. -
Page 33: Setting Originals In The Optional Document Feeder
SETTING ORIGINALS IN THE OPTIONAL DOCUMENT FEEDER SETTING ORIGINALS IN THE OPTIONAL DOCUMENT FEEDER Setting A Stack Of Originals You can insert a stack of originals of the same size into the document feeder. These originals are individually fed onto and removed from the exposure glass. - Page 34 SETTING ORIGINALS IN THE OPTIONAL DOCUMENT FEEDER Set the originals face up into the document feeder until the Insert Original indicator goes off. The last page should be on the bot- tom. The guides must touch both sides of the originals. Do not stack originals above the limit mark.
-
Page 35: Setting One Original At A Time
SETTING ORIGINALS IN THE OPTIONAL DOCUMENT FEEDER Setting One Original At A Time You can insert one original at a time into the document feeder. The original is automatically fed onto and removed from the exposure glass. Set the original after correction fluid and ink has completely dried. Not taking this precaution could mark the exposure glass and cause marks to be copied. - Page 36 SETTING ORIGINALS IN THE OPTIONAL DOCUMENT FEEDER Press the Start key. While the Auto Feed indicator is lit after an original is fed, set the next original. The original is auto- matically fed and copied. If you have set more than two origi- nals, the Auto Feed indicator is not lit after the last original is fed.
- Page 37 SETTING ORIGINALS IN THE OPTIONAL DOCUMENT FEEDER...
-
Page 38: Copying
KF2Jr-AE-6 COPYING BASIC COPYING ....................26 BASIC FUNCTIONS....................28 Adjusting Copy Image Density ..................... 28 Photo Mode............................29 Copying From The Bypass Feed Table ..................30 Entering Copy Job Settings During The Warm-up Period (Auto Start) ........33 REDUCING AND ENLARGING ................34 Reducing And Enlarging Using Preset Ratio (Preset R/E) ............ -
Page 39: Basic Copying
KF2Jr-AE-6 BASIC COPYING BASIC COPYING You can make copies that are the same size as your originals. Set your original on the exposure glass or in the optional document feeder. See page 19 or 20. Make sure that the Paper Size indicator is lit. - Page 40 KF2Jr-AE-6 BASIC COPYING Press the Start key. To stop the copier during a multicopy run, press the Clear/Stop key. Press the Start key to resume copy- ing, or press the Clear/Stop key again to clear the entered copy num- ber. Remove the copies from the copy tray.
-
Page 41: Basic Functions
KF2Jr-AE-6 BASIC FUNCTIONS BASIC FUNCTIONS Adjusting Copy Image Density To match the type of originals, adjust the image density. Auto image density If the Auto Image Density indi- cator is lit, the copier automat- ically controls the image density. If the indicator is not lit, press the Auto Image Density key. -
Page 42: Photo Mode
KF2Jr-AE-6 BASIC FUNCTIONS Photo Mode Use this mode when you copy the photographic originals. Press the Photo Mode key. If you wish to adjust the image density, use the Lighter (left) key or Darker (right) key. -
Page 43: Copying From The Bypass Feed Table
KF2Jr-AE-6 BASIC FUNCTIONS Copying From The Bypass Feed Table Use the bypass feed table to copy onto paper that cannot be set in the paper tray. OHP transparencies, adhesive labels, post cards, and translucent paper can be set into the bypass tray. Regarding the paper sizes and directions that can be set, see page 14 Number of sheets that can be set at one time:... - Page 44 KF2Jr-AE-6 BASIC FUNCTIONS Lift the paper hold lever. Swing out the extender if setting copy paper larger than A4:, 8 " x 11":. Slide the paper guides to the pa- per width. Insert the copy paper until it stops. The image will be copied on the side of paper that you place face up.
- Page 45 KF2Jr-AE-6 BASIC FUNCTIONS Press the Start key.
-
Page 46: Entering Copy Job Settings During The Warm-Up Period (Auto Start)
KF2Jr-AE-6 BASIC FUNCTIONS Entering Copy Job Settings During The Warm-up Period (Auto Start) If you press the Start key during the warm-up period, the Ready indicator will blink, then the copier will start copying after the warm-up period. Set your copy settings during warm-up pe- riod, then press the Start key. -
Page 47: Reducing And Enlarging
KF2Jr-AE-6 REDUCING AND ENLARGING REDUCING AND ENLARGING Regarding functions that cannot be used together with this function, page 44. Reducing And Enlarging Using Preset Ratios (Preset R/E) Reducing Press the Reduce key to select the preset reduction ratios. Enlarging Press the Enlarge key to select the preset enlargement ratios. -
Page 48: Reducing And Enlarging In 1% Steps (Zoom)
KF2Jr-AE-6 REDUCING AND ENLARGING Reducing And Enlarging In 1% Steps (Zoom) You can change the reproduction ratio from 61% to 141% (Type 1), from 50% to 200% (Type 2 and 3) in 1% steps. Press the Zoom Up (+) key re- peatedly, or hold down the key continuously, to increase the ratio in 1% steps. -
Page 49: Making Two-Sheets Copies From Book Originals (Series Copies)
KF2Jr-AE-6 MAKING TWO-SHEETS COPIES FROM BOOK ORIGINALS (SERIES COPIES) MAKING TWO-SHEETS COPIES FROM BOOK ORIGINALS (SERIES COPIES) You can make two-sheets copy from book originals. This function cannot be used for copy paper larger than A4 " x 11" The center of an original is determined according to the selected copy paper and reproduction ratio. - Page 50 KF2Jr-AE-6 MAKING TWO-SHEETS COPIES FROM BOOK ORIGINALS (SERIES COPIES) Or, set the original in the oprional document feeder. see pages 20 or 22. Make sure that the Paper Size indicator is lit, if not, press the Select Paper Tray key. Press the Start key.
-
Page 51: Finishing (Option Of Type 2 And 3)
KF2Jr-AE-6 FINISHING (OPTION OF TYPE 2 AND 3) FINISHING (OPTION OF TYPE 2 AND 3) Sorting Into Sets (123, 123, 123) (Sort) One copy of each originals is delivered to each bin and copies are collated into sets. Note: This function can be used only when your copier is equipped with the optional 10-bin sorter. - Page 52 KF2Jr-AE-6 FINISHING (OPTION OF TYPE 2 AND 3) Press the Sorter key to light the Sort(Upper) indicator. Set your original on the exposure glass or in the optional document feeder. See page 19 or 20. Enter the number of copies re- quired using the Number keys.
-
Page 53: Stacking Together All Copies Of A Page (111, 222, 333) (Stack)
KF2Jr-AE-6 FINISHING (OPTION OF TYPE 2 AND 3) Stacking Together All Copies Of A Page (111, 222, 333) (Stack) All copies of each original are delivered to the same bin. Note: This function can be used only when your copier is equipped with the optional 10-bin sorter. - Page 54 KF2Jr-AE-6 FINISHING (OPTION OF TYPE 2 AND 3) Press the Sorter key to light the Stack(Lower) indicator. Set your original on the exposure glass or in the optional document feeder. See page 19 or 20. Enter the number of copies re- quired using the Number keys.
-
Page 55: Copying With User Codes
KF2Jr-AE-6 COPYING WITH USER CODES COPYING WITH USER CODES The user code function allows you to restrict the copy operator and control the number of copies made. If the user code function is on, operators must input an authorized code before the machine can operate. Please contact your service representative to set the user code mode, or to get more information. -
Page 56: Saving Energy
KF2Jr-AE-6 SAVING ENERGY SAVING ENERGY With the Energy Saver, the copier is reset and uses less electricity. To have the Energy Saver automatically activated when the copier is auto re- set, set the user tools. See page 61. The following actions will cancel the energy saver mode: Opening or closing the optional document feeder. -
Page 57: Combination Chart
KF2Jr-AE-6 COMBINATION CHART COMBINATION CHART This combination chart shows which modes can be used together. means that these modes can be used together. means that the mode after you select will be the mode you’re working in. means that these modes cannot be used together. Mode after you select Preset... -
Page 58: What To Do If Something Goes Wrong
KF2Jr-AE-7 WHAT TO DO IF SOMETHING GOES WRONG IF YOUR COPIER DOES NOT OPERATE AS YOU WANT ........46 IF YOU CANNOT MAKE COPIES AS YOU WANT..........48 LOADING PAPER....................49 Loading Paper In The Paper Tray ....................49 ADDING TONER .....................51 CLEARING MISFEEDS ....................52 Check The Misfeed Location Display.................... -
Page 59: If Your Copier Does Not Operate As You Want
KF2Jr-AE-7 IF YOUR COPIER DOES NOT OPERATE AS YOU WANT IF YOUR COPIER DOES NOT OPERATE AS YOU WANT Check the followings: Copier’s condition Action Check the power cord. Is it properly plugged Nothing happens when the main into the outlet? switch is turned on. - Page 60 KF2Jr-AE-7 IF YOUR COPIER DOES NOT OPERATE AS YOU WANT Copier’s condition Action You cannot use the bypass feed table in the Sort or Check Paper Size indicator Stack mode and the Series Copies. is lit. Select the paper tray. Turn the main switch off and on.
-
Page 61: If You Cannot Make Copies As You Want
KF2Jr-AE-7 IF YOU CANNOT MAKE COPIES AS YOU WANT IF YOU CANNOT MAKE COPIES AS YOU WANT Problem Cause Action The original has a gray or Adjust the image density. colored background. See page 28. The image density is too dark. Copies appear dirty. -
Page 62: Loading Paper
KF2Jr-AE-7 LOADING PAPER LOADING PAPER NOTE: Regarding paper sizes that can be set, see page 14. NOTE: If you want to change the paper size, see page 56 . NOTE: For details about non-recommended copy paper and notes for copy paper, see page 14 . - Page 63 KF2Jr-AE-7 LOADING PAPER Lift the tray slightly, and then re- insert the tray gently until it stops.
-
Page 64: Adding Toner
KF2Jr-AE-7 ADDING TONER ADDING TONER When the Add Toner indicator blinks, it is time to supply toner (copying is still possible). When the Add Toner indicator is continuously on, copies cannot be made until the toner cartridge is replaced. R WARNING: Do not incinerate used toner or toner containers. -
Page 65: Clearing Misfeeds
KF2Jr-AE-7 CLEARING MISFEEDS CLEARING MISFEEDS R CAUTION: The fusing section of this equipment might be very hot. You should be very careful that you don’t touch this section when removing the misfed paper. NOTE: Since some parts of the copier are supplied with high electrical volt- age, touch only the parts specified in the instructions on the sticker inside the machine’s cover. -
Page 66: When A,B Or C Is Lit
KF2Jr-AE-7 CLEARING MISFEEDS When A,B Or C Is Lit Open the front cover of the cop- ier. You will see a sticker (with the top) explaining how to re- move misfed paper, inside the front cover, as shown in the illus- tration. -
Page 67: When P Is Lit
KF2Jr-AE-7 CLEARING MISFEEDS When P Is Lit There is a sticker, explaining how to remove the misfed paper, on the optional document feeder, as shown in the illustration. Remove the misfed original refer- ring to the sticker. The number of originals that should be reset is displayed in the Three Digit indicator. -
Page 68: Changing The Copier's Settings
KF2Jr-AE-8 CHANGING THE COPIER’S SETTINGS CHANGING PAPER SIZE ..................56 How To Change The Paper Size Of Paper Tray ................56 USER TOOLS......................58 How To Access User Tools ......................58 How To Change Adjustment Values Or Modes................59 User Tool Menu ..........................60 SERVICE REPRESENTATIVE SETTINGS ..............68... -
Page 69: Changing Paper Size
KF2Jr-AE-8 CHANGING PAPER SIZE CHANGING PAPER SIZE To check the paper size of the paper tray, see the Paper Size indicators. How To Change The Paper Size Of Paper Tray Pull the paper tray out until it stops. Remove the copy paper. In case of Type 1 and 3, lower the bottom plate. - Page 70 KF2Jr-AE-8 CHANGING PAPER SIZE While pressing the release lever, slide the left guide to the paper size you want to use. While pressing the release lever on the front and rear side guides. Slide the guides to the paper po- sition.
-
Page 71: User Tools
KF2Jr-AE-8 USER TOOLS USER TOOLS You can change or set the copier’s settings using the following user tools. How To Access User Tools Press the Clear Modes/Energy Saver key. Hold down the Clear/Stop key for more than three seconds. Enter the required user tool num- ber using the Number keys. -
Page 72: How To Change Adjustment Values Or Modes
KF2Jr-AE-8 USER TOOLS How To Change Adjustment Values Or Modes Access the user tool you want to adjust. ( See page 58.) The number of the user tool you se- lect will be displayed in the copy counter. The default setting will blink in the Three Digit indicator. -
Page 73: User Tool Menu
KF2Jr-AE-8 USER TOOLS User Tool Menu 1. Image Density Level Selection. You can adjust the Auto Image Density level to lighter and darker. For how to change settings, see page 59. Default: Mode 0 (Setting:0) Setting Mode Normal Light Dark Lighter Darker 2. -
Page 74: Auto Off
KF2Jr-AE-8 USER TOOLS 4. Auto Energy Saver Set As a default setting, when the copier is reset by the auto reset, the Energy Saver is automatically set. You can change this setting. For how to change settings, see page 59. Default: Yes (Auto energy saver is set.) (Setting: 1) Setting Modes... - Page 75 KF2Jr-AE-8 USER TOOLS 7. Counter Up/Down The copy counter can be set to show the number of copies made (count up), or the number of copies remaining to be made (count down). For how to change settings, see page 59. Default: Up (Setting: 0) Setting Definition...
-
Page 76: User Code Counter Check
KF2Jr-AE-8 USER TOOLS User Tools for User Codes If the copier is set with the user codes, operators must input their user codes before the copier can be oper- ated. The copier keeps count of the number of copies made under each user code. To have the copier set for user codes, contact your sales or service representative. - Page 77 KF2Jr-AE-8 USER TOOLS Hold down the Darker key. The lower 3 digits of the total copy quantity made under this user code are displayed in the Three Digit indi- cator. Example: when 123456 copies are made under one user code, "456" is displayed in the Three Digit indica- tor.
-
Page 78: User Code Counter Clear
KF2Jr-AE-8 USER TOOLS 9. User Code Counter Clear You can clear all the user code counter. Access the user tool 9. page 58. Press 1 on the Number keys. If you enter a wrong number, press the Clear/Stop key. Press the Auto Image Density key and the Darker key simulta- neously. -
Page 79: User Code Number Set
KF2Jr-AE-8 USER TOOLS 12. User Code Number Set You can register your user codes (3 digits). Up to 10 user codes can be registered. Same user codes cannot be registered twice or more. How to register user codes Access the user tool 12. ( See page 58.) [1] is displayed in the copy counter. - Page 80 KF2Jr-AE-8 USER TOOLS How to change user codes Access the user tool 12. ( See page 58.) [1] is displayed in the copy counter. You will see your user code for the index in the Three Digit indicator. Press the Zoom Up (+) key or the Zomm Down (-) key to choose the index of the user code you wish to change.
-
Page 81: Service Representative Settings
KF2Jr-AE-8 SERVICE REPRESENTATIVE SETTINGS SERVICE REPRESENTATIVE SETTINGS Some features can be adjusted by your service representative to suit your needs. This section gives a brief description of these features. For more information, contact your service representative. Auto Sort Selection When you insert 2 or more originals in the optional document feeder and make from 2 to 10 sets of copies from each original, the copier selects Sort mode. -
Page 82: Do's And Don'ts
KF2Jr-AE-9 MAINTAINING YOUR COPIER DO’S AND DON’TS WHERE TO PUT YOUR COPIER REMARKS MAINTAINING YOUR COPIER ................70 Copier ..............................70 Document Feeder (Option)......................71 WHERE TO PUT YOUR COPIER ................72 Copier Environment ......................... 72 Power Connection ......................... 73 Access To Copier ..........................74 DO’S AND DON’TS....................75 Copier .............................. -
Page 83: Maintaining Your Copier
KF2Jr-AE-9 MAINTAINING YOUR COPIER MAINTAINING YOUR COPIER To maintain high copy quality, clean the following parts and units regularly. Copier Exposure glass Clean the exposure glass with a damp cloth and wipe it with a dry cloth. Platen cover Clean the platen cover with a damp cloth and wipe it with a dry cloth. -
Page 84: Document Feeder (Option)
KF2Jr-AE-9 MAINTAINING YOUR COPIER Slide out the corona unit until it is fully extended. Push the corona unit back in. Make sure it locks into place. Repeat steps 2 and 3 several times. Close the front cover. Document Feeder (Option) Feed-in unit Clean the original table and origi- nal guide with a damp cloth and... -
Page 85: Where To Put Your Copier
KF2Jr-AE-9 WHERE TO PUT YOUR COPIER WHERE TO PUT YOUR COPIER Copier Environment Your copier’s location should be carefully chosen because environmental conditions greatly affect its performance. Optimum environmental conditions R CAUTION: Keep the equipment away from humidity and dust. Otherwise a fire or an electric shock might occur. -
Page 86: Power Connection
KF2Jr-AE-9 WHERE TO PUT YOUR COPIER Power Connection R WARNING: Only connect the machine to the power source described on the in- side front cover of this manual. Connect the power cord directly into a wall outlet and do not use an extention cord. -
Page 87: Access To Copier
KF2Jr-AE-9 WHERE TO PUT YOUR COPIER Access To Copier Place the copier near the power source, providing clearance as shown. More than 10 cm, 4.0" Copier More than 30 cm, 11.9" More than 30 cm, 11.9" More than 70 cm, 27.6"... -
Page 88: Do's And Don'ts
KF2Jr-AE-9 DO’S AND DON’TS DO’S AND DON’TS Copier General operation If there is a large solid image on the original, the Add Toner D indicator may be lit after copying although toner remains in the toner bottle. In this case, turn the main switch off and then back on again. -
Page 89: Remarks
KF2Jr-AE-9 REMARKS REMARKS Copier To avoid problems caused by curled copies, try turning over the paper stack in the tray. If there is no improvement, change to copy paper with less curl. Load paper with the copy side down in the tray. If copies are curled, try turning the copy paper over in the tray. -
Page 90: Specifications
KF2Jr-AE-10 SPECIFICATIONS COPIER ........................78 DOCUMENT FEEDER (OPTION) ................81 10-BIN SORTER (OPTION) ..................82... -
Page 91: Copier
KF2Jr-AE-10 COPIER COPIER Configuration: Desktop Process: Dry electrostatic transfer system Originals: Sheet, book Original size: Maximum: A3 , 11" x 17" Copy paper size: Paper tray: A3 , A4 , A5 , B4 , B5 11" x 17" " x 11" "... - Page 92 KF2Jr-AE-10 COPIER Copy tray capacity: 100 sheets (80g/m , 20lb) Power source: See the inside front cover of this manual. Warm-up time: Type 1: 35 seconds Type 2: 35 seconds Type 3: 45 seconds Reproduction ratio: 2 enlargement and 3 reduction (Type 1) 3 enlargement and 4 reduction (Type 2 and 3) Metric Version Inch Version...
- Page 93 KF2Jr-AE-10 COPIER Type 2 Copier only During copying 63 dB(A) Standby 40 dB(A) Type 3 Copier only During copying 64 dB(A) Standby 40 dB(A) Sound Pressure Level * Type 1 Copier only Complete System * During copying 59 dB(A) 60 dB(A) Type 2 Copier only Complete System *...
- Page 94 KF2Jr-AE-10 COPIER Dimensions: Type 1 Width Depth Height Copier only 579mm, 22.8" 560mm, 22.1" 420mm, 16.6" Full system * 579mm, 22.8" 560mm, 22.1" 508mm, 19.8" *1 With the document feeder Type 2 Width Depth Height Copier only 579mm, 22.8" 560mm, 22.1" 420mm, 16.6"...
-
Page 95: Document Feeder (Option)
KF2Jr-AE-10 DOCUMENT FEEDER (OPTION) DOCUMENT FEEDER (OPTION) Original Feed: Automatic document feed - ADF mode Semi-automatic document feed - SADF mode Original size, weight and tray capacity: , B4 " x 14" 11" x 17" Original size " x 11" "... -
Page 96: Bin Sorter (Option)
KF2Jr-AE-10 10-BIN SORTER (OPTION) 10-BIN SORTER (OPTION) Paper size, weight and capacity for bins: Metric Version Inch Version Maximum paper size 11" x 17" Minimum paper size " x 11" Maximum paper weight 90 g/m 24 lb Minimum paper weight 64 g/m 17 lb Maximum capacity of bins... - Page 97 KF2Jr-AE-10 10-BIN SORTER (OPTION)
- Page 98 INDEX...
-
Page 99: Index
INDEX INDEX 10-bin sorter (Option), 3 full size copying, 30 Fusing Unit, 3 Add Toner indicator, 51 ADS priority selection, 68 image density, adjusting, 28 Auto image density, 28 Indicators, 6 Auto Start, 33 Installation requirements Copier Environment, 72 Power Connection, 73 BASICS, 9 Bypass feed copying, 30 Bypass feed table, 3... - Page 100 INDEX Reducing and Enlarging, 34 - 35 Zoom, 35 preset ratios, 34 REMARKS, 76 SADF auto reset, 68 SAFETY INFORMATION, i - iv SAVING ENERGY, 43 Series Copies, 36 SERVICE REPRESENTATIVE SETTING, 68 - 69 Setting originals, 19 document feeder, 20 - 23 exposure glass, 19 Sort, 38 SPECIFICATIONS, 77...
- Page 101 INDEX...
- Page 102 INDEX...
-
Page 103: Troubleshooting
TROUBLESHOOTING TROUBLESHOOTING When “XX” Is Displayed U code is displayed on the copy counter. U1 Close the right side cover. U2 The copier is set for user codes. Enter your user code (3digits). See page 42. Reset the optional sorter correctly. Contact your serveice representative. - Page 104 Amstelveen 37139 Verona Phone: +31-(0)20-5474111 Phone: +39-045-8181500 United Kingdom Hong Kong RICOH UK LTD. RICOH HONG KONG LTD. Ricoh House, 23/F., China Overseas Building, 1 Plane Tree Crescent, Feltham, 139, Hennessy Road, Middlesex, TW13 7HG Wan Chai, Hong Kong Phone: +44-(0)181-261-4000...
Need help?
Do you have a question about the FT3813, FT4615, FT4618 and is the answer not in the manual?
Questions and answers