Table of Contents
Advertisement
Quick Links
Region code of DVD/Video player for home is 2 or ALL. In inserting a
disc with other region code, it does not operate. Please only use a
disc with region code 2 or ALL.
is a 'Prohibition' mark. If this mark is displayed in operating the
product, please wait for a while, then use it. If "
continues to be displayed in pressing a button after that, it means
the button does not function in the currently played disc.
Press a product button on the remote control then use the product.
• DVD operation : [DVD] button
• Video operation : [VCR] button
• Radio operation : [FM/AM] button
DCR-9120
Prohibition" mark
Owner's Manual
Advertisement
Table of Contents

Related Manuals for Daewoo DCR-9120


Summary of Contents for Daewoo DCR-9120
- Page 1 Press a product button on the remote control then use the product. • DVD operation : [DVD] button • Video operation : [VCR] button • Radio operation : [FM/AM] button DCR-9120 Owner’s Manual...
-
Page 2: Table Of Contents
Contents Product Information DVD Operation Important Safeguards ........... 2 DVD Playback ............. 36 Advantages of This Product Are ......... 5 Playing a desired scene ..........37 Read Carefully before Using ......... 6 Confirming the current PLAY mode on screen .... 42 Identification of Controls .......... -
Page 3: Important Safeguards
Important Safeguards The lightning flash with arrowhead symbol, within an CAUTION equilateral triangle, is intended to alert the user to the RISK OF ELECTRIC SHOCK presence of uninsulated “dangerous voltage” within DO NOT OPEN the product’s enclosure that may be of sufficient magnitude to constitute a risk of electric shock. - Page 4 Important Safeguards This set has been designed and manufactured to assure openings must not be blocked by placing the unit on a personal safety. Improper use can result in electric shock or bed, sofa, rug, or other similar surface. This unit should fire hazard.
- Page 5 Important Safeguards damage to the unit due to lightning and power line performance-this indicates a need for service. surges. 22 Replacement Parts 15 Disc Tray When replacement parts are required, have the service Keep your fingers well clear of the disc as it is closing. It technician verify that the replacements he uses have the may cause serious personal injury.
-
Page 6: Advantages Of This Product Are
Advantages of This Product Are ..• DVD, VCD, CD, CD-R(MP3), CD-RW, VHS playback • Fast Forward / Reverse playback function • Search of title, chapter, and time in DVD disc, • Watching DVD for recording broadcast and search of track and time in VCD and CD •... -
Page 7: Read Carefully Before Using
Read Carefully before Using Cautions in use of DVD-Video player are described below. Checking and Replacement of Antenna______ Please read carefully before using a DVD-Video player. • Antenna is subject to change in its direction or damage by wind and rain. For clean screen, contact and consult Installation place and handling_____________ your nearest service center about checking and replacement. -
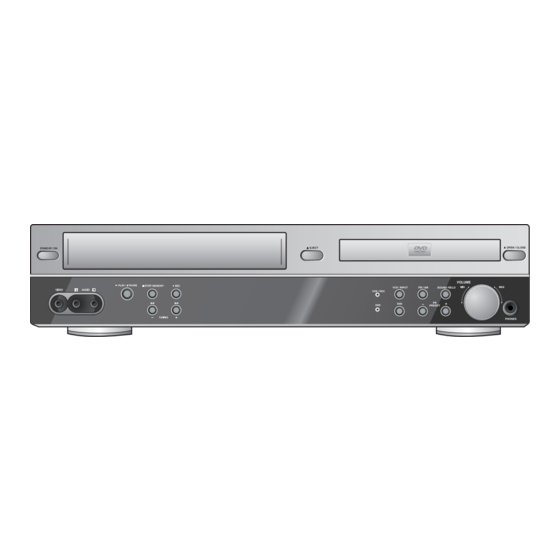
Page 8: Identification Of Controls
Identification of Controls Front panel & 2 3 5 ! Power (STANDBY/ON) button ) Record button Use to power the device on/off if AC power supply is Record a programme from TV or other sources (except connected. DVD). @ Place to insert videotape 1 Operation Display Window Insert the desired tape. - Page 9 Identification of Controls Operation Display Window & 2 Multi angle indicator ! Speaker setup indicator 3 DTS indicator @ Title indicator 4 DSP indicator # Memorized radio stations 5 PBC (Playback Control) indicator $ Chapter indicator 6 RDS indicator % Track indicator 7 FM Stereo indicator ^ Sleep time indicator 8 Mute indicator...
- Page 10 Identification of Controls Rear Panel & ! Power Cord It is a jack for supplying power to the unit. Connect to outlet in a wall. @ Analog 5.1 Speaker Out Jack Connect each of the speaker wires to the satellite speakers. # Connection to Antenna Cable $ AM Antenna Jack % Woofer Out Jack...
-
Page 11: Remote Control
Remote Control ! STANDBY/ON button @ DVD SELECT button # VCR SELECT button “ [DVD] AUDIO LANGUAGE Select, [VCR] AUDIO Select button, [RADIO] Set FM Mode to Stereo or Mono sound ‘ [DVD] SUBTITLE Select button [DVD] ZOOM button & [VCR] Channel Up/Down button, [RADIO]... - Page 12 Remote Control Instructions in using remote control • Operate remote control within 7m from the unit. • Do not press two buttons at the same time. • Do not light up sending part of remote control. • Do not keep in the place with much dust and humidity. Accessories Owner’s Manual/ Remote Control...
-
Page 13: Setting Up Your Player
Setting up your player Before you start, unplug all the equipment from the mains supply. (Option 1) - Connecting your player through RF lead Television 200-240V~ AC Aerial 50/60Hz The type of aerial you should use, depends on local interference and how far you are from the transmitter. -
Page 14: Connecting Your Player Through Extra Equipment (Satellite System)
Connecting your player through extra equipment (satellite system) Before you start, unplug all the equipment from the mains supply. (Option 1) - Connecting your player through RF lead Television 200-240V~ AC Aerial 50/60Hz Back view of your player Satellite You can use this connection if your player has two scart sockets. This will improve sound and picture quality when you are recording from satellite. -
Page 15: Fm/Am Antenna Connection
FM/AM Antenna connection AM loop antenna (supplied) FM wire antenna (supplied) Connect the supplied FM/AM antennas for listening to the radio. • Connect the AM loop antenna to the AM antenna connector. • Connector the FM wire antenna to the FM antenna connector. •... -
Page 16: Speaker System Connection
Speaker system connection Connect the speakers using the supplied speaker cords by matching the colors of the terminals and those of the cords. To obtain the best possible surround sound, adjust the speaker parameters (distance, level, etc.) Front speaker Rear speaker Front speaker (right) (left surround) -
Page 17: Connecting With Other Equipment
Connecting with Other Equipment You can connect a wide variety of audio/video equipment to your DVD-Video, including : an additional VCR, Laser Disc Player, DVD Player, Camcorder, Satellite Receiver, Video Game. Since all of these devices use essentially the same connections, they will be described together. - Page 18 Connecting with Other Equipment Connection with Hi-Fi system 200-240V~ AC 50/60Hz AUDIO INPUT AUDIO Connect Audio jack. Connect AUDIO OUT in rear panel of DVD-Video to In jack of stereo sound unit. For Input Select in stereo unit, Select “External Input” connected with DVD-Video. Playback DVD disc or Hi-Fi videotape, you can hear sound in speaker of stereo unit.
-
Page 19: Initial Installation
Initial Installation Switch the TV on. You can also start "AUTO SET" in the SETUP "PR PRESET" "AUTO SET". To tune in new stations (manual tuning) and to enter station names see page 23-24. Setting up the player LANGUAGE SET You should see this picture the first time you switch on the TV and player. -
Page 20: Setting Time And Date, Auto Clock
Setting time and date / Auto clock Setting time and date Press [VCR] button on the remote control to change into VCR Mode and follow the procedure below. Call the player’s "SETUP", CLOCK SET choose "VCR SETUP", then "CLOCK SET". TIME - - : - - DATE - - / - - /- - - - 0-9:SETUP (HOUR) -
Page 21: Osd On & Off
OSD ON & OFF OSD (On Screen Display) ON & OFF This player is set to “OSD (On Screen Display) ON” mode before shipping and you can change it to OFF mode. Call the player’s "SETUP". SETUP TIMER PROGRAM PR PRESET VCR SETUP TAPE CONTROL …/†:SELECT... -
Page 22: Output Select
Output Select To Select DVD Press [DVD] button. If DVD mode is correctly selected, DVD indicator on the front panel is lighted. Then, remote control button works as DVD function. Press the [DVD] button, then the mode of DVD-Video Player becomes to the DVD OPERATION mode. To Select VCR Press [VCR] button. -
Page 23: Vcr Playback
VCR Playback Press [ ] button to power on. Press [VCR] button of remote control to change into VCR mode. Insert the desired tape. If you want to playback it, press [PLAY/PAUSE] button. When the operational status is flickering or poor, adjust it with [TRACKING +/–] button. To stop it, press [ ] button. -
Page 24: Tuning In New Stations
Tuning in New Stations The TV and player are switched on. To see the picture from your player, press the station button on the TV reserved for player input or the AV (Audio / Video) button. "AV1/2" should not be selected with the AV button on the player. Tuning To complete the set-up of your video recorder when the auto set PR PRESET... - Page 25 Tuning in New Stations Station names If your player is showing no station name or is showing a station name incorrectly, you can correct this. Call this menu (just see the previous page), MANUAL SET if it isn't displayed. RECEPTION AERIAL AUTOSEARCH CH01...
-
Page 26: More Functions
More Functions The counter counts in real time from the point you load the cassette. This does not have to be its beginning! The counter does not count unrecorded parts of the tape. If you rewind beyond the zero position, the counter counts in negative values (e.g. – 0:01:15). Clock / counter display Each time you press [DISPLAY] button, STOP SP... -
Page 27: Auto Repeat
More Functions Resetting the counter to zero Reset the counter. COUNTER RESET 0:00:00 16 : 9 Wide Screen Format Playing back / Recording You can play and record the program of 16:9 Wide-Screen format with this player . VCR SETUP CLOCK SET •... -
Page 28: Child Lock
More Functions Child lock Press the [ ] button for about 5 seconds. No buttons of front panel can be operated now and LOCK INDICATOR (“LOCK”) will be displayed on window display. Keep your remote control in a safe place. To release child lock, press any button of the remote control. - Page 29 More Functions The Hi-Fi system Your player machine is equipped with a high-quality Hi-Fi sound system. This means you can enjoy • films with excellent stereo sound • films of full-length concerts in high quality stereo • films with impressive Surround Sound using additional Surround equipment •...
- Page 30 More Functions Choice of sound output During a stereo performance (playback-”Hi-Fi”/ broadcast - PLAY Hi-Fi “STEREO”): HI-Fi LEFT Hi-Fi stereo left audio channel only right channel only Hi-Fi RIGHT the normal mono sound track of a Hi-Fi cassette Hi-Fi • During broadcasting a bilingual performance : Main language STOP SP PR10 EURO (original sound track)
-
Page 31: Connections
Connections If you are using a SCART cable, select the AV input on the TV to see the picture from the player. If you are not using a SCART cable, select the button number on the TV reserved for video input to see the picture from the player. -
Page 32: Dvd Initial Setting
DVD initial setting LANGUAGE Setup A user can set OSD language, Audio, Subtitle and Disc Menu. While STOP or RESUME STOP, press Language Display Audio Ratings [SETUP] button. Audio : Default Subtitle : Default DVD Menu : Default OSD Language : English Select “Audio”... -
Page 33: Display Setup
DVD initial setting DISPLAY Setup A user can set up a connected TV condition and screen. While STOP or RESUME STOP, press Language Display Audio Ratings [SETUP] button. Aspect Ratio : Letter Box (4:3) By pressing [œ / √] button, select “Display”. Screen Saver : On Select “Aspect Ratio”... -
Page 34: Audio Setup
DVD initial setting AUDIO Setup A user may select audio menu according to a user’s speaker set. While STOP or Resume STOP, press Language Display Audio Ratings [SETUP] button. Dynamic Range : Off Speaker Setup : Configure Select “Dynamic Range” by pressing Language Display Audio... - Page 35 DVD initial setting To hear the test tone of speaker is set, Speaker Setup LEFT CENTER RIGHT press [√ / ] button. Type: Small Type: Small Type: Small Level: 0.0 dB Level: 0.0 dB Level: 0.0 dB Delay: 0 ms Delay: 0 ms Delay: 0 ms Speaker Setup : Default...
-
Page 36: Ratings Setup
DVD initial setting RATINGS Setup While STOP or RESUME STOP, press Language Display Audio Ratings [SETUP] button. Password : Unassigned PARENTAL : 8 ADULT Default : Reset The initial Entering a NEW password. password is 3308. Language Display Audio Ratings In case you forget newly- Input password display appears. -
Page 37: Dvd Playback
DVD Playback Press [ ] button to power on. Press [DVD] button of remote control to change into DVD mode. Press [OPEN/CLOSE] button to open the disc tray. Place a disc firmly on the disc tray, making its label look upward. Insert the disc and press [OPEN/CLOSE] button to close the tray. -
Page 38: Playing A Desired Scene
Playing a desired scene To skip scenes in a disc DVD, VCD, CD, MP3 To move to next chapter (or track), press [NEXT √ √ √ √ ] button. The current chapter (or track) moves to the next chapter (or track). Press [ œ... - Page 39 Playing a desired scene Book Mark Once memorising a scene, the user may watch it anytime. To memorise a scene, [ _ ] _ _ _ _ press [MARK] button while DVD playing. Then press [ENTER] button to save a scene. * Moving cursor with [œ/√] button to select the saving position, up to 5 scenes can be memorised.
- Page 40 Playing a desired scene Playing a programmed order VCD, CD While STOP, press [PROGRAM] button. While the figure is appearing, please select desired track by pressing […/†] and [ENTER] button. Program Program Track 001 (00:03:12) > Track 001 (00:03:12) Track 002 (00:03:54) Track 002 (00:03:54) Track 003 (00:02:08) Track 003 (00:02:08)
- Page 41 Playing a desired scene Repeating a defined period from A to B DVD, VCD, CD You may repeat a defined period from A to B. At the point where you want to start the repeat playback, press [A-B] button. The right figure appears and repeat playback start position (A) is set.
- Page 42 Playing a desired scene Searching VCD and CD with a track number or time VCD, CD Press [SEARCH] button. _ _0 01:46:03 It shows the track numbers and times. If you want to search with a track number, please enter the new track numebr to be searched using the [NUMBER] or […/†] button.
-
Page 43: Confirming The Current Play Mode On Screen
Confirming the current PLAY mode on screen Confirming the current DVD disc mode 01:46:03 While in playing, press [DISPLAY] button. It shows the current title, current chapter and time elapsed. 1/4:Dolby Digital, 5.1Ch. -English Press [DISPLAY] button again. It shows the audio selected. 1/4:Subtitles Off 2/4:Chapter Press [DISPLAY] button again. - Page 44 Confirming the current PLAY mode on screen Confirming the current MP3 disc mode Display screen appears automatically in Track List > +000 / Playback mode. +001 CD01 002 A Track001.mp3 003 A Track002.mp3 004 A Track003.mp3 005 A Track004.mp3 It shows the MP3 File information in disc, the directory, MP3 006 A Track005.mp3 007 A Track006.mp3 008 A Track007.mp3...
-
Page 45: Audio, Subtitle Language And Sound Fields
AUDIO, SUBTITLE language and SOUND FIELDS The user may select an audio language and subtitle language if a disc includes Multi-language. Selecting an audio language Press [AUDIO] button. It shows the audio 1/4:Dolby Digital, 5.1Ch. -English information DVD disc includes. A certain disc may The user can select each audio information by using […†] not support audio select... -
Page 46: Zoom, Multi Angle
ZOOM, Multi Angle Using a zoom function DVD, VCD, VCD2.0 The user can enlarge the current screen about 2, 4 or 8 times. While playback or still mode, press [ZOOM] button till the right figure appears. Every time the user presses [ZOOM] button, a zoom magnification changes 2 times (X2) 4 times (X4) times (X8) -
Page 47: About Mp3 Discs
About MP3 discs Playing a disc containing MP3 files This unit will play MP3 files recorded on CD-R and CD-RW discs. Turn on your television and select the program assigned to this DVD player. Press the DVD open [OPEN/CLOSE] button, the disc tray opens. Put a disc containing MP3 files on the disc tray with the label side up. -
Page 48: Displaying Menus In A Disc
Displaying menus in a disc To display menus in a disc DVD, VCD2.0 If a disc includes menus, the user may use them. Press [TITLE/PBC] or [MENU] button. • It shows menus in the disc. Also they are different according to discs. •... -
Page 49: Recording
Recording To Record With VCR Press [ ] button to power on. • Press [VCR] button of remote control to change into VCR mode. Insert a recordable tape. Insert a tape with recording tab. With [PR/PRESET], [NUMBER] and [INPUT] buttons, select the desired broadcasting channel or external input unit to record. - Page 50 Recording To Record From DVD To Videotape during DVD playback Press [DVD] button of remote control to change into DVD mode. Insert the desired DVD disc. When it is a DVD disc with copy protect function, you can’t copy it. Insert a recordable tape.
-
Page 51: Timer Recordings
Timer Recordings TIMER RECORDINGS USING ShowView For timer recordings, clock, date, and stations must be set correctly. Load a cassette with its safety tab in place and with sufficient free space for the recording. Call the ShowView menu by pressing PROGRAM on the remote control. - Page 52 Timer Recordings NORMAL TIMER RECORDING For timer recordings, clock, date, and stations must be set correctly. Load a cassette with its safety tab in place and with sufficient free space for the recording. Call the player’s "SETUP", choose "TIMER PROGRAM". HOW OFTEN DO YOU WANT TO RECORD THIS PROGRAM? Decide if you want to record "ONCE", "WEEKLY"...
- Page 53 Timer Recordings TIMER REVIEW - CHANGING AND ERASING Call the player’s "SETUP", TIMER PROGRAM START END DATE choose "TIMER PROGRAM". 21:20 22:20 14/06 18:10 20:30 20/06 -- : -- -- : -- -- / -- -- : -- -- : -- -- / -- -- : -- -- : -- -- / -- -- : --...
-
Page 54: Copying And Assembling
Copying and Assembling COPYING Switch off all components when connecting or disconnecting cables. To copy to your player from another video machine, connect the two machines with a cable between their Other VCR EURO AV (SCART) sockets and select as programme Decoder for Pay-TV "AV 1/AV 2"... -
Page 55: Presetting The Radio Stations
Presetting the radio stations You can preset 50 stations for FM and AM. Before tuning, make sure that you have turned down the volume to the minimum. Press [FM/AM] button until the FM or AM appears in the display window. And then every time you press [FM/AM] button, FM and AM changes alternately. -
Page 56: Listening To The Radio
Listening to the radio Preset radio stations in the DVD receiver’s memory first (see “Presetting radio stations” on the previous page). Press [FM/AM] button until FM or AM appears in the display window. The last received station is tuned in. Press [PR/PRESET] button repeatedly to select the preset station you want. -
Page 57: Rds (Radio Data System) Function
RDS (Radio Data System) function RDS (Radio Data System) RDS means Radio Data System, a feature that allows you to receive the radio channel that sends the letter data, for example Weather, News, Affairs, Sports... etc.,. This unit can receive the RDS signal with the help of a FM/AM tuner and display the letter data on the display window. -
Page 58: Speaker Setup For Enjoying The Surround Sound Effect
Speaker Setup for enjoying the surround sound effect Surround Sound Audio Components DTS Digital Surround, Dolby Digital and Dolby Pro Logic technologies can be used to enjoy 3-dimensional sound effects with video image. We recommend you use the following devices. •... -
Page 59: Speaker Positioning
Speaker Setup for enjoying the surround sound effect Speaker Positioning A typical speaker setup uses 6 speakers: 2 front speakers, a center speaker, 2 rear speakers, and a subwoofer. Add a sub- woofer to hear excellent bass sound, DTS digital surround or Dolby Digital surround. Set up a listening position; a couch or chairs, etc. -
Page 60: Delay Time Setting
Delay Time Setting In Dolby Digital or Dolby Pro Logic mode it is assumed that the time it takes the sound from each speaker to reach the listener, is the same. But if the time interval from the center or rear left and right speakers to the listener is closer than the time interval from the listener to the front left and right speaker, the sound of center or rear left and right speaker will reach the listener first;... - Page 61 Delay Time Setting How to set delay time Each time you press the [DELAY] button, the setting of speaker is changed belows. FL (Front Left) CT (Center) FR (Front Right) SL (Surround Left) SR (Surround Right) You can select delay time by pressing †/…. •...
-
Page 62: Setting The Sound Level
Setting the sound level Setting the sound level of the desired channel Press [LEVEL] button. Press [LEVEL] button to select a desired speaker to set. Each time you press the [LEVEL] button, it changes in the following order; FL (Front Left) CT (Center) FR (Front Right) SL (Surround Left) -
Page 63: About Dvd
About DVD Playable Disc • DVD, Video CD (Version 1.1, 2.0), S-VCD and Audio CD Disc type Playable Restriction Possible Region number 2 or Region number All (DVD-5, DVD-9, DVD-10, DVD-18) Video CD Possible Version 1.0/1.1/2.0, SVCD/CVD Possible CD-G Possible Only Audio playback CD-ROM Possible... - Page 64 About DVD Terms related with DVD CHAPTER It means the information recorded in a DVD. A title in a DVD is divided into many tracks, of which a track is called as a chapter. A certain scene of a screen can be quickly searched with the chapter number. TITLE It means the information recorded in a DVD.
-
Page 65: Basic Information About Vcr And Videotape
Basic information about VCR and Videotape Terms related with VCR Automatic fine tuning, a circuit that automatically adjusts TV reception to optimum condition. CABLE Cable television. Index Search A feature of this VCR that automatically records an index each time recording begins. It helps you locate a particular segment of the tape quickly and easily. -
Page 66: Before Doubting About Troubles (Dvd)
Before doubting about troubles (DVD) Symptom Checks • The player does not play. If a DVD is from overseas, it may not be played. Please check a DVD’s region code whether it has the relative region code 2 or All. Please check whether a DVD is inserted in a right direction. -
Page 67: Before Doubting About Troubles (Vcr)
Before doubting about troubles (VCR) Symptom Checks • “Power On” does not work. Please check whether a power plug is inserted in an electric outlet. • It does not work even in “Power On”. Please check whether a videotape is inserted in. Try to insert a plug again. - Page 68 Before doubting about troubles (VCR) Symptom Checks • A screen at pause is trembling or slow Try to use a head-cleaner. screen is not clear. Try to adjust the screen by [TRACKING+/–] button. • Recording a TV program is impossible. Please check whether a channel is fixed on video.
-
Page 69: Specifications
Specifications Power 200-240V~ AC 50/60Hz Consumed electricity Weight 7.15kg Dimension (WxHxD) 430mm x 103mm x 370mm Operative temperature +5°C~40°C Installation condition Horizontal / Relative humidity under 80% Signal type PAL COLOR Antenna Input/output U/V-mixed: 75 unbalanced VIDEO input 1.0 Vp-p unbalanced, RCA JACK AUDIO input -8.8dBm, RCA JACK VIDEO output... - Page 70 Quick-start guide Please follow this guide from the beginning to the end. Before you start, unplug all the equipment from the mains supply. Stage 1. Connecting the Player to your TV Television Aerial Fit the batteries into the remote control. Make sure that the (+) and (-) marks on 200-240V~ AC the batteries agree with the (+) and (-)
- Page 71 Quick-start Guide Stage 3. Tuning in your TV Plug the player into the mains and turn it on by pressing the POWER button. RF 52 will now be displayed on the front panel. LANGUAGE SET ENGLISH Tune a spare channel of your TV until you see the blue ‘Language Set’ screen. Select DEUTSCH ITALIANO the wanted language and country with …...
- Page 72 DVD + VCR HOME THEATER SYSTEM...
Need help?
Do you have a question about the DCR-9120 and is the answer not in the manual?
Questions and answers