
Related Manuals for Daewoo DVR-S05


Summary of Contents for Daewoo DVR-S05
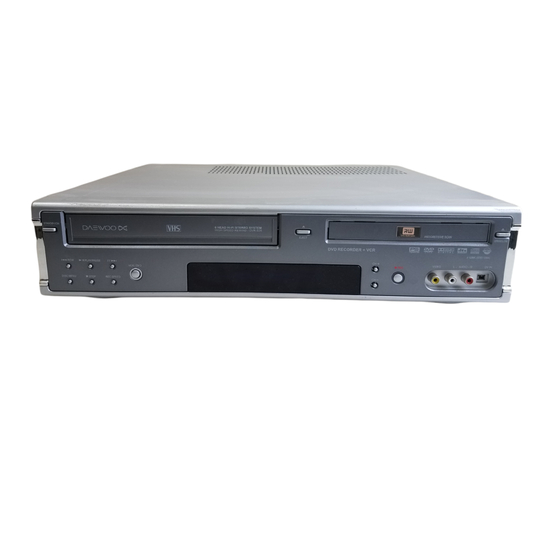
- Page 1 DVD Recorder + VCR DVD Recorder + VCR DVR-S04/DVR-S05 User Manual P/N : 97P95600N0-E0...
-
Page 2: Important Safeguards
Important Safeguards Important Safeguards Important Safeguards REGULATORY INFORMATION: FCC Part 15 The lightning flash with arrowhead symbol, CAUTION within an equilateral triangle, is intended to This product has been tested and found to comply with the limits for a Class B digital device, pursuant to Part RISK OF ELECTRIC SHOCK alert the user to the presence of uninsulated 15 of the FCC Rules. -
Page 3: Table Of Contents
Important Safeguards Table of Contents Table of Contents INTRODUCTION RECORDING Do not use this product near water. Unplug this product during lightning storms or For example: near a bath tub, wash bowl, kitchen when unused for long periods of time. Important Safeguards _________________________i Basic Recording________________________________38 sink, laundry tub, in a wet basement;... -
Page 4: Overview
Overview Overview Overview DVD, DVD+R, DVD+RW? Which discs you can use What is a DVD? The following discs can be used in your DVD Recorder+VCR: DVD (Digital Versatile Disc) is a storage medium that combines the convenience of the compact disc with the Playback and recording latest digital video technology. - Page 5 Overview Overview • When using a DVD+R disc, you can keep recording until the disc is full, or until you finalize the disc. Before Remote Control Battery Installation you start a recording session, check the amount of recording time left on the disc. Detach the battery cover on the rear of the remote control, and insert two AAA batteries.
-
Page 6: Identification Of Controls
Identification of Controls Identification of Controls Identification of Controls Front Panel Front Panel Display # $ % ^ & & STANDBY/ON REC SPEED Turns the DVD Recorder+VCR on and off. Changes Record speed. ! Indicates a VHS tape is inserted in the VCR deck. 1 Circle : Indicates a DVD+R(+RW) is recording. - Page 7 Identification of Controls Identification of Controls Remote Control - DVD: Searches backward/forward. Turns the DVD Recorder+VCR on and off. - VCR: Rewinds/advances during Stop mode. Press during Play mode for fast reverse/forward picture search. - Opens and closes the disc tray in DVD mode. - Ejects the tape in the VCR deck in VCR mode.
-
Page 8: Connections
Identification of Controls Connections Connections • There are a variety of ways to connect the DVD Recorder+VCR to your TV and other equipment. Use only one of Rear panel the connections described below. Whichever TV connection you use will work with all input sources. •... -
Page 9: Connecting A Tv
Connections Connections Connecting a TV Connecting an Amplifier/Receiver Choose one of the following TV connections, depending on the capabilities of your equipment. Connecting to an amplifier equipped with two channel analog stereo or Dolby Pro Logic ll/Pro Logic All video signals are available from all video outputs. Connect the Left and Right AUDIO OUT jacks on the DVD Recorder+VCR to the left and right audio in jacks on That means that whichever TV connection you use, it will your amplifier, receiver, or stereo system, using the supplied audio cables (A). -
Page 10: Connecting Optional Equipment
Connections Initial Installation Initial Installation Connecting Optional Equipment Initial Installation To receive audio/video signals from other equipment, After successfully connecting your DVD Recorder+VCR to your TV and other connect the LINE1 or LINE2 jacks on the DVD devices, this chapter will show you how to complete the initial installation. Recorder+VCR to the audio/video out jacks on your •... -
Page 11: Initial Setup
Initial Installation Initial Setup Initial Setup Setup Menu Overview Select the desired disc playback subtitle language using […/†]. Press Installation The DVD Recorder+VCR Setup menu includes six categories, including: Installation, Recording Options, [ENTER] to confirm. Please select disc play back subtitle Languages, Preferences, System Info, and Restore Defaults. -
Page 12: Recording Options Settings
Initial Setup Initial Setup Auto Channel Search Set Clock The DVD Recorder+VCR has a frequency synthesized tuner capable of receiving Installation Follow steps 1-2 as shown under Tuning Band. Installation up to 181 channels. These include VHF channels 2-13, UHF channels 14-69 and TV/CATV CATV Use […/†] to select ‘Set Clock‘. -
Page 13: Language Settings
Initial Setup Initial Setup PREFERENCE / Video Settings Auto Chapter Press [SETUP]. During recording, chapter markers are added automatically at Recording Options fixed intervals. You can set this interval to 5 minutes, 10 minutes Use [œ/√] to select ‘Preference‘. Preference or 15 minutes. -
Page 14: Preference / Audio Settings
Initial Setup Initial Setup PREFERENCE / Audio Settings Virtual Surround Follow the same procedure as Video Settings to select Audio Settings. You can enjoy a simulated 3D effect from two speakers by setting Audio Virtual Surround to On. Preference Follow the same procedure as ‘Digital Output‘ to set the Virtual Digital Output Video Surround option. -
Page 15: Preference / Parental Controls
Initial Setup Initial Setup PREFERENCE / Parental Controls Press [ENTER] to confirm your rating selection, then press [SETUP] to exit Parental Control Set Parental Level the menu. Set Parental Level Level3 The Parental Controls feature allows you to prevent DVDs from being played Change Password Preference based on their ratings or to have certain discs played with alternative scenes. -
Page 16: Various Preference Settings
Initial Setup Initial Setup Various PREFERENCE Settings System Information AutoPlay System Information helps service personnel identify key firmware information about your DVD Recorder+VCR in case service is required. With Auto Play turn ON (the factory default setting), the VCR System Info automatically starts playback when you insert a tape with its Version FN300BBAAVL... -
Page 17: On-Screen Display Overview
On-Screen Display Overview On-Screen Display Overview On-Screen Display Overview Changing the TV Audio Channel The On-Screen Display provides feedback on the status of the DVD Recorder+VCR and/or the currently loaded disc or tape. To access the On-Screen Display (or OSD), press the [DISPLAY] button. Some TV programs are broadcast with both a main and a Secondary Audio Program (SAP). -
Page 18: Dvd Playback
On-Screen Display Overview DVD Playback DVD Playback Playing a DVD Chapter Press the [DVD] button to set the remote control to operate the DVD deck. Shows the current chapter number and total number of chapters, and skips to the desired chapter number. Press [DISPLAY] during playback. - Page 19 DVD Playback DVD Playback Slow Motion You can repeat a scene between two points (A and B): Press [SLOW+] to enter Slow Motion mode. The default speed is 1/2. When you press [SLOW+] repeatedly, the speed will be set to 1/4, 1/8, and normal speed. Press [PLAY/PAUSE] play to the start of the desired scene.
-
Page 20: Vcr Playback
VCR Playback VCR Playback VCR Playback Before You Begin Special Playback Features Press the VCR button to set the remote control to operate the VCR deck. Notes on special playback features Turn the TV on and select the video input source connected to the DVD Recorder+VCR. Horizontal lines (noise bars) will appear on the TV screen. -
Page 21: Other Disc Playback
Other Disc Playback Other Disc Playback Other Disc Playback Audio CD/MP3 PLAYBACK Select the thumbnail you want to display using […†œ √] and press The DVD Recorder+VCR can play audio CDs and MP3 files on CD-ROM, [ENTER]. CD-R or CD-RW discs. Insert the CD disc and close the tray. -
Page 22: Basic Recording
Basic Recording Basic Recording Basic Recording Recording from TV One Touch Record (OTR) Follow the instructions below to record a TV program. One Touch Recording allows you add recording time in fixed increments at the touch of a button. Turn on the DVD Recorder+VCR and load a recordable disc or tape. Follow steps 1-4 under Recording from TV. -
Page 23: One Touch Copy - Dvd To Vhs
Basic Recording Basic Recording One Touch Copy - DVD to VHS One Touch Copy - VHS to DVD You can copy the contents of a VHS tape to a DVD+R or DVD+RW using the [COPY] button. This allows you to •... -
Page 24: Timer Recording
Timer Recording Timer Recording Timer Recording Canceling a Timer Recording The Timer Recording function allows you to record up to 8 programs within a period of one month. Insert recordable media such as DVD+R ,DVD+RW, recordable VHS tape. You can clear a Timer Recording any time before the recording actually starts. Timer Recording •... -
Page 25: Recording From An External Input
Recording from an External Input Recording from an External Input Recording from an External Input Recording from External Components Recording from a Digital Camcoder You can record from an external component, such as a camcorder or VCR, connected to any of the DVD You can record from a digital camcorder connected to the DV IN jack on the front panel of the DVD Recorder+VCR’s external inputs. -
Page 26: Editing
Editing Editing Editing DISC Initialize You can change the disc status by selecting ‘Yes‘ and pressing [ENTER]. Lock/Unlock Disc • If you load a blank DVD+R(+RW) disc, it will be initialized (formatted to enable recording). Disc is unlocked. Do you want to lock it? •... -
Page 27: Title Menu
Editing Editing Title Menu Change Disc Name You can manage the titles on your DVD+R/RW discs using the Title menu. You can rename your disc to any name you choose. The default disc name is ‘MY DVD‘. Play a Title Use […] to go tothe top menu. -
Page 28: Editing
Editing Editing Editing Change Name When you insert a DVD+R or DVD+RW disc already recorded by your DVD Recorder+VCR, you can edit the titles To change the name of a title: and chapters in a variety of ways. Follow steps 1 to 3 under ‘Play Title‘. To edit a recorded title, select the title on the disc menu and press [EDIT]. -
Page 29: Troubleshooting
Editing Troubleshooting Troubleshooting Check the following guide for the possible cause of a problem before contacting customer support. Hide Chapters Symptom Cause Solution This feature allows you to hide or unhide a chapter. After hiding a chapter, the DVD Edit No power. - Page 30 Troubleshooting Troubleshooting Symptom Cause Solution Symptom Cause Solution Camcorder image via A/V DVD Recorder+VCR’s source is not Use INPUT to select AV input channel The batteries in the remote control Replace the batteries. input to DVD Recorder+VCR set to LINE1/LINE2 composite. (LINE1/LINE2 composite).
-
Page 31: Technical Specifications
Technical Specifications Technical Specifications Technical Specifications General Outputs 1 Vp-p 75 Ω, sync negative, RCA jack x 1 Power requirements AC 120V, 60 Hz VIDEO OUT 1.0 V (p-p), 75 Ω, negative sync, Mini DIN 4-pin x 1 Power consumption S-VIDEO OUT (Y) (C) 0.286 V (p-p) 75 Ω... - Page 32 Warranty DEAM (Daewoo Electronics America) warrants each new electronic product manufactured by it to be free from defective material and workmanship and agrees to remedy any such defect or to furnish a new part (at the Company’s option) in exchange for any part of any unit of its manufacture which under normal installation, use...
Need help?
Do you have a question about the DVR-S05 and is the answer not in the manual?
Questions and answers