Table of Contents
Advertisement
Quick Links
INSTRUCTION MANUAL
DVD Player + Video Cassette Recorder
DX-9810
- Region code of DVD/Video player for home is region "2"
-
- Press a product button on the REMOTE then use the
Please read this manual carefully before connecting your DVD+VCR and operating it for the first time.
Keep the manual in a safe place for future reference.
or ALL. In inserting a disc with other region code, it does
not operate. Please only use a disc with region code 2 or
ALL.
is a 'DO NOT' mark. If this mark is displayed in
operating the product, please wait for a while, then use it. If
"
DO NOT" mark continues to be displayed in pressing
a button after that, it means the button does not function
in the currently played disc.
product.
• DVD operation : [DVD] button
• Video operation : [VCR] button
Advertisement
Table of Contents

Subscribe to Our Youtube Channel
Related Manuals for Daewoo DX-9810


Summary of Contents for Daewoo DX-9810
- Page 1 INSTRUCTION MANUAL DVD Player + Video Cassette Recorder DX-9810 - Region code of DVD/Video player for home is region “2” or ALL. In inserting a disc with other region code, it does not operate. Please only use a disc with region code 2 or ALL.
-
Page 2: Table Of Contents
Contents Product Information DVD Operation Playing a desired scene ..........36 Important Safeguards ............. 2 Confirming the current PLAY mode on screen ..40 Advantages of This Product Are ........ 5 Selecting an AUDIO language, SUBTITLE language Read Carefully before Using ......... 6 and 3D AUDIO ............... -
Page 3: Important Safeguards
Important Safeguards Important Safeguards The lightning flash with arrowhead symbol, CAUTION This set has been designed and manufactured to assure with care. Quick stops, excessive force, and uneven within an equilateral triangle, is intended to personal safety. Improper use can result in electric surfaces may cause the product and cart RISK OF ELECTRIC SHOCK alert the user to the presence of uninsulated... -
Page 4: Advantages Of This Product Are
Advantages of This Product Are ..Important Safeguards 13 LIGHTNING only those controls that are covered by the • DVD, VCD, CD, CD-R(MP3), CD-RW, VHS • Various TV aspect (DVD) For added protection for this unit during a operating instructions. Improper adjustment of •... -
Page 5: Read Carefully Before Using
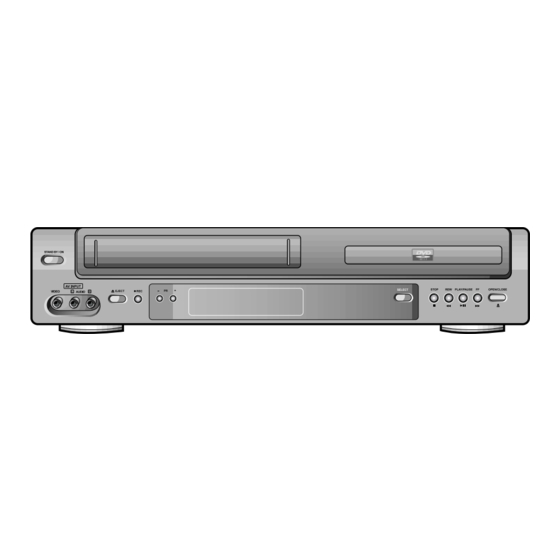
Read Carefully before Using Identification of Controls Main body (front panel) Cautions in use of DVD-Video player are described engineers. below. • For checking, contact your dealer or your nearest service center. Please read carefully before using a DVD-Video player. Checking and Replacement of Antenna Installation place and handling •... - Page 6 Identification of Controls Identification of Controls Main body (Rear Panel) Operation Display Window - RECORDING MODE - - REPEAT MODE - Repeat one chapter [DVD] Timer Recording Standby Repeat track [VCD, CD, DivX, MP3, JPG] Repeat title & [DVD] Repeat DISC Timer Recording Error [VCD, CD, DivX, MP3, JPG] Repeat FOLDER...
-
Page 7: Remote Control
Remote Control Identification of Controls [DVD] OPEN/CLOSE button, [VCR] EJECT button Accessories @ VCR SELECT button [DVD, VCR] NUMBER button, [VCR] TRACKING -/+ button Instruction Remote control 2 Batteries RF cable $ SYSTEM button (This button is not available for this set) Manual % SETUP button “... -
Page 8: Setting Up Your Player
Setting up your player Connecting your player through extra equipment (satellite system) Before you start, unplug all the equipment from the mains supply. (Option 1) - Connecting your player through RF lead Before you start, unplug all the equipment from the mains supply. (Option 1) - Connecting your player through RF lead Television Television... -
Page 9: Connecting Your Player To The Hi-Fi System
Connecting your player to the Hi-Fi system How to connect your player to another player Before you start, unplug all the equipment from the mains supply. Before you start, unplug all the equipment from the mains supply. How to connect Option 1 First player Television... -
Page 10: Connecting Dolby Digital Amp With Digital Audio Out Jack
Connecting Dolby Digital Amp with 2nd scart socket Digital Audio Out Jack 2nd scart socket If your video has the AV2 output, shown in the diagram below, you can connect other equipment as seen on How to connect pages 13-16. 2nd scart INPUT ONLY REAR PANEL OF DVD-VIDEO... -
Page 11: Initial Installation
Initial Installation Setting time and date Switch the TV on. Setting time and date You can also start "AUTO SEARCH" in the SETUP "PR PRESET" "AUTO SEARCH". To tune in new stations (manual tuning) and to enter station names see page 25-26. Press [VCR] button on the remote control to change into VCR Mode and follow the procedure Setting up the player below. -
Page 12: Osd On & Off / Output Select
OSD ON & OFF DVD Playback OSD (On Screen Display) ON & OFF Press [ ] button to power on. This player is set to “OSD (On Screen Display) ON” mode before shipping and you can change it Press [DVD] button of REMOTE to change into DVD mode. to OFF mode. -
Page 13: Vcr Playback
VCR Playback Recording To Record With VCR Press [ ] button to power on. Press [VCR] button of remote control to change into VCR mode. Press [ ] button to power on. • Press [VCR] button of remote control to change into VCR mode. Insert the desired tape. -
Page 14: Tuning In New Stations
Tuning in New Stations Recording To Copy From DVD To Videotape The TV and player are switched on. To see the picture from your player, press the input or AV (Audio/Video) button on the TV. Insert the desired DVD disc. When it is a DVD disc with copy protect function, you can’t copy it. - Page 15 Tuning in New Stations Tuning in New Stations Station names Sorting programme locations If your player is showing no station name or is showing a station name incorrectly, you can correct If the location numbers used for programmes stored in your TV and player are different, you can change them on this.
-
Page 16: Timer Recording
Timer Recording Timer Recording For timer recordings, clock, date, and stations must be set correctly. Load a cassette with its safety tab in place and with sufficient free space for the recording. Normal timer recording Timer Review – changing and erasing Call the player’s "SETUP", choose "TIMER PROGRAM". -
Page 17: More Functions
More Functions More Functions The counter counts in real time from the point you load the cassette. This does not have to be its Accessing counter zero position beginning! The counter does not count unrecorded parts of the tape. If you rewind beyond the zero position, the counter counts in negative values (e.g. – 0:01:15). The player will wind to the position 0:00:00 and stop. -
Page 18: Child Lock
More Functions More Functions The player machine records the complete sound signal transmitted by the TV station. On the mono VCR, you will hear the normal mono sound. Child lock The Hi-Fi system Press the [ ] button for about 5 seconds. In addition to the normal mono sound track of VHS video recorders, your player machine is equipped with a No buttons of front panel can be operated now and LOCK INDICATOR (“... -
Page 19: Connections And Copying
Connections and Copying Connections and Copying Switch off all components when connecting or disconnecting cables. If you are using a SCART cable, select the AV input on the TV to see the picture from the player. If you are not using a SCART cable, select the button number on the TV reserved for video input to Copying see the picture from the player. -
Page 20: Playing A Desired Scene
Playing a desired scene Playing desired scene To skip scenes in a disc Repeating a defined period To move to next chapter (or track), press [√√ NEXT] button. Each time you press [REPEAT] button in playback mode, repeat playback starts as below. The current chapter (or track) moves to the next chapter (or track). - Page 21 Playing desired scene Playing desired scene Searching VCD with a track or track time Searching DVD with a title number, a chapter number or a time If you want to search with a track number, press If you want to search with a title number, press current title number [SEARCH] button one time.
-
Page 22: Confirming The Current Play Mode On Screen
Confirming the current PLAY mode on screen Confirming the current PLAY mode on screen Confirming the current VCD and DivX disc mode Confirming the current DVD disc mode While in playing, press [DISPLAY] button. While in playing, press [DISPLAY] button. It shows the current disc mode. -
Page 23: Selecting An Audio Language, Subtitle Language And 3D Audio
Selecting an AUDIO language, Selecting ZOOM and Multi Angle SUBTITLE language and 3D AUDIO Using a zoom function The user can enlarge the current screen about 0.25 or 3 times. Selecting an audio language Keep pressing [ZOOM] button till the preferred zoom appears. The user may select an audio language and subtitle language if a disc includes Multi-language. -
Page 24: About Mp3, Jpg And Divx® Discs
About MP3, JPG and DivX® discs About MP3, JPG and DivX® discs Playing a disc containing MP3 or JPG files Recognizing range for a MP3 disc is stated below. You will play a MP3 file or a JPG file recorded in disc. •... - Page 25 About MP3, JPG and DivX® discs About MP3, JPG and DivX® discs Playing a disc containing DivX® files • When the frame number of screens per a second is more than 30, it may not play it Insert a DivX disc. normally.
-
Page 26: Displaying Menus In A Disc
Language Setup Displaying menus in a disc A user can set OSD language, Audio, Subtitle and Disc Menu. To display menus in a disc While STOP , press [SETUP] button. OSD LANGUAGE ENGLISH If a disc includes menus, the user may use them. AUDIO AUTO SUBTITLE... -
Page 27: Video Setup
Video Setup Language Setup A user can set up a connected TV condition and screen. Selecting Disc Menu language. OSD LANGUAGE GERMAN AUDIO SPANISH While STOP , press [SETUP] button. Set your preferred DISC MENU language with SUBTITLE ITALIAN TV ASPECT 4 : 3 LB [ENTER]. -
Page 28: Audio Setup
Audio Setup Others Setup A user may select audio menu according to a user’s speaker set. While STOP or RESUME STOP, press [SETUP] button. SCREEN SAVER While STOP or Resume STOP, press DEFAULTS RESET DIGITAL OUT BITSTREAM PARENTAL 8 ADULT [SETUP] button. -
Page 29: About Dvd
About DVD Others Setup Playable Disc Changing a password. • DVD, Video CD(Version 1.1, 2.0), S-VCD and Audio CD To change your password, move the cursor SCREEN SAVER RESET DEFAULTS to “ CHANGE PASSWORD” and press [√]. 8 ADULT PARENTAL Disc type Playable Restriction... - Page 30 About DVD About DVD Terms related with DVD Handling Disc A DVD (abbreviation of Digital Versatile Disc or Digital Video Disc) can include 135 minutes of video information. And for audio, it can hold up to 8 kinds of languages and 32 kinds of subtitle languages. By using MPEG-2 video compression and digital 3D surround sound, DVD realizes high-defined screen •...
-
Page 31: Basic Information About Vcr And Videotape
Basic information about VCR and Videotape Before doubting about troubles (VCR) Terms related with VCR Symptom Checks Automatic fine tuning, a circuit that automatically adjusts TV reception to optimum condition. • “Power On” does not work. Please check whether a power plug is inserted in an electric outlet. CABLE Cable television. -
Page 32: Before Doubting About Troubles (Dvd)
Before doubting about troubles (DVD) Before doubting about troubles (VCR) Symptom Checks Symptom Checks • Recording a TV program is • The recorder does not play. For recording, you should use videotape with a tab. If a DVD is from overseas, it may not be played. Please check a impossible. -
Page 33: Specifications
Specifications Power 200-240V~, 50/60Hz Consumed electricity Weight 4.6kg Dimension (W x H x D) 435mmx93mmx255mm (without foot), 435mmx98mmx255mm (with foot) Operative temperature +5°C~40°C Installation condition Horizontal / Relative humidity under 80% Laser output 5mW (continuous wave max.) Wave length 635nm (DVD), 730nm (CD) Signal type PAL COLOR Antenna Input/output...
Need help?
Do you have a question about the DX-9810 and is the answer not in the manual?
Questions and answers