Advertisement
Quick Links
© 2009 Pella Corporation
INSTALLATION INSTRUCTION -
INSTRUCCIONES DE INSTALACIÓN
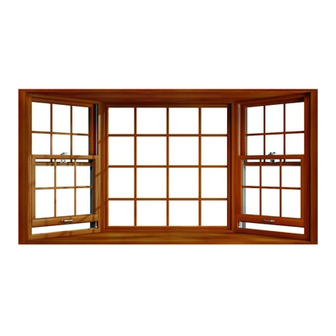
FOR SQUARE DESIGN BAY AND BOW WINDOW
WITH SEAT BOARD
Lea las instrucciones en español en el reverso.
Read these instructions thoroughly before performing any steps.
Jamb covers
(2-1/2" Wide)
Head frame
expander
Always read the Pella
installing this product, you are acknowledging that this Limited Warranty is part of the terms of the
sale. Failure to comply with all Pella installation and maintenance instructions may void your Pella
product warranty. See Limited Warranty for complete details at http://warranty.pella.com.
Note: These instructions may be used for Square Design Pella Bay and Bow windows that
have a head and seat board. Support cables are installed in factory assembled bay and bow
combinations.
Caution: The factory-installed support cables must be attached to members capable of
supporting 1,300 lbs. If the members are not capable of supporting 1,300 lbs., knee braces
must be used in addition to the cables. Bay and bow units are not intended to support any
roof structure. Consult an architect, engineer or construction professional if the ability of the
members to support the bay or bow is not known.
Installation Instructions for Typical Wood Frame Construction.
These instructions were developed and tested for use with typical wood frame wall
construction in a wall system designed to manage water. These instructions are not to be
used with any other construction method. Installation instructions for use with other
construction methods, multiple units or other bow and bay windows, may be obtained
from Pella Corporation, a local Pella retailer, or by visiting http://www.pella.com. Building
designs, construction methods, building materials, and site conditions unique to your project
may require an installation method different from these instructions and additional care.
Determining the appropriate installation method is the responsibility of you, your architect,
or construction professional.
Cable clamps
Knee braces
®
Limited Warranty before purchasing or installing Pella products. By
Part Number: 81470102
Flashing tape #1
Flashing tape #2
Advertisement

Related Manuals for Pella 81470102


Summary of Contents for Pella 81470102
- Page 1 Limited Warranty is part of the terms of the sale. Failure to comply with all Pella installation and maintenance instructions may void your Pella product warranty. See Limited Warranty for complete details at http://warranty.pella.com.
- Page 2 • Square • Closed cell foam backer rod/sealant backer (12 to 30 ft.) • Hammer or Finish Nailer ® ™ • Pella SmartFlash foil backed butyl window and • Stapler door flashing tape or equivalent • Scissors or utility knife ™...
- Page 3 ROUGH OPENING PREPARATION (CONTINUED) F. Confirm wall depth measurement. Measure bottom board cutback on unit to make sure it is larger than the distance from the interior of wall to exterior of wall. If necessary, remove or cut siding. Measure This Distance G.
- Page 4 ROUGH OPENING PREPARATION (CONTINUED) 1 " J. Apply sill flashing tape #2. Cut a piece of flashing tape 12" longer than the opening width. Apply at the bottom, overlapping tape #1 by at least 1". DO NOT allow the tape to extend past the interior face of the opening.
-
Page 5: Cable Clamp Installation
PREPARING AND SETTING THE WINDOW (CONTINUED) TWO OR MORE PEOPLE WILL BE REQUIRED FOR THE FOLLOWING STEPS B. Insert the window from the exterior of the building. Place the seat of the window at the bottom of the opening and slide the top into position. Center the window between the sides of the opening to allow clearance for shimming. - Page 6 CABLE CLAMP INSTALLATION (CONTINUED) CROSS BRACING MOUNT OF CABLE CLAMPS A. Install 2" x 6" cross braces between rafter tails, directly above the cable holes in the bay/bow head board. B. Install the cable clamps directly above the "T" nuts where adequate support is available.
- Page 7 CABLE CLAMP INSTALLATION (CONTINUED) HEADER MOUNT OF CABLE CLAMPS This method may only be used if the projection of the bay/bow is 18" or less. Use the Cross Bracing method if the projection of the bay/bow is more than 18". Note: Be sure that the cable clamps are secured DASHED LINES INDICATE to a solid structural member - header, sill plates...
- Page 8 INSULATING FOAM APPLICATION Caution: Ensure use of low pressure polyurethane window and door insulating foams and strictly follow the foam manufacturer’s recommendations for application. Use of high pressure foams or improper application of the foam may cause the window frame to bow and hinder operation.
- Page 9 SEALING THE WINDOW TO THE EXTERIOR WALL CLADDING Note: The sealant details shown are standard recommendations from the sealant industry. Contact your sealant supplier for recommendations and instructions for these and any other applications. VINYL SIDING REPLACEMENT 2X4 WOOD SIDING REPLACEMENT 2X6 Backer Rod Backer Rod Sealant typical...
- Page 10 SEALING THE WINDOW TO THE EXTERIOR WALL CLADDING (CONTINUED) A. Install wood blocking between the top of the window and the soffit as shown. The blocking should be flush with the exterior of the window frame. B. Apply a bead of sealant on the leg of the head frame expander and install by tapping on it using a block of wood with rounded edges and a hammer.
- Page 11 L. Insert backer rod and apply sealant. Install siding, and insert backer rod between the each jamb cover and the exterior finish material as deep as it will go. Apply a bead of high quality exterior sealant on top of the backer rod and a corner bead to the top of the head frame expander.
-
Page 12: Exterior Finish
Pella windows and doors installed in barrier wall systems. In the states listed above, the installation of Pella Products in barrier wall or similar systems must be in accordance with Pella’s installation instructions.
Need help?
Do you have a question about the 81470102 and is the answer not in the manual?
Questions and answers