Table of Contents
Advertisement
Quick Links
© 2012, Moog Videolarm, Inc. All Rights Reserved
F C H S e r i e s
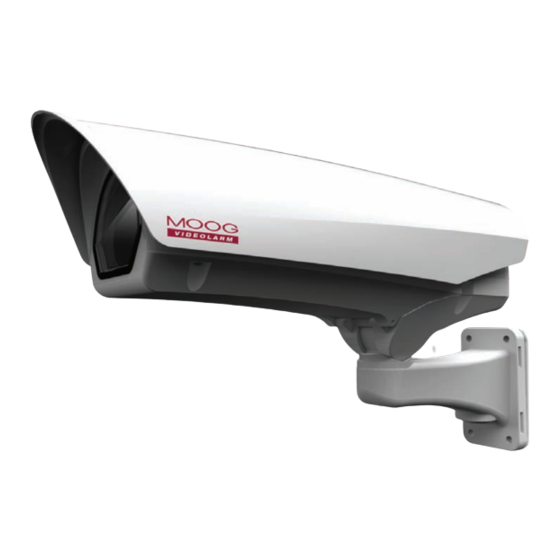
Rugged Environmental Camera Enclosure Housings
Installation and Operation Instructions for the following models:
FCH11CW
Environmental housing with feed-thru wall / pole mount
FCH11C2W
Environmental housing with feed-thru wall / pole mount,
24Vac or 12Vdc input, heater/ blower
FCH11C2WY
Environmental housing with feed-thru wall / pole mount,
24Vac or 12Vdc input, heater / blower, adjustable sunshield
FCH11C8WY
Environmental housing with feed-thru wall/pole mount, dynamic power
allocation PoE input, 30 watt midspan included, heater & blower, supports .at
PoE cameras, adjustable sunshield
FCH11C2WQ
Environmental housing with heat exchanger, feed-thru wall / pole mount,
24Vac or 12Vdc input, heater & blower
FCH11C8WQ
Environmental housing with heat exchanger, feed-thru wall / pole mount,
dynamic power allocation PoE input, 30 watt midspan included,
heater & blower, sunshield, supports .at PoE cameras
Before attempting to connect or operate this product, please read these instructions completely.
www.moogvideolarm.com
81-IN5484
02-29-2012
Advertisement
Table of Contents

Related Manuals for Moog Videolarm FCH SERIES


Summary of Contents for Moog Videolarm FCH SERIES
- Page 1 © 2012, Moog Videolarm, Inc. All Rights Reserved F C H S e r i e s Rugged Environmental Camera Enclosure Housings www.moogvideolarm.com Installation and Operation Instructions for the following models: FCH11CW Environmental housing with feed-thru wall / pole mount FCH11C2W Environmental housing with feed-thru wall / pole mount, 24Vac or 12Vdc input, heater/ blower FCH11C2WY Environmental housing with feed-thru wall / pole mount, 24Vac or 12Vdc input, heater / blower, adjustable sunshield FCH11C8WY Environmental housing with feed-thru wall/pole mount, dynamic power allocation PoE input, 30 watt midspan included, heater & blower, supports .at...
-
Page 2: Important Safeguards
IMPORTANT SAFEGUARDS SAFETY PRECAUTIONS Read these instructions. Keep these instructions. CAUTION Heed all warnings RISK OF ELECTRIC SHOCK DO NOT OPEN Follow all instructions. Do not use this apparatus near water. CAUTION: TO REDUCE THE RISK OF Clean only with damp cloth. ELECTRIC SHOCK, DO NOT REMOVE COVER ( OR BACK). -
Page 3: Terms And Conditions
If Purchaser believes that the Product is defective in material or workmanship, then written notice with an explanation of the claim shall be given promptly by Purchaser to Moog Videolarm. All claims for warranty service must be made within the warranty period. -
Page 4: Electrical Specifications
Electrical Specifications Contents of Box FCH11 Series Power 24Vac / 12Vdc Class 2 Only OUTDOOR and PoE MODELS: FCH11C2W / FCH112WY / FCH11C8WY 24Vac: 26 watts Heater (25 watts), Blower (1 watt) 12Vdc: 10 watts Heater (9 watts), Blower (1 watt) PoE: IEEE802.at Camera Power:... - Page 5 NOTE: THE FOLLOWING INSTRUCTIONS MAINLY SHOW THE FCH11C2W, BUT THESE INSTRUCTIONS ARE APPLICABLE TO ALL FCH11 MODELS. WALL MOUNTING If you are running a conduit to the housing, rst Attach mount to wall with suitable hardware install the appropriate tting to the wall mount. (not provided). • Si usted está funcionando con un conducto a la cubierta, primero instale •...
- Page 6 Hinge housing away from mount by loosening (2) rear screws. • Abisagre la cubierta lejos del montaje aflojando (2) los tornillos posteriores. • Articulez le logement à partir du bâti en desserrant (2) les vis arrière. • Lagern Sie Gehäuse weg von Einfassung schwenkbar, indem Sie (2) hintere Schrauben lösen.
- Page 7 Pass cables through wiring membranes Hinge the housing closed and tighten (2) rear screws. (use screwdriver to pierce). • Abisagre la cubierta cerrada y apriete (2) los tornillos posteriores. • Pase los cables a través de las membranas del cableado (el destornillador del uso a perforar) .
-
Page 8: Incoming Power
Mount camera with ¼-20 hardware. Slide tray into place and con rm tabs are securely snapped into place. • Cámara del montaje con el ¼ - hardware 20. Resbale la bandeja dentro de lugar y confirme las lengüetas se encajan a presión con seguridad hacia lugar. •... - Page 9 12Vdc Diagram - Terminate incoming voltage as shown. INCOMING POWER - Install shunt on “12Vdc” jumper as shown. - Power output to camera will be 12Vdc. SHUNT • Termine el voltaje entrante como se muestra. - Instale la desviación en el puente “12Vdc” como se muestra. - La salida de energía a la cámara será...
- Page 10 The camera tray can be securely locked into place with the provided 3.5 x 7mm screw. Tighten it through the rear tray tab. Close the housing lid and securely tighten the • La bandeja de la cámara se puede trabar con seguridad en lugar con el (2) lid screws.
-
Page 11: Replacement Parts
Replacement Parts Part Number Description RPVL3948 FCH Camera Tray FCH11 RPVL3950 FCH Heater + Bracket RP76VL2016 FCH 12VDC/24VAC PCB RPFD080 12VDC 40mm Fan RPVL3953 Cable Membrane (0.60" hole) RPFTM2425G FCH Wall Mount Assembly RPFCH11HP FCH Hardware Packet RP71VLBL09 Outdoor Rated Fan (Thermiq only) ... -
Page 12: Product Registration/Warranty
Product Registration/Warranty Thank you for choosing Moog Videolarm. We value your patronage and are solely committed to providing you with the highest quality products available and superior customer service. Should a problem arise, rest assure that Moog Videolarm stands behind its products by offering impressive warranty plans: 3 Years on all Housings, Poles, Power Supplies, and Accessories and 5 Years on camera systems (SView, QView, Warriors), and InfraRed Illuminators. Register Your Products Online Take a few moments and validate your purchase via the Online Product Registration Form at www.videolarm.com/productregistration.jsp Register your recent Moog Videolarm purchases and benefit from the following: • Simple and Trouble-Free RMA process • Added into customer database to receive product updates / news • Eliminate the need to archive original purchase documents: Receipts, Purchase Orders, etc…...
Need help?
Do you have a question about the FCH SERIES and is the answer not in the manual?
Questions and answers