Table of Contents
Advertisement
Quick Links
Introducing the Wireless-N CardBus Adapter
The Wireless-N CardBus Adapter is designed to add 802.11n
wireless network to your notebook computer for fast
internet access.
Features and Benefits
•
Compliant with 802.11n draft 2.0, 802.11g and
802.11b standards
•
Supports QoS-WMM, WMM-PS
•
Supports 64/128-bit WEP, WPA (TKIP with IEEE
802.1x), WPA2 (AES with IEEE 802.1x) functions for
high level of security
•
Three internal antenna with 2T3R feature enhances
data throughput with increased transmitting range
for all compatible legacy bands (802.11 a/b/g)
•
Farther coverage, less dead spaces and higher
throughput with MIMO technology
System Requirements
•
PC computer with an available Cardbus interface
•
Windows
(32-/64-bit) / Vista (32-/64-bit)
04-0537B
Wireless-N CardBus Adapter
Quick Installation Guide
2000 / XP (32-/64-bit) / Server 2003
®
1
Advertisement
Table of Contents

Related Manuals for SIIG Wireless-N CardBus Adapter


Summary of Contents for SIIG Wireless-N CardBus Adapter
-
Page 1: Quick Installation Guide
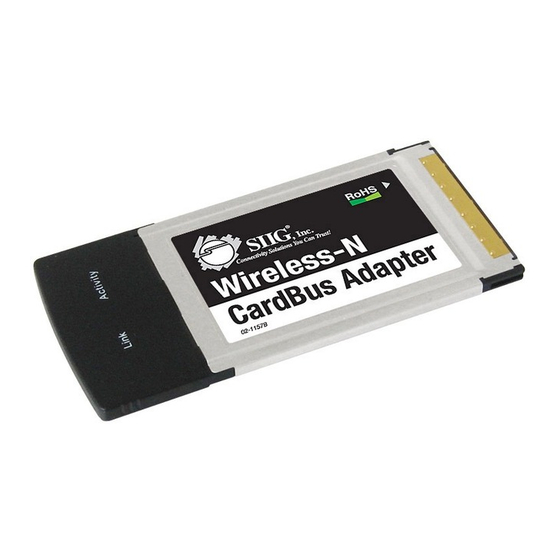
Wireless-N CardBus Adapter Quick Installation Guide Introducing the Wireless-N CardBus Adapter The Wireless-N CardBus Adapter is designed to add 802.11n wireless network to your notebook computer for fast internet access. Features and Benefits • Compliant with 802.11n draft 2.0, 802.11g and 802.11b standards... - Page 2 Package Contents • Wireless-N CardBus Adapter • Driver CD • Quick Installation Guide Layout Activity LED Link LED Figure 1: Layout Activity LED Flashing: Transferring/receving data Off: No wireless activity Link LED On: Linked to a wireless access point/transferring data...
-
Page 3: Safety Information
Safety Information In order to keep the safety of users and your properties, please follow the following safety instructions: This wireless network card is designed for indoor use only. DO NOT expose this network card to direct sun light, rain, or snow. DO NOT put this network card at or near hot or humid places, like kitchen or bathroom. -
Page 4: Driver Installation
Power on your notebook computer. Note: In most system it is not necessary to turn off the notebook before inserting the cardbus adapter into the cardbus slot. Driver Installation Windows 2000/XP/2003 Server At the Found New Hardware Wizard, click Cancel. Insert the driver CD, Click Start, Run. -
Page 5: Windows Vista
Windows Vista ™ At the Found New Hardware window, click Cancel. Insert the driver CD. Click Start, in the Start Search box, type D:\CardBus\setup.exe, press Enter. (Change the D: to match your CD-ROM drive letter) Click Allow. Choose I accept the terms of the license agreement, then click Next. -
Page 6: Connecting To Wireless Access Point
If you stopped config utility by Exit function, you will not be able to maintain the wireless link to the access point you wish to use. In this case, you can start config utility again by clicking Start, All Programs, Ralink Wireless, Ralink Wirelss Utility. - Page 7 Figure 3 Configuration utility will scan for all wireless access points automatically. Scan results will be displayed here, please check if the wireless access point with the SSID (the name of wireless access point) you preferred is shown in Figure 4. If the wireless access point you wish to connect does not show here, please click Rescan to try again, until the one you preferred is displayed.
- Page 8 Click the wireless access point or network device you wish to connect to, then click Connect, shown in Figure 5 below. Figure 5 The non-encrypted access point (The Encryption field indicate None) will connected within one minute. Please jump to step 5 on page 9 if the access point you selected enables encryption, otherwise proceed to next step.
- Page 9 If the wireless access point you selected have SSID, please skip this step, shown in Figure 6. Figure 6 If the wireless access point uses encryption, you have to input WEP passphrase or WPA preshared key. Shown on Figure 7, please ask the owner of the wireless access point to obtain the correct passphrase/preshared key and enter here, then click OK.
- Page 10 You’ll see Connected <-> SSID (SSID is the SSID of the wireless access point or wireless device you connected to) message displayed at lower-left corner of configuration utility, congratulations, you’re successfully connected to the access point or wireless device you selected, shown in Figure 8. Figure 8 SSID: The Service Set IDentifier of wireless access point or other network device.
- Page 11 Signal: Shows the signal strength of access point or wireless device. Larger number means better radio strength. Channel: Shows the channel number that access point or wireless device uses. Encryption: Shows the encryption method that access point or wireless device uses. If the wireless access point does not enable encryption, you’ll see None displayed here.
-
Page 12: Using Windows Zero Configuration
Using Windows Zero Configuration Windows XP and Vista has a built-in wireless network configuration utility called Windows Zero Configuration (WZC). You can use WZC to configure your wireless network adapter. Right-click Ralink configuration utility icon and select Use Zero Configuration as Configuration utility, shown in Figure 9. - Page 13 Figure 10 All wireless access points in proximity will be displayed here. If the access point you want to use is not displayed here, please move your computer closer to the access point, or you can click Refresh network list to rescan access points. Click the access point you want to use if it’s shown, then click Connect, shown in Figure 11.
-
Page 14: Soft-Ap Function
If you can see Connected message, the connection between your computer and wireless access point is successfully established. Soft-AP Function In addition to being a wireless client of other wireless access points, this wireless card can act as a wireless service provider. - Page 15 After you select Switch to AP Mode, the Ralink utility icon will indicated the wireless card is operating in AP mode now. If you want to switch the wireless card back to station mode (become a client of other wireless access points), click Switch to Station Mode.
- Page 16 Channel: Please select the wireless channel you wish to use. The number of channels available here will vary depends on the setting of Country Region Code. Wireless Mode: Please select the wireless operating mode. You can limit the type of wireless client to 802.11b or 802.11g only, or allow 802.11b/g, and 802.11b/g/n clients.
- Page 17 2: SPAIN 3: FRANCE 4: MKK 5: MKKI (TELEC) 6: ISRAEL (Channel 3 to 9) 7: ISRAEL (Channel 5 to 13) Beacon(ms): You can define the time interval that a beacon signal should be send. Default value is 100. Do not modify this value unless you know what will be affected.
-
Page 18: Security Settings
Security Settings This wireless card supports wireless encryption in AP mode, which will encrypt the data being transferred over the air to enhance data security level. It’s recommended to enable data encryption unless you wish to open your computer (and its internet connection) to the public. When you click Security Setting in Ralink configuration utility, shown in Figure 14. - Page 19 Encryption Type: Please select an encryption mode. The available options in this setting item will vary depending on the authentication type you select. If you select Not Use, data will not be encrypted and people with some networking knowledge will be able to read the data you transfer with proper tool.
- Page 20 If you want to use WEP 64 bit encryption, please input 10 characters; if you select HEX, or input 5 characters if you select ASCII; If you want to use WEP 128bit encryption, please input 26 characters if you select HEX, or input 13 characters if you select ASCII.
- Page 21 Figure 15 Access Policy: Select the policy type of your access rule: Disable:Allow any wireless client with proper authentication settings to connect to this access point. Allow All: Only allow wireless clients with MAC address listed here to connect to this access point. Reject All: Reject wireless clients with MAC address listed here to be connected to this access point.
-
Page 22: Mac Table
Mac Table Show the list all wireless clients connected to this access point, shown in Figure 16. Figure 16 MAC Address: Displays the MAC address of this wireless client. AID: The serial number of this wireless connection. Power Saving Mode: Displays the capability of power saving function of this wireless client. - Page 23 Event Log This software access point will log all wireless-related activities as a log, shown in Figure 17. Figure 17 You can click Clear to remove all entries in the log.
- Page 24 Statistics This page shows detailed information about how your software access point works, shown in Figure 18. Figure 18 You can click RESET COUNTERS button to reset all counters to zero.
- Page 25 Blank Page...
- Page 26 Blank Page...
-
Page 27: Technical Support And Warranty
• Clearly write your RMA number on the top of the returned package. SIIG will refuse to accept any shipping package, and will not be responsible for a product returned without an RMA number posted on the outside of the shipping carton. - Page 28 Fremont, CA 94538-3152, USA Ph: 510-657-8688 Wireless-N CardBus Adapter is a trademark of SIIG, Inc. SIIG and the SIIG logo are registered trademarks of SIIG, Inc. Microsoft, Windows and Windows Vista are either registered trademarks or trademarks of Microsoft Corporation in the United States and/or other contries.
Need help?
Do you have a question about the Wireless-N CardBus Adapter and is the answer not in the manual?
Questions and answers