MF DIGITAL Scribe EC Operator's Manual
Hide thumbs
Also See for Scribe EC:
- Installation manual (14 pages) ,
- Installation manual (10 pages) ,
- Installation manual (11 pages)
Table of Contents
Advertisement
Quick Links
Download this manual
See also:
Installation Manual
Advertisement
Table of Contents

Related Manuals for MF DIGITAL Scribe EC


Summary of Contents for MF DIGITAL Scribe EC
- Page 1 Series Operator’s Guide...
- Page 2 Other trademarks referred to are the property of their respective trademark or registered trademark holders. Warranty MF DIGITAL warrants to the original purchaser that the equipment that you have purchased is free from defects in materials and workmanship, for a period of time as follows: Duplicator Electronics & Mechanical Parts...
- Page 3 SCRIBE EC Operator’s Guide Document Revision: 11/4/04 MF DIGITAL 121 Carolyn Blvd. Farmingdale, NY 11735 Tel.: (631) 249 9393 Fax.: (631) 249 9273 Email: info@MFDIGITAL.COM www: http://www.MFDIGITAL.com Page 2...
-
Page 4: Table Of Contents
AKING THE ONNECTION DRIVE PECTRUM SCRIBE EC / P )................19 AKING THE ONNECTION DRIVE RISM (PC) ..........................20 AKING THE ONNECTION INSTALLING THE SCRIBE EC SOFTWARE ....................20 INSTALLING THE SCRIBE EC SOFTWARE ....................21 INSTALLING THE SCRIBE EC ALIGNMENT UTILITY ................23 Page 3... - Page 5 SCRIBE EC Operator’s Guide Document Revision: 11/4/04 STARTING THE SCRIBE EC FOR THE FIRST TIME ..................24 ........................24 OWER ONNECTION ETTINGS ................................24 TARTING INSTALLING THE DRIVE BAY ...........................25 ............................26 LIGNING THE RIVE SETTING UP THE PRINTERS ..........................27 SETTING UP THE PRINTERS ..........................28...
- Page 6 SCRIBE EC Operator’s Guide Document Revision: 11/4/04 ISRC C .....................60 HANGING ODES ROHIBIT LAGS ......................61 NSERTING DITING EMOVING ILENCE ....................62 NSERTING DITING EMOVING UBINDEXES ......................63 AVING URRENT UDIO MAGE ......................64 OADING XISTING UDIO MAGE JOB MANAGER TAB ..............................65 ................................65 UEUED JOBS .................................67...
-
Page 7: About Mf Digital
This manual is written for both novice and experienced users. Please read through this Operator’s Guide from beginning to end before using the unit. Once having read the manual, follow along chapter by chapter. This will provide the necessary understanding of your new SCRIBE EC duplication system. Page 6... -
Page 8: Minimum System Requirements
• One free PCI slot for 1 Drive System, Not required for Print Station Only. • One external COM Port (COM1 or COM2) *Two external COM ports are needed if using MF DIGITAL Spectrum2 or Prism Plus (COM1 and COM2). • WinASPI driver layer (Included) •... -
Page 9: Installing The Scribe Ec
Carefully remove the SCRIBE EC duplication system from the shipping container. Inspect the contents and verify them against the packing slip. Report any errors in shipping as soon as possible. The SCRIBE EC is available as a print only system, a copy only system, or both a copy and print system. -
Page 10: Packing Materials
AC receptacle. DO NOT try to defeat the third “ground” prong. All computer peripherals must be properly grounded and the SCRIBE EC is no exception. The use of a power conditioner such as an Uninterruptible Power Supply (UPS), or a surge protector is highly recommended. -
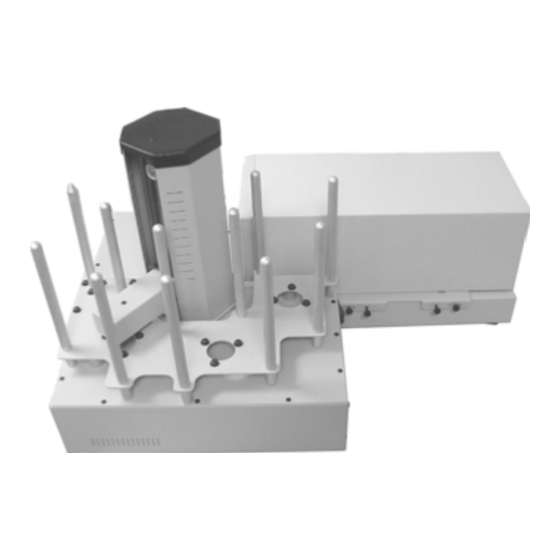
Page 11: Location Of Scribe Ec Components
SCRIBE EC Operator’s Guide Document Revision: 11/4/04 Location Of SCRIBE EC Components Front View Rear View Page 10... -
Page 12: Location Of Cd-R/Rw Recorder Parts And Controls
1. Disc tray - Discs are loaded and removed from this tray. Pressing the eject button will open the tray when the power is switched on to the SCRIBE EC. 2. Emergency eject pinhole - In the event that the disc tray will not open by pressing the eject button, insert the tip of a large paper clip into this hole and push. -
Page 13: Location Of Dvd±R/±Rw Recorder Parts And Controls
SCRIBE EC Operator’s Guide Document Revision: 11/4/04 Location Of DVD±R/±RW Recorder Parts And Controls Pioneer DVD±R/±RW A-06 Drive Legend Disc Tray - Discs are loaded and removed from this tray. Pressing the eject button will open the tray when the power to the Scribe is switched on. -
Page 14: Removing Packing Restraints
Document Revision: 11/4/04 Removing Packing Restraints The SCRIBE EC ships with a picker arm restraint to reduce the possibility of damage in transit. This restraint must be removed before operation or power-on. Remove the foam block above the transfer arm. Save the foam block, as you will need to return it to its place when transporting the unit in the future. -
Page 15: Mounting The Firewire Adapter Card
SCRIBE EC Operator’s Guide Document Revision: 11/4/04 Mounting the Firewire Adapter Card You should never attempt to service a unit without ensuring proper anti- static protection. The use of a grounding strap, or other such grounding Note: device, is advised. In addition, the internal configuration of your computer may be different from the computer pictured below. -
Page 16: Making The Connection
SCRIBE EC Operator’s Guide Document Revision: 11/4/04 Making the Connection Making the Connection (1 & 2 drive SCRIBE EC / Spectrum2) (fig. 1) Page 15... -
Page 17: Making The Connection (1 & 2 Drive Scribe Ec / Inkjet)
SCRIBE EC Operator’s Guide Document Revision: 11/4/04 Making the Connection (1 & 2 drive SCRIBE EC / Inkjet) Page 16... -
Page 18: Making The Connection (4 Drive Scribe Ec / Inkjet)
SCRIBE EC Operator’s Guide Document Revision: 11/4/04 Making the Connection (4 drive SCRIBE EC / Inkjet) Page 17... -
Page 19: Making The Connection (4 Drive Scribe Ec / Spectrum2)
SCRIBE EC Operator’s Guide Document Revision: 11/4/04 Making the Connection (4 drive SCRIBE EC / Spectrum2) Page 18... -
Page 20: Making The Connection (4 Drive Scribe Ec / Prism Plus)
SCRIBE EC Operator’s Guide Document Revision: 11/4/04 Making the Connection (4 drive SCRIBE EC / Prism Plus) Page 19... -
Page 21: Making The Connection (Pc)
SCRIBE EC Operator’s Guide Document Revision: 11/4/04 Making the Connection (PC) (THERMAL PRINTER ONLY) Page 20... -
Page 22: Installing The Scribe Ec Software
SCRIBE EC Operator’s Guide Document Revision: 11/4/04 Installing the SCRIBE EC Software 1. Insert the SCRIBE EC software CD. 2. From the CD ROM drive of the computer, click Install SCRIBE Software. 3. Click Next (fig. 1). (fig. 1) (fig. 2) 4. - Page 23 SCRIBE EC Operator’s Guide Document Revision: 11/4/04 (fig. 3) 5. Click Install (fig. 3). (fig. 4) 6. Click Finish (fig. 4). Page 22...
-
Page 24: Installing The Scribe Ec Alignment Utility
SCRIBE EC Operator’s Guide Document Revision: 11/4/04 Installing the SCRIBE EC Alignment Utility Insert the SCRIBE CD into the CD- ROM drive of your PC. Click on setup.exe of the alignment utility (fig. 1). Click OK (fig. 1). Click the button indicated in (fig. -
Page 25: Starting The Scribe Ec For The First Time
Before CD creation can begin it is necessary to review a few details. Power Connection And Settings • Make sure the SCRIBE EC power switch is set to the off position. • Plug one end of the supplied power cord into the receptacle at the rear of the unit, and the other end into the wall or UPS power outlet. -
Page 26: Installing The Drive Bay
SCRIBE EC Operator’s Guide Document Revision: 11/4/04 Installing the Drive Bay 1. Place the drive bay onto the base unit as seen in (fig. 1). (fig.1) 2. Position the drive bay so that the front right corner sits over the dotted line (fig. -
Page 27: Aligning The Drive Bay
Alert: drive bay in line with the dotted line on the SCRIBE EC base unit. 1. From your Start Menu Open the SCRIBE EC Alignment Utility (fig. 1). It will be located in the folder designated when you installed the alignment utility. - Page 28 SCRIBE EC Operator’s Guide Document Revision: 11/4/04 3. Click Yes when you are satisfied with your adjustment (fig. 4). (fig. 4) 4. The picker arm will then place the disc onto the disc tray. Follow the on screen instructions and click OK (fig.
-
Page 29: Setting Up The Printers
• Spectrum2 printer • Power cord • Parallel printer cable • Printer user guide • Spectrum2 Designer software and printer driver CD • Printer ribbon • MF DIGITAL Product & Warranty Registration card (fig. 0) Cabling arrangement for Spectrum2 Printer Page 28... - Page 30 SCRIBE EC Operator’s Guide Document Revision: 11/4/04 With Phillips head screwdriver, remove the rubber feet from the bottom of the printer (fig. 1). 2. You will also want to remove the small plate from the bottom of the printer (fig. 1).
- Page 31 SCRIBE EC Operator’s Guide Document Revision: 11/4/04 Place the printer / plate onto the drive bay (fig. 3). (fig. 3) Use the dotted line at the rear of the drive bay to get the printer into position prior to alignment (fig. 11).
-
Page 32: Preparing The Prism Plus Printer
SCRIBE EC Operator’s Guide Document Revision: 11/4/04 Preparing the Prism Plus Printer What’s In The Box (Prism Plus) • Prism Plus printer • Power cord • Parallel printer cable • Printer user guide • CD Designer software and printer driver CD •... - Page 33 SCRIBE EC Operator’s Guide Document Revision: 11/4/04 With a Phillips head screwdriver, remove the rubber feet from the bottom of the printer (fig. 1). (fig. 1) 2. Using flat head screws provided, attach the printer plate to the bottom of the printer as seen in (fig.
-
Page 34: Aligning The Thermal Printer
1. From your Start Menu Open the SCRIBE EC Alignment Utility (fig. 1). It will be located in the folder designated when you installed the alignment utility. Click Perform Test. - Page 35 SCRIBE EC Operator’s Guide Document Revision: 11/4/04 3. Click Yes when you are satisfied with your adjustment (fig. 4). (fig. 4) 4. The picker arm will then place the disc onto the printer tray. Follow the on screen instructions and click OK (fig.
-
Page 36: Preparing The Inkjet Printer (Color Printer Iv, Pro Inkjet)
SCRIBE EC Operator’s Guide Document Revision: 11/4/04 Preparing The Inkjet Printer (Color printer IV, PRO Inkjet) What’s In The Box (Signature IV, PRO Inkjet) • Signature IV, PRO printer • Power adapter • Printer software CD • Color ink cartridge •... - Page 37 SCRIBE EC Operator’s Guide Document Revision: 11/4/04 1. Using needle nose pliers, remove the rubber feet from the bottom of the printer (fig. 1). (fig. 1) 2. Screw the printer plate to the bottom of the inkjet printer as seen in (fig.
- Page 38 SCRIBE EC Operator’s Guide Document Revision: 11/4/04 6. Remove the spindles from input area #3 to allow space for the inkjet printer (fig. 3). (fig. 3) 7. Place the printer / plate onto the drive bay (fig. 4). 8. Use the dotted line at the rear of the drive bay to get the printer into position prior to alignment.
-
Page 39: Aligning The Inkjet Printer
1. From your Start Menu Open the SCRIBE EC Alignment Utility (fig. 1). It will be located in the folder designated when you installed the alignment utility. - Page 40 SCRIBE EC Operator’s Guide Document Revision: 11/4/04 3. Click Yes when you are satisfied with your adjustment (fig. 4). (fig. 4) 4. The picker arm will then place the disc onto the printer tray. Follow the on screen instructions and click OK (fig.
-
Page 41: Turning Off Print Spooling
SCRIBE EC Operator’s Guide Document Revision: 11/4/04 Turning Off Print Spooling Print spooling will first store the document on the hard disk before being sent to the printer. Turning off print spooling will specify that the document be sent directly to the printer. -
Page 42: Prn Files (Thermal Printer )
Give your file a name (fig. C). • Select the Labels folder that the SCRIBE EC will use as it’s default, and print the file to this folder (fig. A .prn file cannot be edited. It contains information to create the image, and the settings of the particular printer. -
Page 43: Prn Files (Inkjet Printer )
Click Print to file (fig. C) • Click OK • Type in the full path to the Labels folder that the SCRIBE EC will use as it’s default, and print the file to this (fig. C) folder (fig. D) •... -
Page 44: Application Startup
SCRIBE EC Operator’s Guide Document Revision: 11/4/04 Application Startup The SCRIBE EC is a state-of-the-art CD duplicating system. It is designed to create, duplicate and verify most standard compact disc formats. This startup section will guide you through starting and configuring the SCRIBE EC application. -
Page 45: Scribe Ec Application Layout
(Job Manager, Data Image Editor, Audio Image Editor, and Settings). By completing the information on these cards you control the actions of the SCRIBE EC to create, duplicate and verify CDs as well as print disc labels. -
Page 46: Scribe Ec Startup
Printer, and Communication Serial Ports). The field closest to the top of the tab is the SCRIBE EC’s version information. This lets you know what version of SCRIBE EC you are currently running. The settings below the version information may be customized. -
Page 47: Settings Editor
• To choose a default folder for your CD images, click the Browse button to the right of the CD images default folder field. When creating a new job, this will be the default folder that the SCRIBE EC opens to browse for an image file path. -
Page 48: Cd Labels Default Folder
• To choose a default folder for your CD labels, click the Browse button to the right of the CD labels default folder field. When creating a new job, this will be the default folder that the SCRIBE EC opens to browse for a label file path. -
Page 49: Data Image Editor
The first step in constructing a CD is to specify its contents (disc image). The SCRIBE EC creates industry standard data (Mode 1 ISO 9660 level 2 with Joliet extensions) and audio (Red Book) CDs from scratch as well as duplicates of existing CDs authored in most formats. -
Page 50: Image Toolbar
Along the bottom of the lower panes is a series of radio buttons that are used to select the capacity of the discs that are loaded into the SCRIBE EC: • Click the radio button corresponding to the capacity of the discs loaded into the SCRIBE EC. -
Page 51: Adding Files And Folders
SCRIBE EC Operator’s Guide Document Revision: 11/4/04 Adding Files and Folders • Click the desired file or folder in the top left or right pane (source) and hold down the mouse button. • Drag the file or folder over the CD icon in the lower left pane (fig. 1) and release the mouse button. -
Page 52: Static And Dynamic Content
Document Revision: 11/4/04 Static and Dynamic Content The SCRIBE EC allows CDs to be created from both static and dynamic content. A finished CD created from static content will contain the exact files and folders that are specified when the disc image is created. A... -
Page 53: Removing Files And Folders
Once a data disc image has been created it must be saved so that it can be used by the SCRIBE EC as a data source for recording. Disc images can either be saved as script files (with an “ISC” extension) or physical image files (with an “ISO”... - Page 54 SCRIBE EC Operator’s Guide Document Revision: 11/4/04 To save a data disc image script file: • Click the CD Image Properties button on the toolbar. The screen will now read: The CD IMAGE PROPERTIES dialog box contains a series of radio buttons as well as a number of information boxes.
- Page 55 SCRIBE EC Operator’s Guide Document Revision: 11/4/04 • Click the OK button. • Click the Save CD layout [*.ISC] button on the toolbar. The screen will now read: • Select the volume and directory where you want to save the script file.
-
Page 56: Loading An Existing Script File
SCRIBE EC Operator’s Guide Document Revision: 11/4/04 Loading An Existing Script File Once a data disc image script file has been saved it can be modified at a later date. To load an existing script file: • Click the Load CD layout [*.ISC] button on the toolbar. The screen will now read: •... -
Page 57: Audio Image Editor
The Audio Image Editor tab is divided into four panes. The top left pane lists all the names and icons of the disk drives available to the SCRIBE EC, as well as files and folders on the currently selected disk drive (source). The top right pane displays the contents of any item you click on in the top left pane along with its icon. -
Page 58: Image Toolbar
SCRIBE EC Operator’s Guide Document Revision: 11/4/04 Image Toolbar Horizontally along the top of the screen is an area which contains ten buttons, from left to right the buttons are: New CD layout, Load CD layout [*.ISC], Save CD layout [*.ISC], CD Image properties, Create CD image [*.ISO], Record CD, Enable inserting entire contents of folder [*.*],... -
Page 59: Adding Tracks
SCRIBE EC Operator’s Guide Document Revision: 11/4/04 Adding Tracks • As depicted below, drag one or more WAV / MP3 files onto the text "The end" as it appears in the top left corner of the bottom pane. Multiple files may be selected by pressing and holding down the SHIFT or CTRL key while clicking on the tracks. -
Page 60: Changinga Upc Code
SCRIBE EC Operator’s Guide Document Revision: 11/4/04 Changing A UPC Code The UNIFORM PRODUCT CODE (UPC) is an optional 13-digit descriptor that can be written into an audio CD. To change the UPC code: • Click the CD Image Properties button on the Image toolbar. The screen will now read: •... -
Page 61: Changing Isrc Codes And Copy Prohibit Flags
SCRIBE EC Operator’s Guide Document Revision: 11/4/04 Changing ISRC Codes And Copy Prohibit Flags The INTERNATIONAL STANDARD RECORDING CODE (ISRC) is an optional 12-character descriptor that identifies a specific track on an audio CD. Each track can have its own unique ISRC consisting of 2 alphanumeric characters (country), 3 alphanumeric characters (owner), 2 digits (year of recording) and 5 digits (serial number). -
Page 62: Inserting, Editing And Removing Silence
SCRIBE EC Operator’s Guide Document Revision: 11/4/04 Inserting, Editing And Removing Silence When assembling an audio CD disc image the SCRIBE EC application does not insert silences (gaps) between tracks. To insert silence between tracks: • Right click on an audio track. -
Page 63: Inserting, Editing And Removing Subindexes
SCRIBE EC Operator’s Guide Document Revision: 11/4/04 To remove silence between tracks: • Click the silence indicator you wish to remove in the lower left pane and hold down the mouse button. • Drag the silence indicator over the trashcan in the bottom right of the Audio tab and release the mouse button. -
Page 64: Saving The Current Audio Disc Image
Saving The Current Audio Disc Image Once an audio disc image has been created it must be saved so that it can be used by the SCRIBE EC as an audio source for recording. Disc images are saved as script files (with an “ISC” extension). -
Page 65: Loading An Existing Audio Disc Image
SCRIBE EC Operator’s Guide Document Revision: 11/4/04 Loading An Existing Audio Disc Image Once an audio disc image script file has been saved it can be modified at a later date. To load an existing audio disc image script file: •... -
Page 66: Job Manager Tab
The first step in creating a job is to set the general options so as to define which operations the SCRIBE EC will perform when the job is submitted for production. - Page 67 Speed The recording speed pull-down allows you to set the recording speed as determined by the capabilities of the recorders installed in the SCRIBE Print first When checked, SCRIBE EC will print the disc before copying. Page 66...
-
Page 68: Archive Only
(fig. 1) 2. Click browse and select the “Image file path” for the file that you would like to archive. This lets the SCRIBE EC know where to place your file and what name to give your file. (fig. 2) 3. - Page 69 SCRIBE EC Operator’s Guide Document Revision: 11/4/04 4. The “Job parameters” will then be displayed. Give your job a name and select a priority. 5. Click “Finish” and the SCRIBE EC will run the job. (fig. 4) Page 68...
-
Page 70: Copy And/Or Verify
3. Select the Image source for your job. You have the option of selecting a master disc that you can load into the SCRIBE EC’s disc drive. The SCRIBE EC will archive the contents of the master and copy the contents to as many discs as are indicated in the quantity box. - Page 71 SCRIBE EC Operator’s Guide Document Revision: 11/4/04 8. The Job parameters will then be displayed. Give your job a name and select a priority. 9. Click Finish and the SCRIBE EC will run the job. (fig. 4) Page 70...
-
Page 72: Relay-Mode Job
4. Click Next. (fig. 2) 5. The Job parameters will then be displayed. Give your job a name and select a priority. 6. Click Finish and the SCRIBE EC will run the job. (fig. 3) Page 71... - Page 73 SCRIBE EC Operator’s Guide Document Revision: 11/4/04 7. The Job parameters will then be displayed. Give your job a name and select a priority. 8. Click Finish and the SCRIBE EC will run the job. Page 72...
-
Page 74: Print Only
SCRIBE EC Operator’s Guide Document Revision: 11/4/04 Print only 1. Select the Print only button as seen in (fig. 1). 2. Click Next. (fig. 1) 3. Click Browse and locate the label file that you would like to use. 4. Enter a quantity of discs for the job. - Page 75 SCRIBE EC Operator’s Guide Document Revision: 11/4/04 8. The Job parameters will then be displayed. Give your job a name and select a priority (fig. 4). 9. Click Finish and the SCRIBE EC will run the job. (fig. 4) Page 74...
-
Page 76: Image File Path (Optional)
(ISC or ISO file) that was previously created, to be used as the data or audio source for recording. The SCRIBE EC also accepts standard Mode 1 data physical image files (such as ISO 9660, MacOS HFS, Unix UFS and Rock Ridge, etc.) created with other premastering software (such as Roxio... -
Page 77: Making Copies (Relay Mode)
CD to be copied (master disc), placed on top. The SCRIBE EC then loads the master disc into the recorder, creates an image of it on the internal hard disk drive, and unloads the master disc onto the output spindle. -
Page 78: Archive
SCRIBE EC Operator’s Guide Document Revision: 11/4/04 Archive When checked an existing CD is saved to the hard drive as a physical image file for later recording. This option is used for duplicating existing CDs. Page 77... -
Page 79: Media Type (Required)
Jobs in progress The Jobs in progress area displays the job currently running on the SCRIBE EC. This area displays the: job name, type of operation, quantity, number done, number rejected, status, and progress. The three buttons along the right side of the Jobs in progress area are abort, pause, and status. -
Page 80: Submitting Jobs
EC uses the job as a guide or map for bringing together the various elements of the CD (label, disc image, etc.) to print and record as needed. The SCRIBE EC processes up to three different jobs simultaneously and queues up to ten jobs awaiting production. -
Page 81: The Production Process
If selected, the discs will go to the printer before being placed on the output spindle. This process will continue until the job is complete and the SCRIBE EC will then advance to produce the next job in the queue according to its priority. -
Page 82: Duplicating Existing Cds
Duplicating Existing CDs In addition to creating industry standard data and audio CDs from scratch, the SCRIBE EC also duplicates existing CDs authored in most formats. Creating An Image File The first step in duplicating an existing CD is to create an image file of it on the hard disk drive to be used as the master source for recording. - Page 83 SCRIBE EC Operator’s Guide Document Revision: 11/4/04 • Check the Archive box in the Operations and options window. Ensure that no other boxes are checked. • Proceed through the wizard (page 59) • Select the volume and directory where you want to save the image file.
-
Page 84: Recording An Image File
SCRIBE EC Operator’s Guide Document Revision: 11/4/04 The screen is now switched to the Job manager tab to display the progress of the submitted job. During production the master disc will be loaded from the input spindle into the recorder and saved as an image file with the specified name on the hard disk drive. -
Page 85: Changing Printers (Switching Between Spectrum2, Sigiv, Or Sigpro)
SCRIBE EC Operator’s Guide Document Revision: 11/4/04 Changing Printers (switching between Spectrum2, SigIV, or SigPRO) Changing Jumper Settings If you decide to switch printers, you will need to change the jumper setting inside of the Scribe EC. • Remove the 5 screws indicated in (fig. -
Page 86: Jumper Settings For Spectrum2
Jumper Settings for Spectrum2 • The illustration to the right shows the front left corner of the Scribe EC. The illustration at the bottom of the page shows an expanded view of the same area. Front left corner of Scribe EC... -
Page 87: Jumper Settings For Signature Iv
Jumper Settings for Signature IV • The illustration to the right shows the front left corner of the Scribe EC. The illustration at the bottom of the page shows an expanded view of the same area. Front left corner of Scribe EC... -
Page 88: Jumper Setting For Signature Pro
Jumper Setting for Signature Pro • The illustration to the right shows the front left corner of the Scribe EC. The illustration at the bottom of the page shows an expanded view of the same area. Front left corner of Scribe EC... -
Page 89: Spindle Change (Switching From Signature Iv / Pro To Spectrum2)
When changing from a Signature IV or Pro printer to a Spectrum2 printer, screw in the spindles indicated in (fig. 1). This will enable the 3 input/output bin. You will also want to change the jumper setting inside of the Scribe EC (see previous section). (fig. 1) -
Page 90: Utilizing The Business Card Adapter
SCRIBE EC Operator’s Guide Document Revision: 11/4/04 Utilizing the Business Card Adapter Preparing the Inkjet Printer for Business Cards Open the printer tray. Remove the tape backing from the inkjet template (fig. 7). (Fig. 7) 5. Place the bottom half of the inkjet template onto the printer tray as seen in (fig. - Page 91 SCRIBE EC Operator’s Guide Document Revision: 11/4/04 6. Place the top half of the inkjet template onto the printer tray as seen in (fig. 9). The template has a round stabilizer that fits into the printer tray inset. (fig. 9) The template should sit on the printer tray as seen in (fig.
Need help?
Do you have a question about the Scribe EC and is the answer not in the manual?
Questions and answers