MF DIGITAL Director Series Operator's Manual
Duplication publishing system
Hide thumbs
Also See for Director Series:
- Operator's manual (81 pages) ,
- User manual (69 pages) ,
- Developer's manual (22 pages)

Subscribe to Our Youtube Channel
Related Manuals for MF DIGITAL Director Series


Summary of Contents for MF DIGITAL Director Series
- Page 1 Director Series Director PRO Series Duplication Publishing System Operator’s Guide...
- Page 2 DIRECTOR Series Operator’s Guide Document Revision: 06/15/05 This Page Left Blank Page 1...
-
Page 3: Table Of Contents
DIRECTOR Series Operator’s Guide Document Revision: 06/15/05 Table of Contents WELCOME TO THE DIRECTOR .......................... 5 ..............................5 OPYRIGHT OTICE ..........................5 ECORDER ARRANTY OLICY ..................................5 IRACY : ........................... 5 ORPORATE EADQUARTERS ABOUT MF DIGITAL ............................... 6 MF D DIRECTOR D ....... - Page 4 DIRECTOR Series Operator’s Guide Document Revision: 06/15/05 ) ......................19 EFAULT MAGE OLDER EQUIRED ) ......................19 EFAULT ABEL OLDER EQUIRED ........................20 REATING RIVILEGES ROFILE ........................21 DITING XISTING RIVILEGES ROFILE ........................ 22 ELETING XISTING RIVILEGES ROFILE ............................22...
- Page 5 DIRECTOR Series Operator’s Guide Document Revision: 06/15/05 ) ............................55 ASSWORD EQUIRED “C ” ) ..................... 56 MAGE NEEDED IF OPTION IS CHECKED )............................56 ABEL PTIONAL ID............................58 MART UARD EDIA ) ............................58 OMMENTS PTIONAL ) ............................58...
-
Page 6: Welcome To The Director
The copying of audio, video, or software without the permission of the copyright holder is illegal. MF DIGITAL. accepts no responsibility for the copyright use or misuse of this equipment. It is the sole responsibility of the user to ensure that the legal rights of copyright in duplicating are respected. -
Page 7: About Mf Digital
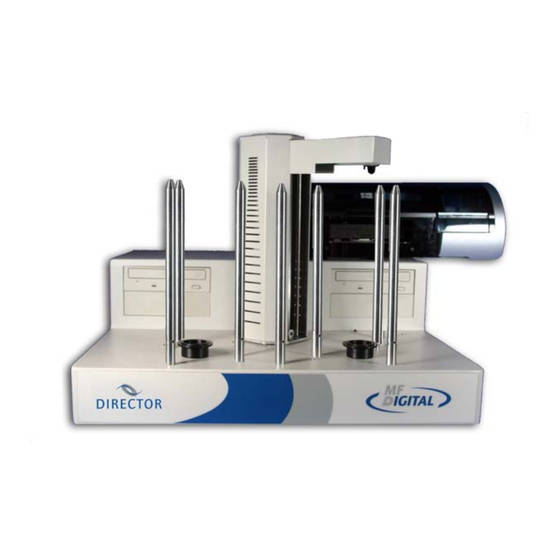
About MF Digital Thank you for purchasing MF Digital’s DIRECTOR duplication publishing system. MF Digital manufactures a wide variety of software and audio duplication and production equipment, including manual and fully automatic CD and DVD duplicators and printers. We hope you will consider us for all of your production needs. -
Page 8: Installing The Director Ec
All connection cords Operator’s Guide (on CD) Windows XP Pro license pack MF Digital Product & Warranty Registration card Packing Materials Please retain the original box and packaging in the event that the unit requires future servicing. This will help to reduce the possibility of damage occurring in transit. -
Page 9: The Best Place To Put The Director
PC portion of the DIRECTOR to a UPS. The minimum required size is 500VA. Repairs or alterations should only be attempted by authorized factory trained technicians. MF Digital reserves the right to void the warranty if unauthorized service is performed. Page 8... -
Page 10: Removing Packing Restraints
DIRECTOR Series Operator’s Guide Document Revision: 06/15/05 Removing Packing Restraints The DIRECTOR ships with a picker arm restraint to reduce the possibility of damage in transit. This restraint must be removed before operation or power-on. Remove the foam block above the transfer arm. Save the foam block, as you will need to return it to its place if you need to transport the unit in the future. -
Page 11: Installing The Network Cable
Note: purposes here, we will assume you either have expertise with networking computers, or had your unit professionally installed by MF Digital. Connecting The Network Cable Connect a suitable patch cord to the RJ45 network port on the back of the DIRECTOR unit. -
Page 12: Installing Firewire Cables
DIRECTOR Series Operator’s Guide Document Revision: 06/15/05 Installing Firewire Cables -- Director PRO ONLY !! The following illustrations show firewire installation on the Director. Please connect the firewire cables as illustrated below. Director PRO ONLY Firewire Connection on back of PC... -
Page 13: Starting The Director Ec For The First Time
DIRECTOR Series Operator’s Guide Document Revision: 06/15/05 Starting the DIRECTOR For The First Time Before DVD / CD creation or duplication can begin it is necessary to review a few details. Power Connection And Settings Make sure the DIRECTOR power switch is set to the off position. Also, set the PC switch to off or “0”. -
Page 14: Starting Up
Begin Logon dialog box. Enter “MF Digital” in lowercase letters for the password. Please note that the password is case sensitive. Press the ENTER key. The screen will now display the DIRECTOR desktop screen. -
Page 15: Application Startup
DIRECTOR Series Operator’s Guide Document Revision: 06/15/05 Application Startup The DIRECTOR is a state-of-the-art DVD / CD duplication publishing system and duplicator. It is designed to create, duplicate and verify most standard compact disc formats. This startup section will guide you through starting and configuring the DIRECTOR application. -
Page 16: Director Application Configuration
DIRECTOR Series Operator’s Guide Document Revision: 06/15/05 Tabs: System Status Displays the status of jobs after they have been submitted for production. Create Job Brings together the data or audio contents and label components of a DVD / CD so it can be produced. -
Page 17: Printer Driver (Required)
DIRECTOR Series Operator’s Guide Document Revision: 06/15/05 The System Setup tab is divided into a number of information fields that must be completed. Printer Driver (Required) The Printer Driver pull-down is used to indicate to the DIRECTOR the type of printer that is installed. -
Page 18: Recording Speed (Required )
DIRECTOR Series Operator’s Guide Document Revision: 06/15/05 Click the Operator’s E-mail Address field and enter an email address. Leave the field blank if the DIRECTOR is not attached to a network or if you do not want to receive unit attention messages. -
Page 19: Description
DIRECTOR Series Operator’s Guide Document Revision: 06/15/05 this particular job. Asynchronous mode is more demanding of system resources. The modes of operation are: Mode Description Disabled Jobs=Synchronous (FIFO), Drives=Synchronous When the setting is “disabled”, jobs are processed on a first in/first out (FIFO) basis such that they will be kept together when placed on the output spindle. -
Page 20: Default Job File Folder (Required)
DIRECTOR Series Operator’s Guide Document Revision: 06/15/05 Click the ASYNCHRONOUS MODE pull down and select the desired “disabled” or “level O” setting (level 1 and level 2 not used). Default Job File Folder (Required) The DEFAULT JOB FILE FOLDER field is used to specify the default location where job files (*.JOB) will be saved. -
Page 21: Creating New Privileges Profile
DIRECTOR Series Operator’s Guide Document Revision: 06/15/05 Creating New Privileges Profile Control access to the DIRECTOR by restricting use to only authorized users. The main intent of this is for jobs submitted remotely through the included Windows Client, or through other client side applications. New users must first be entered into the DIRECTOR’s database and their... -
Page 22: Editing Existing Privileges Profile
DIRECTOR Series Operator’s Guide Document Revision: 06/15/05 Editing Privileges Profile name Required. Enter the profile name. Max quantity per day Required. Enter the maximum number of discs this type of user is allowed to record/print per day. Max quantity per month Required. -
Page 23: Deleting Existing Privileges Profile
DIRECTOR Series Operator’s Guide Document Revision: 06/15/05 Make any changes as needed then click the Save To Database button. Deleting Existing Privileges Profile To delete an existing privileges profile: Click the privilege profile you wish to delete and click the Delete button below the PRIVILEGES window. - Page 24 DIRECTOR Series Operator’s Guide Document Revision: 06/15/05 Department Optional. Enter the user’s department name. (31 characters maximum, A to Z, 0 to 9) Street Address 1 Optional. Enter the user’s street address. (63 characters maximum, A to Z, 0 to 9) Street Address 2 Optional.
-
Page 25: Editing Existing Users
DIRECTOR Series Operator’s Guide Document Revision: 06/15/05 Editing Existing Users To edit an existing user: Click the username you wish to edit and click the Edit button below the USERS window and the user information boxes will be displayed. Make any changes as needed then click the Save To Database button. -
Page 26: System Drives
DIRECTOR Series Operator’s Guide Document Revision: 06/15/05 System Drives The SYSTEM DRIVES window allows you to specify which hard disk drives the DIRECTOR uses exclusively. The factory settings should be sufficient for most uses. Director PRO (4 drive): Be sure that: D:, E:, F:, and G: are selected. DO NOT SELECT C:. -
Page 27: Trusted Drives
Unless you have added a raid solution, or other additional fast storage, you should never change the default settings. EIDE drives should not be used Note: for this purpose. Please consult your MF Digital reseller if you wish to add additional storage. Page 26... -
Page 28: Controlling The Director From Custom Applications
DIRECTOR Series Operator’s Guide Document Revision: 06/15/05 Controlling the DIRECTOR From Custom Applications In addition to operating the DIRECTOR from its console, you have the option to remotely control the system from anywhere on the network using your own custom applications or scripts. This is accomplished using the DIRECTOR’s Application Program Interface (SmartAPI) after initial... -
Page 29: Creating Disc Labels
DIRECTOR Series Operator’s Guide Document Revision: 06/15/05 Creating Disc Labels The first step in creating a CD is to create a label that will be printed on the surface of the disc. The DIRECTOR’s built-in label design software provides a quick and easy way to create simple disc labels that contain text and graphics. - Page 30 DIRECTOR Series Operator’s Guide Document Revision: 06/15/05 Label Menu Buttons: Creates a new disc label. Open Opens an existing disc label file (*.LBL). Save Saves the current disc label. Cuts the selected item Select Used to select the font, style, size and color before creating test Font on the disc label.
-
Page 31: Creating Text
DIRECTOR Series Operator’s Guide Document Revision: 06/15/05 Creating Text Using the Text Mode tool, you can create horizontal text anywhere on your disc label. In addition, once the text has been entered it can be repositioned and its font and other attributes changed. To create text: Click the Text Mode button on the toolbar. -
Page 32: Importing Graphics
DIRECTOR Series Operator’s Guide Document Revision: 06/15/05 To change the font, style, size or color, click the Select Font button. The screen will now display: After making the changes click the OK button. Click the OK button. Importing Graphics Using the Import Picture tool, you can place graphics created using other software anywhere on your disc label. -
Page 33: Resizing Graphics
DIRECTOR Series Operator’s Guide Document Revision: 06/15/05 Resizing Graphics To proportionally resize a graphic image after it has been imported: Click the Point button on the toolbar. Click the graphic image you wish to resize. A bounding box will appear around the image with eight solid squares (handles). -
Page 34: Repositioning Text, Graphics And Dates
DIRECTOR Series Operator’s Guide Document Revision: 06/15/05 Repositioning Text, Graphics and Dates To reposition a piece of text, a graphic image or a date field after it has been created or imported: Click the Point button on the toolbar. Click and hold on the selected text or graphic image you wish to move. -
Page 35: Deleting Text, Graphics And Dates
DIRECTOR Series Operator’s Guide Document Revision: 06/15/05 Deleting Text, Graphics And Dates To delete a piece of text, a graphic image or a date field after it has been created or imported: Click the Point Mode button on the tool bar. -
Page 36: Opening Existing Disc Labels
DIRECTOR Series Operator’s Guide Document Revision: 06/15/05 Opening Existing Disc Labels Once a disc label has been saved it can be modified at a later date. To open an existing disc label file: Click the Open button on the menu bar. -
Page 37: Creating Disc Images
DIRECTOR Series Operator’s Guide Document Revision: 06/15/05 Creating Disc Images After creating a label, the next step in constructing a CD is to specify its contents (disc image). The DIRECTOR creates industry standard data (Mode 1 ISO 9660 level 2 with Joliet extensions) and audio (Red Book) CDs from scratch as well as duplicates existing CDs authored in most formats. -
Page 38: Data Image Editor Toolbar
DIRECTOR Series Operator’s Guide Document Revision: 06/15/05 Data Image Editor Toolbar Horizontally at the top of the panes, which contains eight buttons: New Open, Save, Properties, Disc Capacity, CD, DVD, Wildcard. Data Image Editor Toolbar: New Folder Creates a new volume. -
Page 39: Static And Dynamic Content
DIRECTOR Series Operator’s Guide Document Revision: 06/15/05 Static And Dynamic Content The DIRECTOR allows discs to be created from both static and dynamic content. A finished dsic created from static content will contain the exact files and folders that are specified when the disc image is created. A... -
Page 40: Adding Files And Folders
DIRECTOR Series Operator’s Guide Document Revision: 06/15/05 Adding Files And Folders Click the desired file or folder in the top left or right pane (source) and hold down the mouse button. Drag the file or folder over the CD icon in the lower right then release... -
Page 41: Saving The Current Disc Image File
DIRECTOR Series Operator’s Guide Document Revision: 06/15/05 Saving The Current Disc Image File Once a data disc image has been created, it must be saved for the DIRECTOR EC to use it as a data source for recording. Disc images can either be saved as script files (with an “ISC”... - Page 42 DIRECTOR Series Operator’s Guide Document Revision: 06/15/05 To save a data disc image script file: Click the Save button on the toolbar. The screen will now display: The file will automatically be saved with the .isc extension. Page 41...
- Page 43 DIRECTOR Series Operator’s Guide Document Revision: 06/15/05 Click the OK button. The screen will now display: Select the volume and directory where you want to save the script file. Enter the name for the script file and click the Save button.
- Page 44 DIRECTOR Series Operator’s Guide Document Revision: 06/15/05 Volume Properties Volume Label Enter the name you want to call the CD. Publisher Enter the name of the publisher. Data Preparer Enter the name of the person who prepared the CD. Copyright File Enter the file name that provides copyright information about the CD.
-
Page 45: Loading An Existing Script File
DIRECTOR Series Operator’s Guide Document Revision: 06/15/05 Loading An Existing Script File Once a data disc image script file has been saved it can be modified at a later date. To load an existing script file: Click the Load Script button on the toolbar. The screen will now display: Select the appropriate file and click the Open button. -
Page 46: Audio Image Toolbar
DIRECTOR Series Operator’s Guide Document Revision: 06/15/05 The Audio Image Editor tab is divided into three panes. The top left pane lists all the names and icons of the disk drives available to the DIRECTOR, as well as files and folders on the currently selected disk drive (source). The top right pane displays the contents of any item you click on in the top left pane along with its icon. -
Page 47: Adding Tracks
DIRECTOR Series Operator’s Guide Document Revision: 06/15/05 Adding Tracks As depicted below, drag one or more WAV / MP3 files onto the text. Multiple files may be selected by pressing and holding down the SHIFT or CTRL key while clicking on the tracks. SHIFT allows you to select a range of contiguous tracks, while CTRL allows you to randomly pick multiple tracks. -
Page 48: Removing Tracks
DIRECTOR Series Operator’s Guide Document Revision: 06/15/05 Removing Tracks Right click on the audio track you wish to delete. Choose Delete Track from the drop down menu. Editing A Track Right click the track to be edited. The screen will now display:... -
Page 49: Changing Isrc Codes And Copy Prohibit Flags
DIRECTOR Series Operator’s Guide Document Revision: 06/15/05 Changing ISRC Codes And Copy Prohibit Flags Only DIRECTOR systems equipped with Plextor ProDRIVE 48X drives Note: support MF Digital SmartDRIVE features. The INTERNATIONAL STANDARD RECORDING CODE (ISRC) is an optional 12-character descriptor that identifies a specific track on an audio CD. -
Page 50: Inserting, Editing And Removing Silence
DIRECTOR Series Operator’s Guide Document Revision: 06/15/05 To enable Copy Prohibit select the Copy Prohibit box so that it is checked, or uncheck the box to disable Copy Prohibit. Inserting, Editing And Removing Silence When assembling an audio CD disc image the DIRECTOR application does not insert silences (gaps) between tracks. -
Page 51: Inserting, Editing And Removing Sub-Indexes
DIRECTOR Series Operator’s Guide Document Revision: 06/15/05 Click the up and down indicators to increase or decrease the duration of the silence (minutes, seconds, frames). Click the OK button. To remove silence between tracks: Click the silence indicator you wish to remove in the lower left pane and hold down the mouse button. - Page 52 DIRECTOR Series Operator’s Guide Document Revision: 06/15/05 Click the audio track you wish to edit in the lower left pane, and its existing sub-indexes will be displayed in the bottom right pane. Double click the sub-index you want in the bottom right pane. The screen will now display: Click the Insert Sub-index button.
-
Page 53: Saving The Current Audio Disc Image
DIRECTOR Series Operator’s Guide Document Revision: 06/15/05 Saving The Current Audio Disc Image Once an audio disc image has been created it must be saved so that it can be used by the DIRECTOR as an audio source for recording. Disc images are saved as script files (with an “ISC”... -
Page 54: Creating Jobs
DIRECTOR Series Operator’s Guide Document Revision: 06/15/05 Creating Jobs After creating a data or audio disc image, the next step in constructing a CD is to create or define a job. A job brings together the various elements of the CD (label, disc image, etc.) so they can be recorded and printed. -
Page 55: General Options
Only DIRECTOR systems equipped with Plextor ProDRIVE 48X Note: CD-R drives support MF Digital SmartDRIVE features. Vertically along the left side of the Job tab is a series of nine check boxes: Copy, Verify, Print, Print First, Simulate, Archive, Align, SmartGuard Media. -
Page 56: Job Id (Required)
DIRECTORs equipped with any drive other than the Plextor 48x, DO NOT support MF Digital SmartDRIVE features. After setting the general options, complete the required information in... -
Page 57: Image (Needed If "Copy" Option Is Checked)
DIRECTOR Series Operator’s Guide Document Revision: 06/15/05 Image (needed if “Copy” option is checked) The IMAGE field is used to specify the data or audio disc image, (ISC or ISO file) that was previously created, to be used as the data or audio source for recording. - Page 58 DIRECTOR Series Operator’s Guide Document Revision: 06/15/05 Select the appropriate file and click the Open button. Leave the field blank if no label is to be printed. Page 57...
-
Page 59: Smart Guard Media Id
DIRECTOR Series Operator’s Guide Document Revision: 06/15/05 SmartGuard Media ID – This Feature No Longer Available DIRECTOR systems equipped with drives other than the Plextor 48X Note: SmartDRIVE do not support this feature. This option allows you to create SmartGUARD Media for use with MF Digital stand-alone duplicators (CD-5000 or Scribe SA Standalone). - Page 60 DIRECTOR Series Operator’s Guide Document Revision: 06/15/05 Click the PRIORITY field and enter the priority number. Page 59...
-
Page 61: Saving The Current Job
DIRECTOR Series Operator’s Guide Document Revision: 06/15/05 Saving The Current Job Once a job has been created it can be saved and used by the DIRECTOR for future recording. Job files are saved as job files with a “JOB” extension. -
Page 62: Submitting Jobs
DIRECTOR Series Operator’s Guide Document Revision: 06/15/05 Submitting Jobs After defining or creating a job, the final step in constructing a DVD or CD is to submit the job for production. During the production process the DIRECTOR uses the job as a guide or map for bringing together the various elements of the DVD or CD (label, disc image, etc.) to print and record as... -
Page 63: The Production Process
DIRECTOR Series Operator’s Guide Document Revision: 06/15/05 discs, copying discs, unloading discs, etc.), and the estimated time of completion (E.T.C). The lower pane is the COMPLETED JOBS window that lists all the jobs completed by the DIRECTOR. Information displayed for each job includes:... -
Page 64: Removinga Job
DIRECTOR Series Operator’s Guide Document Revision: 06/15/05 Removing A Job To remove a pending job from the queue so that it will not be produced: Click the job you wish to remove in the JOB QUEUE window. Click the Remove Job button. -
Page 65: Viewing Logs
DIRECTOR Series Operator’s Guide Document Revision: 06/15/05 Viewing Logs The DIRECTOR maintains a comprehensive database of all jobs completed by the unit. The collected information is useful for a variety of reasons such as, tracking disc usage, helping to diagnose problems, or even for billing clients. -
Page 66: Deleting Individual Job Records
DIRECTOR Series Operator’s Guide Document Revision: 06/15/05 Deleting Individual Job Records To delete a job record from the history log: Click the job name you wish to delete and click the Delete Record button at the bottom of the JOBLOG window. -
Page 67: Duplicating Existing Cds
DIRECTOR Series Operator’s Guide Document Revision: 06/15/05 Duplicating Existing Discs In addition to creating industry standard data and audio CDs source files, the DIRECTOR also duplicates existing discs authored in most formats. Creating An Image File The first step in duplicating an existing disc is to create an image file of it on the hard disk drive to be used as the master source for recording. - Page 68 DIRECTOR Series Operator’s Guide Document Revision: 06/15/05 Select the volume and directory where you want to save the image file. Enter the name for the image file and click the Save button. Place your original disc to be duplicated (master disc) on top of the stack of blank discs on the input spindle.
-
Page 69: Recording An Image File
DIRECTOR Series Operator’s Guide Document Revision: 06/15/05 Recording An Image File Once created, the image file of the master disc is used as the source for recording. To use the image file of the master disc as the recording source: Click the Create Job tab. -
Page 70: Viewing Resources
DIRECTOR Series Operator’s Guide Document Revision: 06/15/05 Viewing Resources The Resource tab is a simple diagnostic tool that displays the hardware elements connected to the DIRECTOR. These include the disc autoloader, recorders and the printer. To display the hardware elements connected to the DIRECTOR EC: Click the Resources Info tab. -
Page 71: Upgrading Director Software
DIRECTOR Series Operator’s Guide Document Revision: 06/15/05 Upgrading DIRECTOR Software Overview of the process Do not remove the previous version of Director EC software from the Note: add/remove program applet. Download the zipped files Unzip the downloaded files and save it as c:\cdDIRECTOR\cdDIRECTOR Reboot the PC Run Setup.exe found in as c:\cdDIRECTOR EC\cdDIRECTOR XXX–... -
Page 72: Extract The Zipped Files
DIRECTOR Series Operator’s Guide Document Revision: 06/15/05 Extract the Zipped files Unzip the downloaded files and save it as c:\cdDIRECTOR\cdDIRECTOR Browse to the location where the zipped file was saved. Double Click on the cddirXXX.zip folder to open WinZip window. Click on [I agree] to open WinZip-cddirXXX window. -
Page 73: Changing Computer Name
DIRECTOR Series Operator’s Guide Document Revision: 06/15/05 Changing Computer Name 1. Disconnect computer in the Internet Service Manager (ISM) 2. Change the Computer name 3. Change Anonymous user account and password 4. Reboot the computer Disconnecting computer in the Internet Service Manager (ISM) From desktop Click start, settings, control panel at this point the screen will appear as below. - Page 74 DIRECTOR Series Operator’s Guide Document Revision: 06/15/05 Right Click on the computer icon with the name results in the following window Right Click on the computer name to reveal the following window Although “Connect” is highlighted, select disconnect. When computer name is changed, a reboot is required and upon reboot ISM will automatically connect.
-
Page 75: Changing The Computer Name
DIRECTOR Series Operator’s Guide Document Revision: 06/15/05 Changing the Computer Name From desktop, right click on the computer icon and click on Properties to open System Properties window. Click [Properties] button to open the Identification changes window Page 74... - Page 76 DIRECTOR Series Operator’s Guide Document Revision: 06/15/05 Key in the new computer name in the computer name box, and click [OK]. Need to reboot the system for the new name to be effective. Page 75...
-
Page 77: Change The Anonymous Account
DIRECTOR Series Operator’s Guide Document Revision: 06/15/05 Change the Anonymous Account Open ISM window as instructed previously Right clicking on the default website will open the following window Right Click on the properties, select Directory Securities tab to reveal the following... - Page 78 DIRECTOR Series Operator’s Guide Document Revision: 06/15/05 Click the [Edit] button to edit anonymous access in the authentication control window Click browse to select the user, select the user in window that you would like to change The “Look In” window should default to the new computer name, select the user and click [OK], Manually key in the user password.
- Page 79 DIRECTOR Series Operator’s Guide Document Revision: 06/15/05 This Page Left Blank Page 78...
Need help?
Do you have a question about the Director Series and is the answer not in the manual?
Questions and answers