Table of Contents
Advertisement
Quick Links
Advertisement
Table of Contents

Related Manuals for MF DIGITAL Dolphin 5900


Summary of Contents for MF DIGITAL Dolphin 5900
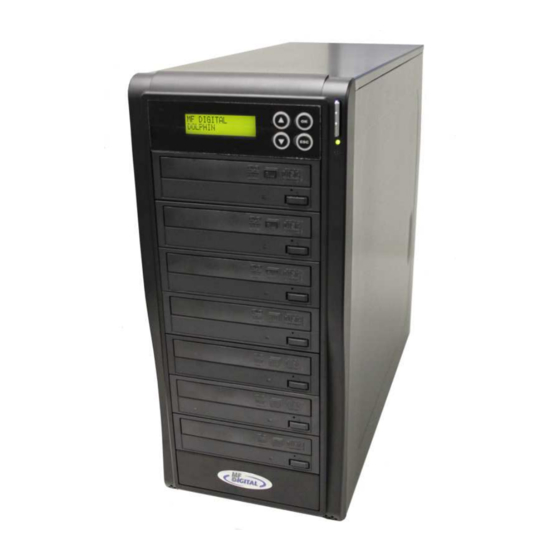
- Page 1 Dolphin 5900 CD/DVD Tower User Manual...
-
Page 2: Before You Start
Before you start: Before you start using this duplicator, please read the following to ensure proper operation: 1. DVD Duplication Limitations: For a DVD Duplicator, it will not copy any DVD that has Copy Protection. Typically, most DVDs you purchase or rent from a store will contain Copy Protection. -
Page 3: Table Of Contents
Table of Contents Introduction …………………………………………………………...4 Features ……………………………………………………………..5 Control Panel ….…………………………………………………..…..6 Menu Overview ……………………………………………………….7 Operation Guide 1. Copy ………………………………………………………...9 2. Test …………………………………………………………10 3. Compare …………………………………………………….11 4. Copy & Compare …………………………………………..12 5. Ste Burn Speed …………………………………………..13 6. Select Source ……………………………………………….14 7. Utility ………………………………………….....15 8. -
Page 4: Introduction
INTRODUCTION Introduction This is stand-alone CD/DVD Disc Duplicator Controller, and each SATA port is independent from each other. Therefore, the controller can control different CD/DVD Devices with different model, brand, or burning speed to operate at the same time. The controller supports up to maximum 56X CD, 20X DVD, 8X BluRay writing. It is easy to use operating control panel included a LCD screen and 4 push buttons. -
Page 5: Features
Features ☆ No PC needed. Independent SATA to SATA CD\DVD Disc Duplication. ☆ Auto detect devices as soon as system power on. ☆ 2x16 LCD panel and 4 control buttons. ☆ Support up to max. 56X CD, 20X DVD and 8X BluRay duplication ☆... -
Page 6: Control Panel
LCD Front Panel LCD FRONT PANEL 1. Control Buttons There are 4 control buttons: : UP; Backward; Use this button to navigate backward to search functions you like. : Down; Forward; Use this button to navigate forward to search function you like : OK, Enter, Execute the function : Escape, Go back to previous function 2. -
Page 7: Menu Overview
Menu Overview COPY This option makes Disc to Disc copy. Before you start to copy, please make sure you have put correct reading source and blank discs. The system will detect and display how many blank discs there are automatically. When the system got ready, just press OK to execute Disc copies. TEST This option simulates Copying Process. - Page 8 Menu Overview HDD MANAGER This function will guide you to perform various Hard Drive related operations. Select Image This function is to select Image file as copied Sources. When this operation was selected, the system will set the HDD be source drive automatically. Disc ->...
-
Page 9: Operation Guide
Operation Guide 1. COPY This operation will guide you to copy Master Reading Source to Blank CD/DVD disc. Please ensure that Master Reading Source be set to the READER if you would like to make Disc-to-Disc copy. Turn on the duplicator. Before you start this menu to copy, please make sure you have put correct reading source and blank discs. -
Page 10: Test
Operation Guide 2. TEST This function is to perform Copying Process Simulation. The process is the same as COPY but it won’t write anything on the recordable discs. , Press to navigate the function menu to 2. TEST and press to execute it. -
Page 11: Compare
Operation Guide 3. Compare This option makes a bit-by-bit comparison between master reading source and all copied discs inside the writer trays. This operation ensures all information in your copied discs is exactly the same as your master reading source. Put master source disc and all copied discs into the duplicator. -
Page 12: Copy&Compare
Operation Guide 4. COPY&COMPARE This option will make a copy first and then compare copied discs with master disc immediately for ensuring data correctness . Before start this menu to copy, please make sure that reading source and blank discs have already put into correct disc trays. -
Page 13: Ste Burn Speed
Operation Guide 5. Select Burn Speed This operation will allows you to adjust and select duplication speed on three different disc types of CD, Audio CD, and DVD. , Press to navigate to function 7. Select Speed, and press 7.Set Burn Speed You will see three disc types of CD, Audio CD, and DVD. -
Page 14: Select Source
Operation Guide 6. SELECT SOURCE This option allows you to set master reading source from any Optical Drive or Hard Drive Disk. , Press to navigate to function. Select Source and press 8.Select Source , Press to select HDD or Optical Drive with assigned number as Reading Source and press to complete your selection. -
Page 15: Utility
OPERATING GUIDE Operation Guide 7. Utility , This function group includes several Disc related functions. You can press and press to select function you want. This feature can provide information of the duplicator system, included controller model number, RAM capacity, and firmware version. ,... - Page 16 Operation Guide ★ Note: If you see “O” “o” take turns blinking, it means Erasing in process. If you see “F” “f” take turns blinking, it means whole new DVD+RW Disc Formatting in processing. TRACK EDIT This process will guide you to select and combine audio tracks from various CDs into a single customized audio CD.
- Page 17 Operation Guide ‘ . When copying your selection to the blank disc, the system screen shows copy progress as below. Track 01 04:39 Copy…… 00:04 When duplication was finished, the LCD shows CD-R’s usage and free space. Track Used 59:15 15 Free 20:42 You can repeat above step 1-7 to select Audio track from other source discs, and copy them to the same blank disc.
- Page 18 Operation Guide Enable Counter , Under Copy Counter, press to select Enable Counter, and press for entry. , to Enable or Disable counter function, and press to confirm it. Clear Counter , Under Copy Counter , press to select Clear Counter, and press The system will pop up the confirm window, press again to ensure that counter goes back to zero...
-
Page 19: Setup
Operation Guide 8. SETUP This function group provides features, which allowed changing manufacturer’s default setting. Auto Start Time When the duplicator detected master and blank discs were placed, the system will execute the copy process automatically. The system default setting of auto-copy is 5 seconds after detected master and blank discs. - Page 20 Operation Guide Display Mode There are two LCD display modes (Basic, Advanced) for users to select for displaying the information while duplicating(test,compare,verify). , Under Setup, press to select Display Mode, and press for entry. [Setup] Display Mode [Display Mode] Basic ,...
- Page 21 Operation Guide Eject On Start You can set the ways of disc tray to be eject or not when the system boot up. Including all disc trays ejected or only master source disc tray ejected or all of writer’s disc trays ejected. ,...
- Page 22 Operation Guide Language Set system language interface, there are English, Japanese, Spanish and Portuguese for selection. , Under Setup , press to select Language, and press for entry. [Setup] 6.Language , to select the language you want and press for confirmation. [Language] English Clear Setup...
- Page 23 Operation Guide Advance Setup Auto Start Time You can set the system warm up time from 5 seconds to 255 seconds after system power on. , Under Setup, press to select Advanced setup and select 1. Power On Time, and press for entry.
-
Page 24: Hdd Manager
Operation Guide 9. HDD Manager This option allows you to set master reading source from any Optical Drive or Hard Drive Disk. , Press to navigate to function . HDD Manager and press 8.Select Image , Press to select HDD or Optical Drive with assigned number as Reading Source and press to complete your selection.
Need help?
Do you have a question about the Dolphin 5900 and is the answer not in the manual?
Questions and answers