Table of Contents
Advertisement
Quick Links
Advertisement
Table of Contents

Related Manuals for MF DIGITAL 5200 Live Series EventCD


Summary of Contents for MF DIGITAL 5200 Live Series EventCD
- Page 1 MF Digital eventCD 5200 Live Series EventCD Operator’s Guide...
-
Page 2: Table Of Contents
OPYRIGHT OTICE ........................3 ECORDABLE RIVE ARRANTY OLICY ..................................3 IRACY ..........................4 ICENSE GREEMENT MF DIGITAL ..............................5 BOUT MF DIGITAL P ..................5 XPECT RODUCT ..............................5 BOUT ANUAL GETTING STARTED ..............................6 ’ ..............................6 ..............................6... -
Page 3: Welcome To The 5200 Series Cd Recorder/Duplicator
The copying of audio, video, or software without the permission of the copyright holder is illegal. MF DIGITAL. accepts no responsibility for the copyright use or misuse of this equipment. It is the sole responsibility of the user to ensure that the legal rights of copyright in duplicating are respected. -
Page 4: End User License Agreement
End User License Agreement You have acquired a device (“5200 Series CD-R/RW duplicator”) that includes software licensed by MF DIGITAL from Microsoft Licensing Inc. or its affiliates (“MS”). Those installed software products of MS origin, as well as associated media, printed materials, and “online”... -
Page 5: About Mf Digital
About MF DIGITAL Thank you for purchasing MF DIGITAL’s 5200 Series Copier Module duplicator. MF DIGITAL manufactures a wide variety of CD / DVD duplication equipment, including manual and fully automated CD / DVD duplicators and printers. We hope you will consider us for all of your duplication needs. -
Page 6: Getting Started
Supply (UPS) or a surge protector, is highly recommended. The minimum required size is 500VA. Repairs or alterations should only be attempted by an authorized, factory-trained technician. MF DIGITAL reserves the right to void the warranty if unauthorized service is performed. -
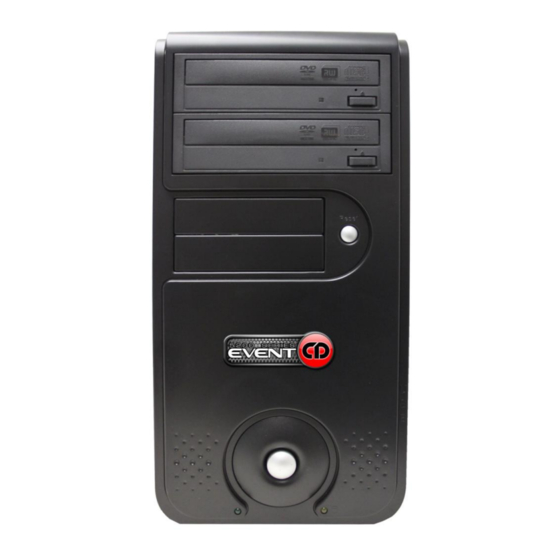
Page 7: Location Of 5200 Series Components
Location Of 5200 Series Components Connect a Keyboard, Monitor and Mouse (not supplied) To the corresponding connections below. Rear View... -
Page 8: Dvd±R/±Rw
DVD±R/±RW Legend 1) Disc Tray - Discs are loaded and removed from this tray. Clicking the eject button will open the tray when the power to the 5200 Series is switched on. 2) Headphone Jack – Connect headphones here. 3) Volume Control Knob – This controls the volume level of the headphones. 4) Disc Indicator –... -
Page 9: System Startup
System Startup Before operation can begin it is necessary to review a few details. Plug one end of the supplied power cord into the upper receptacle at the rear of the unit. Next, verify that the voltage selector switch is set correctly. It is located between the two power receptacles. -
Page 10: Loadinga Disc
Loading A Disc After the 5200 Series’ power has been switched on, click the eject button on the front of the recorder to open its disc tray. Load by carefully placing the disc (label side up) into the recessed area of the disc tray, so that the disc lays flat. - Page 11 CAUTION Your 5200 uses Microsoft Windows XP Operating System. While this may appear to be a conventional PC, XP Embedded is specially designed for embedded applications. Do not install any non MF Digital supported software. Any damage as a result of this will not be covered under warranty.
-
Page 12: Using The 5200 Live
Using the 5200 Live Recording Connect the desired input to the analog IN Using your mouse, click on the AUDIO TAB and the following screen should be displayed: Click on RECORD to bring up the RECORDER dialog... - Page 13 Using your mouse, select the desired input from the Audio Capture Device pull- down. Click on browse to select location and a filename to save the recording to. Keep in mind that CD-DA quality recording consumes about 10 MB/min ...
-
Page 14: Editing Your Recording And Adding Tracks
Editing your recording and Adding tracks The AUDIO TAB is where you create your CD projects. WAV files and MP3 files may be dragged and dropped into your project and represent a single track. WAV files must be 44.1 kHz, 16-Bit, and stereo. The CD-DA standard does not allow for mono CDs. A mono CD is simply one where the left and right channels are the same. - Page 15 protection), and the ability to split a track into multiple tracks. This is extremely handy on long recordings where several tracks are desired. Note this is non destructive and does not effect the source file in anyway but merely sets the a START ID, or track mark, at the location inserted.
- Page 16 Once you are satisfied, click on the SET IN POINT button Set Out Point: Out Point sets the end of the track. If you are making a disc from a single WAV file, you may want to use SPLIT TRACK (See below) to set all track START IDs and use SET OUT POINT only to trim the end of the last track if desired.
-
Page 17: Disc Spanning
digital time display in the top left corner for direct entry. You will see the following: Once you are satisfied, click on the SPLIT TRACK button. A handy trick to delete undesired content is to create a track out of the content you do not wish to include then delete the track. -
Page 18: Making The Disc(S)
Select “Create New Disc”. You will notice the disc number in the left most column increment along with all tracks below. If a third disc is desired, left click on the track you wish to be the first track of the next disc, right click and select “Create New Disc”... -
Page 19: Method 2
.IMG). Likely this will be the .ISC file made in the previous step. Leave LABEL blank as the 5200 does not support in-line direct to disc printing so you need not enter anything here. Consider the MF Digital 3000 Series for automating duplication and printing if desired. - Page 20 Click on the START NEWJOB button Use the default JOB ID or enter your own. This is a handy way to identify your job making it easy to recognize what job is running. In the box under TOTAL, enter the desired quantity of discs ...
- Page 21 Leave LABEL blank as the 5200 does not support in-line direct to disc printing so you need not enter anything here. Consider the MF Digital 9000 Series for automating duplication and printing if desired. Select the desired job options: COPY: If you would like to write the disc, check this option.
Need help?
Do you have a question about the 5200 Live Series EventCD and is the answer not in the manual?
Questions and answers