Runco PLASMAWALL XP-65DHD Owner's Operating Manual
High definition, 1080p flat panel plasma display with widevision
Hide thumbs
Also See for PLASMAWALL XP-65DHD:
- Quick manual (1 page) ,
- Installation and operation manual (96 pages) ,
- Owner's operating manual (82 pages)

Related Manuals for Runco PLASMAWALL XP-65DHD


Summary of Contents for Runco PLASMAWALL XP-65DHD
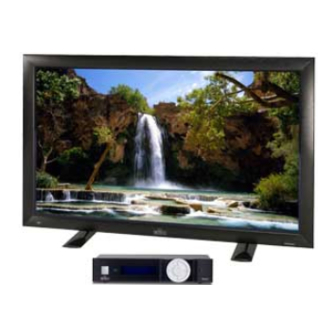
- Page 1 ’ W N E R P E R A T I N G A N U A L XP-65DHD XP-65DHDxa High Definition, 1080p Flat Panel Plasma Display with Digital High Definition Controller with Vivix II Technology...
- Page 3 PLASMA GLASS PANEL: Runco will pay for service labor by a Runco Authorized Service Center when needed as a result of a manufacturing defect for a period of one (1) year from the effective date of delivery to the end user. In addition, Runco will provide new or rebuilt replacement parts for the parts that fail due to defects in materials or workmanship for a period of one (1) year from the effective date of delivery to the end user.
- Page 4 IMPORTANT – WARRANTY REGISTRATION: Please fill out and mail your warranty registration card. It is imperative that Runco knows how to reach you promptly if we should discover a safety problem or product update for which you must be notified.
- Page 5 ADDITIONAL INFORMATION: To locate the name and address of the nearest Runco Authorized Service Center, or for additional information about this Limited Warranty, please call or write: RUNCO INTERNATIONAL, INC. Attn: Customer Service Department 2900 Faber Street Union City, CA 94587...
-
Page 6: Safety Precautions
Safety Precautions Thank you for your purchase of this quality Runco product! It has been designed to provide you with the quality of video that is expected in a home theater. This manual is your guide through the menus and operation. For the best performance, please read it carefully and keep it handy for future reference. -
Page 7: Table Of Contents
Notes on Batteries ....................13 Notes on Remote Control Operation ..............13 Quick Setup .......................15 Installation Considerations ..................16 High-Altitude Operation ..................16 Mounting the PlasmaWall on a Wall or Table Stand ..........16 Ambient Light .......................17 Ventilation ......................17 Other Considerations ....................18 PlasmaWall XP-65DHD Owner’s Operating Manual... - Page 8 Cleaning the Screen....................45 Cleaning the Vents....................45 Troubleshooting Tips ....................46 6. Serial Communications ..................49 RS-232 Connection and Port Configuration ...............49 Serial Command Syntax .....................49 7. Specifications ......................55 PlasmaWall Specifications ..................55 DHD Controller Specifications ..................56 PlasmaWall Dimensions .....................57 viii PlasmaWall XP-65DHD Owner’s Operating Manual...
- Page 9 4-3. Typical Gray Bar Pattern for Adjusting Contrast ............34 4-4. Typical Color Bar Pattern for Adjusting Color Saturation and Tint........35 4-5. Typical Test Pattern for Adjusting Sharpness..............36 7-1. PlasmaWall Model XP-65DHD Dimensions (with Optional Table Stand) ......57 PlasmaWall XP-65DHD Owner’s Operating Manual...
- Page 10 List of Figures Notes: PlasmaWall XP-65DHD Owner’s Operating Manual...
-
Page 11: Introduction
Target Audience most out of the PlasmaWall. Runco has made every effort to ensure that this manual is accurate as of the date it was printed. However, because of ongoing product improvements and customer feedback, it may require updating from time to time. You can always find the latest version of this and other Runco product manuals on-line, at www.runco.com. -
Page 12: Using This Manual
Information about obtaining service General information about the PlasmaWall Flat-Panel Plasma Display Monitor and DHD Con- troller Installation instructions First-time configuration instructions Advanced configuration instructions Troubleshooting tips Specifications for the PlasmaWall Flat-Panel Plasma Display Monitor and DHD Controller PlasmaWall XP-65DHD Owner’s Operating Manual... -
Page 13: Description, Features And Benefits
"solarization" and "stair stepping" characteristics previously plaguing digital flat panel displays. The XP-65DHD features all of the Runco technologies you have come to expect from the World's Finest Home Theater Products. Discrete multiple aspect ratio control includes VirtualWide™ for viewing 4:3 content in widescreen without appreciable picture degradation, as well as ISF(ccc) calibration modes to easily maintain ISF standards. -
Page 14: Parts List
Parts List Your PlasmaWall is shipped with the following items. If any items are missing or damaged, please contact your Runco dealer or Runco Customer Service at (800) 23-RUNCO. • PlasmaWall Flat-Panel Plasma Display Monitor and DHD Controller • AC Power Cords (2) •... -
Page 15: Controls And Functions
Connects or disconnects the display panel from the AC power source. 3. STANDBY/ON INDICATOR - Lights green to indicate normal operation; - Lights red to indicate that the PlasmaWall is in standby mode. 4. REMOTE CONTROL SENSOR Receives the signals from the remote control. PlasmaWall XP-65DHD Owner’s Operating Manual... -
Page 16: Connectors
3. SLOT 3 Not used. 4. PC IN Not used. 5. RS-232C (9-pin, male D-Sub) Connect the RS-232 OUT port on the DHD Controller to this input. PlasmaWall XP-65DHD Owner’s Operating Manual... -
Page 17: Dhd Controller Front Panel
HDMI 2 - HDMI 1 - HD/RGB 2 - HD/RGB1 - Component SD - S-Video 2 - S-Video 1 - Composite 7. ENTER BUTTON Press ENTER to select a highlighted menu item. PlasmaWall XP-65DHD Owner’s Operating Manual... -
Page 18: Dhd Controller Rear Panel
3. HD1 / HD2 (5 x Analog BNCs) Two inputs (five BNCs per input) for connecting either RGB or component high-definition television signals. The DHD Controller automatically detects the signal format: RGB(HV) or YPrPb, 480p, 720p, 480i, 576i or 1080i. PlasmaWall XP-65DHD Owner’s Operating Manual... - Page 19 Connect the DHD Controller to power here. 12. MAIN AC FUSE This is the main AC input fuse (5mm x 20mm, 500 mA, 250V slow-blow). 13. MAIN POWER SWITCH Disconnects or applies power to the DHD Controller. PlasmaWall XP-65DHD Owner’s Operating Manual...
-
Page 20: Dhd Controller Remote Control
Figure 2-5 shows the DHD Controller remote control, and the paragraphs that follow describe its functionality. DHD Controller Remote Control (not available on RETURN some models) EXIT 16 : 9 4 : 3 HDMI HDMI CUST CUST Figure 2-5. DHD Controller Remote Control PlasmaWall XP-65DHD Owner’s Operating Manual... - Page 21 Press to select Composite video input as the source or to enter the numeric character “1.” 9. COMP (Component) (2) Press to select Component SD (480i/576i) video input as the source or to enter the numeric character “2.” PlasmaWall XP-65DHD Owner’s Operating Manual...
- Page 22 Press to recall settings for the current input from the “ISF Day” memory preset. CUST 1 Press to recall settings for the current input from the “Custom 1” memory preset. CUST 2 Press to recall settings for the current input from the “Custom 2” memory preset. PlasmaWall XP-65DHD Owner’s Operating Manual...
-
Page 23: Installation
The remote control can be used to control the PlasmaWall within the ranges shown in Notes on Remote Control Figure 3-1. Operation Approx. 7m /23ft Figure 3-1. Available Range of the Remote Control PlasmaWall XP-65DHD Owner’s Operating Manual... - Page 24 • If the effective range of the remote control decreases, or it stops working, replace the batteries with new ones. • Ambient conditions may possibly impede the operation of the remote control. If this happens, point the remote control at the plasma display and repeat the operation. PlasmaWall XP-65DHD Owner’s Operating Manual...
-
Page 25: Quick Setup
Display calibration: adjust the following for analog inputs; 31 through 40 save settings when finished: • Aspect ratio • Brightness • Contrast • Color level • Tint • Sharpness • White Balance Repeat Step 7 for digital inputs PlasmaWall XP-65DHD Owner’s Operating Manual... -
Page 26: Installation Considerations
Runco has found the XP-65DHD to operate reliably at altitudes of up to 6000 MSL (mean sea level). The XP-65DHDxa has been found to operate reliably at altitudes of up to 9000 MSL. -
Page 27: Ambient Light
Figure 3-2. This allows heat to disperse, maintaining the proper operating temperature. Wall (2") (2") Wall (2") Figure 3-2. Ventilation Requirements for Enclosure Mounting PlasmaWall XP-65DHD Owner’s Operating Manual... -
Page 28: Other Considerations
• For correct installation and mounting it is strongly recommended to use a trained, authorized dealer. • To avoid sulfurization, it is strongly recommended not to place the unit in a dressing room in a public bath or hot spring bath. PlasmaWall XP-65DHD Owner’s Operating Manual... -
Page 29: Connections To The Plasmawall And Dhd Controller
100-230VAC 50-60 Hz, 165 Watts Max HDMI Out HDMI 1 HDMI 2 Option Component Video Video S-Video 2 RS-232 Out RS-232 Control Made In USA HDMI OUT RS-232 Figure 3-3. Connecting the PlasmaWall to the DHD Controller PlasmaWall XP-65DHD Owner’s Operating Manual... -
Page 30: Rs-232 Connection From The Dhd Controller To The Plasmawall
SIG GND SIG GND 2, 5 To/From REQUEST TO SEND Controller SERIAL CLEAR TO SEND NO CONNECTION 1, 6 1, 9 DB-9 Female RJ-11 Male Figure 3-4. RS-232 Connection from the DHD Controller to the PlasmaWall PlasmaWall XP-65DHD Owner’s Operating Manual... -
Page 31: Connecting Source Components To The Dhd Controller
INPUTS R/Pr B/Pb TRIGGERS R/Pr B/Pb S-Video 1 HDMI 1 HDMI 2 Component Video Video S-Video 2 HDMI Source (HD-DVD/BD/DVD Player or HD Tuner with HDMI or DVI out) Figure 3-5. HDMI Source Connections PlasmaWall XP-65DHD Owner’s Operating Manual... -
Page 32: Digital (Dtv) Rgb Connections
Digital (DTV) RGB Connections: See Figure 3-6. INPUTS R/Pr B/Pb TRIGGERS R/Pr B/Pb S-Video 1 Video S-Video 2 HDMI 1 HDMI 2 Component Video Red/Pr Green/Y Blue/Pb Horiz Vert DTV or Progressive Component (YPbPr) Source Figure 3-6. Digital (DTV) RGB Connections PlasmaWall XP-65DHD Owner’s Operating Manual... -
Page 33: Analog Rgb Connections
Contact your nearest authorized service center or dealer. INPUTS R/Pr B/Pb TRIGGERS R/Pr B/Pb S-Video 1 Video S-Video 2 HDMI 1 HDMI 2 Component Video Red Green Blue Horiz Vert Personal Computer Figure 3-7. Analog RGB Connections PlasmaWall XP-65DHD Owner’s Operating Manual... -
Page 34: Composite, S-Video And Component Video Connections
Composite/S-Video/Component Video Connections: See Figure 3-8. INPUTS R/Pr B/Pb TRIGGERS R/Pr B/Pb S-Video 1 HDMI 1 HDMI 2 Video S-Video 2 Component Video DVD Player, VCR, Satellite Receiver, Laser Disc etc. Figure 3-8. Composite, S-Video and Component Video Connections PlasmaWall XP-65DHD Owner’s Operating Manual... -
Page 35: Rs-232 Controller Connection
Outputs to External Equipment TRIGGERS S-Video 1 Component Video Video S-Video 2 RS-232 Out RS-232 Control 3.5-mm mini plug to 12-Volt Sleeve = Ground trigger-activated Tip = +12V equipment Figure 3-10. Connecting 12-Volt Trigger Outputs PlasmaWall XP-65DHD Owner’s Operating Manual... -
Page 36: Connecting An External Ir Receiver To The Dhd Controller
Remote (3.5-mm Control mini phono plug) Figure 3-11. External IR Receiver Connection When an external IR receiver is connected to the wired IR input, the Note built-in IR sensor on the DHD Controller is disabled. PlasmaWall XP-65DHD Owner’s Operating Manual... -
Page 37: Operation
DHD Controller). The power indicator on the DHD Controller lights solid blue. 7. After a brief warm-up period (approximately 10 seconds), the PlasmaWall will display an image. PlasmaWall XP-65DHD Owner’s Operating Manual... -
Page 38: Setting The Computer Display Properties
3. Click the Settings tab on the display dialog box. 4. Adjust the resolution to 1024x768 pixels. 5. Click the Advanced button and click the Monitor tab on the dialog box. Set the vertical frequency to 60Hz and click OK. PlasmaWall XP-65DHD Owner’s Operating Manual... -
Page 39: Using The Dhd Controller Menus
DHD Controller as you navigate them: ↑ Input Source ↓ Aspect Ratio When the input signal resolution is 1080i digital or 1080p (via the HDMI1 or HDMI2 input), the menus appear on the front-panel display only. PlasmaWall XP-65DHD Owner’s Operating Manual... -
Page 40: Dhd Controller Osd Menu Structure For Plasmawall
1 / 2 / 3 / Save Language (currently, English only) Menu Mode Miscellaneous Timeout Side Bar Color Film Mode (SD src. only) System Reset Restore Saved Settings Figure 4-1. DHD Controller OSD Menu Structure for PlasmaWall PlasmaWall XP-65DHD Owner’s Operating Manual... -
Page 41: Main Menu
The currently-selected aspect ratio is indicated by a “ ” to its left; in this example, 16:9 is selected. Letterbox The aspect ratio selection is automatically saved for each input and VirtualWide Note resolution. Cinema PlasmaWall XP-65DHD Owner’s Operating Manual... - Page 42 Select Cinema to view 2.35:1 source material on a 16:9 screen. The upper and lower 2.35:1 Image on portions of the screen are 16:9 Screen masked, but the geometry of the active image area is not changed. PlasmaWall XP-65DHD Owner’s Operating Manual...
-
Page 43: Picture
ISF Presets on page 37. Although it may be possible to obtain satisfactory picture quality using the naked eye and regular program material, Runco recommends using the following calibration tools for best results: • External test pattern source – Ovation Multimedia, Video Essentials or AVIA test DVD (or equivalent). -
Page 44: Typical Gray Bar Pattern For Adjusting Contrast
Select Contrast and press ENTER. Adjust the contrast to a point just below which the white rectangle starts to increase in size. Brightness and contrast controls are interactive. A change to one Note may require a subtle change to the other in order to achieve the optimum setting. PlasmaWall XP-65DHD Owner’s Operating Manual... -
Page 45: Typical Color Bar Pattern For Adjusting Color Saturation And Tint
(on either side of the green bar) appear to be a single shade of blue. Like the brightness and contrast controls, the color and tint controls Note are interactive. A change to one may require a subtle change to the other in order to achieve the optimum setting. PlasmaWall XP-65DHD Owner’s Operating Manual... -
Page 46: Input Position
Height: Select Height from the Input Position menu to change the projected image height. Use the right or up cursor button to increase the height; use the left or down button to decrease it. PlasmaWall XP-65DHD Owner’s Operating Manual... -
Page 47: Isf Presets
Information display: its serial number, the installed hardware and firmware versions and the firmware version build date. Should you ever need to contact Runco Technical Support, this Information information will help them answer your questions or resolve product performance issues. -
Page 48: Calibration
Calibration menu passcode. This makes it possible to restore the picture quality settings to what they were when the display was installed, simply by recalling the “ISF Night” preset. PlasmaWall XP-65DHD Owner’s Operating Manual... - Page 49 Press MENU when you have finished entering text. Then, check the “Splash Enable” box to have the PlasmaWall display the information you enter here when it is turned on. PlasmaWall XP-65DHD Owner’s Operating Manual...
-
Page 50: Service
• Runco/ISF Logo Splash Screen Timers: When you turn on the PlasmaWall, it projects a welcome screen with the Runco logo followed by one with the ISF logo. Select Splash Timer from the Splash Configure menu to set the amount of time that these two images appear. - Page 51 9 as “09.” 3. The LED turns off to confirm the code change. If you enter an invalid code, the LED flashes for three or four seconds. Try again, entering a valid code. PlasmaWall XP-65DHD Owner’s Operating Manual...
- Page 52 The PlasmaWall stores any changes you make to these settings in Note the currently-selected ISF preset (ISF Day or ISF Night). After calibrating the display for one ISF preset, save your settings, select the other ISF preset and repeat the process. PlasmaWall XP-65DHD Owner’s Operating Manual...
- Page 53 (SD) sources. In most cases, the PlasmaWall detects the proper “pull-down” rate and vertical frequency. However, if your source is jittery and/or tearing you may wish to enable Film Mode to ensure stable processing for that source. PlasmaWall XP-65DHD Owner’s Operating Manual...
- Page 54 Presets (page 37), ISF Day/Night presets (page 37), Output Shift settings (page 39), Input Names (page 40) and Trigger settings (page 43). Restore Saved Settings: Following a System Reset, select Restore Saved Settings to apply all previously-saved settings to the PlasmaWall and DHD Controller. PlasmaWall XP-65DHD Owner’s Operating Manual...
-
Page 55: Maintenance And Troubleshooting
(set the vacuum cleaner to its weakest setting when doing this). If not removed, accumulated dust can cause the internal temperature to increase, resulting in possible breakdown or fire. PlasmaWall XP-65DHD Owner’s Operating Manual... -
Page 56: Troubleshooting Tips
Table 5-1 provides some general guidelines for troubleshooting problems you may encounter with the PlasmaWall. If the suggested solutions fail to resolve the problem or if Troubleshooting Tips you encounter an issue not described here, please contact your Runco dealer or Runco Technical Support. Table 5-1. Troubleshooting Chart... - Page 57 55). The image is too large or too • Image size needs • Adjust the image size (refer small. adjusting. to Input Position on page 36 or Display Device - Display Position on page 42). PlasmaWall XP-65DHD Owner’s Operating Manual...
- Page 58 Maintenance and Troubleshooting Notes: PlasmaWall XP-65DHD Owner’s Operating Manual...
-
Page 59: Serial Communications
DHD Controller to power up. If you have enabled the ISF splash screen (refer to Splash Configure on page 39), allow 15 seconds for the DHD Controller to power up. Once it does, it will accept and properly execute multiple serial commands. PlasmaWall XP-65DHD Owner’s Operating Manual... - Page 60 Aspect Ratio Commands (not available on HDMI 1 or HDMI 2 inputs) 16:9 Selects the 16:9 aspect ratio ASPECT? Returns current aspect ratio CINEMA Selects the Cinema aspect ratio LETTERBOX Selects the Letterbox aspect ratio Selects the 4:3 aspect ratio VIRTUALWIDE Selects the VirtualWide aspect ratio PlasmaWall XP-65DHD Owner’s Operating Manual...
- Page 61 Loads “Custom 2” image preset PRESET? Returns currently-selected preset (ISF Day, ISF Night, Custom 1 or Custom 2) Image Preset Commands (available on all inputs) Loads “ISF Day” image preset NIGHT Loads “ISF Night” image preset PlasmaWall XP-65DHD Owner’s Operating Manual...
- Page 62 OHPOS? Returns output horizontal position value OVPOS -100/100 Sets the value for output vertical position OVPOS? Returns output vertical position value OWIDTH -100/100 Sets the value for output width OWIDTH? Returns output horizontal width value PlasmaWall XP-65DHD Owner’s Operating Manual...
- Page 63 7 = 1080i / 25 Hz Any other value = Auto HWVER? Returns hardware version number INRES? Returns input resolution Miscellaneous Commands (available on all inputs) SWVER? Returns software version number TRIGGER Assigns trigger to currently-selected aspect ratio PlasmaWall XP-65DHD Owner’s Operating Manual...
- Page 64 IR remote only you’ll be doing so via serial commands. These commands provide active OSD responses just like the IR remote. DOWN Down-Arrow ( ) key ENTER ENTER key LEFT Left-Arrow ( ) key MENU MENU RIGHT Right-Arrow ( ) key Up-Arrow ( ) key PlasmaWall XP-65DHD Owner’s Operating Manual...
-
Page 65: Specifications
Three (3) years parts and labor from the date of delivery to the end user (except for plasma glass panel). Plasma Glass Panel: One (1) year parts and labor from the date of delivery to the end user. Specifications are subject to change without notice. PlasmaWall XP-65DHD Owner’s Operating Manual... -
Page 66: Dhd Controller Specifications
13.0 lbs. (5.90 kg) Regulatory Approvals: Complies with FCC, CE C-Tick Limited Warranty: Two (2) years parts and labor from the date of delivery to the end user. Specifications are subject to change without notice. PlasmaWall XP-65DHD Owner’s Operating Manual... -
Page 67: Plasmawall Dimensions
Specifications Figure 7-1 shows the PlasmaWall dimensions (all dimensions are in inches). PlasmaWall Dimensions 10.0 31.2 59.8 62.3 10.3 18.5 43.0 52.3 60.0 62.3 Figure 7-1. PlasmaWall Model XP-65DHD Dimensions (with Optional Table Stand) PlasmaWall XP-65DHD Owner’s Operating Manual... - Page 68 Specifications Notes: PlasmaWall XP-65DHD Owner’s Operating Manual...
- Page 70 S ER IAL N UM B E R RUMA-009825 rev 04-11-07 v1.2a Runco International • 2900 Faber Street • Union City, CA 94587 • Ph (510) 324-7777 / (800) 23RUNCO / Fax (510) 324-9300 www.runco.com Runco CL-810 Owner’s Operating Manual...
Need help?
Do you have a question about the PLASMAWALL XP-65DHD and is the answer not in the manual?
Questions and answers