Table of Contents
Advertisement
6 0 - 5 8 2 7 - 0 8 _ 0 0 _ E n . i n d d 1
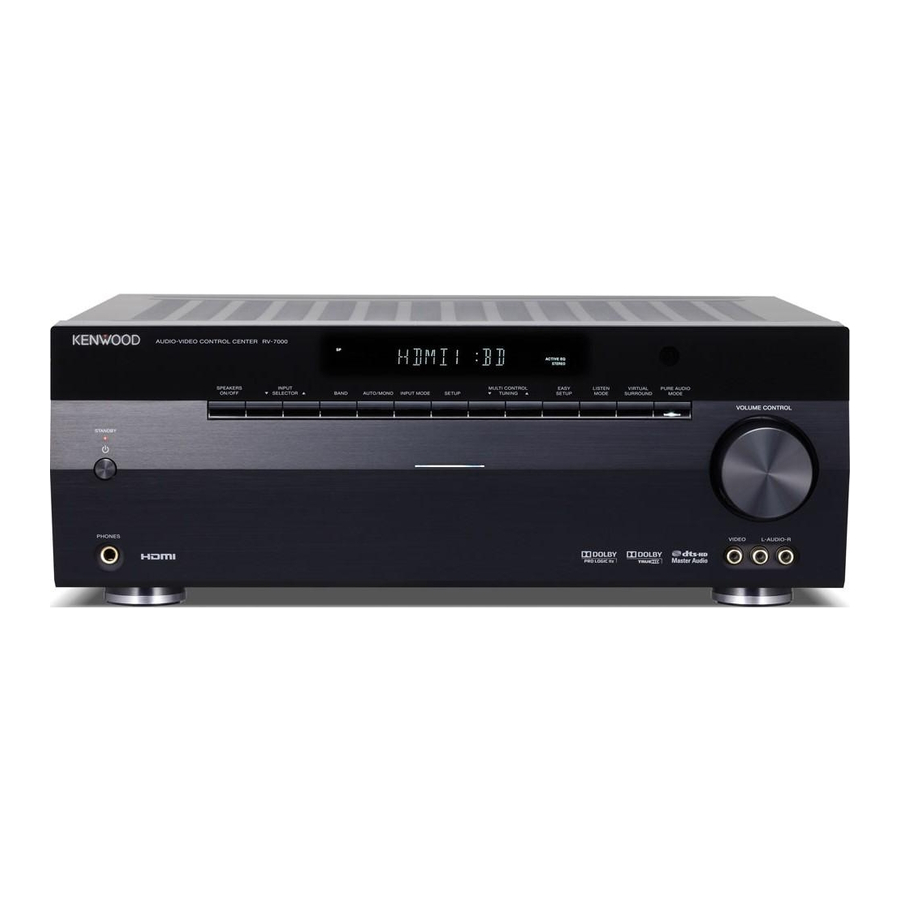
AUDIO-VIDEO CONTROL CENTER
RV-7000
RV-6000
RA-5000
INSTRUCTION MANUAL
Declaration of Conformity with regard to
the EMC Directive 2004/108/EC
Manufacturer:
Kenwood Corporation
2967-3 Ishikawa-machi, Hachioji-shi, Tokyo, 192-8525 Japan
EU Representative's:
Kenwood Electronics Europe BV
Amsterdamseweg 37, 1422 AC UITHOORN, The Netherlands
RV-7000
RV-6000
RA-5000
© B60-5827-08/00 (E/X)
1 0 . 8 . 3 1 1 : 0 7 : 3 3 A M
Advertisement
Table of Contents

Subscribe to Our Youtube Channel
Related Manuals for Kenwood RV-7000


Summary of Contents for Kenwood RV-7000
-
Page 1: Instruction Manual
Declaration of Conformity with regard to the EMC Directive 2004/108/EC Manufacturer: Kenwood Corporation 2967-3 Ishikawa-machi, Hachioji-shi, Tokyo, 192-8525 Japan EU Representative's: Kenwood Electronics Europe BV Amsterdamseweg 37, 1422 AC UITHOORN, The Netherlands RV-7000 RV-6000 RA-5000 © B60-5827-08/00 (E/X) 6 0 - 5 8 2 7 - 0 8 _ 0 0 _ E n . i n d d 1... -
Page 2: Safety Precautions
MAGNITUDE TO CONSTITUTE A RISK OF ELECTRIC operate, notify your dealer immediately. If the unit was shipped SHOCK TO PERSONS. to you directly, notify your shipper immediately. Kenwood recommends that you retain the original carton and packing THE EXCLAMATION POINT WITHIN AN EQUILATERAL materials in case you need to move or ship the unit in the future. -
Page 3: Important Safety Instructions
IMPORTANT SAFETY INSTRUCTIONS ¤ Caution : Read this page carefully to ensure safe operation. Read These Instructions 10. Overloading – All the safety and operating instructions should be read before the – Do not overload wall outlets, extension cords, or integral product is operated. -
Page 4: Table Of Contents
Display dimmer adjustment Lip Sync Listening with headphones HDMI Link Muting the sound Power Control Remote control operations for Kenwood BD/DVD Confirming the HDMI function ......35 players .............. 53 Before operation Confirming the basic HDMI operations Troubleshooting Confirming the HDMI control functions Troubleshooting.......... - Page 5 English 6 0 - 5 8 2 7 - 0 8 _ 0 0 _ E n . i n d d 5 1 0 . 8 . 3 1 1 : 0 7 : 3 5 A M...
-
Page 6: Special Features
Virtual Surround ✔ Dolby Virtual Speaker \ \ Easy Setup of the speaker (RV-7000/RV-6000) Easy Setup of the speaker (RV-7000/RV-6000) The speaker settings can be completed by simply selecting the room type and the listening position. The audio will be corrected automatically according to the characteristics of the speaker system in use. - Page 7 \ Crossover Frequency Adjustment Crossover Frequency Adjustment The bass frequency from the subwoofer and the other speakers can be adjusted making better sound phase between speakers and natural sound field. \ \ Lip Sync function Lip Sync function This function corrects deviation between the video and audio. Automatic correction is also available provided that all of the playback component, this unit and the TV are connected through HDMI.
-
Page 8: How To Read This Manual
• In this manual, RV-7000 is used for the illustrations of front panel and rear panel. • The illustrations of the main unit display panel and the examples of operations are shown for the purpose of explanation and may differ from the actual view or operation. -
Page 9: Names And Functions Of Parts
MULTI CONTROL ∞/5 key MODE/PURE AUDIO MODE ON/OFF. Press to switch this unit ON or to put it Press to select a setting item. (RV-7000/RV-6000) to standby. TUNING key The standby indicator lights in the Press to switch the PURE AUDIO Press to select a radio station. - Page 10 Use to turn this unit on and off. BD/DVD key Press to switch the Kenwood BD/DVD player ON/OFF. RV-7000/RV-6000/RA-5000 6 0 - 5 8 2 7 - 0 8 _ 0 0 _ E n . i n d d 1 0...
- Page 11 ¡ MUTE key Press to mute the sound temporarily. ™ TUNING 1/¡ keys Press to select a radio station. Use to operate the Kenwood BD/DVD player.* £ Input source keys Press to select the input source. ¢ DIMMER key Press to switch the brightness of the display and indicators.
- Page 12 Insert two (R03) batteries following the polarity indications. Close the cover. RV-7000/RV-6000/RA-5000 6 0 - 5 8 2 7 - 0 8 _ 0 0 _ E n . i n d d 1 2 1 0 . 8 . 3 1 1 : 0 7 : 4 0 A M...
- Page 13 Display Display Virtual Surround Lights up when the Virtual Surround is on. SP (speaker) Lights up when the speakers are on. Lights up when searching a radio station by program type. CLIP Lights up when the input level is Lights up when receiving an too high.
-
Page 14: Notes On Connections
Notes on connections Speaker placement RV-7000 (Surround Back speaker) ¤CAUTION Do not connect the power cord to a wall outlet until all Front speaker Front speaker connections are completed. When connecting the related system components, be sure to refer to the instruction manuals supplied with the components you are connecting. - Page 15 RA-5000 Front speakers Install in the front left and right positions. Symmetrical Front speaker Front speaker installation is ideal. The front speakers are always used regardless of the listen mode. Front Height speakers Install on the front of the listening position, at the same height as the surround speakers.
-
Page 16: Connecting Speakers
• RV-6000 : Subwoofer sound comes out at the both Subwoofer terminals (SPEAKERS and PREOUT) simultaneously depending on speaker setup. • RV-7000 : When only one surround back speaker is used, connect it to the [SURROUND BACK L] terminal. RV-7000/RV-6000/RA-5000 6 0 - 5 8 2 7 - 0 8 _ 0 0 _ E n . - Page 17 RV-6000 Power Amplifier Subwoofer/ Surround Back Right Left speaker Powered Surround Back Front speakers Subwoofer speaker Center speaker Right Left Surround speakers English 6 0 - 5 8 2 7 - 0 8 _ 0 0 _ E n . i n d d 1 7 1 0 .
- Page 18 Front speakers Subwoofer RV-7000/RV-6000/RA-5000 6 0 - 5 8 2 7 - 0 8 _ 0 0 _ E n . i n d d 1 8 1 0 . 8 . 3 1 1 : 0 7 : 4 7 A M...
- Page 19 How to connect the wire to terminals How to connect the wire to terminals How to connect the wire to terminals How to connect the wire to terminals (Screw type terminal) (Screw type terminal) (Push type terminal) (Push type terminal) Strip the vinyl coating of the wire by a length of Strip the vinyl coating of the wire by a length of about 1 cm.
-
Page 20: Connecting Components Equipped With Hdmi Terminals
To use the ARC function of this unit, be sure to use a cable carrying the logo shown above. RV-7000/RV-6000/RA-5000 6 0 - 5 8 2 7 - 0 8 _ 0 0 _ E n . i n d d 2 0... -
Page 21: Connecting A Tv Monitor
Connecting a TV Monitor Connect A and B to the TV monitor according to the connected video component as shown below. For the video and audio connections of the connected component, see the description on the page for the connected components. •... -
Page 22: Connecting A Cd Player
OUT (AUDIO) CD player RV-7000/RV-6000/RA-5000 6 0 - 5 8 2 7 - 0 8 _ 0 0 _ E n . i n d d 2 2 1 0 . 8 . 3 1 1 : 0 7 : 5 1 A M... -
Page 23: Connecting A Dvd Player
Connecting a DVD player Connect the audio line: Connection A (digital) or B (analog). Connect the video line: Connection C. Connect the TV monitor. Connect as shown in <Connecting a TV Monitor> ¡. AUDIO OUT COAXIAL DIGITAL VIDEO OUT (Analog) OUT (AUDIO) DVD player •... -
Page 24: Connecting A Video Player
• When the connected Video player and TV monitor have the HDMI terminals, it is recommended to use the HDMI connection. (See <Connecting components equipped with HDMI terminals> ).) RV-7000/RV-6000/RA-5000 6 0 - 5 8 2 7 - 0 8 _ 0 0 _ E n . i n d d 2 4... -
Page 25: Connecting An Audio Player
Connecting an audio player AUDIO OUT Cassette deck and etc. Connecting to the [AV AUX] jacks A component that is usually not connected to this unit, such as a portable video camera, can be connected to the [AV AUX] jacks on the front panel of this unit. -
Page 26: Connecting Antennas
Otherwise, an electric shock accident may occur if the antenna falls down. RV-7000/RV-6000/RA-5000 6 0 - 5 8 2 7 - 0 8 _ 0 0 _ E n . i n d d 2 6 1 0 . 8 . 3 1 1 : 0 7 : 5 6 A M... -
Page 27: Turning This Unit On
Turning this unit ON After completing all of the necessary connections, connect the power cord to a wall power outlet. The standby indicator on the front panel lights red to indicate the standby mode. Press the [ (Power)] key of this unit or the [ RECEIVER] key of the remote control unit to turn this unit ON. -
Page 28: Speaker Setup (Easy Setup) (Rv-7000/Rv-6000 Only)
Speaker setup (Easy Setup) (RV-7000/RV-6000 only) The speaker settings can be completed by simply selecting the • Easy setup with may not be appropriate with certain room type and listening position. The audio will be corrected speaker systems or listening environment. In this case, go automatically according to the characteristics of the speaker through <Speaker setup (Detailed Setup)>. -
Page 29: Speaker Setup (Detailed Setup)
Speaker configuration receiver according to the environment of your listening room. Select the use of each speaker and its size. For creating the best listening environment, Kenwood recommends to perform the setup at the listening position. Enter the Detailed Setup mode. -
Page 30: Speaker Level
• If "FRNT NML" is selected, "LRG" cannot be selected for the other speakers. RV-7000/RV-6000/RA-5000 6 0 - 5 8 2 7 - 0 8 _ 0 0 _ E n . i n d d 3 0 1 0 . 8 . 3 1 1 : 0 8 : 0 2 A M... -
Page 31: Speaker Distance
Adjustment starts from front left speaker. Use [MULTI CONTROL ∞/5] to set the distance. Distances of speakers Measure the distance from the listening position to each speaker and jot down in the table below. RV-7000 [SETUP] Distance from the Speaker Input channel The distance can be set in the range of 0.3 to 9.0 meters (1... -
Page 32: Lfe (Low Frequency Effect) Level
The delay time is adjusted from 0ms to 300ms in 10ms step. Go to the next setting. RV-7000/RV-6000/RA-5000 6 0 - 5 8 2 7 - 0 8 _ 0 0 _ E n . i n d d 3 2... -
Page 33: Hdmi Setup Flow
HDMI setup The HDMI setup is required to use the component connected to Audio Out Audio Out the HDMI terminal or to use the HDMI control functions. This function selects whether the output destination of the audio input is the TV or this unit. Select "AUDIO OUT". -
Page 34: Lip Sync
"PWR OFF" power ON/OFF status of the TV. RV-7000/RV-6000/RA-5000 6 0 - 5 8 2 7 - 0 8 _ 0 0 _ E n . i n d d 3 4 1 0 . 8 . 3 1 1 : 0 8 : 0 9 A M... -
Page 35: Confirming The Hdmi Function
Confirming the HDMI function Note that some HDMI control functions may not work with Confirming the HDMI control functions Confirming the HDMI control functions certain components and TV that are not compatible with them. To use the HDMI control functions properly, it is recommended to Turn all of the HDMI-connected components ON. -
Page 36: Preparation For Playing Music Or Movie
• If the audio is lost as a result of change in the input signal while "MANUAL" is selected, press [LISTEN MODE]. RV-7000/RV-6000/RA-5000 6 0 - 5 8 2 7 - 0 8 _ 0 0 _ E n . i n d d 3 6... -
Page 37: Arc (Audio Return Channel)
Playback ARC (Audio Return Channel) ARC (Audio Return Channel) This function allows the audio signal from an Audio Return Channel (ARC) compatible TV to be input into the HDMI MONITOR terminal of this unit. To use this function, set "LINK SET" in the HDMI setup to "ON". Connection of ARC-compatible TV monitor ∞/5 HDMI cable... -
Page 38: Monitoring The Input Source In The Original Sound (Straight Decode Mode)(Rv-7000/Rv-6000 Only) Listening To Music With Pure Audio Mode
Monitoring the input source in the original sound (STRAIGHT DECODE mode)(RV-7000/RV-6000 only) Listening to music with PURE AUDIO MODE STRAIGHT DECODE mode : The signal input from a source can be output directly without any sound field effect added to it. -
Page 39: Listen Mode
The listen modes provided with this unit allow you to enjoy various surround effects with various video software. To enjoy the surround audio in the best condition, it is required to set up the speakers in advance. RV-7000 RV-6000 RA-5000... - Page 40 · Stereo • Certain listen modes cannot be selected depending on the input signal. RV-7000/RV-6000/RA-5000 6 0 - 5 8 2 7 - 0 8 _ 0 0 _ E n . i n d d 4 0 1 0 . 8 . 3 1 1 : 0 8 : 1 9 A M...
-
Page 41: Surround Play Using The Listen Mode
Surround play using the listen mode RA-5000 2.1ch stereo system Select the listen mode according to the source being played back. TV / SCREEN Listen mode Dolby Virtual Speaker Off · Stereo Dolby Virtual Speaker On · Dolby Pro Logic II (Movie, Music) Preparations ·... -
Page 42: Checking The Current Input Signal
• This function is not available when in Tuner source. Press [VIRTUAL] (remote control unit) or [VIRTUAL SURROUND]/[DOLBY VIRTUAL SPEAKER] (main unit). Each press switches the mode as follows: RV-7000/RV-6000 only Display Setting "VS ON" Sets Virtual Surround mode to “ON”.. -
Page 43: Tuning Into A Radio Station
Tuning into a radio station This unit can store up to 40 stations in the memory and recall Use [TUNING 1/¡] to select the station. them by easy operation. "TUNED" lights when a broadcast is being received. Radio stations can be classified into Radio Data System stations and other stations. -
Page 44: Using Radio Data System
01–15 will be replaced by the Radio Data System stations.) RV-7000/RV-6000/RA-5000 6 0 - 5 8 2 7 - 0 8 _ 0 0 _ E n . i n d d 4 4... -
Page 45: Presetting Radio Stations Manually
Presetting radio stations Receiving preset stations manually The Radio Data System auto memory function assigns preset numbers to Radio Data System stations starting from preset number "1". Therefore, be sure to execute the Radio Data System auto memory function before using the following operations to Numeric keys manually store AM stations and other FM stations, and Radio Data System stations. -
Page 46: Tuning By Program Type (Pty Search)
Varied Speech "VARIED" RV-7000/RV-6000/RA-5000 6 0 - 5 8 2 7 - 0 8 _ 0 0 _ E n . i n d d 4 6 1 0 . 8 . 3 1 1 : 0 8 : 2 8 A M... -
Page 47: Using The Display Key
Using the DISPLAY key Press [PTY] to start searching. Example: Searching for a Rock Music broadcast. Display while searching. Blinks Display when a station is received. Goes out Pressing [DISPLAY] changes the contents of the display. Each press switches the display mode as follows: Station name display 1 PS (Program Service) name display 2 RT (Radio Text) display... -
Page 48: Adjusting The Sound
[TONE] The level is adjusted from –10 to +10. RV-7000/RV-6000/RA-5000 6 0 - 5 8 2 7 - 0 8 _ 0 0 _ E n . i n d d 4 8 1 0 . 8 . 3 1 1 : 0 8 : 3 1 A M... -
Page 49: Adjustments According To The Playing Source
Note that some items are not displayed depending on Input source speaker settings and listen mode. Exit the adjustment mode. name Settings of RV-7000 The adjustment is only temporary for the current input selection. The value will return automatically to the original Display Setting item... -
Page 50: Speaker Level Adjustment
Midnight mode. • "AUTO” can be selected only in the TrueHD mode. Press [SOUND] repeatedly to select "INPUT". Panorama mode (RV-7000/RV-6000 only) Panorama mode (RV-7000/RV-6000 only) ¶ Pro Logic IIx Music and Pro Logic II Music mode only Use [MULTI CONTROL ∞/5] to adjust the input... -
Page 51: Dimension (Rv-7000/Rv-6000 Only)
Dimension (RV-7000/RV-6000 only) Dimension (RV-7000/RV-6000 only) Center image (RV-7000/RV-6000 only) Center image (RV-7000/RV-6000 only) ¶ Pro Logic IIx Music and Pro Logic II Music mode only ¶ DTS Neo:6 Music mode only The center of the acoustic field can be moved toward the front The output level of the center speaker can be adjusted. -
Page 52: Convenient Functions
Press [MUTE] again so that the "MUTE" indicator goes off. MUTE can also be deactivated by adjusting volume. RV-7000/RV-6000/RA-5000 6 0 - 5 8 2 7 - 0 8 _ 0 0 _ E n . i n d d 5 2... -
Page 53: Remote Control Operations For Kenwood Bd/Dvd Players
Remote control operations for Kenwood BD/DVD players The remote control of this unit can control Kenwood BD/DVD players directly without using the remote control supplied with the BD/DVD player. Compatible BD/DVD player models DV-4900, DV-4070B, DV-2070, DV-203, DVF-9010, DVF-K7010, DVF-5010, DVF-R9030, DVF-R7030, DVF-3530, DV-402, DV-5900, DV-5700,... -
Page 54: Troubleshooting
The HDMI Link is OFF. Set the HDMI Link to ON. RV-7000/RV-6000/RA-5000 6 0 - 5 8 2 7 - 0 8 _ 0 0 _ E n . i n d d 5 4 1 0 . 8 . 3 1 1 : 0 8 : 4 4 A M... -
Page 55: Resetting The Unit
The remote control has not been changed to the Press the [DVD] key to activate the operation mode for the component you want to control before operation. E operation mode for the Kenwood BD/DVD player you wish to control. Batteries are exhausted. -
Page 56: Glossary
Compatibility with existing home theater systems incorporating the Dolby Digital technology is also secured. RV-7000/RV-6000/RA-5000 6 0 - 5 8 2 7 - 0 8 _ 0 0 _ E n . i n d d 5 6 1 0 . 8 . 3 1 1 : 0 8 : 4 5 A M... - Page 57 DTS−HD Master Audio • 3D Over HDMI This unit is able to pass through 3D mandatory formats This loss-less (reversible) audio technology has been developed defined by HDMI Licensing, LLC, Frame Packing, Side-by-Side by DTS Corporation and reproduces audio in the same high Horizontal and Top-and-Bottom.
-
Page 58: Specifications
RA-5000 ............... 8.3 kg (18.3 lb) PRE OUT (SUBWOOFER) ...............2.0 V / 100 kΩ (SURROUND BACK/FRONT HEIGHT : RV-7000 only) ...1.1 V / 100 kΩ • Kenwood follows a policy of continuous advancements (SURROUND BACK : RV-6000 only) ......1.1 V / 100 kΩ... - Page 59 English 6 0 - 5 8 2 7 - 0 8 _ 0 0 _ E n . i n d d 5 9 1 0 . 8 . 3 1 1 : 0 8 : 4 5 A M...
- Page 60 For your records Record the serial number, found on the back of the unit, in the spaces designated on the warranty card, and in the space provided below. Refer to the model and serial numbers whenever you call upon your dealer for information or service on this product.
Need help?
Do you have a question about the RV-7000 and is the answer not in the manual?
Questions and answers