
Related Manuals for Friedrich WallMaster WS07A10D


Summary of Contents for Friedrich WallMaster WS07A10D
- Page 1 Room Air Room Air Room Air Room Air Room Air Conditioning Conditioning Conditioning Conditioning Conditioning SERVICE SERVICE SERVICE SERVICE SERVICE Manual Manual Manual Manual Manual RACServMn (01/02)
-
Page 2: Table Of Contents
T T T T T able of Contents able of Contents able of Contents able of Contents able of Contents Page Typical Unit Components ........ Refrigerant Charging ........40-41 Introduction ............. Undercharged Refrigerant Systems ....41-42 Unit Identification ..........Overcharged Refrigerant Systems ....Unit Specifications .......... -
Page 3: Typical Unit Components
If you install or perform service on equipment, you must assume responsibility for any bodily injury or property damage which may result to you or others. Friedrich Air Conditioning Company will not be responsible for any injury or property damage arising from improper... -
Page 4: Unit Identification
UNIT IDENTIFICA UNIT IDENTIFICA UNIT IDENTIFICATION UNIT IDENTIFICA UNIT IDENTIFICA TION TION TION TION Model Number Code S Q 06 J 1 0 A 1st Digit – Function 8th Digit – Engineering S = Straight Cool, Value Series Major change C = Straight Cool, Budget Series 7th Digit –... -
Page 5: Unit Specifications
Sleeve dimensions are listed on the following page. ✭✭ These heat pumps have no supplemental electric and should not be operated below 37F. As an E partner, Friedrich Air Conditioning co. has determined that the selected E (M) models meet the E NERGY NERGY NERGY requirements for energy efficiency. - Page 6 WallMaster® Thru-the-wall Specifications Room Side Moisture Energy Removal Weight Circulation Cooling Heating Efficiency Pints/Hr. Lbs. Capacity Capacity Volts Cooling Cooling Heating Heating Ratio Model BTU/Hr. BTU/H Rated Amps Watts Amps Watts 7000 – – – WS07A10D 9000 – – – WS09A10D 11500 –...
-
Page 7: Unit Performance
Unit Performance Sheets SPECIFICATIONS SQ05J10A-1 SQO6J10A-1 SQO7J10A-1 SQO8J10AB-1 BTUH (Cooling) 5400 6300 7100 8000 E.E.R. (Cooling) 11.0 10.8 10.3 10.0 Volts Amperes (Cooling) Total Watts (Cooling) Hertz Fuse / Breaker Size Fan RPM 1115 1115 1115 1115 Evaporator Air CFM Exhaust Air CFM Dehumidification Pts / Hr. - Page 8 KQ05J10A-1 KQ06J10A-1 KQ08J10A-1 YQ06J10A-1 SPECIFICATIONS KQ05J10A-3 KQ06J10A-3 BTUH (Cooling) 5300 6200 7900 6200 E.E.R. (Cooling) 10.0 Volts Amperes (Cooling) Total Watts (Cooling) Hertz Fuse/Breaker Size Fan RPM 1075 1075 1075 1075 Evaporator Air CFM Exhaust Air CFM Dehumidification Pts/Hr Width 19¾"...
- Page 9 PERFORMANCE DATA* SPECIFICATIONS SC06H10D SC06H10D DISCHARGE 56.1 BTUH (Cooling) 5950 EVAPORATOR AIR E.E.R. (Cooling) TEMP. °F TEMP 23.9 Volts DROP °F Amperes (Cooling) OPERATING SUCTION Total Watts (Cooling) PRESSURES DISCHARGE Hertz AMPS Fuse/Breaker Size ELECTRICAL Fan RPM 1595 RATINGS LOCKED 35.0 Evaporator Air CFM ROTOR AMPS...
- Page 10 SPECIFICATIONS KM14J10B1 KS10J10-1 KS12J10-1 KS12J30A1 KM18J30A2 KM21J304 KL21J30A3 KS10J10-3 KS12J103 KS12J30A3 KM18J30A3 KL25J30A1 BTUH 12500 18000 21000 25000 14000 10000 12000 12500 18000 20500 24700 E.E.R. 10.0 10.1 10.3 10.0 Volts Amperes 10.5 13.5 12.0 10.8 11.3 15.0 1250 1875 2335 3010 Total Watts...
-
Page 11: Specifications
SPECIFICATIONS RS10J101 RS10J103 RS12J101 RS12J103 RS15J301 RM15J101 RM18J302 RM18J303 BTUH 15,000 18,500 18,500 10,000 10,000 12,000 12,000 15,000 14,500 18,300 18,300 E.E.R. 11.0 11.0 10.5 10.5 10.5 10.0 10.0 10.0 10.0 Volts Amperes 10.2 10.2 12.0 Total Watts 1145 1145 1565 1380 1850... - Page 12 SPECIFICATIONS YS09J10-1 YS13J33-1 YM18J34A-2 YL24J35A-1 BTUH (Cooling) 9000 13000 17500 24000 13000 17500 23800 BTUH (Heating) 8300 12400 16500 23000 12300 16300 22800 E.E.R. (Cooling) 11.5 E.E.R. (Heating) 11.0 Volts Amperes (Cooling) 12.0 13.0 Amperes (Heating) 10.4 11.5 Total Watts (Cooling) 1325 1860 2665...
-
Page 13: Performance Data
PERFORMANCE DATA *YS09J10-1 **YS13J33-1 **YM18J34A-2 **YL24J35A-1 (Heating) AHAM @ 70°F Inside 47°F Outside 8300 12400/12300 17200/17200 23000/22800 @ 70°F Inside 35°F Outside 10700/8900 13000/10600 17300/14300 Evaporator Air Temperature Rise @ 70°F Inside 47°F Outside 19.62 31.38 24.74 31.71 @ 70°F Inside 35°F Outside 28.69/23.87 24.46/20.22 24.38/20.16... - Page 14 SPECIFICATIONS ES12J33-1 ES15J33A-1EM18J34A-2EL24J35A-1 EL33J35-2EK12J33A-1 EK18J34A-2 ES12J33-3 EM18J34A-3EL24J35A-2 EK12J33A-3 EK18J34A-3 BTUH (Cooling) 12000 15000 18500 24000 33000 12500 18000 12000 15000 18300 24000 32500 12500 18000 BTUH (Heating) 10700 10700 13000 17300 17300 10700 13000 8900 8900 10600 14300 14300 8900 10600 E.E.R.
- Page 15 SS08J10R1 SS09J10A1 SS10J10R1 SS12J10R1 SS12J30A1 SPECIFICATIONS SS08J10A1 SS10J10A1 SS12J10A1 SS12J30A SS12J10A3 BTUH 8200 9200 10200 12000 12000 12000 E.E.R. 10.8 11.55 11.7 10.5 10.5 Volts 230/208 Amperes 10.2 5.5/5.7 Total Watts 1145 1145 1090 Hertz Fuse/Breaker Size Fan RPM 1110 1110 1095 1120...
- Page 16 SM14J10B1 SS15J30A1 SM18J30A2 SM21J30A4 SL24J30A3 SL28J30A SL33J302 SPECIFICATIONS SM18J30A3 SL24J30A1 BTUH 14000 15000 18200 21000 24000 28000 33000 15000 18000 20500 24000 27500 32500 E.E.R. 10.5 10.0 10.0 Volts Amperes 12.0 10.6 12.0 14.0 17.0 11.4 13.3 15.5 18.0 Total Watts 1335 1565 1850...
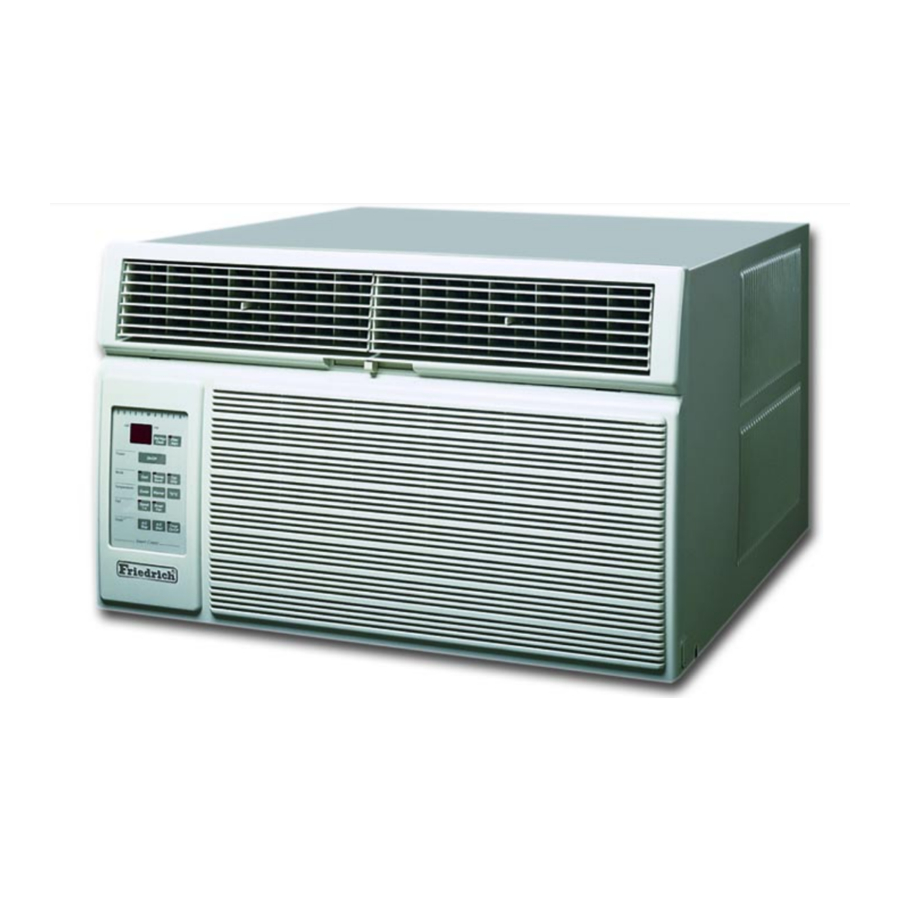
- Page 17 SPECIFICATIONS WS07A10D WS09A10D WS12A10D WS09A30D WS12A30D WS13A30D BTUH 7000 9000 11500 9000 11500 12500 8800 11300 12300 E.E.R. Volts Amperes 11.5 Total Watts 1280 1280 1440 1255 1415 Hertz Fuse/Breaker Size Fan RPM 1145 1140 1275 1140 1275 1275 Evaporator Air CFM Fresh Air CFM Exhaust Air Dehumidification Pts/Hr...
- Page 18 SPECIFICATIONS WE09A33D WE12A33D WE13A33D WY09A33D WY12A33E BTUH (Cooling) 9000 11500 12500 9000 11300 8800 11300 12300 8800 10900 BTUH (Heating) 11000 11000 11000 8200 10800 9100 9100 9100 8200 10500 E.E.R. (Cooling) E.E.R (Heating) Volts Amperes (Cooling) Amperes (Heating) 16.0 16.0 16.0 14.7...
- Page 19 EVAPORATOR AIR OPERATING ELECTRICAL R-22 COMP. PERFORMANCE TEMP. °F. PRESSURES RATINGS REFRIG. DATA* DISCHARGE TEMP. SUCTION DISCHARGE AMPS LOCKED CHARGE IN CHARGE IN Cooling DROP °F. ROTOR AMPS OUNCES FLUID OZ. WE09A33D 58.0 22.0 20.0 11.8 WE12A33D 55.0 25.0 26.3 11.8 WE13A33D 47.1...
- Page 20 PERFORMANCE DATA *WY09A33D *WY12A33E (Heating) BTUH @70°F Inside 62°F Outside 9700 12400 @70°F Inside 57°F Outside 9300 12000 @70°F Inside 52°F Outside 8800 11400 @70°F Inside 47°F Outside 8200/8100 10800/10400 @70°F Inside 42°F Outside 7600 10000 @70°F Inside 37°F Outside 6800 9000 @70°F Inside 35°F Outside...
-
Page 21: Refrigeration Sequence Of Operation
Refrigeration System Refrigeration System Refrigeration System Refrigeration System Refrigeration System Sequence of Operation Sequence of Operation Sequence of Operation Sequence of Operation Sequence of Operation A good understanding of the basic operation of the refrigeration The refrigerant leaves the condenser coil through the liquid line as a warm high pressure liquid. -
Page 22: Electrical Rating Tables
* Optional 30 Amp Kit (618-869-00) is recommended in 208 Volt power supply areas that fall below 208 Volts. For more information, call the Friedrich Service Department. Due to a program of continuing improvement, specifications are subject to change without notice. -
Page 23: Compressor
COMPONENTS OPERATION GROUND TEST & TESTING Use an ohmmeter set on its highest scale. Touch one lead to the compressor body (clean point of contact as a good con- nection is a must) and the other probe in turn to each com- WARNING pressor terminal (see Figure 2.) If a reading is obtained, the DISCONNECT ELECTRICAL POWER TO... -
Page 24: Thermal Overload (Internal)
The overload is wired in series with the common motor CHECKING THE INTERNAL OVERLOAD terminal. The overload senses both major amperage and (See Figure 4) compressor temperature. High motor temperature or amperage heats the disc causing it to open and break the Figure 4 circuit to the common motor terminal. -
Page 25: System Switches/Controls
System Control Fan Motor Figure 6 Figure 5 Panel (SQ Models Only) FAN MOTOR - TEST SYSTEM CONTROL SWITCH (SQ Models) (See Figure 6) 1. Determine that capacitor is serviceable. 2. Disconnect fan motor wires from fan speed switch or A five-position control switch is used to regulate the operation system switch. - Page 26 1. "Off" - Turns everything off. Figure 8 ROCKER SWITCH 2. "Hi Fan" - Maximum circulation of filtered room air (no cooling.) 3. "Low Fan" - Fan runs slower for less circulation of filtered room air. 4. "Low Cool" - Fan runs slowly for quiet operation when maximum cooling is not needed.
- Page 27 SYSTEM CONTROL SWITCH System Control Switch ("YQ" Model Only) (See Figure 11) Figure 12 ("YQ" Models Only) The YQ Model unit uses a six position control switch to regulate the operation of the unit (see Figure 9). Function of each position (Clockwise rotation) is as follows: SYSTEM CONTROL PANEL Figure 11...
-
Page 28: System Control
3. "Hi Cool" Contacts closed between terminals "L1" to "1" System Control Panel and "L1" and "C". Figure 15 WS Models 4. "Lo-Cool" Contacts are closed between terminals "L1" to "2" and "L1 to "C". SYSTEM CONTROL SWITCH Figure 14 (SC Model Only) Figure 16 System Control... -
Page 29: System Control Switch
SYSTEM CONTROL SWITCH - TEST (See Figure 18) 2. "Lo Cool" Position - between terminals "L1" and "C," "LO" and "MS." Disconnect leads from control switch. Turn control to position being tested. There must be continuity as follows: 3. "Med Cool" Position - between terminals "L1" and "C," "M"... - Page 30 SYSTEM CONTROL SWITCH (See Figure 21) System Control Switch Figure 23 A six-position control switch is used to regulate the operation of the fan motor and compressor. The compressor can be operated with the fan operating at low, medium or high speed. The fan motor can also be operated independently on medium speed.
- Page 31 SYSTEM CONTROL SWITCH (See Figure 24) 7. "Lo Heat" Position - fan operates on low speed, (Heat Pump & Electric Heat Models) compressor or electric heater is on. An eight position control switch is used to regulate the 8. "Fan Only" Position - operates on medium speed. operation of the fan motor and compressor.
-
Page 32: Electronic Control
Smart Center Electronic Control Center: TO ADJUST TEMPERATURE (See Figure 26) COOLER - Touch COOLER to see setting, touch again to FILTER ALERT light will come on after 250 hours of use. Touch change. FILTER ALERT to reset. WARMER - Touch WARMER to see setting, touch again to TO SET MODE OF OPERATION change. - Page 33 TESTING THE ELECTRONIC CONTROL IMPORTANT 2001 XQ BOARDS & QME BOARDS Error Codes are cleared from the log by exiting from Checking Room Temperature: Error Code Mode. To exit on XQ models, press Timer 1. Check the room temperature at the electronic control pad On/Off button.
-
Page 34: Thermostats (Indoor)
TEST: providing that the mode was set for cooling and the set point temperature has not been met in the room. 1. Remove leads from thermostat. 2. Turn thermostat knob clockwise to its coldest position. THERMOSTAT ("SQ & KQ" Models) - See Figure 27. 3. -
Page 35: Thermostats (Defrost)
THERMOSTAT - Models ES, YS, EM, YM, EL, YL THERMOSTAT BULB LOCATION (See Figure 29) Figure 30 ("SQ" Models Only) A cross ambient thermostat is used on all heat pump and Thermostat sensor holder 020 and anticipator (4712D-140) to be positioned electric heat units. -
Page 36: Resistor (Heat Anticipator)
RESISTOR (Heat Anticipator) (See Figure 34) DEFROST THERMOSTAT Figure 32 Failure of the resistor will cause prolonged "off" and "on" cycles (Heat Pump Models) of the unit. When replacing a resistor, be sure and use the exact replacement. Resistor ratings are as follows: 115 Volt - 5,000 ohms 3 watt 230 Volt - 20,000 ohms 3 watt RESISTOR... -
Page 37: Check Valve
NOTE: The slide (check) inside the valve is made of DUAL RATED RUN teflon. Should it become necessary to replace the Figure 35 CAPACITOR HOOK-UP check valve, place a wet cloth around the valve to prevent overheating during the brazing operation. -
Page 38: Solenoid Coil (Heat Pump Models)
SOLENOID COIL REVERSING VALVE (Heat Pump Models Only) (See Figure 37) Figure 37 The solenoid coil is an electromagnetic type coil mounted on the reversing valve and is energized during the operation of the compressor in the heating cycle. Should the reversing valve fail to shift during the heating cycle, test the solenoid coil. -
Page 39: Heating Element
SEALED REFRIGERATION SYSTEM REPAIRS HEATING ELEMENT (See Figure 39) All heat pumps and electric heat models are equipped with a IMPORTANT heating element with the exception of the YS09J10. The "YS", ANY SEALED SYSTEM REPAIRS TO HEAT PUMP "ES" and "EK12" models are equipped with a 3.3 KW element. The "YM", "EM"... -
Page 40: Refrigerant Charging
HERMETIC COMPONENT REPLACEMENT SPECIAL PROCEDURE IN THE CASE OF COMPRESSOR MOTOR BURNOUT The following procedure applies when replacing components in the sealed refrigeration circuit or repairing refrigerant leaks. Recover all refrigerant and oil from the system. (Compressor, condenser, evaporator, capillary tube, refrigerant leaks, etc.) Remove compressor, capillary tube and filter drier from the system. -
Page 41: Undercharged Refrigerant Systems
refrigerant charge problems. The refrigerant circuit diagnosis The weighed in method should always be used whenever a chart will assist you in properly diagnosing these systems. charge is removed from a unit such as for a leak repair, compressor replacement, or when there is no refrigerant An overcharged unit will at times return liquid refrigerant charge left in the unit. -
Page 42: Overcharged Refrigerant Systems
NOTE: Heat pump refrigeration drawing Overcharged Refrigerant Systems Overcharged Refrigerant Systems Overcharged Refrigerant Systems Overcharged Refrigerant Systems Overcharged Refrigerant Systems Compressor amps will be near normal or higher. An over charge can cause the compressor to fail, since it would Noncondensables can also cause these symptoms. -
Page 43: Restricted Refrigerant System
Restricted Refrigerant System Restricted Refrigerant System Restricted Refrigerant System Restricted Refrigerant System Restricted Refrigerant System A quick check for either condition begins at the evaporator. Troubleshooting a restricted refrigerant system can be With a partial restriction, there may be gurgling sounds at the difficult. -
Page 44: Routine Maintenance
Routine Maintenance Routine Maintenance Routine Maintenance Routine Maintenance Routine Maintenance NOTE: Units are to be inspected and serviced by qualified service personnel only. Clean the unit air intake filter at least every 250 to 300 fan hours of operation or when the unit's indicator light is on if so equipped. -
Page 45: Troubleshooting Touch Test Chart
TROUBLESHOOTING TOUCH TEST CHART TO SERVICE REVERSING VALVES NORMAL FUNCTION OF VALVE NOTES: VALVE OPERATING * TEMPERATURE OF VALVE BODY CONDITION ** WARMER THAN VALVE BODY POSSIBLE CAUSES CORRECTIONS Normal Cool Cool *TVB Cooling as (2) as (1) Normal Heating Cool Cool *TVB... - Page 46 TROUBLESHOOTING COOLING PROBLEM POSSIBLE CAUSE TO CORRECT Low voltage. Check for voltage at compressor. 115 volt and 230 volt units will operate at 10% voltage variance Thermostat not set cold enough or Set thermostat to coldest position. Test thermostat inoperative. and replace if inoperative.
- Page 47 PROBLEM TO CORRECT POSSIBLE CAUSE Dirty filter. Clean as recommended in Owner’s Manual. Restricted air flow. Check for dirty or obstructed coil - clean as re- Evaporator coil quired. freezes up. Inoperative thermostat. Test for shorted thermostat or stuck contacts. Short of refrigerant.
- Page 48 TO CORRECT PROBLEM POSSIBLE CAUSE Poorly installed unit. Refer to Installation Instructions for proper installation. Fan blade striking chassis. Reposition - adjust motor mount. Compressor vibrating. Check that compressor grommets have not Noisy operation. deteriorated. Check that compressor mounting parts are not missing.
- Page 49 PROBLEM POSSIBLE CAUSE TO CORRECT Evaporator drain pan cracked or Repair, clean or replace as required. obstructed. Outside water leaks. Detach shroud from pan and coil. Clean and Water in compressor area. remove old sealer. Reseal, reinstall and check. Steam clean. Obstructed condenser coil.
- Page 50 Troubleshooting Heating (Heat pumps) PROBLEM POSSIBLE CAUSE TO CORRECT Thermostat setting. Set thermostat to a warmer position. Defective thermostat. Replace — do not attempt to adjust. No heating — fan Compressor not operating. Check compressor wiring. Check for open internal operates.
- Page 51 PROBLEM POSSIBLE CAUSE TO CORRECT Outdoor thermostat does not cut off Defective thermostat - replace. compressor at the preselected tem- Unit does not heat perature and bring on heating element. adequately. Fresh air or exhaust door open. Check if operating properly. Instruct customer on proper use of control.
- Page 52 PROBLEM POSSIBLE CAUSE TO CORRECT Outdoor thermostat. Refer to the heating data on applicable models for Compressor will not turn (Applicable models.) the preselected temperature the compressor shuts off and operate on heating off and the electric element is energized. element only during low outside ambients.
- Page 53 Troubleshooting Heating (Cooling/Electric Models) PROBLEM POSSIBLE CAUSE TO CORRECT Heater relay or contactor coil open. Check continuity of coil. Heater relay or contactor stuck open, Inspect, test continuity with ohmmeter. Fan Operates – pitted or burned. heating element does High limit control open. Check continuity –...
-
Page 54: Troubleshooting
POSSIBLE CAUSE TO CORRECT PROBLEM Outdoor thermostat. Refer to the heating data on applicable models for Compressor will not (Applicable models.) the preselected temperature the compressor shuts turn off and operate on off and the electric element is energized. heating element only during low outside ambients. -
Page 55: Electrical Troubleshooting Chart
Troubleshooting Chart — Heating Troubleshooting Chart — Heating Troubleshooting Chart — Heating Troubleshooting Chart — Heating Troubleshooting Chart — Heating Troubleshooting Chart — Heating Troubleshooting Chart — Heating Troubleshooting Chart — Heating Troubleshooting Chart — Heating Troubleshooting Chart — Heating REFRIGERANT SYSTEM DIAGNOSIS –... -
Page 56: Rs", "Rm
WIRING DIAGRAM FOR MODELS RS10J101, RS10J103, RS12J101, RS12J103, RS15J301, RM18J30, RM15J101, RM18J302, RM18J303... -
Page 57: Sq08J10B
Wiring Diagram for Models SQ05J10A-1, SQ06J10A-1, SQ07J10A-1 & SQ08J10B-1... - Page 58 WIRING DIAGRAM FOR MODELS KQ05J10A-1, KQ05J10A-3, KQ06J10A-1, KQ06J10A-3, KQ08J10A-1 617-581-04...
- Page 59 WIRING DIAGRAM FOR MODEL YQ06J10A-1 617-581-05...
- Page 60 WIRING DIAGRAM FOR MODEL SC06H10D...
-
Page 61: Ss", "Sm
WIRING DIAGRAM FOR MODELS SS08J10A-1, SS08J10R-1, SS09J10A-1, SS10J10A-1, SS10J10R-1, SS12J10A-1, SS12J30A-1, SS12J30A-3, SS12J10R-3, SS12J10R-2, SS15J30A- 1, SM14J10B-1, SM18J30A-2, SM18J30A-3, & SM21J30A-4... - Page 62 WIRING DIAGRAM FOR MODELS: SL24J30A-1, SL24J30A-3, SL28J30A-1, & SL33J30-2...
-
Page 63: Ks", "Km", "Kl
Wiring Diagram for "KS," "KM" & "KL" Models... -
Page 64: Es", "Em", "El", "Ek
WIRING DIAGRAM FOR MODELS ES12J33, ES15J33A, EM18J34A EL24J35, EL33J35, EK12J33A, EK18J34A-2 & EK18J34A-3... -
Page 65: Ys13", "Ym", "Yl
WIRING DIAGRAM FOR MODELS YS13J33, YM18J34A & YL24J35A... -
Page 66: Ys09
WIRING DIAGRAM FOR MODEL YS09J10A... -
Page 67: Testing Xq And Qme Boards
TESTING THE ELECTRONIC CONTROL 2001 XQ BOARDS & QME BOARDS Checking Room Temperature: 1. Check the room temperature at the electronic control pad by pressing at the same time the "FAN SPEED" button and the temperature "UP" button on XQ models. 2. -
Page 68: Quick Reference Guide - Quietmaster
920–044-01 (11/2000) QUICK REFERENCE GUIDE QuietMaster Electronic Room Air Conditioner ® TOUCH TO START UNIT Touch the ON/OFF button. The unit will automatically be in regular COOLING mode with the temperature set at 75 ° F (24 ° C) and the fan speed at F1 (SLEEP). NOTE: Should the FILTER ALERT light flash when you first turn the unit on, touch the ON / OFF FILTER ALERT button to turn off the flashing light. -
Page 69: Quick Reference Guide - Xstar
920–117-00 (12/00) QUICK REFERENCE GUIDE XSTAR Room Air Conditioner ® TOUCH TO START UNIT Touch the POWER ON/OFF button. The unit will automatically be in regular COOLING mode with the temperature set at 75 ° F (24 ° C) and the fan speed at F1 (SLEEP). POWER On/Off TO ADJUST TEMPERA... - Page 70 FRIEDRICH AIR CONDITIONING CO FRIEDRICH AIR CONDITIONING CO FRIEDRICH AIR CONDITIONING CO..FRIEDRICH AIR CONDITIONING CO FRIEDRICH AIR CONDITIONING CO • Post Office Box 1540 • San Antonio, Texas 78295-1540 • 4200 N. Pan Am Expressway • San Antonio, Texas 78218-5212 •...
Need help?
Do you have a question about the WallMaster WS07A10D and is the answer not in the manual?
Questions and answers