Table of Contents
Advertisement
Quick Links
Advertisement
Table of Contents

Related Manuals for Elo TouchSystems 19R SERIES


Summary of Contents for Elo TouchSystems 19R SERIES
- Page 1 Touchcomputer User Guide 19R SERIES 19-inch LCD Multifunction Touchcomputer...
- Page 2 Elo TouchSystems Touchcomputer User Guide 19" LCD Multifunction Touchcomputer 19R series Revision A P/N E065202 Elo TouchSystems 1-800-ELOTOUCH (1-800-356-8682) www.elotouch.com...
- Page 3 References in this publication to Elo TouchSystems products or services do not imply that Elo TouchSystems intends to make them available in all countries in which Elo TouchSystems operates. Elo TouchSystems reserves the right to revise this publication and to make changes from time to time in the content hereof without obliga- tion of Elo TouchSystems to notify any person of such revisions or changes.
-
Page 4: Table Of Contents
Technical Support MS-9820 Technical Assistance Short Base Mounting Using the Touchcomputer Securing the Touchcomputer Base 21 Using the Web Mounting To A Wall Using the Phone Display Angle Regulatory Information Wall Mounted Warranty Elo TouchSystems 19R series User Guide 4... -
Page 5: Setup
This chapter discusses how to set up and test your Touchcomputer and any included peripheral options. Unpacking Your Touchcomputer Check that the following items are present and in good condition: Touchcomputer Power cable US/Canadian European power cable Quick Install Guide & CD/DVD Power Adapter Elo TouchSystems 19R series User Guide 5... -
Page 6: Product Overview
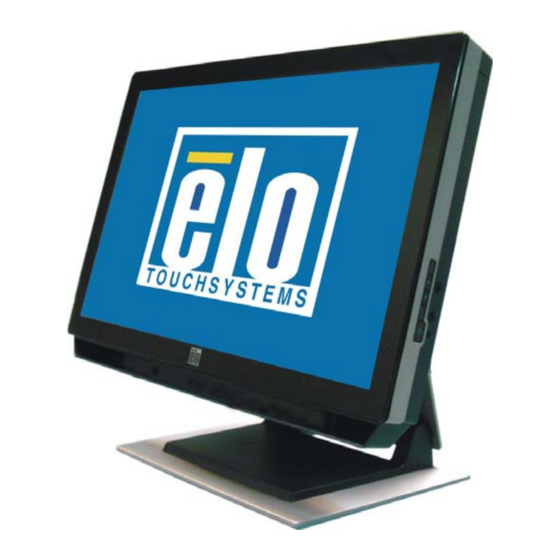
Product Overview Front View Rear View Elo TouchSystems 19R series User Guide 6... -
Page 7: Side View
Side View Base Bottom View Elo TouchSystems 19R series User Guide 7... -
Page 8: Display Orientation
Display Orientation Elo TouchSystems 19R series User Guide 8... -
Page 9: Initial Connections
Standard Unit: Intel: Integrated Dual-core Intel® Atom™ 1.6 GHz processor & 533 MHz system bus Advanced Unit: Intel Core 2 Duo E5300 2.6 GHz, 800 MHz FSB, 2 MB L2 Cache Elo TouchSystems 19R series User Guide 9... -
Page 10: Initial Power-On
Click Customize. The Regional and Language window shown below will appear. Select the Language tab. The window shown below will appear. Select the desired language in the drop-down list labeled Language used in menus and dialogs. Elo TouchSystems 19R series User Guide 10... -
Page 11: Test Devices
After making any changes, click Next to finish. Windows Setup will complete the initialization of the touchcomputer. Test Devices Testing the Touchscreen The touchscreen is pre-calibrated for accurate touch response. Elo TouchSystems 19R series User Guide 11... - Page 12 Click on the Align button. This launches the align/calibration program. A window similar to the one shown below will open. Follow the instructions to align/calibrate the touchscreen. *The alignment/calibration procedure may vary between touch technologies. Elo TouchSystems 19R series User Guide 12...
-
Page 13: Operation
This chapter shows the user how to: control the On-Screen Display (OSD) and Power buttons, use the I/O panel, securely mount the Touchcomputer and adjust the display head. MENU UP / INCREASE DOWN / DECREASE SELECT POWER Elo TouchSystems 19R series User Guide 13... -
Page 14: Side Panel Controls
To adjust the value of the function: 1. Pressing the UP button increases the value of the selected OSD control option. 2. Pressing the DOWN button decreases the value of the selected OSD control option. Elo TouchSystems 19R series User Guide 14... - Page 15 Traditional Chinese and Japanese. Default: English. Recall Color Recall Selecting “Color Recall” shall restore all factory default settings for the color temperature . Recall Defaults Selecting “Recall Defaults” shall restore all factory default settings for the OSD . Elo TouchSystems 19R series User Guide 15...
-
Page 16: Headphone Jack
OSD LOCK appears on the screen (approximately 2 seconds). To re- enable the OSD function again, simultaneously press the MENU and UP buttons until OSD UNLOCK appears on the screen (approximately 2 seconds). Headphone Jack Elo TouchSystems 19R series User Guide 16... -
Page 17: Power Control
To override all Operating System settings and shut down the Touchcomputer, press and hold the power button for 4-5 seconds. Note: On select models the delay to override the operating system is extended to 15 seconds. Elo TouchSystems 19R series User Guide 17... -
Page 18: Using The I/O Panel
PS/2 Keyboard A PS/2 keyboard is functional when connected directly to the PS/2 keyboard port. PS/2 Mouse A PS/2 mouse may be connected to the PS/2 mouse port. Intel® Desktop Board D945GCLF2 Elo TouchSystems 19R series User Guide 18... -
Page 19: Advanced Unit: Intel® Desktop Board
PS/2 Keyboard A PS/2 keyboard is functional when connected directly to the PS/2 keyboard port. PS/2 Mouse A PS/2 mouse may be connected to the PS/2 mouse port. Intel® Desktop Board D MS9820 Elo TouchSystems 19R series User Guide 19... -
Page 20: Kensington Lock
Kensington Lock The Kensington lock is a security device that prevents theft. To find out more about this security device, look for Computer Locks on the Kensington website at: http:// www.kensington.com. Elo TouchSystems 19R series User Guide 20... -
Page 21: Short Base Mounting
2. Rotate the monitor 180° (so the monitor will not be upside down when mounted in the position shown). 3. Reinstall the four screws (C). 4. Route the cables through the cutout (if applicable) and mount the monitor to the wall using the templates provided. Elo TouchSystems 19R series User Guide 21... -
Page 22: Display Angle
For viewing clarity, you can tilt the desktop LCD from 30 to 75 degrees from vertical. CAUTION In order to protect the LCD if no touchscreen is installed, be sure to hold the base when adjusting the LCD, and take care not to touch the LCD screen. Elo TouchSystems 19R series User Guide 22... -
Page 23: Maintenance
• Do not wipe the screen with a cloth or sponge that could scratch the surface. • To clean the touchscreen, use window or glass cleaner, apply the cleaner on a soft cloth, then wipe the touchscreen clean. Never apply the cleaner directly to the touchscreen. Elo TouchSystems 19R series User Guide 23... -
Page 24: Warning
Directive In the European Union, this label indicates that this product should not be disposed of with household waste. It should be deposited at an appropriate facility to enable recov- ery and recycling. Elo TouchSystems 19R series User Guide 24... -
Page 25: Technical Specifications
C H A P T E R Technical Specifications Touchcomputer Specifications Note: Not all operating systems or options are supported in all regions. Please contact your local Elo TouchSystems representative for details. Dimensional Diagrams Front NOTE: Technical specifications are subject to change without notice. -
Page 26: Vesa
Rear VESA Elo TouchSystems 19R series User Guide 26... -
Page 27: Base Mounting
Base Mounting Elo TouchSystems 19R series User Guide 27... -
Page 28: General Information
Integrated graphics via the Intel® Graphics Media Accelerator 950 (Intel® GMA 950) & S-video output support BIOS Intel BIOS Operating system (optional) Windows XP Embedded, Microsoft Windows Embed- ded for Point of Service (WEPOS) Elo TouchSystems 19R series User Guide 28... -
Page 29: Advanced Unit: Intel® Desktop Board Ms9820
2GB DDR2 667 SDRAM, Two 240-pin, DDR2 1.8 V SDRAM Dual Inline Memory Module (DIMM) sockets 800/667 MHz single or dual channel DDR2 SDRAM interface Support for up to 4 GB of system memory (not user serviceable) Elo TouchSystems 19R series User Guide 29... - Page 30 - some restrictions may apply - not user ser- viceable) PCI Express X16: 1 (connectors on Motherboard - some restrictions may apply - not user serviceable) Mini-PCIe: 1 ( not user serviceable) Serial: 1 serial port header (not user serviceable) Elo TouchSystems 19R series User Guide 30...
- Page 31 Input (line) voltage: 100-240 VAC, 50-60 Hz, 2.0 Amp. Output voltage/current: 12 V at 9.165 Amp. min. 110 watts min. Power dissipation 110 W Typical Weight Actual: 21 lbs (9.5 kg) Actual without stand: 14.7lbs (6.7 kg) Shipping: 30.3lbs (13.8 kg) Elo TouchSystems 19R series User Guide 31...
- Page 32 DB9 connector Pin Definition Pin # Signal Name Receive Data (RD) Transmit Data (TD) Signal Ground Request to send (RTS) Clear to Send (CTS) Power Input Pin Definition Pin # Signal Name +12V Ground +12V Grand Elo TouchSystems 19R series User Guide 32...
-
Page 33: Display Specifications
Tr = 3.6 ms, Tf = 1.4 ms typical Display Color 16.7 million colors (RGB 6-bit + FRC data) Viewing Angle (L/R) = -85° / +85° (typical), (U/D) -80° / +80° (typical) Plug & Play DDC2B Touch Panel Acoustic Pulse Recognition Elo TouchSystems 19R series User Guide 33... -
Page 34: Power Supply Specifications
5% to 95% Altitude Operating 0 to + 12,000 feet [3,658 m] Equivalent to 14.7 to 10.1 psia Non-Operating 0 to + 40,000 feet [12,192 m] Equivalent to 14.7 to 4.4 psia Elo TouchSystems 19R series User Guide 34... -
Page 35: Hard Disk Recovery
19R series Touchcomputer. Do not attempt recovery with a Recovery CD from another computer version. If do not have the correct recovery CD or you have questions about this process, contact Elo. Elo TouchSystems 19R series User Guide 35... -
Page 36: General Overview
Install the external USB CD/DVD drive as directed by the manufacturer. Insert the Elo Recovery CD into the USB CD/DVD drive. Turn on the Elo Touchcomputer. When the screen below appears press the F10 key on the keyboard. Elo TouchSystems 19R series User Guide 36... - Page 37 Using the Arrow UP or DOWN key(s) on the keyboard to select the CD/ DVD drive you are using. When selected press ENTER. When prompted, press any key to boot from the CD. The following two screens should appear. Elo TouchSystems 19R series User Guide 37...
- Page 38 You will lose all previous work not backed up. Click “I agree...” and then OK. Unplug the USB device which contains the recovery software when directed to do so on the screen (see screen shot #4.) Elo TouchSystems 19R series User Guide 38...
- Page 39 3. The system restarts into mini setup. 4. Follow the on screen instructions. Click NEXT. Elo TouchSystems 19R series User Guide 39...
- Page 40 Read and accept the End User License Agreement. WEPOS License Agreement XP License Agreement Follow the instructions on the screen. Elo TouchSystems 19R series User Guide 40...
- Page 41 For Windows XP you will be required to enter the 25 digit product ID from the license on the back of the computer. You may have to remove the cable cover to see the license. Note: This step not required for WEPOS. Enter information as required. Elo TouchSystems 19R series User Guide 41...
- Page 42 For APR (Acoustic Pulse Recognition) touch technology. If the “Found New Hardware Window” pops up on the screen (see below) DO NOT interact with this window. It will close itself as the APR drivers load automatically. Elo TouchSystems 19R series User Guide 42...
- Page 43 The APR drivers will load automatically. You will see the following two screens appear as the drivers load. Please wait until the computer reboots. 7. Congratulations - your operating system has been restored to the original factory configuration and is ready for use. Elo TouchSystems 19R series User Guide 43...
- Page 44 Elo TouchSystems 19R series User Guide 44...
-
Page 45: Technical Support
• Right click "My Computer" and choose "Properties" • Click on the "Start Button" and select "Control Panel" and Double click on the "System" icon . Using the Web www.elotouch.com/go/contactsupport. Using the Phone Call toll-free 1-800-557-1458 Elo TouchSystems 19R series User Guide 45... -
Page 46: Regulatory Information
This Information Technology Equipment (ITE) is required to have a CE Mark on the manufacturer’s label which means that the equipment has been tested to the following Directives and Standards: This equipment has been tested to the requirements for the CE Mark as required by Elo TouchSystems 19R series User Guide 46... - Page 47 AC adapter plugs. (Removing or cutting the line cord ground may in- crease RF emission levels and may also present a lethal shock hazard to the user.) vii) If you need additional help, consult your dealer, manufacturer, or an experienced radio or television technician. Elo TouchSystems 19R series User Guide 47...
- Page 48 CAUTION : Risk of Explosion if Battery is replaced by an Incorrect Type. Dispose of Used Batteries According to the Instructions. Laser Notice CAUTION : Laser radiation when open. DO NOT STARE INTO BEAM. Elo TouchSystems 19R series User Guide 48...
-
Page 49: Warranty
THESE REMEDIES SHALL BE THE BUYER’S EXCLUSIVE REMEDIES FOR BREACH OF WARRANTY. EXCEPT FOR THE EXPRESS WARRANTY SET FORTH ABOVE, SELLER GRANTS NO OTHER WARRANTIES, EXPRESS OR IMPLIED BY STATUTE OR OTHERWISE, REGARDING THE PRODUCTS, THEIR FITNESS FOR ANY PUR- Elo TouchSystems 19R series User Guide 49... - Page 50 Products made or authorized by Buyer. Buyer will indemnify Seller and hold Seller harmless from any liability, claims, loss, cost, or expenses (including reasonable attorney’s fees) attributable to Buyer’s products or representations or warranties concerning same. Elo TouchSystems 19R series User Guide 50...
- Page 51 Care and Handling Operation Color Reset Color Temperature Horizontal Position Contrast Language Menu Orientation Disclaimer OSD Vertical Position Display Angle time-out Display Mode OSD Lockout Electrical Safety Position Reset Emissions Power Supply Factory Reset Elo TouchSystems 19R series User Guide 51...
- Page 52 Speakers (internal) Standard Unit 9, 18, 28 Surface Acoustic Wave Technical Assistance Technical Support 35, 45 Temperature Testing the Touchscreen Time-zone Time-zone selection Trademark Turn-On Unpacking Video jumper cable Viewing Angle Volume Warranty Weight Elo TouchSystems 19R series User Guide 52...
-
Page 53: Product Information
Germany Belgium (800) ELO-TOUCH Tel +49 (0)(89) 60822-0 Tel +32(0)(16)35 21 00 Tel +81(45)478-2161 Fax +49(0)(89) 60822-180 Fax +32(0)(16)35 21 01 (800) 356-8682 Fax +81(45)478-2180 Tel 650-361-4800 elosales@elotouch.com elosales@elotouch.com www.tps.co.jp Fax 650-361-4722 customerservice@elotouch.com Elo TouchSystems 19R series User Guide 53...
Need help?
Do you have a question about the 19R SERIES and is the answer not in the manual?
Questions and answers