Chapters
Table of Contents

Related Manuals for Kenmore 580.74156


Summary of Contents for Kenmore 580.74156
-
Page 1: Indice De Materias
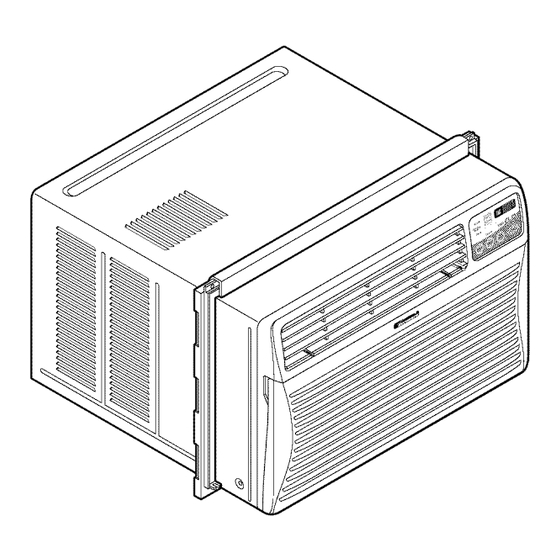
Owner's Manual Manual del Propietario ® ROOM AIR CONDITIONER ACONDICIONADOR DE AIRE DE VENTANA Model, Modelo 580. 74156 Sears, Roebuck and Co., Hoffman Estates, IL 60179 U.S.A. www.sears.com... -
Page 2: Table Of Contents
Features ..........TABLE OF CONTENTS ......2 Using the Air Conditioner ....... 10 WARRANTY ..........2 Display ........... SAFETY .............3 Remote Control ........ImportantSafety Instructions ...... 3 MAINTENANCE ........13 ELECTRICAL REQUIREMENTS ..4 Air Filter Cleaning ........13 INSTALLING THE POWER CORD----4 Air Conditioner Cleaning ......13 INSTALLATION ........5 How to Remove the Front Grille .... -
Page 3: Safety
IMPORTANT SAFETY INSTRUCTIONS The safety instructions below will tell you how to use your room air conditioner to avoid harm to yourself damage to your ROOM AIR CONDITIONER. YOUR SAFETY Do not store or use gasoline or other flammable Avoid fire hazard or electric shock. -
Page 4: Installing The Power Cord
OBSERVE A LL LOCAL CODES AND ORDINANCES. DO NOT, UNDER ANY CIRCUMSTANCES, REMOVE THE POWER SUPPLY CORD GROUND PRONG. ELECTRICAL GROUND IS REQUIRED ON THIS APPLIANCE. For 230/208 volt 60 Hz, AC only, 15A fused Electrical Shock Hazard and properly grounded electrical supply is Plug into a grounded 3 prong outlet. -
Page 5: Installation
INSTALLATION HARDWARE INSTALLATION REQUIREMENTS Your air conditioner will install into standard double hung windows with actual clear opening widths 29 to 41 inches (737mm to 1041mm) (FIG. Lower sash must open sufficiently to allow a clear vertical opening of 18 inches (457mm). -
Page 6: How To Install
INSTALLATION Insert the side curtain (ITEM A) into the upper guide and lower guide of the air conditioner. Fasten the curtains Pick a location which will allow you to blow the cold to the unit with screws (ITEM E). air into the area you want. Windows used for installation must be strong... - Page 7 Pull the bottom window sash down behind • Connect a drain elbow of 9/16" inside diameter upper guide until they meet. the drain pipe. • Connect a drain hose of 9/16" inside diameter to the NOTE: drain elbow. (Drain hose is not supplied.) •...
-
Page 8: Removal From Window
FRONT INSTALLATION Top of wood strip should be approximately 3/4" higher than the storm window frame to help Install the front grille(packed separately) onto the condensation to drain properly to the outside. cabinet as follows: • Install a second wood strip (approximately 6"... -
Page 9: Operation
HOW AND WHY Your room air conditioner provides the following Compressor functions to make hot weather living more The modern high efficiency comfortable: compressor may have a high • Cools and circulates room air. pitched hum or pulsating noise that cycles on and off. -
Page 10: Features
FEATURES USING THE AIR CONDITIONER IF.'_'iVl:_B_ll_[_! To reduce the risk of fire, electric shock, or injury to persons, read the important SAFETY instructions section before operating this appliance To begin operating the air conditioner after installation, follow these steps: 1. Plug in the air conditioner. (To prevent electrical hazards,... -
Page 11: Display
DISPLAY I FAN SPEED •Every time you push this button, it advances the setting as follows: {High -_ Low -_ Med-_ High} REMOTE CONTROL SlGNAL RECEIVER SETTING • This button can automatically control the temperature of the room. The temperature can be set within a range of 60°F to 86°F by increments of 1°F. -
Page 12: Remote Control
REMOTE CONTROL NOTE: The Remote Control will not operate properly if strong light shines on the sensor window of the Air Conditioner or if there are obstacles between the Remote Control and the Air Conditioner. Every time you push button, you will hear a beep from the Air Conditioner. -
Page 13: Air Filter Cleaning
AIR FILTER CLEANING HOW TO REMOVE THE FRONT GRILLE The Air Filter will become dirty as it removes dust from the inside air. It should be washed at least • Open the inlet grille downward. every 2 weeks. If the Air Filter remains full of dust, •... -
Page 14: Maintenance
BEFORE CALLING FOR SERVICE Check the following list to be sure a service call is really necessary. A quick reference to this manual help you avoid an unneeded service call. THE AIR CONDITIONER WILL NOT OPERATE Check if... Then... Wail plug disconnected. Push plug firmly into walt outlet, House fuse blown or circuit breaker tripped, Replace fuse with time delay type or reset circuit breaker. -
Page 15: Espanol
INDICE DE MATERIAS ......1 Caracteristicas ........23 Uso del equipo de aire acondicionado--23 GARANTiA ..........Despliegue ..........Control remoto ........SEGURIDAD ..........MANTENIMIENTO ........26 Importantes instrucciones de seguridad ..1 Limpieza del filtro del aire ...... 26 REQUERIMIENTOS ELI_CTRICOS .. - Page 16 IMPORTANTES INSTRUCCIONES DE SEGURIDAD Las siguientes instrucciones de seguridad le indicar&n c6mo usar su equipo de aire acondicionado habitaci6n para evitar dafios para usted mismo y para su EQUIPO DE AIRE ACONDIClONADO. I/'._'.lJtvl_;ll_I[_r,1 POR SU SEGURIDAD No almacene ni use gasolina u otros vapores Evite los peligros de incendios y...
-
Page 17: Instalacion Del Cable El_:Ctrica
RESPETE TODOS LOS CODIGOS Y REGLAMENTOS. BAJO NINGUNA CIRCUNSTANCIA CORTE, QUITE 0 EVITE EL USO DE LA CONEXION A TIERRA DE ESTA CLAVIJA. ESTE APARATO NECESITA SER CONECTADO A TIERRA. Se requiere una alimentaci6n electrica CA, adecuadamente conectada a tierra con un fusible de Peligro de choqueelectrico 15 A, de 60 Hz y de 230/208 V. - Page 18 INSTALACION PIEZAS DE MONTAJE REQUERIMIENTOS PARA INSTALAClON Su equipo de aire acondicionado se instalara ventanas estandar de doble panel con anchos abertura libre de 737 mm a 1041 mm (29 a 41 pulgadas). (Figura El marco inferior debe abrirse Io suficiente para permitir una abertura...
- Page 19 INSTALAClON Inserte los panetes de guia (iTEM A) en Ia guia superior y tas guias de marco deI equipo de aire acondicionado. Escoja un lugar que le permita Ilevar el aire frio al &rea Sujete tas cortinas en la unidad con los tornillos (iTEM E) que desea.
- Page 20 Tire del marco inferior de la ventana hacia abajo • Conecte un codo de tubo de 9/16" de pulgada de diametro detras de ia guia superior hasta que se encuentre la guia interno al tubo de drenaje, conecte seguidamente con el marco. manguera de drenaje de 9/16"...
-
Page 21: La Eliminaci6N De La Ventana
INSTALACION F RONTAL La parte superior del liston de madera debe ser aproximadamente 3/4" mas alto que el marco de la Instale la rejilla frontal con el gabinete de la contraventana o el list6n de madera (fuera de la casa) siguiente manera: para que el vapor emanado de la unidad pueda drenar... -
Page 22: C6Mo Y Por Que
COMO Y POR QUI En ocasiones, el uso de HIGH FAN para hacer circular el aire por la habitaci6n hace que el ambiente sea m&s Su equipo de aire acondicionado de habitacion confortable aun cuando el equipo no este enfriando brinda las siguientes funciones... -
Page 23: Uso Del Equipo De Aire Acondicionado--23
CARACTERiSTICAS USO DEL EQUIPO DE AIRE ACONDICIONADO _Para reducir el riesgo de incendio, descargas electrica o lesiones personales, lea las IMPORTANTES INSTRUCCIONES SEGURIDAD antes de operar este aparato. Para comenzar a utilizar el equipo de aire acondicionado, siga estos pasos: 1. -
Page 24: Despliegue
DESPLIEGUE F VELOCIDAD DEL VENTILADOR • Cada vez que presione este bot6n, el ajuste es come sigue: {Alto -_ Bajo -* Medio -* Alto} DE SENAL DE LA TEMPERATURA • Este bot6n puede controlar la temperatura del cuarto automaticamente. La temperatura se puede ajustar de grado en grado, desde 60°F hasta 86°F cada 1°F. -
Page 25: Control Remoto
CONTROL REMOTO Precauci6n: El dispositiovo de control remoto no funcionar& adecuadamente si la ventana sensora acondicionador de aire es expuesta a luz fuerte, o si hay obst&culos entre el dispositivo de control remoto el acondicionador de aire. Cuando opere el aire acondicionado con el control remoto, debera... -
Page 26: Limpieza Del Filtro Del Aire
LIMPIEZA DEL FILTRO DEL AIRE COMO A REEMPLAZA EL GRILLE ANTERIOR El filtro del aire se ira ensuciando a medida que va atrapando el polvo proveniente del aire interior. Es • Saque el tornilto que mantiene la rejiIIa frontal en posicion. preciso lavar el filtro deI aire al menos cada dos •... -
Page 27: De Fallas
ANTES DE LLAMAR PARA SERVICIO Cheque la siguiente lista para asegurarse si en realidad es necesario Ilamar para servicio. Una referencia rapida a este manual puede evitar una Ilamada para servicio innecesaria. EL EQUIPO DE AIRE ACONDIClONADO NO FUNClONA. Etenchufeno estaconectadoen latomade comente de pared. Conecte etenchufe firmemente en latomadeconiente depared. - Page 28 1 28 1...
- Page 29 1291...
- Page 30 l 301...
-
Page 31: De Protecclon
Acuerdos de Proteccion Especializada iEnhorabuena! Ha realizado una compra inteligente. Congratulations on making a smart purchase. Su nuevo aparato Kenmore® esta disefiado y fabricado Your new Kenmore ® product is designed para ofrecerle afios de buen funcionamiento. manufactured for years of dependable operation. -
Page 32: Para Pedir Serviclo
Your Home For repair- in your home-of all major brand appliances, lawn and garden equipment, or heating and cooling systems, no matter made it, no matter sold For,the replacement parts, accessories owner s manuals that you need to do-it-yourself. For Sears professional installation of home...
Need help?
Do you have a question about the 580.74156 and is the answer not in the manual?
Questions and answers