Table of Contents
Advertisement
Available languages
Available languages
Quick Links
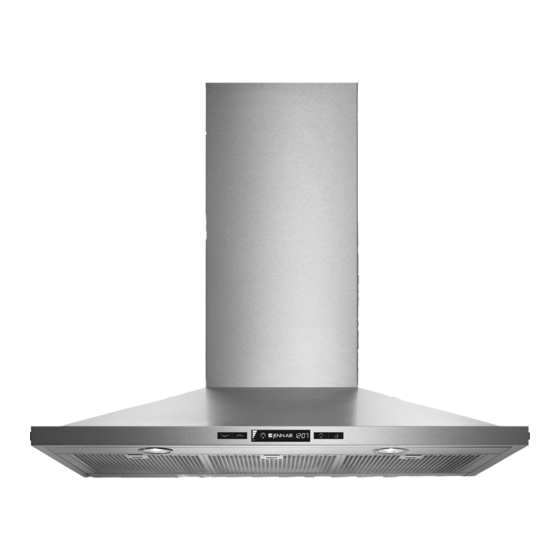
JENN-AIR _ 36"AND 42" (91.4 CM AND 106.7CM)
ISLANDCANOPY RANGEHOOD
HOTTE DECUISINIERE J ENN-AII_ POUR'JLOT DE
36" ET 42" (91,4 CM ET106,7CM)
Installation Instructions a nd Use&Care Guide
For questions about features, operation/performance,
parts, accessories, or service in the U.S.A., call:
1-800-JENNAIR
(1-800-536-6247)
or visit our website at www.jennair.com.
In Canada, call: 1-800-807-6777,
or visit our website at www.jennair.ca.
Instructions d'installation et Guide d'utilisation et d'entretien
Au Canada, pour assistance, installation ou service, composez le 1-800-807-6777
ou visitez notre site web & www.jennair.ca.
Table of Contents/Table
des matieres ................... 2
IMPORTANT: READ AND SAVE THESE iNSTRUCTIONS.
FOR RESIDENTIAL
USE ONLY.
IMPORTANT : LIRE ET CONSERVER CES INSTRUCTIONS.
POUR UTILISATION
RI_SIDENTIELLE
UNIQUEMENT.
JENN-AIR°
LI3W7B/W10274319E
Advertisement
Table of Contents

Subscribe to Our Youtube Channel
Related Manuals for Jenn-Air JXI8036WS


Summary of Contents for Jenn-Air JXI8036WS
- Page 1 JENN-AIR _ 36"AND 42" (91.4 CM AND 106.7CM) ISLANDCANOPY RANGEHOOD HOTTE DECUISINIERE J ENN-AII_ POUR'JLOT DE 36" ET 42" (91,4 CM ET106,7CM) Installation Instructions a nd Use&Care Guide For questions about features, operation/performance, parts, accessories, or service in the U.S.A., call:...
-
Page 2: Table Of Contents
TABLE OF CONTENTS TABLEDESMATIERES SI_CURITI_ DE LA HOTTE DE CUlSINIF:RE ....... 16 RANGE HOOD SAFETY ..............INSTALLATION REQUIREMENTS ..........INSTALLATION REQUIREMENTS ..........Tools and Parts ................Outils et pieces ................Location Requirements ..............Exigences d'emplacement ............Venting Requirements ..............Exigences concernant I'evacuation ........... 19 Electrical Requirements ............... -
Page 3: Range Hood Safety
RANGE HOOD SAFETY Your safety and the safety of others are very important. We have provided many important safety messages in this manual and on your appliance. Always read and obey all safety messages. This is the safety alert symbol. This symbol alerts you to potential hazards that can kill or hurt you and others. - Page 4 iMPORTANT SAFETY iNSTRUCTiONS WARNING: TO REDUCE THE RISK OF A RANGE TOP WARNING: TO REDUCE THE RISK OF FIRE, ELECTRIC GREASE FIRE: SHOCK, OR INJURY TO PERSONS, OBSERVE THE FOLLOWING: [] Never leave surface units unattended at high settings. Boilovers cause smoking and greasy spillovers that may [] Use this unit only in the manner intended by the ignite.
-
Page 5: Installation Requirements
INSTALLATION REQUIREMENTS Gather the required tools and parts before starting installation. IMPORTANT: Observe all governing codes and ordinances. Read and follow the instructions provided with any tools listed Have a qualified technician install the range hood. It is the here. installer's responsibility to comply with installation clearances specified on the model/serial rating plate. -
Page 6: Venting Requirements
For the most efficient and quiet operation: Installation Dimensions Use a straight run or as few elbows as possible. • • Use no more than three 90 ° elbows. • Make sure there is a minimum of 24" (61.0 cm) of straight vent between the elbows if more than 1 elbow is used. -
Page 7: Electrical Requirements
cQ 8®qc Calculating Vent System Length Observe all governing codes and ordinances. To calculate the length of the system you need, add the equivalent feet (meters) for each vent piece used in the system. Ensure that the electrical installation is adequate and in conformance with National Electrical Code, ANSl/NFPA 70 (latest Vent piece... -
Page 8: Install Range Hood
Range Hood Mounting Screws Installation Insk:ll t,4o 1. Position the vertical supports (A) with notches at the bottom 1. Determine and mark the centerline on the ceiling where the and attach to the range hood using 16 - 4 x 8 mm screws. range hood will be installed, considering the requirements for ceiling support structures. -
Page 9: Make Electrical Connection
3. Remove the knockout in the terminal box cover and install a Connect Vent System UL listed or CSA approved 1/2"strain relief. 1. Install vent system. 2. Push duct over the exhaust outlet. Seal all connections with vent clamps. Non-Vented (recirculating) Installation 1. -
Page 10: Install Duct Covers
6. UseULlisted wire connectors andconnect white wires (E) Attach lower duct covers using a plastic bracket at each together. corner (4 needed). Electrical Shock Hazard Electricaly ground blower. Connect ground wire to green and yellow ground wire A. Upper duct cover B. -
Page 11: Range Hood Controls
Heat Sensor The control is equipped with a heat sensor that will turn on the blower to the highest speed if excessive heat occurs around the control area. • If the blower is On or Off, the blower will automatically set to the highest speed. -
Page 12: Range Hood Care
RANGE HOOD CARE IMPORTANT: Clean the hood and grease filters frequently To replace charcoal filter: according to the following instructions. Replace grease filters 1. Cover the grill that covers the blower motor with the charcoal before operating hood. filter so that the slots on the filter correspond to the pins on the sides of the motor protection grille. -
Page 13: Wiring Diagram
WIRING DIAGRAM ElectronicUser Interface CON2 ElectronicPowerBoard Y/G! CON1 P1 P2 P4A P3 P4 CON3 L CON7 CON6 CON 11 CON 12 CON5 CON 9 CON 10... -
Page 14: Assistanceor Service
5. Proof of purchase (sales receipt). 5. Proof of purchase (sales receipt). User's guides, service manuals and parts information are User's guides, service manuals and parts information are available from Jenn-Air Brand Home Appliances, Customer available from Jenn-Air Brand Home Appliances, Customer eXperience Centre. -
Page 15: War Ranty
HEREIN. IMPLIED WARRANTIES, INCLUDING WARRANTIES OF MERCHANTABILITY OR FITNESS FOR A PARTICULAR PURPOSE, ARE LIMITED TO ONE YEAR OR THE SHORTEST PERIOD ALLOWED BY LAW. JENN-AIR SHALL NOT BE LIABLE FOR INCIDENTAL OR CONSEQUENTIAL DAMAGES. SOME STATES AND PROVINCES DO NOT ALLOW THE EXCLUSION OR LIMITATION OF... -
Page 16: Si_Curiti_ De La Hotte De Culsinif:re
SECURITE DE LA HOTTE DECUISINIERE Votre securite et celle des autres est tres importante. Nous donnons de nombreux messages de s_curit_ importants dans ce manuel et sur votre appareil m_nager. Assurez-vous toujours lire tousles messages de s_curit_ et de vous y conformer. Ce symbole d'alerte de s_curit_ vous signale les dangers potentiels de d_c_s et de blessures graves &... - Page 17 llVIPORTANTES iNSTRUCTiONS DE Sl CURITl AVERTISSEMENT : POUR MINIMISER LE RISQUE AVERTISSEMENT : POUR REDUIRE LE RISQUE D'UN FEU DE GRAISSE SUR LA CUISINIF:RE : D'INCENDIE, CHOC ¢:LECTRIQUE OU DOMMAGES CORPORELS, RESPECTER LES INSTRUCTIONS [] Ne jamais laisser un _16ment de surface fonctionner &...
-
Page 18: Installation Requirements
INSTALLATION REQUIREMENTS IMPORTANT : Observer les dispositions de tous les codes et Rassembler les outils et pieces necessaires avant d'entreprendre r_glements en vigueur. I'installation. Lire et observer les instructions fournies avec chacun des outils de la liste ci-dessous. Confier I'installation de la hotte & un technicien qualifi& C'est I'installateur qu'incombe la responsabilite... -
Page 19: Exigences Concernant I'evacuation
• Ne pas utiliser une bouche de decharge murale de Dimensions d'installation 4" (10,2 cm) normalement utilisee pour un equipement de buanderie. • Utiliser un conduit metallique uniquement. Un conduit en metal rigide est recommand& Ne pas utiliser de conduit de plastique ou d'aluminium. -
Page 20: Specifications Electriques
Dans I'exemple suivant, la Iongueur theorique du circuit est Installation sans d_charge & I'ext_rieur (recyclage) inferieure au maximum de 35 pi (10,7 m). S'il n'est pas possible d'evacuer les fumees et vapeurs de cuisson & I'exterieur, on peut employer I'installation sans 1 -coudea90 °... -
Page 21: Instructions D'installation
INSTRUCTIONS D'INSTALLATION II est recommand@ que I'installation du circuit d'@vacuation preparation soit r@alis@e avant celle de la hotte. Terminer Avant d'executer les decoupages, verifier qu'il existe un 1. Determiner I'emplacement necessaire pour le c&ble degagement suffisant dans le plafond pour le conduit d'alimentation du domicile et percer un trou de 1/2"(1,3 cm) d'evacuation. -
Page 22: Raccordement Electrique
de - n@n , ® ® Risque de choc 61ectrique D_connecter la source de courant _lectrique avant rentretien. A. Supports verticaux B. Hauteur verticale Replacer pi_ces et panneaux avant de faire la remise en marche. Fixer la hotte au support horizontal fixe au plafond & I'aide des 16 vis de 4 x 8 mm et serrer. -
Page 23: Installation Des Cache-Conduits
5. Connecter ensemble les conducteurs noirs (C) a I'aide de Fixer les sections inferieures du cache-conduit en plaI)ant une bride en plastique & chaque coin (4 sont necessaires). connecteurs de ills (homologation UL). 6. Connecter ensemble les conducteurs blancs (E) a I'aide de connecteurs de ills (homologation UL). -
Page 24: Commandes De La Hotte
• L'inclusion ou I'exclusion du filtre & charbon doit etre selectionnee pendant que I'eclairage et le moteur du ventilateur sont eteints. Capteur de chaleur Le module de commande est equipe d'un capteur de chaleur qui met le ventilateur en marche & la vitesse maximale si la temperature autour de la zone du module de commande A. -
Page 25: Entretien De La Hotte
• Un signal sonore retentit Iorsque le ventilateur atteint sa vitesse maximale. Filtres d'installation sans d_charge & I'ext_rieur (recyclage) : Power Decrease/Off (diminution de la puissance/ Le filtre & charbon n'est pas lavable. Celui-ci devrait durer d_sactiv_) pendant six mois dans des conditions d'utilisation normales. -
Page 26: Schema De C.&,Blage
SCHI_MA DE CABLAGE Interface-utilisateur _ lectronique CON2 TERRE L JANE Carte electronique d'alimentationelectrique CON1 P2 P4A P3 ill CON4 CON7 J_VE CON6 CON 11 CON !2 CON5 CON 9 CON 10... -
Page 27: Assistance Ou Service
Ensemble d'extension de cache-conduit de service designe le plus proche. Commander la piece numero W10272078 Telephonez au marchand qui vous a vendu I'appareil ou telephonez & Jenn-Air en composant au 1-800-807-6777 pour Iocaliser une compagnie de service autorisee. Lors d'un appel, veuillez connaitre la date d'achat et les numeros de modele et de serie complets de votre appareil. -
Page 28: Garantie
CONF#RE DES DROITS JURIDIQUES SPI2CIFIQUES ET VOUS POUVEZ 12GALEMENT JOUIR D'AUTRES DROITS QUI PEUVENT VARIER D'UNE JURIDICTION A UNE AUTRE. Si vous residez & I'exterieur du Canada et des 50 12tats des 12tats-Unis, contactez votre marchand Jenn-Air autorise pour determiner si une autre garantie s'applique.
Need help?
Do you have a question about the JXI8036WS and is the answer not in the manual?
Questions and answers