Jenn-Air 30" Installation Instructions And Use & Care Manual
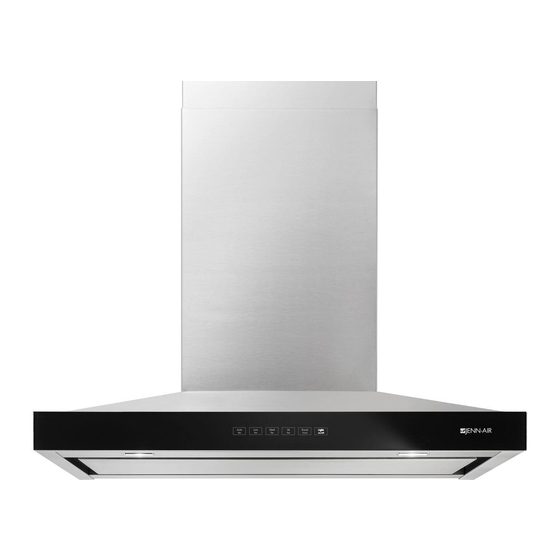
30" and 36" (76.2 cm and 91.4 cm) wall-mount canopy range hood
Hide thumbs
Also See for 30":
- Installation instructions and use & care manual (32 pages) ,
- Installation instructions manual (64 pages) ,
- Use and care manual (32 pages)
Table of Contents
Advertisement
Available languages
Available languages
Quick Links
JENN-AIR
WALL-MOUNT CANOPY RANGE HOOD
HOTTE DE CUISINIÈRE JENN-AIR
MONTAGE MURAL 30" ATE 36" (76,2 CM ATE 91,4 CM)
Installation Instructions and Use & Care Guide
For questions about features, operation/performance, parts, accessories, or service in the U.S.A., call:
In Canada, call: 1-800-JENNAIR (1-800-536-6247), or visit our website at www.jennair.ca.
Instructions d'installation et Guide d'utilisation et d'entretien
Au Canada, pour des questions à propos des caractéristiques, du fonctionnement/rendement, des pièces, accessoires ou service,
composer le 1-800-JENNAIR (1-800-536-6247) ou visiter notre site web à www.jennair.ca.
IMPORTANT: READ AND SAVE THESE INSTRUCTIONS.
FOR RESIDENTIAL USE ONLY.
IMPORTANT : LIRE ET CONSERVER CES INSTRUCTIONS.
POUR UTILISATION RÉSIDENTIELLE UNIQUEMENT.
LI316A/W10674114C
®
30" AND 36" (76.2 CM AND 91.4 CM)
1-800-JENNAIR (1-800-536-6247) or visit our website at www.jennair.com.
Table of Contents/Table des matières ................................... 2
®
POUR
Advertisement
Table of Contents

Related Manuals for Jenn-Air 30"


Summary of Contents for Jenn-Air 30"
- Page 1 ® JENN-AIR 30" AND 36" (76.2 CM AND 91.4 CM) WALL-MOUNT CANOPY RANGE HOOD HOTTE DE CUISINIÈRE JENN-AIR ® POUR MONTAGE MURAL 30" ATE 36" (76,2 CM ATE 91,4 CM) Installation Instructions and Use & Care Guide For questions about features, operation/performance, parts, accessories, or service in the U.S.A., call: 1-800-JENNAIR (1-800-536-6247) or visit our website at www.jennair.com.
-
Page 2: Table Of Contents
TABLE OF CONTENTS TABLE DES MATIÈRES RANGE HOOD SAFETY ..............2 SÉCURITÉ DE LA HOTTE DE CUISINIÈRE........16 INSTALLATION REQUIREMENTS ..........4 EXIGENCES D'INSTALLATION ...........18 Tools and Parts ................4 Outils et pièces................18 Location Requirements..............4 Exigences d’emplacement............18 Venting Requirements..............5 Exigences concernant l’évacuation ...........19 Electrical Requirements ...............6 Spécifications électriques ............20 INSTALLATION INSTRUCTIONS ..........7 INSTRUCTIONS D’INSTALLATION..........21... - Page 3 IMPORTANT SAFETY INSTRUCTIONS READ AND SAVE THESE INSTRUCTIONS...
-
Page 4: Installation Requirements
INSTALLATION REQUIREMENTS Tools and Parts Location Requirements Gather the required tools and parts before starting installation. IMPORTANT: Observe all governing codes and ordinances. Read and follow the instructions provided with any tools listed here. Have a qualified technician install the range hood. It is the installer's responsibility to comply with installation clearances Tools needed specified on the model/serial rating plate. -
Page 5: Venting Requirements
Cabinet Dimensions Venting Requirements (vented models only) 10" (25.4 cm) min. Vent system must terminate to the outdoors, except for non- 13" (33.0 cm) max. vented (recirculating) installations. 2" (5.1 cm) min. 9" (22.9 cm) min.* Do not terminate the vent system in an attic or other enclosed 9¹⁄₂"... -
Page 6: Electrical Requirements
For Non-Vented (recirculating) Installations Electrical Requirements If it is not possible to vent cooking fumes and vapors to the outside, the hood can be used in the non-vented (recirculating) Observe all governing codes and ordinances. version, fitting a charcoal filter and the deflector. Fumes and Ensure that the electrical installation is adequate and in vapors are recycled through the top grille. -
Page 7: Installation Instructions
INSTALLATION INSTRUCTIONS Prepare Location 6. Install the 2 - 5 x 45 mm mounting screws. Leave a ¹⁄₄" It is recommended that the vent system be installed before hood is installed. (6.4 mm) gap between the wall and the back of the screw head to slide range hood into place. -
Page 8: Install Range Hood
For vented installations only: Install Range Hood 1. Fit vent system over transition piece. 2. Seal connection with clamps. 1. Using 2 or more people, hang range hood on 2 mounting screws through the mounting slots on back of hood. 3. -
Page 9: Make Electrical Connection
Make Electrical Connection 5. Use UL listed wire connectors and connect black wires (C) WARNING together. 6. Use UL listed wire connectors and connect white wires (E) together. WARNING Electrical Shock Hazard Disconnect power before servicing. Replace all parts and panels before operating. Electrical Shock Hazard Failure to do so can result in death or electrical shock. -
Page 10: Install Vent Covers
Secure the bottom of the duct with 2 - 4.2 x 8 mm screws. Install Vent Covers When using both upper and lower vent covers, push lower cover down onto hood and lift upper cover to ceiling and install with 2 - 4.2 x 8 mm screws. -
Page 11: Range Hood Use
RANGE HOOD USE The range hood is designed to remove smoke, cooking vapors and odors from the cooktop area. For best results, start the hood Auto Sense before cooking and allow it to operate several minutes after the cooking is complete to clear all smoke and odors from the Auto Sense allows the range hood fan to turn on automatically kitchen. -
Page 12: Range Hood Care
Timer Light The range hood can be set to turn off automatically after The range hood has both task and ambient lighting. 15 minutes. To operate the lights: 1. Press and hold the desired fan speed button for 2 seconds. 1. -
Page 13: Wiring Diagram
4. Bend spring clips back into place to secure the charcoal filter 5. Replace metal grease filter. See “Metal Grease Filter” in this to the metal filter. section. 6. Turn the charcoal filter clockwise to lock it. 7. Repeat steps 1 - 2 on the other filter. Replacing an LED Lamp The LED lights are replaceable by a service technician only. -
Page 14: Assistance Or Service
For further assistance service technicians are trained to fulfill the product warranty ® If you need further assistance, you can write to Jenn-Air and provide after-warranty service, anywhere in the Canada. Appliances with any questions or concerns at: Features and specifications on our full line of appliances. -
Page 15: Warranty
DISCLAIMER OF REPRESENTATIONS OUTSIDE OF WARRANTY Jenn-Air makes no representations about the quality, durability, or need for service or repair of this major appliance other than the representations contained in this warranty. If you want a longer or more comprehensive warranty than the limited warranty that comes with this major appliance, you should ask Jenn-Air or your retailer about buying an extended warranty. -
Page 16: Sécurité De La Hotte De Cuisinière
SÉCURITÉ DE LA HOTTE DE CUISINIÈRE Votre sécurité et celle des autres est très importante. Nous donnons de nombreux messages de sécurité importants dans ce manuel et sur votre appareil ménager. Assurez-vous de toujours lire tous les messages de sécurité et de vous y conformer. Voici le symbole d’alerte de sécurité. - Page 17 IMPORTANTES INSTRUCTIONS DE SÉCURITÉ AVERTISSEMENT : POUR MINIMISER LE RISQUE AVERTISSEMENT : POUR RÉDUIRE LE RISQUE D'UN FEU DE GRAISSE SUR LA CUISINIÈRE : D'INCENDIE, CHOC ÉLECTRIQUE OU DOMMAGES CORPORELS, RESPECTER LES INSTRUCTIONS Ne jamais laisser un élément de surface fonctionner à SUIVANTES : puissance de chauffage maximale sans surveillance.
-
Page 18: Exigences D'installation
EXIGENCES D'INSTALLATION Outils et pièces Exigences d’emplacement Rassembler les outils et pièces nécessaires avant d’entreprendre IMPORTANT : Observer les dispositions de tous les codes et l’installation. Lire et observer les instructions fournies avec règlements en vigueur. chacun des outils de la liste ci-dessous. Confier l'installation de la hotte à... -
Page 19: Exigences Concernant L'évacuation
Dimensions du placard Exigences concernant l’évacuation 10" (25,4 cm) min. (seulement pour les modèles avec 13" (33,0 cm) max. 2" (5,1 cm) min. décharge à l'extérieur) 9" (22,9 cm) min.* 9¹⁄₂" (24,1 cm) Le circuit d'évacuation doit décharger l'air à l'extérieur, excepté... -
Page 20: Spécifications Électriques
Exemple de circuit d'évacuation système de décharge. Méthodes d’évacuation Bouche de décharge murale Coude à 90˚ Cette hotte a été configurée à l'usine pour la décharge de l'air 6 pi (1,8 m) aspiré à travers le toit ou à travers un mur. Un circuit d'évacuation en conduit rond de 6"... -
Page 21: Instructions D'installation
INSTRUCTIONS D’INSTALLATION Préparation de l’emplacement 5. Percer des avant-trous de ³⁄₁₆" (4,8 mm) à tous les Il est recommandé d’installer le circuit d’évacuation avant de procéder à l’installation de la hotte. emplacements pour la pose des vis dans du bois. 6. -
Page 22: Installation De La Hotte
Pour installations avec décharge à l’extérieur uniquement : Installation de l'ensemble de ventilateur déporté 1. Installer le circuit d’évacuation sur le raccord de transition. intelligent en option 2. Serrer le point de connexion avec des brides de serrage. 3. Vérifier que les clapets anti-retour fonctionnent correctement. REMARQUE : La hotte peut fonctionner avec un moteur de ventilateur intégré... -
Page 23: Raccordement Électrique
Raccordement électrique 5. Connecter ensemble les conducteurs noirs (C) à l'aide de AVERTISSEMENT connecteurs de fils (homologation UL). 6. Connecter ensemble les conducteurs blancs (E) à l'aide de connecteurs de fils (homologation UL). AVERTISSEMENT Risque de choc électrique Déconnecter la source de courant électrique avant l'entretien. -
Page 24: Installation Des Cache-Conduits
Fixer le bas du conduit avec 2 vis de 4,2 x 8 mm. Installation des cache-conduits En cas d’utilisation des sections supérieure et inférieure du cache-conduit, pousser la section inférieure vers le bas, sur la hotte et soulever la section supérieure vers le plafond pour installer à... -
Page 25: Utilisation De La Hotte
UTILISATION DE LA HOTTE La hotte de cuisinière est conçue pour extraire fumée, vapeurs de cuisson et odeurs de la zone de la table de cuisson. Pour obtenir Commandes et caractéristiques les meilleurs résultats, mettre la hotte en marche avant REMARQUES : d’entreprendre une cuisson, et laisser la hotte fonctionner pendant plusieurs minutes après l’achèvement d’une cuisson... - Page 26 Pour désactiver la fonction Auto Sense (détection automatique) : Minuterie Si le témoin lumineux du bouton Auto est allumé, appuyer La hotte peut être réglée pour s'éteindre automatiquement après une fois sur AUTO pour désactiver la fonction Auto Sense. Le 15 minutes.
-
Page 27: Entretien De La Hotte
ENTRETIEN DE LA HOTTE Nettoyage IMPORTANT : Nettoyer fréquemment la hotte et les filtres à graisse en suivant les instructions suivantes. Réinstaller les filtres à graisse Filtres d'installation sans décharge à l’extérieur avant de faire fonctionner la hotte. (recyclage) : Surfaces externes : Le filtre à... -
Page 28: Schéma De Câblage
SCHÉMA DE CÂBLAGE Interface utilisateur Capteur de vitesse automatique Carte électronique d'alimentation électrique GRIS Neu La1 Terre Pwm Sortie : 700mA (2-15 VCC) Pilote Entrée : 120 VCA Sortie : 700mA (2-15 VCC) Pilote Entrée : 120 VCA Rampe de DEL Caractéristiques du moteur Alimentation électrique 120 VCA... -
Page 29: Assistance Ou Service
(pour installations sans décharge à l’extérieur uniquement) Téléphoner sans frais au Centre pour l'eXpérience de la clientèle Commander la pièce numéro W10692910 Jenn-Air Canada LP au 1-800-JENN-AIR (1-800-536-6247) ou visiter notre site Internet sur www.jennair.ca. Ensemble de recyclage Nos consultants peuvent vous aider sur les points suivants : (pour installations sans décharge à... -
Page 30: Garantie
EXONÉRATION DE RESPONSABILITÉ DANS LES DOMAINES NON COUVERTS PAR LA GARANTIE Jenn-Air décline toute responsabilité au titre de la qualité, de la durabilité ou en cas de dépannage ou de réparation nécessaire sur ce gros appareil ménager autre que les responsabilités énoncées dans la présente garantie. Si vous souhaitez une garantie plus étendue ou plus complète que la garantie limitée fournie avec ce gros appareil ménager, adressez-vous à... - Page 31 Notes...
- Page 32 9/14 ® /™ ©2014 Jenn-Air. Used under license in Canada. All rights reserved. Printed in Mexico W10674114C Utilize soul licence au Canada. Thus druids reserves. Emporium au Mexique...
Need help?
Do you have a question about the 30" and is the answer not in the manual?
Questions and answers