Table of Contents
Advertisement
Available languages
Available languages
Quick Links
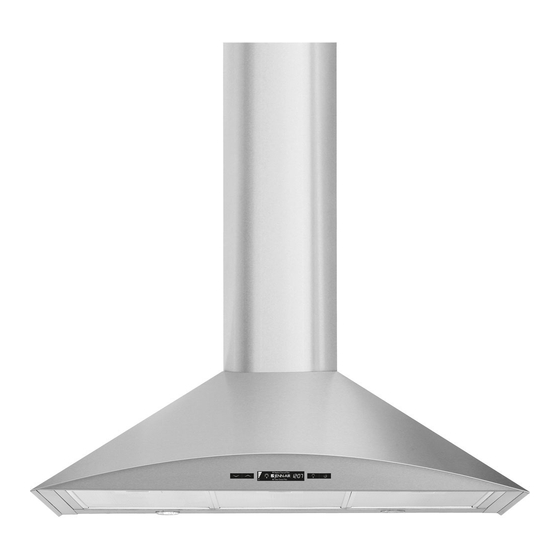
JENN-AIR TM36"(91.4 CM) WALL-MOUNT
CANOPY RANGEHOOD
HOTTEDECUISINII:RE JENN-AIRTMPOUR
II
MONTAGEMURAL 36 (91,4 CM)
Installation Instructions a nd Use&Care Guide
For questions about features, operation/performance,
parts, accessories, or service in the U.S.A., call:
1-800-JENNAIR
(1-800-536-6247),
or visit our website at www.jennair.com.
In Canada, call: 1-800-807-6777,
or visit our website at www.jennair.ca.
Instructions d'installation et Guide d'utilisation et d'entretien
Au Canada, pour assistance, installation ou service, composez le 1-800-807-6777
ou visitez notre site web _]www.jennair.ca.
Table of Contents/Table
des mati_res ..................... 2
IMPORTANT: READ AND SAVE THESE INSTRUCTIONS.
FOR RESIDENTIAL
USE ONLY.
IMPORTANT : LIRE ET CONSERVER CES INSTRUCTIONS.
POUR UTILISATION RI_SIDENTIELLE
UNIQUEMENT.
JENN-AIR °
LI3UUB/W102743200
Advertisement
Table of Contents

Related Manuals for Jenn-Air JXW8836WS0


Summary of Contents for Jenn-Air JXW8836WS0
- Page 1 JENN-AIR TM36"(91.4 CM) WALL-MOUNT CANOPY RANGEHOOD HOTTEDECUISINII:RE JENN-AIRTMPOUR MONTAGEMURAL 36 (91,4 CM) Installation Instructions a nd Use&Care Guide For questions about features, operation/performance, parts, accessories, or service in the U.S.A., call: 1-800-JENNAIR (1-800-536-6247), or visit our website at www.jennair.com. In Canada, call: 1-800-807-6777, or visit our website at www.jennair.ca.
-
Page 2: Table Of Contents
TABLE OF CONTENTS TABLEDESMATIERES SI_CURITI_ DE LA HOTTE DE CUlSINII_RE ....... 17 RANGE HOOD SAFETY ..............INSTALLATION REQUIREMENTS ..........EXIGENCES D'INSTALLATION ........... Tools and Parts ................Outils et pieces ................Location Requirements ..............Exigences d'emplacement ............Venting Requirements ..............Exigences concernant I'evacuation ........... 20 Electrical Requirements ............... -
Page 3: Range Hood Safety
RANGE HOOD SAFETY Your safety and the safety of others are very important. We have provided many important safety messages in this manual and on your appliance. Always read and obey all safety messages. This is the safety alert symbol. This symbol alerts you to potential hazards that can kill or hurt you and others. -
Page 4: Installation Requirements
iMPORTANT SAFETY iNSTRUCTiONS WARNING: TO REDUCE THE RISK OF A RANGE TOP WARNING: TO REDUCE THE RISK OF FIRE, ELECTRIC GREASE FIRE: SHOCK, OR INJURY TO PERSONS, OBSERVE THE FOLLOWING: [] Never leave surface units unattended at high settings. Boilovers cause smoking and greasy spillovers that may •... - Page 5 Parts needed Product Dimensions For vented installations, you will also need: • 1 wall or roof cap 81/16" 81/8" (20.4 cm) (20.7 cm) • Metal vent system For non-vented (recirculating) installations, you will also need: • Recirculation Kit Part Number W10272063 for non-vented (recirculating) installations only.
- Page 6 Vent system must t erminate totheoutdoors, except fornon- Wall Venting Non-vented Roof Venting vented (recirculating) installations. (recirculating) Do not terminate the vent system in an attic or other enclosed area. • Do not use 4" (10.2 cm) laundry-type wall cap. •...
- Page 7 • The grounded 3 prong outlet is to be located above the range hood at a maximum distance of 337_e'' (85.0 cm) from where the power cord exits the hood. See illustration. 337/%" (85 cm) Electrical Shock Hazard Plug into a grounded 3 prong outlet. Do not remove ground prong.
-
Page 8: Venting Requirements
INSTALLATION INSTRUCTIONS • It is recommended that the vent system be installed before 8. Mark centers of the fastener locations through the template hood is installed, to the wall. IMPORTANT: All screws must be installed into wood. If there • Before making cutouts, make sure there is proper clearance is no wood to screw into, additional wall framing supports within the ceiling or wall for exhaust vent. - Page 9 For non-vented (recirculating) installation only: 1. Assemble the air deflector with the duct cover bracket with 2 - assembly screws provided with the Recirculation Kit. Using 2 or more people, hang range hood on 2 mounting screws through the mounting slots on back of hood. A.
-
Page 10: Range Hood Use
8. Seal connections withvent c lamps. RANGE HOOD USE The range hood is designed to remove smoke, cooking vapors and odors from the cooktop area. For best results, start the hood before cooking and allow it to operate several minutes after the cooking is complete to clear all smoke and odors from the kitchen. - Page 11 Charcoal Filter Saturation Alarm To operate the light: After 120 hours of fan function, the display will show "Replace Charcoal Filter" when the fan is active. When this icon shows in 1. Press the Light button to turn the light on to high. the display, the charcoal filters should be replaced.
-
Page 12: Range Hood Care
RANGE HOOD CARE IMPORTANT: Clean the hood and grease filters frequently Non-Vented (recirculating) Installation Filters according to the following instructions. Replace grease filters before operating hood. The charcoal filter is not washable. It should last up to 6 months Exterior Surfaces: with normal use. -
Page 13: Wiring Diagram
WIRING DIAGRAM Electronic User Interface IXSA Electronic Power Board CON1 S3 S2 Sl L[[_ &_ 4 _CON4 _>- ( _5 COLOR TABLE COLOR TABLE BLACK BLUE WHITE BROWN YELLOW GREEN YELLOW/GREEN GREY... -
Page 14: Assistanceor Service
4. A clear description of the problem you are having. User's guides, service manuals and parts information are 5. Proof of purchase (sales receipt). available from Jenn-Air Brand Home Appliances, Customer eXperience Centre. User's guides, service manuals and parts information are... -
Page 15: War Ranty
HEREIN. IMPLIED WARRANTIES, INCLUDING WARRANTIES OF MERCHANTABILITY OR FITNESS FOR A PARTICULAR PURPOSE, ARE LIMITED TO ONE YEAR OR THE SHORTEST PERIOD ALLOWED BY LAW. JENN-AIR SHALL NOT BE LIABLE FOR INCIDENTAL OR CONSEQUENTIAL DAMAGES. SOME STATES AND PROVINCES DO NOT ALLOW THE EXCLUSION OR LIMITATION OF... - Page 17 SECURITE DE LA HOTTE DECUISINIERE Votre securite et celle des autres est tres importante. Nous donnons de nombreux messages de securite importants dans ce manuel et sur votre appareil menager. Assurez-vous toujours lire tousles messages de securite et de vous y conformer. Ce symbole d'alerte de securite vous signale les dangers potentiels de deces et de blessures graves &...
- Page 18 llVIPORTANTES iNSTRUCTiONS DE Sl CURITl AVERTISSEMENT : POUR MINIMISER LE RISQUE AVERTISSEMENT : POUR REDUIRE LE RISQUE D'UN FEU DE GRAISSE SUR LA CUISINIF:RE : D'INCENDIE, CHOC ¢:LECTRIQUE OU DOMMAGES CORPORELS, RESPECTER LES INSTRUCTIONS [] Ne jamais laisser un _16ment de surface fonctionner &...
-
Page 19: Exigencesd'installation
EXIGENCESD'INSTALLATION Rassembler les outils et pieces necessaires avant d'entreprendre IMPORTANT : Observer les dispositions de tousles codes et I'installation. Lire et observer les instructions fournies avec reglements en vigueur. chacun des outils de la liste ci-dessous. Confier I'installation de la hotte & un technicien qualifi& C'est & I'installateur qu'incombe la responsabilite... - Page 20 • Le circuit d'evacuation doit decharger I'air & I'exterieur, excepte pour une installation sans decharge a I'exterieur 65/8" (recyclage). • Ne pas terminer le circuit d'evacuation dans un grenier ou dans un autre espace ferme. Point d'entr_e du circuit • Ne pas utiliser une bouche de decharge murale de d'_vacuation 7%"...
- Page 21 M_thodes d'_vacuation Calcul de la Iongueur effective du circuit d'_vacuation Cette hotte a et6 configuree a I'usine pour la decharge de I'air Pour calculer la Iongueur effective du circuit d'evacuation aspire a travers le toit ou & travers un mur. necessaire, additionner les Iongueurs equivalentes (pieds/m_tres) de tousles...
- Page 22 La prise & 3 broches reliee & la terre doit se trouver au-dessus de la hotte, & une distance maximale de 337/le'' (85 cm) & partir du point duquel le cordon d'alimentation sort de la hotte. Voir I'illustration. 337/%" (85 cm) Risque de choc _lectrique Brancher sur une prise &...
-
Page 23: Exigences Concernant I'evacuation
INSTRUCTIONS D'INSTALLATION • II est recommande d'installer le circuit d'evacuation avant de 8. A I'aide du gabarit, marquer sur lemur le centre des proceder a I'installation de la hotte. emplacements des attaches. IMPORTANT : Toutes les vis doivent _tre vissees dans du •... - Page 24 Installations sans d_charge a I'ext_rieur (recyclage) uniquement : 1. Assembler le deflecteur d'air et la bride de cache-conduit & A l'aide d e deux personnesou plus, suspendre lahotteaux I'aide des 2 vis d'assemblage fournies avec I'ensemble de 2 visde montage, & travers lesencoches de montage recyclage.
-
Page 25: Utilisation De La Hoi-I'e
C. Auvent G. Tableaude commande ......Tableau de commande Les commandes de la hotte se trouvent & I'avant de I'auvent. ®..!, ..... _':_ ==JENN-AIR BB:BBI @ Clean grease filter A. Diminution de la puissance B. Augmentation de la puissance C. - Page 26 Alarme de saturation du filtre & charbon Fonctionnement de I'_clairage Apr_s 120 heures de fonctionnement du ventilateur, I'affichage indique "Replace Charcoal Filter" (remplacer le filtre a charbon) 1. Appuyer sur le bouton Light (eclairage) pour mettre la lumiere Iorsque le ventilateur est activ& Lorsque cette ic6ne apparaYt sur au niveau d'eclairage fort.
-
Page 27: Entretien De La Hotte
ENTRETIEN D E LA HOTTE IMPORTANT : Nettoyer frequemment la hotte et les filtres & Remplacement du filtre a charbon : graisse en suivant les instructions suivantes. Reinstaller les filtres 1. Placer le filtre & charbon sur la grille protegeant le moteur du &... -
Page 28: Schi_Ma De Cablage
SCHI_MA DE CABLAGE Interface-utilisateu r _lectroni u%u CON2 JANE Tableau d'alimentation _lectronique CON1 NlVl S3 S2 Sl P2 P4A 413_ _1 CON4 JANE 102030405060 ® GRIS TABLEAU DES COULEURS TABLEAU DES COULEURS NOIR ROUGE BLEU BLANC MARRON JAUNE VERT JANE JAUNE/VERT GRIS GRIS... -
Page 29: Assistance Ou Service
Ensemble filtre _ charbon Telephonez au marchand qui vous a vendu I'appareil ou (pour installations sans decharge & I'exterieur uniquement) telephonez & Jenn-Air en composant le 1-800-807-6777 pour Commander la piece numero W10272068 Iocaliser une compagnie de service autorisee. Lors d'un appel, veuillez connaitre la date d'achat et les numeros de modele et de serie complets de votre appareil. -
Page 30: Garantie
CONF#RE DES DROITS JURIDIQUES SPI2CIFIQUES ET VOUS POUVEZ 12GALEMENT JOUIR D'AUTRES DROITS QUI PEUVENT VARIER D'UNE JURIDICTION A UNE AUTRE. Si vous residez & I'exterieur du Canada et des 50 12tats des 12tats-Unis, contactez votre marchand Jenn-Air autorise pour determiner si une autre garantie s'applique. - Page 32 Printed in Mexico. All rights reserved. ® Registered Trademark/TM Trademark of Jenn-Air, U.S.A. Used under license by Maytag Limited in Canada. Tous droits reserves. ®Marque deposee/TM Marque de commerce de Jenn-Air, U.S.A. Emploi sous licence par Maytag Limited au Canada.
Need help?
Do you have a question about the JXW8836WS0 and is the answer not in the manual?
Questions and answers