Advertisement
Quick Links
( hampion
and ( logo are used raider license fi'om Champion
Atldeficwear
ASSEMBLY
INSTRU IONS
/ OI ERS
MANUAL
IMPORTANT:
S._rET'£ :
SERIAL
NO.
Part
No.
06055
READ ALL ASSEMBLY ENSTRUCTIONS .kND SAFETY PRE(A[THONS BEFORE USLNG THIS PRODUCT. REFERENCE
ALL
SAFETY GUIDELLNES AND X_ _Aa_NIN G LABELS. RETALN PRODUCT LITERAT[_E
FOR FI_RE
REFERENCE.
PROPERLY
W._'_i
[_._ND
STRETCH
BEFORE
EXERCISENG.
IF YOU FEEL
P.A1N OR DIZZINESS
AT A_N_"TEXIE X_IILE
EXER(]SLNG,
STOP
E_iMEDL_TELY
AND (ONSULT
YO[_
PI_'SIC[_N.
PURCHASE
DATE:
Revision:
A
Date:
09/05
Advertisement

Subscribe to Our Youtube Channel
Related Manuals for Champion C44F

Summary of Contents for Champion C44F
- Page 1 ( hampion and ( logo are used raider license fi'om Champion Atldeficwear ASSEMBLY INSTRU IONS / OI ERS MANUAL IMPORTANT: READ ALL ASSEMBLY ENSTRUCTIONS .kND SAFETY PRE(A[THONS BEFORE USLNG THIS PRODUCT. REFERENCE SAFETY GUIDELLNES AND X_ _Aa_NIN G LABELS. RETALN PRODUCT LITERAT[_E FOR FI_RE REFERENCE.
-
Page 2: Table Of Contents
PAGE TABLE OF CONTENTS C44F Reference Information Pa e Assembly Prep & Intro Parts Listing Hardware Chart Product Exploded 6-13 Product AssembJ_ 14-18 C o mp u t e r Op e Troubleshooting Preventative Maintenance Product Registration __ANT _CAU_ONS WARNING: To reduce the risk of injury, please read the following precautions befol_e assembling or using this product. It is the responsibility of the owner to ensure that all itsers of this equipment are adequately informed of stated pl_ecaution_ Read allinstl_ctions and enclosed literatm-e carefully. -
Page 3: Assembly Prep & Intro
ASSEMBLY PAGE 2 PREP & INTRO. ASSEMBLY PREPARATION € The product assembly proeess has been documented in easy to follow stages. Please read all assembly instructions carefully. Take time to review the manual and familiarize yore'self with the entire assembly process before proceeding. -
Page 4: Parts Listing
PAGE PARTS REFERENCE C44F PARTS LISTING Item Part Description QTY, 23110 Front Stabilizer Assembh, 07116 0_reinstaned) Roller ( over (Right) Base Assembly 10027 (omputer 12059 Lower Data Cable 14001 A( Adapter 05183 Stabilizer Extension Assembly 31001 Bottle Cage 23107 Handlebar Mast Assembly 31010 Sports BottJe... -
Page 5: Hardware Chart
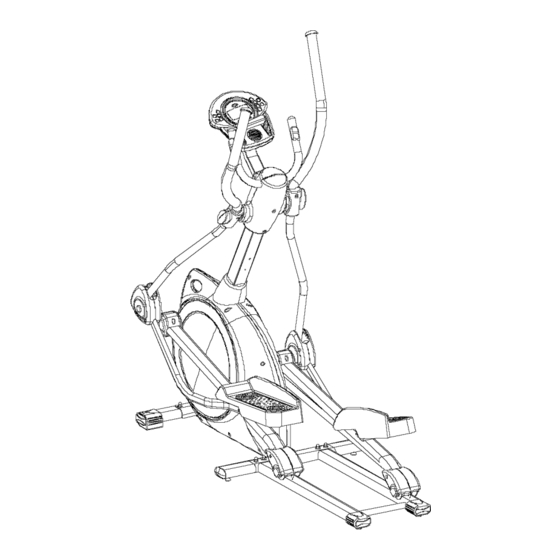
PAGE 4 HARDWARE CHART C44F HARDWARE REFERENCE ® BoxSpanner(2) Allen Key(l) ® ® © NOTE: Most of the listed assembly hardware has been packaged separately, but some hardware items have been preinstalled in the identified assembly parts. In these instances, simply remove and reinstall the hardware assembly is required. - Page 6 PAGE EXPLODED PARTS VIEW C44F PARTS C|,_S_TOMER SERVlCE I-S 77-$61-21S1...
-
Page 7: Product Assembj
PAGE 6 ASSEMBLY INSTRUCTION ASSEMBLY STAGE Attach Stabilizers to the Main Base l Recommended: Apply thin coat of silicon lubricant to the top Of the base rails Assembly Hardware Required: Button Head Allen Bolt Qty. 2 Flat Washer Qty. 6 Hex Head Bolt Qty. - Page 8 PAGE 7 ASSEMBLY INSTRUCTION ASSEMBLY STAGE Attach Handlebar Mast to the Main Base ® Figure #1 [ Hardware Preinstalled in Frame Be Careful Not to Pinch Cables During Assembly Assembly Hardware Required: (*Hardware may be pveinstalled in the Base Assembly) Flat Washer* QD:.
- Page 9 ASSEMBLY INSTRUCTION PAGE ASSEMBLY STAGE Attach Upper Pivot Arms to the Handlebar Mast Assembly Hardware Required: Wave Washer Qty. 2 Flat Washer Qty. Thin Teflon Washer Qty. 2 Hex Head Flange Bolt Qty. Flat Washer Qty. Assembl v Description: A) Slide the Threaded Pivot Shaft (#42) through the pivot-boss of the Handlebar Mast (#5).
- Page 10 PAGE ASSEMBLY INSTRUCTION ASSEMBLY STAGE Attach Pedal Arms Assembly Hardware Required: Flat Washer QD_. 2 Button Head Allen Bolt Qty. 2 Button Head Allen Bolt Qty. 2 Flat Washer Qty. 2 Flat Washer Qty. 2 Nylon Nut Qty. 2 Nylon Nut QD'.
- Page 11 ASSEMBLY INSTRUCTION PAGE 10 ASSEMBLY STAGE #5 Attach Plastic Covers Assembly Hardware Required: (*Some Hardware Preinstalled in the Assembly Pal_s) Truss Screw _ QD_. 4 Self-threading Screw Q_,. 2 Self-threading Screw Assembly Description: A_ssemblv Notes: Before attaching covers, check all pivot / roller mounting hardware to make sure it has been tightened properly.
- Page 12 PAGE 11 ASSEMBLY INSTRUCTION ASSEMBLY STAGE Attach Computer & Upper Mast Covers to the Handlebar Mast Figure #2 ] Assembly Hardware Required: (*Hardware Preinsl'_ed in the Assembly Pa_s) Flat Washer* QU- 3 Self-Threading Screw Qty. 6 Button Head Allen Bolt* Qty.
- Page 13 ASSEMBLY INSTRUCTION PAGE ASSEMBLY STAGE Attach Upper Pivot Covers & Water Bottle Cage Assembly Hardware Required: (*Hardware Preinstalledin theAssembh_ Parts) Truss Screw _ QD:- 4 Self-threading Screw Qty. 4 Assembly Description: Assembly Note: Before attaching the Pivot Cover_ check the Pivot Arm mounting hardware to make sure it has been tightened properh,.
- Page 14 PAGE ASSEMBLY INSTRUCTION ASSEMBLY STAGE Supplying Power Reference the Front of the Base Assembly <_mul q_7_ Assembly Description: This product requires AC voltage to operate properly. A_ssembly Caution: The Adapter cx_nvertsAC voltage to a low DC output. The Adapter can be shorted it'it is improperly grounded while plugging it into a wall outlet.
- Page 15 PAGE 14 COMPUTER OPERATION COMPUTER |NSTRU_|ON BUTTON / INTUT FUNCTIONS NOTE: THESE ARE THE BASIC OPERATING FI_CTIONS OF EACH B[YFTON. ACTUAL PROGRA_'_LMING MAY REQUIRE A ACTB'ATION SEQI_NCE OF MORE THAN ONE BUTTON (REFERENCEPROG1LL\IDESC_dVfIONSON PAGE 17). SELECTS & SETS DISPLAY FUNCTIONS. HOLDING THE ENTER BUTTON DOWN WILL ACTIVATE A [A] ENTER TOTAL DISPLAY RESET (ZERO-OUT VALUES).
-
Page 16: C O Mp U T E R Op E
PAGE COMPUTER OPERATION COMPUTER INSTRUCTION © 1) ACTIVATION (START MAKE SURE THE AC ADAPTER IS PROPERLY PLUGGED IN'TO A WALL OWIZET. PRESS ANY FUNCTION BUTTON OR START PEDALIN'G TO ACTIVATE DISPLAY. A BEEP WILL SOL_,,T) ANT) THE DISPLAY WILL ILLUMINATE. 2) SET UP STEPS ONCE ACTIVATED, THE DISPLAY... - Page 17 COMPUTER OPERATION PAGE COMPUTER INSTRUCTION DISPLAY FUNCTIONS / RE,M)LNGS TIME COMPLFFERDISPLAY WILL ACCXJlVRJ'LATE TOTAL TRAINING TIME IN 00:00(MINCJTES :SECONDS). COMPUTER WILL COUNT UP TO, OR DOWN FROM, A MAXIMUM READING OF 99:59. PRESET TARGET TRAINING TgIE: USE THE ENTER BUTTON TO SCROLL TO _ TIME FUN(TION AND USE THE UP / DO_TN BUTTONS TO AD,R_STTHE SETTD_G.
- Page 18 PAGE 17 COMPUTER OPERATION COMPUTER INSTRUCTION DISPLAY FUNCTION / READ_GS (Continued) BODY FAT % THE COMPUTER V_qLLALLOW A USER TO MEASURE THEIR BODY COMPOSITION BASED ON BODY FAT & BODY MASS ENDEX (BMI) EVALUATION. THE READINGS ARE CALCULATED USING A COMBINATION OF USER ENTRY DATA (HEIGHT, WEIGHT, AGE, &...
- Page 19 PAGE 18 COMPUTER OPERATION T !N!NG PR MS SELECHNG A TRAINTNG PROGRAM Once a [Tser ID is set up, the computer will list six available tluinh_g program across the top of the display (Manual, User, Watt, Fitness, Progl_gul3_ or Target Heart Rate).
-
Page 20: Troubleshooting
PAGE TROUBLESHOOTING PROBLEM DESCRIPTION SUGGESTED SOLUTION 1. NO DISPLAY CHECK AC ADAPTER FOR PROPER VOLTAGE OUTPUT 0-12 VDC). (E-2 ERROR ('ODE) INSPECT RECEPTACLE ON THE FRONT OF THE UNIT FOR DAMAGE. CHECK CABLE CONNECTIONS: MAKE SURE CONNECTIONS ARE SECURE AND INTHE CORRECT ORIENTATION. CHECK CABLE ASSEMBLIES FOR DAMAGE: PINCH POINTS &... -
Page 21: Preventative Maintenance
PAGE 20 PREVENTATIVE MAINTENANCE Use a dampened soft-cloth to wipe equipment free of perspiration 'after each use. Avoid getting excessive moisture on computer or electronic components. Do not use abrasive cleaners petroleum-based solvents to clean equipment. € Do not remove drive train shrouds or attempt any technical... - Page 22 PAGE 21 LIMITED WARRANTY General Terms & Comlitions Exclusive Remedies All LAMAR Heahh, Fimess & Sports, exercise products For any product that fails to conform under terms of applied warranted to be free fi'om defects in materials and workmanship warranty, LAMAR Health, Fitness...
-
Page 23: Product Registration
PAGE 22 PRODUCT REGISTRATION Thank you for purchasing a LAMAR Health, Fitness & Sports, LL C product. Our products are designed and manufactured to the highest quality stamhu.ds. We are committed to our customers satisfaction and we will do everything we can umler the comlitions of yourproduct... - Page 24 STAMP LAMAR HEALTH, FITNESS, & SPORTS, 4699 #205 NAUTILUS COURT SOUTH 80301 BOULDER, FOLD LINE FOLD & TAPE (LOSED OR _]AIL REGISTRATION IN A SEPARATE ENVELOPE www. lamarhfs,...
Need help?
Do you have a question about the C44F and is the answer not in the manual?
Questions and answers