
Subscribe to Our Youtube Channel
Related Manuals for Perle C-110-XXXXX


Summary of Contents for Perle C-110-XXXXX
-
Page 1: Installation Guide
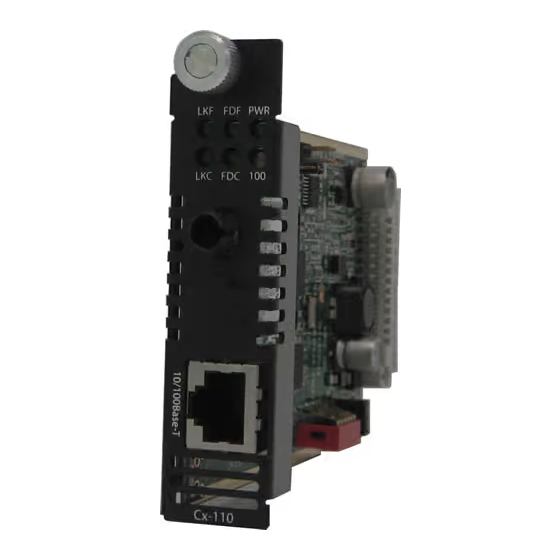
Perle 10/100 Ethernet Media Converter Module Installation Guide C-110-XXXXX Unmanaged Module CM-110-XXXXX Managed Module P/N 5500307-15... - Page 2 This document contains instructions necessary for the installation and operation of the Perle 10/100 Ethernet Media Converter Module(s) (C-110 and CM-110) that are used in conjunction with a Perle MCR Chassis. The C- 110 are unmanaged media converter modules, and the CM-110 are the managed versions.
-
Page 3: Installation
The default dip switch settings (all switches in the UP position) and default jumper settings will work for most installations. The following steps are used to configure the Perle 10/100 Ethernet Media Converter Module: 1. Set the Auto-MDIX jumper (optional). - Page 4 SW: When set to SW (Switch), the module will, at power-up, read the settings of the DIP Switches and use those as its running configuration. It will ignore any configuration information in its flash memory. NOTE: The default jumper setting is Auto Perle 10/100 Media Converter Module – Installation Guide...
-
Page 5: Dip Switches
Off: When the Auto Negotiation switch is set to the OFF position, the Media Converter Module will not negotiate the Ethernet parameters with the copper link partner. The parameters used by the Media Perle 10/100 Media Converter Module – Installation Guide... - Page 6 If the remote Media Converter is set up for Far End Fault (FEF) and the local Media Converter is set up with Link Pass-Through, a loss of Perle 10/100 Media Converter Module – Installation Guide...
- Page 7 3 – (B) Detects FEF signal and shuts down the fiber link. 4 – (B) Drops link on copper connection because Link Pass-Through is configured. 5 – (A) Link on copper connection is not affected because Link Mode is set to Standard. Perle 10/100 Media Converter Module – Installation Guide...
- Page 8 Converter Module will use this Speed setting for its Ethernet copper connection. Up: The Media Converter will be fixed at 100 Mbps. Down: The Media Converter will be fixed at 10 Mbps. Perle 10/100 Media Converter Module – Installation Guide...
- Page 9 (TX) fiber connection. The state of the copper link is not relevant since no data is passed through to the copper side. This mode will override all other switch settings. Perle 10/100 Media Converter Module – Installation Guide...
-
Page 10: Installing Or Replacing Media Converter Modules
Failure to observe this caution could result in damage to the Media Converter Module(s) and /or chassis. The Perle Media Converter Modules can be installed in any available slot and in any order within the Chassis. Installing or Replacing a Media Converter Module 1. - Page 11 Media Converter/switch/fiber device ensuring that the RX and TX are reversed (crossed) at the opposite end. Installing the Simplex Fiber Cable Locate a 10/100Base-X compliant simplex (1 strand) fiber cable with appropriate connectors. Perle 10/100 Media Converter Module – Installation Guide...
-
Page 12: Installing The Copper Cable
Installing the Copper Cable Locate 10/100Base-T compliant copper cables with male, RJ- 45 connectors installed at both ends. Connect the RJ-45 cable between the Perle Media Converter Module and the device. Note: The Perle Media Converter Module supports Auto-MDIX which allows a straight-through or cross-over Ethernet cable. -
Page 13: Operation
Operation Status LED The Perle 10/100 Ethernet Media Converter Modules have six single color status LEDs located on the face plate of the module. 100 (copper speed) On – Power is on; module is On – 100 Mbps operating normally Off –... -
Page 14: Other Features
Integrated Pause signalling is an IEEE feature that temporarily suspends data transmission between two devices in the event that one of the devices becomes overwhelmed. The Perle Media Converter Module can generate and respond to Pause messages. Perle 10/100 Media Converter Module – Installation Guide... -
Page 15: Troubleshooting
Media Converter. 4. Connect the fiber cable to both Converters. The LKF LED indicates good fiber connection. If no LKF LED then check the fiber cabling. 5. Return converters to desired configuration. Perle 10/100 Media Converter Module – Installation Guide... - Page 16 Note: If troubleshooting a CM-110, setting the Auto-Config jumper (J6) to SW will ensure the DIP switches are being read. Perle 10/100 Media Converter Module – Installation Guide...
-
Page 17: Technical Specifications
RX: 1550 Max: 5 Max: -3 C-110-S2LC80 TX: 1550 Min: -5 Min: -34 CM-110-S2LC80 RX: 1550 Max: 0 Max: -3 C-110-S2SC120 TX: 1550 Min: Min: -35 RX: 1550 Max: 5 Max: -3 CM-110-S2SC120 Perle 10/100 Media Converter Module – Installation Guide... - Page 18 Category 5 UTP or STP 24-22 AWG Straight through or Ethernet crossover Note: Please refer the product page on the Perle website for the most up to date list of models and specifications. http://www.perle.com/ Perle 10/100 Media Converter Module – Installation Guide...
-
Page 19: Compliance Information
Failure to observe this warning could result in an eye injury or blindness. WARNING: Use of controls, adjustments or the performance of procedures other than those specified herein may result in hazardous radiation exposure. Perle 10/100 Media Converter Module – Installation Guide... - Page 20 Warranty / Registration Perle’s standard Lifetime Warranty provides customers with return to factory repairs for Perle products that fail under the conditions of the warranty coverage. Details can be found at: http://www.perle.com/support_services/warranty.shtml Contacting Technical Support Contact information for the Perle Technical Assistance Center (PTAC) can be found at the link below.
Need help?
Do you have a question about the C-110-XXXXX and is the answer not in the manual?
Questions and answers