Table of Contents
Advertisement
Quick Links
Advertisement
Table of Contents

Related Manuals for Patton electronics 1092ARC


Summary of Contents for Patton electronics 1092ARC
- Page 1 USER MANUAL MODEL 1092ARC High Speed, 2-Wire/4-Wire, Synchronous and Asynchronous Rack Mount Modem Card Part# 07M1092ARC-C SALES OFFICE Doc# 033041UB (301)975-1000 Revised 03/23/00 TECHNICAL SUPPORT (301)975-1007 An ISO-9001 Certified http://www.patton.com Company...
-
Page 2: Table Of Contents
TABLE OF CONTENTS 1.0 WARRANTY INFORMATION Section Page Patton Electronics warrants all Model 1092ARC components to be free from defects, and will—at our option—repair or replace the 1.0 Warranty Information .............2 product should it fail within one year from the first date of shipment. 1.1 Radio and TV Interference This warranty is limited to defects in workmanship or materials, and 1.2 CE Notice... -
Page 3: Service Information
2.0 GENERAL INFORMATION 1.3 SERVICE iNFORMATION Thank you for your purchase of this Patton Electronics product. This product has been thoroughly inspected and tested and is All warranty and non-warranty repairs must be returned freight warranted for One Year parts and labor. If any questions arise during prepaid and insured to Patton Electronics. -
Page 4: Configuration
2.3 1092A SNMP MANAGEMENT SOLUTIONS 3.0 CONFIGURATION This section describes the hardware and software configuration Model 1092A is SNMP manageable when it is connected to a switches and jumpers, and provides detailed instructions for all possible rack-mounted Model 1092ARC . SNMP management is enabled settings. -
Page 5: Reversible Interface Driver Board
3.1.1 Reversible Interface Driver Board The Model 1092ARC Series features switchable interface driver 3.1.2 Configuration Switch Set “S1” boards that allow a wide range of DTE interface connections. Figure 3 shows the Interface Driver Board on the top of the 1092ARC PC board. The configuration switches on S1 allow you to specify the data rate, async/sync data format, transmit clock source and response to RDL request. - Page 6 Switch S1-3: Data Set Ready During Local Line Loopback Test Switch S1-8: Response to Remote Loop Request Use Switch S1-8 to allow the Model 1092ARC to enter the Remote Use Switch S1-3 to control the behavior of the DSR signal at the Digital Loopback diagnostic test when requested to do so by the far end EIA interface during the local line loopback test.
-
Page 7: Configuration Switch Set "S2
Switch S5-2: 2-Wire/4-Wire Table A-1. Starting Address Setting Use Switch S5-2 to configure 2-Wire or 4-Wire operation. 1- 2 - 3 - 4 - 5 - 6 - 7 - 8 - 9 - 10 - 11 - 12 - 13 - NMS - PS2 - PS1 The following table A-2 shows the bit setting to configure the S5-2 Setting... -
Page 8: Configure The Local 1092Arc
MAIN MENU Option 1: Display Active Configuration To make a selection from any menu, enter the option number. Select Option 1 to display the most recent configuration of the local To exit any menu without making a selection, press the [ESC] Model 1092ARC (See below). - Page 9 2. Data Format MAIN MENU Option 4: Setup Software Configuration Select Option 2 in the SOFTWARE CONFIGURATION Menu to select the sync data format (See below). Select Option 4 to edit the software configuration of the Model 1092ARC. To save changes after editing the software configuration, select MAIN MENU Option 5, then select “Use Software Switches”...
- Page 10 4. DSR During Local Line Loop 7. DTE Controlled Remote Digital Loop Select Option 4 in the SOFTWARE CONFIGURATION to configure Select Option 7 in the SOFTWARE CONFIGURATION Menu to the behavior of the local Data Set Ready (DSR) signal during the Local enable DTE control of the Remote Digital Loop Menu (See below).
- Page 11 To run or terminate a particular test, key in the option to get to that MAIN MENU Option 6: Display Modem Status screen menu. Select Option 6 from MAIN MENU to display the Modem Status Test Mode options 2,3,7,8 and 9 require the 1092ARC to be in Data (below).
-
Page 12: Configure The Rear Interface Card
3.3.1 Model 1001RCM12545 Rear Card Strap Settings 3.3 CONFIGURE THE REAR INTERFACE CARD Figure 6 shows strap locations for the Model 1001RCM12545 The Model 1092ARC Series has several interface card options: the (DB-25/RJ-45S) rear cards. These straps determine various grounding Model 1001RCM12545 (DB-25/RJ-45), 1001RCM13445 (M/34/RJ-45), characteristics for the terminal interface and twisted pair lines. -
Page 13: Model 1001Rcm13445 Rear Card Strap Settings
3.3.2 Model 1001RCM13445 Rear Card Strap Settings Figure 7 shows the strap location for the Model 1001RCM13445 (M/34/RJ-45) rear card. This strap determines whether Signal Ground and Frame Ground will be connected. Figure 8. 1001RCM11545 strap locations The table below provides an overview of interface strap functions for the rear interface cards. -
Page 14: Installation
4.0 INSTALLATION SGND & FRGND (JB4) In the connected position, this strap links DB-15 pin 8 (Signal This section describes the functions of the Model 1001R14 rack Ground) and frame ground through a 100 ohm resistor. In the open chassis, tells how to install front and rear Model 1092ARC Series cards position, pin 8 is connected directly to frame ground. -
Page 15: Install The Model 1092Arc Series Into Chassis
4.2 INSTALL THE MODEL 1092ARC SERIES INTO THE CHASSIS 4.3.2 Connect to a “DCE” Device Since the Model 1092ARC’s serial port is always wired as a DCE, The Model 1092ARC Series is comprised of a front card and a rear you must use a null modem cable when connecting to another DCE card. -
Page 16: Connection To The Control Port Interface
The RJ-45 connector on the Model 1092ARC’s twisted pair interface 5.0 OPERATION is polarity insensitive and is wired for a two-wire interface. The Once the Model 1092ARC is properly configured and installed, it signal/pin relationships are shown in Figure 9 below. should operate transparently. -
Page 17: Test Modes
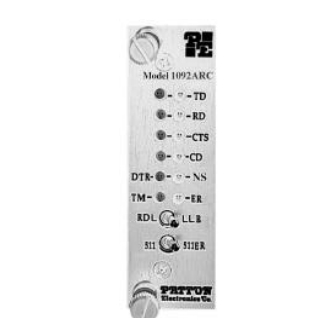
glows red to indicate the likelihood of a Bit Error To perform an LLB test, follow these steps: in the received signal. During the 511 or 511/E Activate LLB. This may be done in one of three ways: test, ER flashes to indicate that the Test Pattern Detector has detected a bit error. -
Page 18: Ber) Test Pattern Generator
APPENDIX A Activate RDL. This may be done in three ways: PATTON ELECTRONICS MODEL 1095RC - Move the front panel toggle switch to the Left to “Remote”. FACTORY REPLACEMENT PARTS - Raise the RDL signal on the interface (see Appendix C). - Set Remote Loopback from the VT100 screen. - Page 19 APPENDIX B APPENDIX B (Continued) MODEL 1092ARC TERMINAL INTERFACE PIN ASSIGNMENT PATTON MODEL 1092ARC TERMINAL INTERFACE PIN ASSIGNMENT M/34F Connector-DCE (V.35 Interface) DB-25F Connector-DCE (RS-232 Interface) Pin # Signal B ......SGND (Signal Ground) Pin # Signal C ......RTS (Request to Send) D ......CTS (Clear to Send) 1......FG (Frame Ground)
- Page 20 APPENDIX C APPENDIX D PATTON MODEL 1092ARC LINE INTERFACE PIN ASSIGNMENT CONTROL PORT PIN ASSIGNMENT (RJ45 Connector) (RJ-45 CONNECTOR ON 1000CC CARD) EIA 561 Pin Number Signal 1...........N/C (No Connection) Pin Function RJ-45 Pin Number 2...........N/C (No Connection) 3...........4 Wire Tip Transmit data (from DTE)........7 4...........Tip 5............Ring...
Need help?
Do you have a question about the 1092ARC and is the answer not in the manual?
Questions and answers