Advertisement
Quick Links
Operator's IVlanuai
CRRFr. NRN °
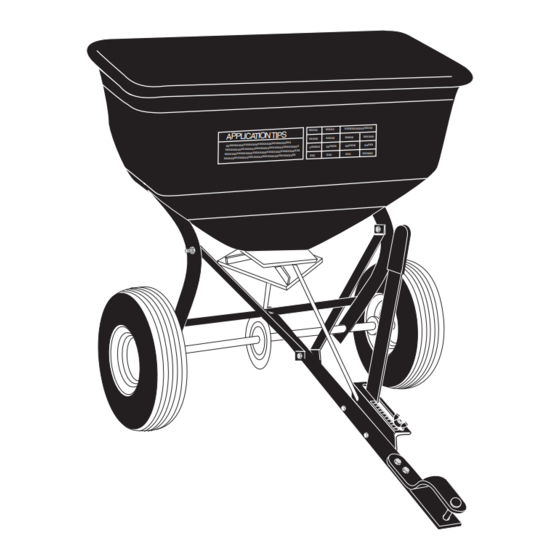
BROADCAST SPREADER
Model No. 486.24321
DO NOT RETURN TO STORE
For Missing Parts or Assembly
Questions
Call 1-866-576-8388
CAUTION:
Before using this product, read
this manual and follow all Safety
Rules and Operating
Instructions.
,, Safety
,, Assembly
,, Operation
,, Maintenance
,, Parts
Sears, Roebuck and Co., Hoffman Estates, IL 60179 U.S.A.
www.sears.com/craftsman
PRINTED IN U.S.A.
FORM NO. 42096 (12/08/08)
Advertisement

Related Manuals for Craftsman 486.24321


Summary of Contents for Craftsman 486.24321
- Page 1 Before using this product, read ,, Assembly this manual and follow all Safety ,, Operation Rules and Operating Instructions. ,, Maintenance ,, Parts Sears, Roebuck and Co., Hoffman Estates, IL 60179 U.S.A. www.sears.com/craftsman PRINTED IN U.S.A. FORM NO. 42096 (12/08/08)
- Page 2 When operated and maintained according to all supplied instructions, if this Craftsman product fails due to a defect in material or workmanship within one year from the date or purchase, return it to any Sears store or other Craftsman outlet in the United States for free replacement.
- Page 3 SHOWN FULL SIZE ._.__.--f NOT SHOWN FULL SIZE DESCRIPTION DESCRIPTION Hair Cotter Pin Hex Bolt, 1/4-20 x 1- 1/2" Hitch Pin Hex Bolt, 1/4-20 x 1" Carriage Bolt, 1/4-20 x 3/4" Spacers Nylock Nuts, 1/4-20 Nylon Wing Nut Adjustable Stop Nylon Washer Flow Control Link Flat Washer, 5/16"...
- Page 4 Hitch Tube Flow Control Rod Flow Control Arm Drive Wheel Hitch Bracket Wheel Flow Control Mount Bracket Hopper Assembly Braces (2) Hardware Package (see page 3) ... 4 TOOLS REQUIRED FOR ASSEMBLY STEP 2: (SEE FIGURE 2) Remove lock nut from the middle bolt in the crossover Pliers 7/16"...
-
Page 5: Step 4: (See Figure
STEP 3: STEP 5: (SEE FIGURE 3) (SEE FIGURE 5) • Place the drive wheel onto the end of the axle that Tighten all hex nuts and bolts, following the same sequence as assembled in steps 4, 5 and 6. Do not has an indent. - Page 6 STEP 7: STEP 9: (SEE FIGURE (SEE FIGURE 7) Place a 5/16" fiat washer onto the end of the flow Assemble the flow control link (end with small hole) to the flow control arm using a 1/4" x 1" hex bolt, a nylon control rod.
- Page 7 STEP 11: STEP 13: (SEE FIGURE (SEE FIGURE 11) • Assemble both the flow control mounting bracket and • Position the flow control mounting bracket. • Push on flow control arm until it locks in "OFF" position. short handle tube to the long handle tube. Use two 1/4"...
-
Page 8: Application Diagram
HOW TO USE YOUR SPREADER APPLICATION DIAGRAM SETTING THE FLOW CONTROL (Refer to figure 13 on page 7.) • Loosen the nylon wing nut, set the adjustable stop to REFER the desired flow rate setting and retighten the wing nut. The higher the setting number, the wider the CHARTS \ opening in the bottom of the hopper. - Page 9 CHECK FOR LOOSE FASTENERS LUBRICATE (See figure 15) • Before each use make a thorough visual check of • Lightly apply automotive grease as needed to the the spreader for any bolts and nuts which may have sprocket and gear. loosened.
- Page 10 BROADCAST SPREADER MODEL 486.24321 - -i _.. ¸_ ..'_0 21 22 Call 1-866-576-8388 for missing parts or assembly help DO NOT RETURN TO STORE...
- Page 11 BROADCAST SPREADER MODEL 486.24321 PART NO. DESCRiPTiON DESCRiPTiON PART NO. 44624 Hopper 43850 Pin, Spring !/8" Dia. x 5/8" Lg. 46055 Pin, Spring 1/8" Dia. x 1" Lg. 44468 Sprocket, 6 Tooth 62482 Ass'y, Guide Closure C-9M5732 Pop Rivet (not shown) 40469 Tube, Frame 40883...
- Page 12 Your Home For expert troubleshooting and home solutions advice: www.managemyhome.com For repair - in your home - of all major brand appliances, lawn and garden equipment, or heating and cooling systems, no matter who made it, no matter who sold it! For the replacement parts, accessories owner's manuals that you need to do-it-yourself.
Need help?
Do you have a question about the 486.24321 and is the answer not in the manual?
Questions and answers