Advertisement
Quick Links
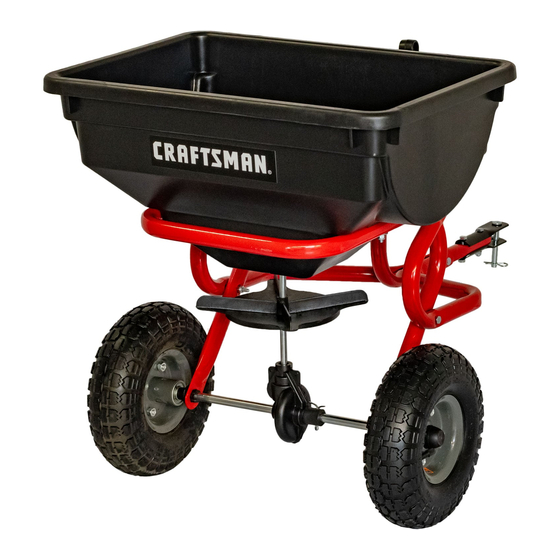
Owner's Manual
2
cu. ft. (TOW)
BROADCAST
SPREADER
Model No. 486.243231
CAUTION:
Before using this product, read
this manual and follow all
Safety Rules and
Operating
Instructions.
IMPORTANT
- READ
THIS
FIRST!!!
For Missing Parts or Assembly
Questions
Please Call 217-728-8388
Mon.-Fri.
7 am - 5 pm CST.
FAX 217-728-2032
or e-mail info@agri-fab.com
Missing parts will be sent UPS in 24 hours directly to your home.
• Safety
• Assembly
• Operation
• Maintenance
• Parts
Sears,
Roebuck
and Co.,
Hoffman
Estates,
IL 60179
U.S.A.
www.sears.com/craftsman
PRINTED IN U.S.A.
FORM NO. 48674 (11/02)
Advertisement

Related Manuals for Craftsman 486.243231


Summary of Contents for Craftsman 486.243231
- Page 1 7 am - 5 pm CST. FAX 217-728-2032 or e-mail info@agri-fab.com Missing parts will be sent UPS in 24 hours directly to your home. Sears, Roebuck and Co., Hoffman Estates, IL 60179 U.S.A. www.sears.com/craftsman PRINTED IN U.S.A. FORM NO. 48674 (11/02)
- Page 2 ACCESSORIES ............MAINTENANCE/STORAGE ........SAFETY RULES ............SERVICE AND ADJUSTMENTS ......12 FULL SIZE HARDWARE CHART ......4 TROUBLESHOOTING ..........CARTON CONTENTS ..........REPAIR PARTS ILLUSTRATION ......14 ASSEMBLY ..............REPAIR PARTS LIST ..........OPERATION .............. PARTS ORDERING/SERVICE ....Back Page LIMITED ONE YEAR WARRANTY For one year from the date of purchase, when this spreader is maintained and lubricated according to the operating and maintenance instructions in the owner's manual, Sears will repair any defect in material or workmanship free of charge.
- Page 3 Any power equipment can cause injury if operated improperly or if the user does not understand how to operate the equipment. Exercise caution at all times, when using power equipment. Read the towing vehicle owners manual and towing Always begin with the transmission in first (low) vehicle safety rules.
- Page 4 SHOWN FULL SIZE NOT SHOWN FULL SIZE QTY. DESCRIPTION QTY. DESCRIPTION Flat Washers 1-5/8" Hex Bolt, 1/4-20 x 1-3/4" Hex Bolts, 3/8-16 x 1-1/4" Cotter Pin, 3/32" x 3/4" Hex Bolt, 1/4-20 x 3/4" Cotter Pin, 1/8 x 1-1/2" Hair Cotter Pin, 1/8" Carriage Bolt, 1/4-20 x 3/4"...
-
Page 5: Table Of Contents
CARTON CONTENTS 5. Braces (2) 1. Hitch Tube 6. Flow Control Rod 2. Flow Control Arm 7. Wheels (Drive and Idler) 3. Hitch Bracket 8. Hopper Assembly 4. Flow Control Mount Bracket 9. Vinyl Cover 5. Braces (2) Hardware Package (see page 4) TOOLS REQUIRED FOR ASSEMBLY... -
Page 6: Hitch Tube
Assemble t hetwohitchbraces totheinsideofthe Assemble a spacer and a 1-5/8" flat washer onto the hopper f rame, o neoneachside,using two1/4"x 1-3/ end of the axle that has the small hole. See figure 3. 4"hexboltsandtwo1/4"hexlocknuts.DONOT TIGHTEN YET.Seefigure2. Place a wheel (air valve facing out) and then one or two 1-5/8"... -
Page 7: Flow Control Arm
Turnthe spreader upright o nitswheels. • Assemble the flow control arm to the flow control mounting bracket using a 1/4" x 3/4" hex bolt, two Assemble t hehitchbracket t othetopofthehitch nylon washers and a 1/4" hex lock nut as shown in tubeusingtwo3/8"x 1-1/4"... - Page 8 • Hook the free end of the flow control rod through the NYLON hole in the slide gate bracket located near the bottom WING NUT of the hopper. See figure 9. 5/16"FLAT _'_"_ WASHER NYLON SLIDE GATE WASHER BRACKET HOPPER 1_"x3/4"...
- Page 9 KNOW YOUR SPREADER Read this owner's manual and safety rules before operating your spreader. Compare the illustration below with your spreader to familiarize yourself with the various controls and their locations. SPREADER PLATE (IMPELLER) FLOW CONTROL ADJUSTABLE STOP CLOSURE PLATE FLOW CONTROL ARM - Opens and closes the closure CLOSURE PLATE - Slides to open or close the opening plate in the bottom of the hopper.
-
Page 10: Vinyl Cover
Iffertilizer i s accidentally d eposited t ooheavilyina IMPORTANT: Application rates shown in the chart are small a rea,soaktheareathoroughly w itha garden affected by humidity and by the moisture content of hoseor sprinkler t oprevent b urning ofthelawn. the material (granular and pellet). Some minor setting Toinsure uniform coverage, makeeachpasssothat adjustments may be necessary to compensate for thebroadcast pattern slightly overlaps thepattern... - Page 11 CUSTOMER RESPONSIBILITIES Read and follow the maintenance schedule and the maintenance procedures listed in this section. MAINTENANCE SCHEDULE Fill in dates as you _'_'_.4_7_7 Service Dates complete regular service. Check for loose fasteners Check for worn or damaged parts Check tire inflation Cleaning Lubricate CHECK FOR LOOSE FASTENERS...
- Page 12 If the axle, slotted gear and sprocket assembly is disassembled, mark down the positions of the parts SPROCKET as they are removed. The drive wheel and sprocket SHAFT positions in relation to the slotted gear determine which direction the spreader plate will spin. Be sure HEX NUT to reassemble them in their original positions.
- Page 13 NOTES...
- Page 14 REPAIR PARTS FOR MODEL 486.243231 20 21 22...
- Page 15 REPAIR PARTS FOR MODEL 486.243231 REF. PART ;ITY. DESCRIPTION REF. PART CITY DESCRIPTION 44466 Hopper 43070 Washer, Flat 3/8" * 43882 Rivet, Stainless 41576 Bolt, Hex 3/8-16 x 1-3/4" Lg.* 62482 Rod, Flow Control Ass'y, Guide Closure 44469 44462 Tube, Frame 23525 Brace, Hitch 23753...
- Page 16 Get it fixed, at your home or ours! For repair of major brand appliances in your own home... no matter who made it, no matter who sold it! 1-800-4-MY-HOM EsM Anyt,me, day or n,ght (1-800-469-4663) www.sears.com To bring in products such as vacuums, lawn equipment and electronics for repair, call for the location of your nearest Sears Parts &...
Need help?
Do you have a question about the 486.243231 and is the answer not in the manual?
Questions and answers