Table of Contents
Advertisement
Quick Links
Owner's Manual
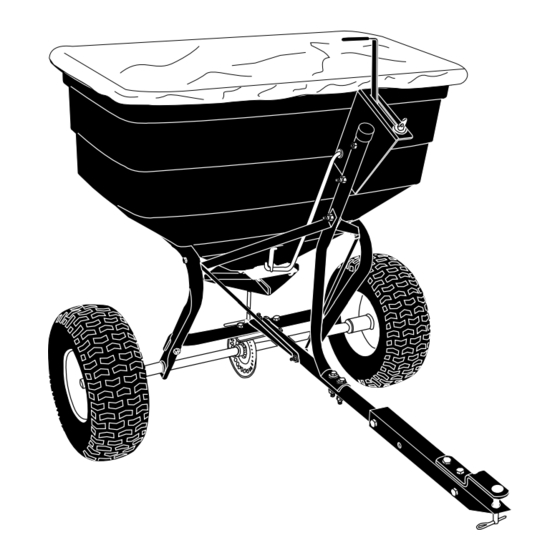
TOW BROADCAST SPREADER
Model No. 486.245951
CAUTION:
Before using this product, read
this manual and follow all Safety
Rules and Operating Instructions.
Sears, Roebuck and Co., Hoffman Estates, IL 60179 U.S.A.
www.sears.com/craftsman
PRINTED IN U.S.A.
®
STOP
DO NOT RETURN TO STORE
For Missing Parts or Assembly
Questions Call 1-866-576-8388
• Safety
• Assembly
• Operation
• Maintenance
• Parts
FORM NO. 49914 (REV. 05/09/08)
Advertisement
Table of Contents

Related Manuals for Craftsman 486.245951


Summary of Contents for Craftsman 486.245951
- Page 1 Before using this product, read • Assembly this manual and follow all Safety • Operation Rules and Operating Instructions. • Maintenance • Parts Sears, Roebuck and Co., Hoffman Estates, IL 60179 U.S.A. www.sears.com/craftsman PRINTED IN U.S.A. FORM NO. 49914 (REV. 05/09/08)
-
Page 2: Table Of Contents
If this product is used for commercial or rental purposes, this warranty applies for only 90 days from the date of purchase. This warranty gives you specific legal rights, and you may also have other rights which vary from state to state. Sears, Roebuck and Co., D817WA, Hoffman Estates, IL 60179 The model number and serial numbers will be found on MODEL NUMBER: 486.245951... -
Page 3: Safety Rules
SAFETY Any power equipment can cause injury if operated improperly or if the user does not understand how to operate the equipment. Exercise caution at all times, when using power equipment. • Read the towing vehicle owners manual and towing •... -
Page 4: Full Size Hardware Chart
HARDWARE PACKAGE CONTENTS SHOWN FULL SIZE NOT SHOWN FULL SIZE QTY. DESCRIPTION QTY. DESCRIPTION Hex Bolt, 5/16" x 1-3/4" Cotter Pin, 3/32" x 3/4" Hex Bolt, 1/4" x 1-3/4" Cotter Pin, 1/8 x 1-1/2" Hex Bolt, 3/8" x 3/4" Hair Cotter Pin, 1/8" Hex Bolt, 1/4"... -
Page 5: Carton Contents
CARTON CONTENTS 1. Hopper Assembly 7. Hitch Bracket 8. Hitch Tube 2. Braces (4) 9. Flow Control Mount Bracket 3. Flow Control Rod 10. Flow Control Arm 4. Flow Control Mounting Tube 11. Hopper Cover 5. Wheels (2) 6. Hitch Extension Bracket 12. - Page 6 • Turn the spreader upside down as shown in figure 1. • Assemble a spacer, a 3/4" flat washer, a wheel (air • Remove the lock nut from the middle bolt in the valve facing out) and another 3/4" flat washer onto crossover tube and shaft support plate.
- Page 7 • Turn the spreader upright on its wheels. • Assemble the flow control mounting bracket to the • Assemble the flow control mounting tube to the hitch flow control mounting tube using two 5/16" x 1-3/4" tube using two 5/16" x 1-3/4" hex bolts and 5/16" hex bolts, four 5/16"...
- Page 8 • Assemble the flow control arm to the flow control mounting bracket using a 1/4" x 1" hex bolt, two nylon washers and a 1/4" nylock hex nut. Tighten carefully. 5/16" FLAT The flow control arm should be snug but should pivot WASHER with no more than slight resistance.
- Page 9 • Assemble the hitch bracket to the hitch extension bracket using two 3/8" x 3/4" hex bolts (inserted from the bottom) and two 3/8" nylock hex nuts. See figure • Assemble the hitch pin through the hitch bracket and the hitch extension bracket and secure with the hair cotter pin.
-
Page 10: Operation
OPERATION KNOW YOUR SPREADER Read this owner's manual and safety rules before operating your spreader. Compare the illustration below with your spreader to familiarize yourself with the various controls and their locations. FLOW CONTROL ARM ADJUSTABLE STOP CLOSURE PLATE HITCH EXTENSION BRACKET FLOW CONTROL ARM - Opens and closes the closure CLOSURE PLATE - Slides to open or close the opening plate in the bottom of the hopper. - Page 11 OPERATING TIPS • When broadcasting weed control fertilizers, make sure the broadcast pattern does not hit evergreen trees, flowers or shrubs. We do not recommend the use of any powdered lawn • Heavy moisture conditions may require a cover over chemicals, due to difficulty in obtaining a satisfactory or the hopper to keep contents dry.
-
Page 12: Maintenance/Storage
MAINTENANCE/STORAGE CUSTOMER RESPONSIBILITIES • Read and follow the maintenance schedule and the maintenance procedures listed in this section. MAINTENANCE SCHEDULE Fill in dates as you Service Dates complete regular service. Check for loose fasteners Check for worn or damaged parts Check tire inflation Cleaning Lubricate... -
Page 13: Service And Adjustments
SERVICE AND ADJUSTMENTS REPLACING SLOTTED GEAR LOCKED UP SPREADER • If the axle, slotted gear and sprocket assembly is • Turn the spreader over so that the wheels are off the disassembled, mark down the positions of the parts ground. as they are removed. -
Page 14: Repair Parts Illustration
PARTS REPAIR PARTS FOR MODEL 486.245951 21 22... -
Page 15: Repair Parts List
REPAIR PARTS FOR MODEL 486.245951 REF. PART QTY. DESCRIPTION REF. PART QTY. DESCRIPTION 44480 Hopper 23525 Brace, Hitch 43882 Rivet, Stainless 23762 Shaft Support Plate 65129 Ass'y, Guide Closure 1509-69 Bolt, Hex 1/4-20 x 1-3/4" 44462 Tube, Frame 47441 Screen... - Page 16 1-800-488-1222 1-800-469-4663 (U.S.A.) (Canada) Call anytime, day or night www.sears.com www.sears.ca To purchase a protection agreement on a product serviced by Sears: 1-800-827-6655 1-800-361-6665 (U.S.A.) (Canada) Para pedir servicio de reparación Au Canada pour service en français: a domicilio, y para ordenar piezas:...
Need help?
Do you have a question about the 486.245951 and is the answer not in the manual?
Questions and answers
How do I order a part