Advertisement
Available languages
Available languages
Quick Links
Advertisement

Related Manuals for Fisher & Paykel WA37T26GW2


Summary of Contents for Fisher & Paykel WA37T26GW2
- Page 2 £_ectric Shock Hazard Read and foJJow the iMPORTANT SAFETY iNSTRUCTiONS outJined in this User Guide before operating this appliance, pages 11 - 13. Failure to do so can result in death, e[ectdc shock, fire or injury to personso PleaseNote: lo obtain maximum efficiency, your/¢osrrl(;rl" washer has the ability to learn and adapt to the local environment.
- Page 3 Installation _nstructions Important Safety _nstructions How to get Started About your Fcosmay£ _'_ How Idosm_;rt Works I kt Lock Wash Cycles and Options The Wash Progress Lights The Wash Cycles,Wash Options Softener Rinse,Soak,Time Saver Water i evels Spin Hold, Delay Start, Clothes Care Safeguards Customizing the Wash (}yde, Favorite Cycle Washing Bulky Items, VV_;shing Woollens, Cold VV_;ter Washing Befo re You Wa sh...
- Page 4 Congratulations onpurchasing anew Fisher &Paykel washing machine We are very proud o f our w ashers and trust t hey will s erve you well f ormany y ears AtFisher &Paykel weaim toprovkte innovative products that a re simple t ouse, ergonomic energy efficient Thousands oftonnes ofwashing and 70}/ears oflaundry experience have b eers...
- Page 5 nsta at n tr, ct o +"° _ C q..Before you begin - read these instructions completely and carefu[[yo Electric Shock Hazard Read and follow the IMPORTANT SAFETY INSTRUCTIONS outlined in this User Guide before operating this app[iance_ pages 11 - 13.
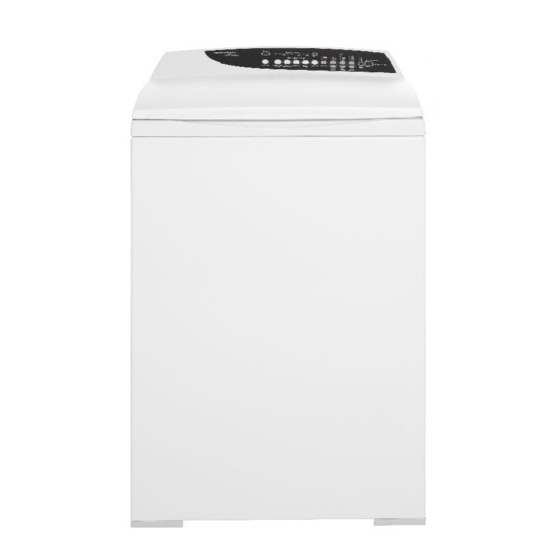
- Page 6 ÷ iI ii Dimensions Depth 25 _S'(650mm) Width 29 !,S'(650rY_rn) Height to top of console 4164'(1020 1060IT]IT/) Height lid open 5<:' 96!q'(1400 1440rY_m)
- Page 7 nsta ato nstr, ct o Step 1 Remove Bottom Packer Remove outer packagin 9 Tilt the machine backwards and walk the machine off the bottom packer The plastic bottom packer can now be removed iiiiiiiiiiiiiilll _..Operating the machine when the bottom packer is in place can result in damage to the machine, Step Removing...
- Page 8 nsta ato ,, ct o Step 4 In_et Hoses 1 Install hoses with the straight end (with filters) fitted to the faucets 2 hstall elbow ends onto washing machine (inlet "( valves are marked on the back of the machine o S! H=hot, C- cold) Ensurethe hot is connected to the hot, and the cold is connected to the cold...
- Page 10 Special Requirements for Alcove or Closet Installation The minimum ventilatior_ clearance between the washer and adjacer¢ walls or other surfaces is 1"(25ram) minimum either skte and front _"(75mm} minimum rear Consideration must be giver] to providing adequate clearance for installatior_ and servking. The minimum vertical space required from floor to overhead shelves, cabinets, ceilings etc is 59"...
- Page 11 ! ia fety nstr, ct ons Read all Safety Information Before Using Many washers are located near a gas dryer or a water heater in the home, Fire Hazard For your safety the information in this manual must be followed to minimize the risk of fire or explosion or to prevent property damage, personal injury or loss of life, Do not store or use gasoline or other flammable vapors and liquids in the vicinity of this or any other appliance,...
- Page 12 £_ectric Shock Nazard Follow the safety p_ecautions outlined in this User Guide° Failure to do so can result in death, ÷[÷ctdc shock, fire or injury to pe_sonso Safety Precautions: o Read all instructions before usinc_the appliance o Usethis appbnce only for its intended purpose as described in this User Gukte o This washer must be properly installed and located in accordance with the Instalbdon Instructions before it is used o Properly ground to conform with all governing codes and ordinances...
- Page 13 mportant : afety nstr, ct on] o Before loading, unloading or adding clothes, press START/PAUSE and wait until the machine has completely stopped before openin9 the lid Close sl@ervision is necessary if this appliance is used by or near chiktrer_ Do not allow chiktren to play inskte, or on, or with this appliance or any discarded appliance Dispose of discarded appliances and shippin(_/packin(_ materials properly Before ctiscardin<]a washer, or removin(_ from service, remove the washer Ikt...
- Page 14 t/ow To . et .: tarted 4 ..Place load evenly around the agitator Note; rPon't wrap large items such as sheets around the agitator o Remove the fabric softener ctispenser A° Detergent Follow the instructior_s on the deterger¢ packaqe o Use the mark on the aqitator, nearest to the top of the clothes, asa quicte to the correct amount of deterqer_t to Hse...
- Page 15 C° Fabric Softener If you wish to use fabric softener, place it it] the O Soak dispenser on the top of the agitator Select the f,oftener Rinse option so that the softener will be dispensed correctly into the final rinse (Referto fabric softener page 19 and 2r_) D°...
- Page 16 A bo Yo r Eco srn a rt ''J' How Ecosma rt Works The Fishor P_ Paykol Ecosmart's'2 in 1'wash systom gives you the bost of both worlds Usinq a combination of front loader and top Goader wash systems, the/qosm_rF "_ gives exceptional wash results wNle usin9 up to 50% less hot wateP<,and, at the same time taking better care of your clothes thai] a conventional top load washer Phase 1 - Eco Active T_v_...
- Page 17 A bo Yo r Ecos m art n,,A Lid Lock o gh, ?o_r ,-cesri_;rl has a lict lock.This ensures the lid cannot be o _t_ opened during the cycle, provkting added safety for you and The lid lock light {above the start/pause button} comes on Delay when the Ikt is Io_ked to tall you when you cannot open the Ikt sfan...
-
Page 18: Wash Options
Wash Cyc es dnd Options Eco Active Wash_; 4 rain 4 rain 4 IT]in 4 rnin AgitateTime u 12 r@n 9 rain 6 inin 3 rain 9 rain Wash Action HeavyDuty Regular Delicate Delicate Regular w_h T_?mr_ ..wa_'] wa_'] .. - Page 19 Wash Cyces and Opt ons () TTme Softener Rinse 0 W_fm We recommend the use of softener dryer sheets because liqukt fabric softener has been known to cause an unpleasant buikt up inside washing machines (Refer to <}crudpage 2r_) Usethe SOFTENERRINSEopSon: o If you use Iiqukt fabnc softener Wash Temp...
- Page 20 Wash Cyces and Opt o Water Levels Auto Wate_ Leve_ Your Fcosmsr; _' c an automatically select the appropriate water level for the load 1 Place your clothes in the machine, and press Power 0 F_st 0 Ho_ 0 H@h 2 Select wash cycle (select Auto water level if not 0 W_rm 0 Med...
- Page 21 Wash £7ces and Opt or s Spin HoM Use the SPIN HOLD option to: o Remove drip dry garments from a mixed load before the wash goes into spin o Minimize wrinkling that is caused when clothes are left sitting in the machine at the end of the cycle When SPIN HOLD is selected, your Rosm(;rN "_ will pause at the end of rinse, Deep and the spin light will flash to tell you that it is waitin D for another instruction Press...
- Page 22 Wash Cyces and Opt ons Customizing the Wash Cycles You can program your fcosmc;rl _ T'_ to remember the wash options you prefer for each wash cycle For instance, you may want to set the Regular cycle to cold wash or set Heavy Duty to include a soak To Customize a Cycle...
- Page 23 Wash Cyces and Opt ons Washing Bulky Items Make sure there is er ough room in the machine for items to move when being washed Forcing brge items into the machine may result in them being damaged <:turingwashing. <Some items float up durir_g the wash (eg comforters and pillows), if they sit too high they may touch ..
- Page 24 Before Wash fo get the best wash results sort your clothes Hand Wash Color Do not bleach Sortwhite fabricsfrom coloredfabrics Do not tumble dry Care Labeb The care label will tell you about the fabric of the garment and how it should be washed Medium iron Soi_ Sort clothes according to the type and amount...
-
Page 25: Fabric Softener
efore Wash Check clothing care labels for special instrl]ctior_s Liquid B_each: I Usehalfthe recommendeddoseof bleachand dilute with water 2 Remove the fabric sof/ener dispenser and pour down the inside edge oi; the aoitator stem, in line with the fins Select the SOFTENER RINSE button. - Page 26 Chan!:l nf! et Opt ....Option Adjustment Mode After usin(l your Ecosmt;rtT''you may want to fine tune some of the options to suit your wash needs You can change the following pre set options: the default rinse option the amount of water used in the Shower Rinse the number of beeps at the end of the cycle the Out of Balance recovery routine o the fill level selected by auto water level...
- Page 27 Chan_l n_9Pro Set Opt ons 1 PressSTART/PAUSEand hold down PressPOWER 0 gh_' 0 Sh_ 0 _hr Lift £_k_d Power 2 The diagram below shows how the lights relate to the options you can change, It also shows which lif_hts will be on when you first _,nter the Option Adjl_stment Mode coo,to,,, ......
- Page 28 Ct-l n 9n!9 Pre : ..Opt ons Out of Balance Recovery Routine When your F,:osmc;r/-T" is spipnin(t it car" sense if the wash load is out of balance ar'd will stop and re try spinning up to _ times If the machine still senses an unbalanced load there are two options the machine offers Automatic Recovery...
-
Page 29: End Of Cycle Beeps
Chanting P " re .: et ..)pro End of Cycle Beeps The beeps signaling the end of the cycle can be increased or decreased 1 Enter the Optior Adjustment Mode 2 Usethe WASH OPTION button to select the number of beeps you prefer 3 PressPOWERto store your selection Default Rinse Option... -
Page 30: Care And Cleaning
Ecosmart n'A Care and Cleaning When You Have Finished Turn off the faucets to prevent any chance of floodinc_ shoukt a hose burst o Unplu{t the machine from the wall socket Cleaning Your Fco,smayt '_' o Clean with a soft damp cloth and wipe dry, Do not use chemical or scouring cleaners as they can damage the paint and plastic surfaces, o You can remove the lid for cleaning. - Page 31 £ar g Ecosm rt 'M Products that Might Damage 'four Ecosmart _wClothes Washer (oncentrated bleaches, diaper sanitizers and hydrocarbor solvents (eg gasoline and paint thinners) can cause damage to the paintwork and components of your clothes washer (Do not wash or dry garments stained with these solvents as they are flammable) Do not use pre treatment sprays or liquids or] or near your clothes washer as they car] damage your machine's control panel and other surfaces Useof dyes in your clothes washer may cause stainir_(t of the plastic components...
- Page 32 Before Ca For : erv ce Pleaseread the following pages before calling for service You can correct many of your machine's problems using the checklists on the following pages Your machine is capable of diagnosing its own problems If it has a problem it will Deep and display a message telling you what is wrong f Yo, r Ecosmart 'MBeeps For Hep Musical Series of Beeps _*Every 5 Seconds and°°°...
- Page 33 f yo,, rEcosmart Boeps Fo H p Wah load is out of balan(e. F __,_ _ _n lit tn_ ma(hine is stationary. Manually redistribute the load Che(k ma(hine is level [nsure the machine's feet haw_been unscrewed and the rubber levelling inserts havebeen fitted so the machine sits on its [pet and not on tl_e corner cabinets.
- Page 34 OI,>er ti n! l Problern Is the power switched on? Unplug ma(hine from the wall. Wait 60 se(onds, plug ba(k in and op_rat the machine Could you/household power supply be at fault? Try plugging in another ele< trK al appliawe Are both hot and (old faucets turned on? Are the inlet hose fikers blocked]? Is Delay Start on?
- Page 35 Y\!a h F: robl Ove/Ioadinq the washe/or d/ye/ Choose a Permanent Press or Delicate (ycle a_,thee cy(les have been desiqned to minimize wrinkles Try selecting a slower spin speed. Do not leave wet clothes to sit in the washer or laundry basket. Not enough detergent for load size or amount of oil.
- Page 36 L m to t Warrant7 When you purchase any new Fisher& Paykel whiteware product for personal or consumer use you automatically receive a one year limited warranty covering parts and labor for servicing within the 4_ mainland United States, Hawaii, Washington DC and Canada In Alaska the limited warranty is the same except that you must pay to ship the product to the service shop or the service technician's travel to your home Products for use in Canada must be purchased through the Canadiar_distributior_ chanr_el to ensure regulatory...
-
Page 37: Lmted Warranty
Lmted Warranty This Warranty Does Not Cover: A Service calls that are not related to any defect in the Product. The cost of a service call will be charoed if the problem is not found to be a defect of the Product For example: I Correct faulty installation of the Product 2. -
Page 38: Limited Warranty
Limited Warranty How to Get Service Pleaseread your User Guide. ff you then have any questions about operatirx] the Product, need the name of your local Fisher& Paykel Authorized <}erviceAgent, or believe the Product is defective and wish service under this limited Warranty, please contact your dealer or call us at: USA and Ca_]ada loll FREE1o888ogoFHPoUSA (1o888o936o7872}... - Page 40 Tabe des mat 6res Instructions d installation _mpor'tan'tes <onsignes de s6curi't@ Apropos de votre Fcosma_8 _ Verrouillage du couvercle Cycles et options de _avage l es Cycles de lava(_e Rinta(_e avec actoucissant,Tremper_Gain de temps Niveau× ct%au En attente, D6part diff(_r6,Recommandations de lavage Avant _e _avage Tria@eet char<-tementdu lave linge Eau de Javel...
- Page 41 nstr. ct d'nsta Avant de commencer, bez ces instructions attentivement et dans leur int6gralit6o Risque d_lectrocution Suivez [es CONSIGNES DE SECURITE d_crites darts [e mode d'emp[oi pages 47 _ 49 avant d'uti[iser cet apparei[o Le manquement & ces consignes peut provoquer des accidents graves tel que: _[ectrocutionoincendieob[essuresod_c_so...
- Page 42 n_tr_ctons _sta ato_ _f-....Dimensions Prof,o ndeur 25//' (650mm) Largeu/ 25/9 '(650mm) Hauteur totale 416';/' (1020 - ]060iT}m) Hauteur avec ddaaq_m_nt_ du cou_r(KJ__ $6!',Y'(1400 1440mm)
- Page 43 dubas Hsque d'endommager [amachh÷o Etape2 Enlever _%mbaHage dutambour e t_es a ccessoi_es 1 Soulevez lecouvercle etenlever I'emballac]e encarton s itu(; _ sous l ecouvercle 2 Conservez I'omballaf_e duhas etdutambour aucas 08vous enaunez besoin p our u nd6placement fl4tur s Enlever les tuyaux, les accessoires etlekitd'insta[ladon Le kit d'i_sstallado_s co_stie_st : 4 lames de caoutchouc pour les cales {._ poser sous la machine...
- Page 44 n tr,, ct o d nsta ato Etape Tuyaux d'aFdv6e d%au Installez I'extr{_mitd_ { 7bout droit des tuyaux (avec filtres) sur les robinets Enstallezlesextr6mit6s coud6es sur la laveuse (les _Sd,Sd <:tl robinets d'admission sont ktentifi6s b I'arri6re de 2 Ext'_' <£1 ttl)/ tl(ol_,...
- Page 46 n trJct ..ons d' nsta aton Conditions sp6ciaies pour [es installations en aic6ve ou placard I'ospace de d_gagemer¢ minimal de ventilation entre la laveuse et les tours ou autres surfaces 25rnm (1") de chaque cot(<` e t c}evant 75ram (3") b I'arnOre <, Note: lesespaces de d6gagement mentionn6s ici sont minimum Veuillez consid6rer qu'ur_ plus grand...
-
Page 47: Risque D'incendie
rnporta tes cons gnes de Veuillez life toutes les informations sur la s6curit6 avant FutiBation I)e nombroux lave Iinc_osont instalk"s dans les maisons _,_ sroximit(" d'un s4_che Iinc_oou d'un Risque d'incendie Pour votre s_curit_, les informations contenues dans ce manuel doivent _tre respect_es afin de _[iminer [es dsques dlncendie ou d'exp[osion et d'_viter tout dommaye materiel, toute... - Page 48 mportantes gnes de s c,, r Risque d'_lectrocution Su[vez les cons[gnes de s_cur[t_ d_cr[tes darts [e mode d'emploL Le manquement _ ces cons[gnes put provoquer des acddents t÷[ qu÷: _[÷ctrocution, des b[essures corpore[[es, ou [÷ d_c_so Pr6cautions de s6curit6 [ire toutes les instructions avant d'utilisor I'appareil o Ud[iser uniquement cet appareil conform6ment _}son utilisation prdwuecomme d6crit dans ce manuel d'utilisation et d'er_tretien o II est imp6ratif que ce lave lin<]e soit correctement install6 et sositionn6 en conformit6 avec les...
- Page 49 mportantes cons gnes de Ne jamais essayer d'attraper quelque chose dans le lave Iinge si le tambour ou I'agitateur sont en mouvement Avant d'ouvrir le couvercle, de d6charoer ou d'ajouter des v#tements, appuyer sur la touche MAACHE/PAUSEet attendre que la machine soit compl6tement arr6t6e avant de soulever le couvercle Une 6troite surveillance est recommand6e si cet appareil est utilis6 par ou ;7proximit6 d'enfants Ne pas laisser lesenfants jouer a I'int6rieur de cet appareil, rfi jouer avec cet appareil ou tout...
- Page 50 %" ernarrage o Repartir de mani{,re {_gale la charge autour de I'agitateur Rema_que N'enroulez pas d'artides de grande taille, comme les draps, 8utour de I'agitateur Retirer le dispeNsateur 3 adoucissar¢ A° Detergent Suivre les instructions sur la charge de lessive Utiliser le rep6re sur I'agitateur, se rapprochant le plus du haut du niveau de la charge, cornrne guide pour d6terminer et verser la quantit6 de d6tergent {_utiliser...
- Page 51 C° Adoucissant o Si vous voulez udliser un adoucissant, le verser dans le -; _emf_s Tremt_er dispensateur D adoucissant en haut de I'agitateur = S61ectionner Ibption Rintage avec adoucissant de mani6re _ ce que I%doucissant soit correctement dd_vers6 dans k_audu ri%age final (vous r6f6rer _ la section Adoucissant aux pages 54 et 58) D, Puissance @issance...
- Page 52 Apropos de votre Ecosmart ''J' Verrouillage du couverc[e Votre lave linge/qosmt;rl _' est d, q uip6 d'un syst_,mede s('_curit6 avec verrouillage du couverde. (]race b cette for/ction, le couverde ne pourra pas 6tre ouvert db(_ une s_'_curit6 accrue pour vous et les membres de votre famille l e t6moin de s6curitd_ d u couvercle(situ6au dessusde D@a_ dffF4r4...
- Page 53 et options de lavage _avage Eco Actif 4 mir 4 mn 4 mi_ 4 mr 12 rain fP mr/ 6 T/in }_ rT/r 9 mr/ Dur&e d'agitation ........ Mouveme_st de _avage R6gulier Frao[ e Frag[e R6gulier Ri_sgage let d'eauf(oide d'eaufroide vapo/isatio_ vaporisation vapor sa_on...
- Page 54 Cyces et oI:>t o de avage fiin_age avec adoucissant Nous vous recommandor_s d'utiliser de prd_fGrence des feuilles adoucissarcs pour sGche linge dans la mesure o8 les adoucissants liquides sont rGputGspour provoquer une accuml/lation dGsagrGablea I'intGrieur des lavedinge (vous rGfGrer;} la section D<'_pOt collant {} la page _fi) Utiliser IbpSon RINgA(}E AVECADOUCISSANT Temp C"...
- Page 55 Cyces et opt uns de avage Niveaux d'eau Hiveau d%au automadque Votre lavehnoe rco.rr t;rl peut s61ectionner automatiquement le niveau d'eau approprk <_ D la charge de Nnge Auto 0 R_p_J_ 1 Mettre lesv6tements dans le lave linge et appuyer sur la _>r_ Chaude 0 Elev4 0 _oyen...
- Page 56 Cyces et opt ons de avage En attente Utiliser Ibption EN ATTENTEpour: Retirer des v0tements devant 0tre ._',tendusmouill<% lesquels ont <'_t<', laves avec une charge mixte, avant la Minimiser le chiffonnage rc'_sultant d es v0tements laissCs en attente dans la machine {_, la fin du cycle [orsque Ibption EN ATTENTEest s¢lectionnCe, votre lave linge/:<-osmcr/-_'fera une pause {_, l a fin du tint age, Cmettra un hip sonore et le t6moin dbssorage dktnotera pour...
- Page 57 Avant e avage Pour obtenir d%xcellents r6sultats au lavage, trier vos _a main v6tements avant le lavage Co@our Javel interdite Fairele tri entre loscouleurset le Nanc d6conseiH6 l'<',tiquette d'_,ntretien vous d<',cntle tissu du v6tement et comment le laver Repassage a fer Sa_et6 moye_ Trier los vCtements solon le type et le niveau de...
- Page 58 Avant e avage Eau de Javel Vd, r ifier 1'6tiquette ct'entretier_pour route recommandatior_ sp<',ciale Eau de Javel _iquide : 1 Utiliser la moiti{ _de la dose d%au de Javel recommandd_eet la diluer ctans de I'eau 2 Retirer le distributeur ;7adoucissant et verser le liquide dans le rebord interne de la tige de I'agitateur, en ligne dr©ire avec les ailettes %%ctionr_er la touche RINgAGE AVECADOUCISSANT Vous Temp,...
- Page 59 Entret en de votre Ecosrnart rM x, \\ ,, Entretien et nettoyage Une fob que vous avez terrain6 o Fermer les robinets pour .X, viter tout risque d'ir_or_dationdans le cas o8 un tuyau viendrait t 6claret o D<',brancherle lavelin<]e de la prise murale Nettoyage du _aveqing÷...
- Page 60 Entret e de votro Ecosmart Produits risquant d'endommager votre laveuse Ecosmart o { esjavellisants conceritrd,s, lesproduits d<'_sinfectants pour couches et les solvants D,base d'hydrocarbure (ex :essence et diluants pour peinture) peuvent endomma<]er le fini ou les composantes de votre laveuse (Ne lavez et ne s6chezjamais de v(!Stements tach6s par ces solvants car ils sont inflammables) °...
- Page 61 . i r ..i..i..Avant d'appe er e serv ce d entret en Veuillez life les pages suivantes avant d'appeler le service d'entretien. Vous pouvez remd_ctier b un grand nombre de problOmes par vous m4_me en suivant les instructions d6crites dans les pages suivantes Votre machine est capable de diagnosdquer ses propres problOmes En cas de probbme, elle <<_mettra u n signal sonore et affichera un message vous indiquant ce qui ne lonctionne pas...
- Page 62 de sigr al onore dappl I' ioe l.a brassie n'est pas K,partie correctement. Assurez-vous que I'appareil est stable. I%partissez la brassie manuellement. V(Sriflez si I'appareil est au niveau Assurez vous que les pieds de I'appareil sont d('wiss_s et que les tales de raise ;9niveau en caoutchouc sont ins(_rd, es de fa?on _ ce qu'il repose sur les pieds plut6t que su/les pi_ces des coins Reportez vous aux Instructions d'insta%tion (pages 44 - 4_i).
- Page 63 Probl rues d fonctior nernent V_'_rifierque I'alimenta ion est sous tension. prise D6brancher la machine de la murale. Attendre 60 secondes awmt de la rebrancher et de faire fonctionnerla machine, V(',rifw que h_limentation 61ectrique de la rnaison ntst pas d#Mllante. Essayer de brancher un autre appareil 61ectrorn6nager.
- Page 64 Probl rn s Machine ou g:,chedinge trop charg& S¢,lectionne_un cycle Fragiles ot Syn h6 iques dam la mesure o(] ces cycles ont #,#_con(us pour Iimiter au minimum le protg_me du Iinge f_oissO_ S@lecionner une vitesse d'essorage plus lente. He pas laisser le linge mouill4 en attente dans le lave linge ou le panier _ linge. quantitd, de dd_tergent insuMsante pour la charge ou le niveau de salet&...
-
Page 65: Garantie Limitee
Garantie limitee [ orsque vous achetez un nouvel appareil ._%ctromd_nager F isher & Paykel pour une utilisation md_nagt'_re, vous recevez automatiquement une garantie limitd,e d'un an couvrant les piOcesde rechange et la main dbeuvre pour le service dans les4S (,tats du continent amd,ricain, Hawal, Washington DC. - Page 66 Garant e rote Cette garantie ne couvre pas [es points suivants " Ales d(_placements d'un technicien de maintenance jusqu'_ votre domicile pour tout problOme non Iid_ b,un ctdq;aut c tans le Produit Lesfrais du old, placement vous seront factur(_s si le problOme s'avOrene pas Otre tan ddffaut du Produit.
- Page 67 Garantie lirnitee Comment solliciter le service clientele V_uillez life le manuel ct'u@isation Si apn',s la lecture du manuN, vous avez toujours des questions sur le ffx-_ctionnement du Produit, ou si vous avez besoin de connai'tre le nora de votre rep@sentant Fisher& Paykel agr66 local ou si vous pensez que le Produit eat dCf{,ctueux et que vous souhaitez contacter le service dientkle ctans le cadre de cette 6aranSe IimitCe, veu@ez prersdre contact avec votre reversdeurou nous appeler au numd_rosuivant : Etats=Unis et Canada...
Need help?
Do you have a question about the WA37T26GW2 and is the answer not in the manual?
Questions and answers