Advertisement
Quick Links
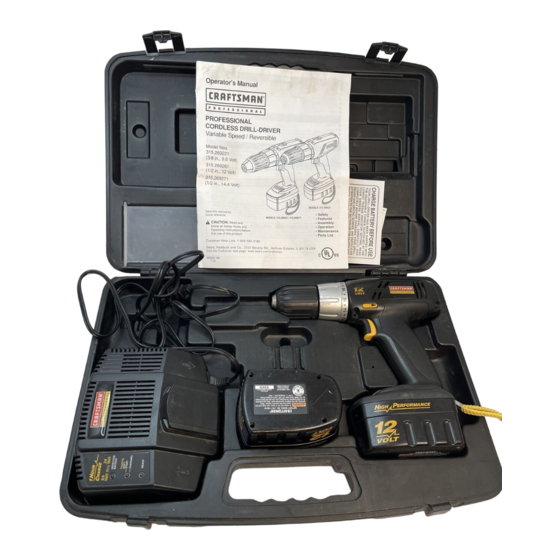
Operator's Manual
F E S S I 0
NAL
PROFESSIONAL
CORDLESS DRILL-DRIVER
Variable Speed / Reversible
Model Nos.
315.269221
(3/8 in., 9.6 Volt)
315.269261
(1/2 in., 12 Volt)
315.269271
(1/2 in., 14.4 Volt)
MODELS 315.269221
Save this manual
for
future reference
_,
CAUTION:
Read and
follow all Safety Rules and
Operating Instructions before
first use of this product.
MODELS 315.269261 / 315.269271
• Safety
• Features
• Assembly
• Operation
• Maintenance
• Parts List
Customer
Help Line:
1-800-932-3188
Sears,
Roebuck
and Co., 3333
Beverly
Rd., Hoffman
Estates,
IL 60179
USA
Visit the Craftsman
web page: www.sears.com/craftsman
983000-188
1-03
Advertisement

Related Manuals for Craftsman 315.269271


Summary of Contents for Craftsman 315.269271
- Page 1 Safety Rules and • Maintenance Operating Instructions before • Parts List first use of this product. Customer Help Line: 1-800-932-3188 Sears, Roebuck and Co., 3333 Beverly Rd., Hoffman Estates, IL 60179 Visit the Craftsman web page: www.sears.com/craftsman 983000-188 1-03...
- Page 2 18-19 • PartsOrdering / Service ............................... FULL ONE YEAR WARRANTY ON CRAFTSMAN PROFESSIONAL CORDLESS DRILL-DRIVER If this rRnFTSMRN Professional Cordless Drill-Driver fails due to a defect in material or workmanship within one year from the date of purchase, Sears will repair it, free of charge.
-
Page 3: Battery Pack
Yourdrill-driver hasmanyfeatures formaking yourdrilling _1_ CAUTION:Carefully r eadthrough thisentireowner's operations m orepleasant andenjoyable. Safety, manual b efore using yournewdrill-driver. Payclose performance anddependability havebeengiven top attention totheSpecific Safety Rules / Symbols, priority in thedesignofthisdrill-driver making iteasyto Warnings and Cautions. If you use your drill-driver maintain andoperate. - Page 4 Tool Use and Care • Use clamps or other practical way to secure and • Maintain tools with care. Keep cutting tools sharp support the workpiece to a stable platform. Holding and clean. Properly maintained tools, with sharp the work by hand or against your body is unstable and cutting edges are less likely to bind and are easier to control.
- Page 5 Do not operate charger with a damaged cord or ,_llb WARNING: Never use a battery that has been • plug. If damaged, have replaced immediately by a dropped or received a sharp blow. A damaged battery qualified serviceman. Following this rule will reduce the is subject to explosion.
-
Page 6: Alert Symbol
Important: Some of the following symbols may be used on your tool. Please study them and learn their meaning. Proper interpretation of these symbols will allow you to operate the tool better and safer. SYMBOL NAME DESIGNATION/EXPLANATION Volts Voltage Amperes Current Hertz Frequency (cycles per second) - Page 7 PRODUCT SPECIFICATIONS: DRILL-DRIVER 315.269221 315.269261 315.269271 Chuck 3/8 in. Keyless 1/2 in. Keyless 1/2 in. Keyless Motor DC Motor 9.6 Volt DC Motor 12 Volt DC Motor 14.4 Volt Gear Train Two Speed Two Speed Two Speed Switch Variable Speed Variable Speed Variable Speed No Load Speed...
- Page 8 MODELNO.315.269221 TWO SPEED GEAR T RAIN ( HI-LO) (3/8 in. KeylessChuck, 9.6 Volt) TORQUE " ADJUSTMENT RING CHARGER YELLOWLIGHT"ON" ANDRED LIGHTFLASHINGINDICATES DEFECTIVE BATTERYPACK DIRECTIONOF ROTATION SELECTOR (FORWARD/REVERSE) KEYLESS TRIGGER CHUCK RED LIGHT"ON" INDICATES FASTCHARGING MODE GREENLIGHT"ON" INDICATESFULLY CHARGEDANDSLOW CHARGING TO MAINTAINBATTERYPACK BATTERY >' SCREWDRIVER BITS PACK...
- Page 9 MODEL NO. 315.269261 (1/2 in. Keyless Chuck, 12 Volt) MODEL NO. 315.269271 (1/2 in. Keyless Chuck, 14.4 Volt) TORQUE ADJUSTMENT RING ) SPEED GEARTRAIN(HI-LO) KEYLESS CHUCK DIRECTION OF ROTATION SELECTOR (FORWARD/REVERSE) SWITCH TRIGGER BATTERYPACK " WRISTSTRAP Fig. 2 CHARGER _ee Figure Your charger has a "key hole"...
- Page 10 AUTO-SPINDLE LOCK _ILWARNING: Make sure to insert drill bit straight into chuck jaws. Do not insert drill bit into chuck jaws at Your cordless drill has an auto-spindle lock. This feature an angle and then tighten, as shown in Figure 5. This makes installing and removing bits much easier.
- Page 11 TO REMOVE BATTERY PACK FROM DRILL TO ATTACH BATTERY PACK TO DRILL Gee FigureZ Gee Figure 6. • Lock the switch trigger by placing the direction of Note: Battery pack is shipped in a low charge condition. rotation selector in center position. Gee Figure if. Therefore, it must be charged prior to use.
- Page 12 If after one hour red light is still flashing, this indicates a & WARNING: Always wear safety goggles or safety defective battery pack and should be replaced. glasses with side shields when operating tools. Failure to do so could result in objects being thrown Green light on indicates battery pack is fully charged into your eyes, resulting in possible serious injury.
- Page 13 SWITCH LOCK SWITCH See Figure 11. See Figure The switch trigger can be locked in the OFF position. This To turn your drill ON, depress the switch trigger. To turn it feature can be used to prevent the possibility of accidental OFF, release the switch trigger.
- Page 14 ADJUSTABLE TORQUE CLUTCH KEYLESS CHUCK See Figure 12 Your drill is equipped with an adjustable torque clutch for A keyless chuck has been provided with your drill to allow driving different types of screws into different materials. for easy installation and removal of bits. As the name The proper setting depends on the type of material and implies, you can hand tighten or release drill bits in the the size of screw you are using.
- Page 15 When drilling hard smooth surfaces use a center punch to ,t_tb WARNING: Always wear safety goggles or safety mark desired hole location. This will prevent the drill bit glasses with side shields when operating tools. from slipping off center as the hole is started. However, Failure to do so could result in objects being thrown the low speed feature allows starting holes without center into your eyes, resulting in possible serious injury.
- Page 16 Insert hex key in chuck and tighten chuck jaws CHUCK REMOVAL securely. Tap sharply with a mallet in a counterclock- Gee Figures15,16,and 17. wise direction. This will loosen chuck on the spindle. It The chuck must be removed in order to use some can now be unscrewed by hand.
-
Page 17: Battery Pack Removal And Preparation For Recycling
Do net abuse power tools. Abusive practices can WARNING: When servicing use only identical Craftsman replacement parts. Use of any other damage tool as well as workpiece. parts may create a hazard or cause product damage. Only the parts shown on parts list, page 17, are intended to be repaired or replaced by the customer. - Page 18 CORDLESS DRILL-DRIVER MODEL NO, 315.269221 in all correspondence regarding your CRAFTSMAN 318 in. PROFESSIONAL CORDLESS DRILL-DRIVER The model number will be found on a plate attached to the motor housing. Always mention the model number or when ordering repair parts.
- Page 19 NOS. 315.269261 / 315,269271 The model number will be found on a plate attached to the motor housing. Always mention the model number in all correspondence regarding your CRAFTSMAN 1/2 in. PROFESSIONAL CORDLESS DRILL-DRIVER or when ordering repair parts. SEE BACK PAGE...
- Page 20 Get it fixed, at your home or ours! Your Home For repair-in your home-of all major brand appliances, lawn and garden equipment, or heating and cooling systems, no matter who made it, no matter who sold it! For the replacement parts, accessories owner's manuals that you need to do-it-yourself.
Need help?
Do you have a question about the 315.269271 and is the answer not in the manual?
Questions and answers