Advertisement
Quick Links
Owner's Manual
II:RRFTSMRN'I
Variable Speed / Reversible
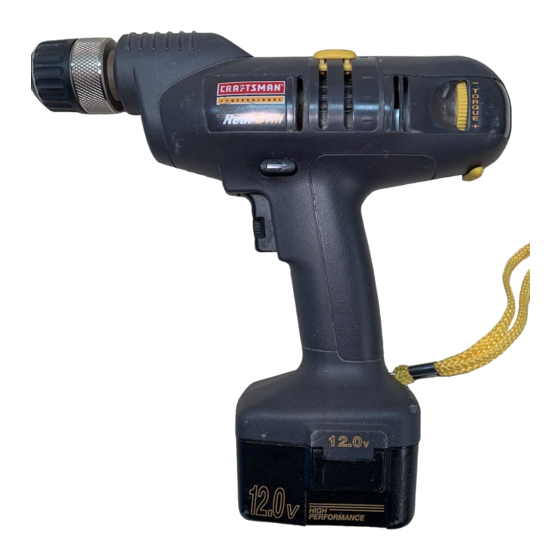
318in. PROFESSIONAL
CORDLESS REDI DRILL-DRIVER
Model No.
315.274910
Save this manual for
future reference
_, CAUTION:
Read and follow
all Safety Rules and Operating
Instructions before first use of
this product.
Customer
Help Line: 1-800-932-3188
Sears,
Roebuck
and
Co.,
Hoffman
Estates,
IL 60179
USA
visit the Craftsman web page: www.sears.com/craftsman
972000-554
7-98
NRTL
Advertisement

Related Manuals for Craftsman 315.274910


Summary of Contents for Craftsman 315.274910
- Page 1 Save this manual for future reference _, CAUTION: Read and follow all Safety Rules and Operating Instructions before first use of this product. Customer Help Line: 1-800-932-3188 NRTL Sears, Roebuck Co., Hoffman Estates, IL 60179 visit the Craftsman web page: www.sears.com/craftsman 972000-554 7-98...
- Page 2 Parts Ordering / Service ..........................FULL ONE YEAR WARRANTY ON CRAFTSMAN PROFESSIONAL CORDLESS REDI DRILL-DRIVER If this CRflFTIMI_N Professional Cordless Redi Drill-Driver fails due to a defect in matedal or workmanship within one year from the date of purchase, Sears will repair it, free of charge.
- Page 3 The purpose of safety symbols is to attract your attention to possible dangers. The safety symbols, and the explanations with them, deserve your careful attention and understanding. The safety warnings do not by themselves eliminate any danger. The Instructions or warnings they give are not substitutes for proper accident prevention measures.
- Page 4 WHEN SERVICING USE ONLY IDENTICAL • DO NOT USE TOOL IF SWITCH DOES NOT CRAFTSMAN REPLACEMENT PARTS. TURN IT ON AND OFF. Have defective switches IMPORTANT SAFETY INSTRUCTIONS replaced by an authorized service center.
-
Page 5: Rules For Safe Operation
RULES FOR SAFE OPERATION (Continued) DO NOT OPERATE CHARGER WITH A • To i'educe dsk of damage to charger body and cord, pull by charger body rather than cord when DAMAGED CORD OR PLUG. If damaged, have replaced immediately by a qualified disconnecting charger. - Page 6 The following recommended accessodes are currently available at Sears Retail Steres. • 6-Pc. Extra Length Magnite Power Bit Set • 17-Pc. Power Screwdriver/Nutddver Set W/Case • 30-Pc. Power Screwddver/Nutdriver Set W/Case • High Speed Bits (For Wood or Metal)...3/4 in. Max.
- Page 7 CHARGER See Figure 2. Your charger has a "key hole" hanging feature for convenient, space saving storage. Screws should be installed so that center distances are 1-7/16 inches apart. YELLOW ANDGREENLIGHTS INDICATESOFT STARTMODE GREENUGHT "ON" INDICATESFULLYCHARGED RED LIGHT"ON"INDICATES FASTCHARGING MODE BATTERY CHARGER BATI'ERYPACK...
- Page 8 • Normally, the yellow end green lights on charger WARNING: Always wear safety goggles or will come on. This indicates charger is in soft start safety glasses with side shields when operating tools. Failure to do so could result in objects mode and should switch to fast charge mode within being thmwn into your eyes, resulting in possible 5 minutes.
- Page 9 TOINSTALLBATrERY PACK SWITCH See Figure 3. • Lock switch trigger on your drill-driver by placing the direction of rotation selector in center position. To turn your drill ON, depress the switch trigger. To See Figure 3. turn it OFF, release the switch trigger. •...
- Page 10 REVERSIBLE KEYLESS CHUCK See Figure 6. See Figure 5. Your drill-driver has a keyleas chuck. As the name This tool has the feature of being reversible. The direction of rotation is controlled by a selector located implies, you can hand tighten or release drill bits in the above the switch trigger.
- Page 11 WARNING: Always wear safety goggles or WARNING: Do not insert drill bit into chuck safety glasses with side shields when operating jaws and tighten as shown in figure 8. This could tools. Failure to do so could result in objects cause drill bit to be thrown from drill-driver being thrown into your eyes, resulting in possible resulting in possible serious personal injury or...
- Page 12 INSTALLING BITS FROM MAGAZINE • Tighten the chuck jaws on drill bit. See Figure 9. • To tighten the chuck jaws; grasp and hold the A convenient feature of your drill-driver is the five bit collar of the chuck with one hand, while rotating magazine.Three screwdriver and two drill bits are _ the chuck body clockwise with your other hand.
- Page 13 DRILLING WARNING: When servicing, use only identical Craftsman replacement parts. Use of any other See Figure 11. part may create a hazard or cause product damage. Avoid using solvents when cleaning plastic parts. Most plastics are susceptible to damage from various types of commercial solvents and may be damaged by their use.
-
Page 14: For Recycling
BAI"rERIES Yourddll-driver's b attery packis equipped w ith12 • Store and charge your battedes in a cool area. nickel-cedmium r echargeable batteries. Length of Temperatures above normal room temperature service fromeachcharging willdepend onthetypeof will shorten battery life. workyouaredoing. • Never store battedes in a discharged condition. Thebatteries in this tool have been designed to Recharge them immediately after they are... -
Page 15: Parts List
CRAFTSMAN PROFESSIONAL 3/8 In. CORDLESS REDI DRILL-DRIVER MODEL NO. 315.274910 number in a!l correspondence regarding your 3/8 In. CORDLESS REDI DRILL-DRIVER or when Them_de_numberwi__bef_und_naplateattachedt_them_t_rh_using_A_waysmenti_nthem_de_ ordering repair padS. SEE BACK PAGE FOR PARTS ORDERING INSTRUCTIONS PARTS LIST Part Number Description Ouan. - Page 16 For in-home major brand repair service: Call 24 hours a day, 7 days a week 1-800-4.MY-Home". (1-800-469-4663) Para pedir servicio de reparaci6n a domicilio - 1-800-676-5811 In Canada for all your service and parts needs call - 1-800-665-4455 Au Canada pour tout le service ou les pi_ces _For the repair or replacement parts you need: Call 7 am - 7 pm, 7 days a week...
Need help?
Do you have a question about the 315.274910 and is the answer not in the manual?
Questions and answers