NEC PE401H User Manual
Hide thumbs
Also See for PE401H:
- User manual (87 pages) ,
- Specifications (2 pages) ,
- Installation manual (6 pages)
Table of Contents
Advertisement
Advertisement
Table of Contents
Troubleshooting

Related Manuals for NEC PE401H


Summary of Contents for NEC PE401H
- Page 1 Projector PE401H User’s Manual Model No. NP-PE401H...
- Page 2 (3) Great care has been taken in the preparation of this user’s manual; however, should you notice any questionable points, errors or omissions, please contact us. (4) Notwithstanding article (3), NEC will not be responsible for any claims on loss of profit or other matters deemed to result from using the Projector.
-
Page 3: Important Information
Important Information Safety Cautions Precautions Please read this manual carefully before using your NEC projector and keep the manual handy for future reference. CAUTION To turn off main power, be sure to remove the plug from power outlet. The power outlet socket should be installed as near to the equipment as possible, and should be easily accessible. -
Page 4: Important Safeguards
The Federal Communications Commission does not allow any modifications or changes to the unit EXCEPT those specified by NEC Display Solutions of America, Inc. in this manual. Failure to comply with this government regulation could void your right to operate this equipment. This equipment has been test- ed and found to comply with the limits for a Class B digital device, pursuant to Part 15 of the FCC Rules. - Page 5 Important Information Place the projector in a horizontal position The tilt angle of the projector should not exceed 5 degrees, nor should the projector be installed in any way other than the desktop and ceiling mount, otherwise lamp life could decrease dramatically. Fire and Shock Precautions •...
-
Page 6: Remote Control Precautions
Important Information - If the projector has been dropped or the cabinet has been damaged. - If the projector exhibits a distinct change in performance, indicating a need for service. • Disconnect the power cord and any other cables before carrying the projector. •... - Page 7 Important Information Health precautions to users viewing 3D images • Before viewing, be sure to read health care precautions that may be found in the user’s manual included with your LCD shutter eyeglasses or your 3D compatible content such as DVDs, video games, comput- er’s video files and the like.
-
Page 8: Table Of Contents
Table of Contents Table of Contents.......1 SETTING | ADVANCED ....... 45 SETTING | ADVANCED | SECURITY .. 46 Usage Notice ........2 SETTING | ADVANCED | NETWORK .. 48 Precautions .........2 OPTIONS | GENERAL ......51 Introduction ........4 OPTIONS | LAMP/FILTER SETTINGS 52 Product Features ........4 OPTIONS | INFORMATION .... -
Page 9: Usage Notice
Usage Notice Precautions Follow all warnings, precautions and maintenance as recom- mended in this user’s guide to maximize the life of your unit. ■ This projector will detect the life of the lamp Warning- itself. Please be sure to change the lamp when it shows warning messages. - Page 10 Usage Notice ■ Turn off the product before cleaning. ■ Use a soft cloth moistened with mild detergent to clean the display housing. ■ Disconnect the power plug from AC outlet if the product is not being used for a long period of time. ■...
-
Page 11: Introduction
Introduction Product Features High resolution ■ Full HD (1920 x 1080) support. x 1.7 Zoom ratio ■ Wide zoom ratio provide the easy to set up for the different situation. Quick Power Off, Direct Power Off ■ The projector can be put away immediately after the projec- tor is powered down. - Page 12 Introduction Integrated RJ-45 connector for wired networking capability ■ The customer can control the projector by own computer via Wired LAN. Software programs (User Supportware) ■ Two programs: Virtual Remote Tool, PC Control Utility Pro 4/Pro 5, which can be be downloaded from our website. Preventing unauthorized use of the projector ■...
-
Page 13: Package Overview
Q uick Setup Guide (P/N: North America: 7N8N3891 7N8N3631) ferent accessories. and 7N8N3901) For North America: Limited Warranty For Europe: G uarantee Policy For customers in Europe:You will find our current valid Guarantee Policy on our Web Site:www.nec-display-solutions.com English ... -
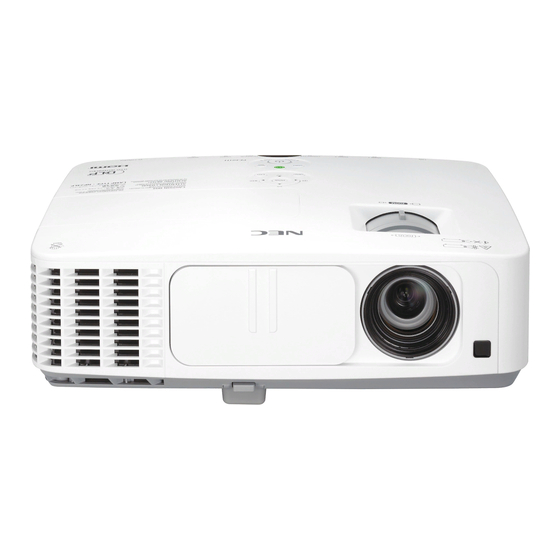
Page 14: Product Overview
Introduction Product Overview Projector 1. Lens Cover 9. Lamp Cover 2. Tilt Foot 10. Control Panel 3. Remote Sensors 11. Kensington Lock Port 4. Lens (This security slot sup- 5. Focus Ring ports the MicroSaver ® 6. Zoom Lever Security System) 7. -
Page 15: Connection Ports
Introduction Connection Ports 9 10 13 14 1. LAN Connector (RJ-45) 2. SERVICE Port (for service purpose only) 3. HDMI 1 IN Connector 4. HDMI 2 IN Connector 5. COMPUTER IN Connector 6. MONITOR OUT Connector (Separate sync signal only) 7. -
Page 16: Control Panel
Introduction Control Panel KEYSTONE Adjust the image to compensate Correction for distortion caused by tilt- ing the projector (vertical ± 40 degrees). ENTER Confirm your section of items in sub menu operation. VOLUME - Decrease speaker volume. VOLUME + Increase speaker volume. Four to select Directional... -
Page 17: Attaching The Cable Cover
Introduction POWER ON/ Power on the projector. Refer to OFF and LED the “Power On/Off the Projec- indicator tor” section on pages 27-28. Dim the projector lamp which will lower power consumption and extend the lamp life. (refer to page 52) SOURCE Press “SOURCE”... -
Page 18: Remote Control
Introduction Remote Control POWER ON Power on the projector. Refer to the “Power On/Off the Projec- tor” section on pages 27-28. POWER OFF Power off the projector.Refer to the “Power On/Off the Projec- tor” section on pages 27-28..English... - Page 19 Introduction COMPUTER 1 Press “1” to choose COMPUTER IN connector. COMPUTER 2 No function. COMPUTER 3 VIDEO Press “VIDEO” to choose VIDEO IN connector. Select password. When you input a password, you must press “NUM” and other number button simultaneously. AV-MUTE Momentarily turn off/on the audio and video.
- Page 20 Introduction Number Button Select password. CLEAR Clear the number while you input the password. FREEZE Freeze To pause the screen im- age. Press again to resume the screen image. EXIT Exit the settings. ENTER Confirm your section of items in sub menu operation.
-
Page 21: Battery Installation
Introduction Battery Installation 1. Press firmly and slide the battery cover off. 2. Install new batteries (AAA). 3. Slip the cover back over the Ensure that you have the batteries until it snaps into batteries’ polarity (+/–) place. Do not mix different aligned correctly. -
Page 22: Using The Downloadable Software
Projector (Virtual Remote Tool) IN” is selected for Using the utility software “Virtual Remote Tool” that you can input, the Virtual download from our web site (http://www.nec-display.com/ Remote screen or the dl/en/index.html), Virtual Remote screen (or toolbar) can be toolbar will be dis- displayed on your computer screen. - Page 23 1 Download the updated VRT exe file from our web site (http://www.nec-display.com/dl/en/index.html). 2 Double-click the VRT. exe icon. The Installer will start and the Wizard screen will appear. 3 Click “Next”. “END USER LICENSE AGREEMENT” screen will be displayed.
- Page 24 Introduction Follow the instructions on the installer screens to complete the installation. After the installation is completed, the shortcut icon for Virtual Remote Tool TIP:Uninstalling Virtual Remote Tool • Preparation: Exit Virtual Remote Tool before uninstalling. To uninstall Virtual Remote Tool, the Windows user account must have “Administrator”...
- Page 25 Step 3: Start Virtual Remote Tool Start using the shortcut icon Start from the Start menu Click [Start] -> [All Programs] or [Programs] -> [NEC Projector User Supportware] -> [Virtual Remote Tool] -> [Virtual Remote Tool]. When Virtual Remote Tool starts for the first time, “Easy Setup”...
- Page 26 2 Click “Help”. The Help screen will be displayed Displaying the help file using the Start Menu. Click “Start” -> “All programs” or “Programs” -> “NEC Projector User Supportware” -> “Virtual Remote Tool” and then “Virtual Remote Tool Help” in this order.
- Page 27 [Using on Windows] Using the utility software “PC Control Utility Pro 4” that you can download from our web site (http://www.nec-display.com/dl/en/index.html), the projector can be controlled from a computer over a LAN. Control Functions Power On/Off, signal selection, picture freeze, picture mute, audio mute, adjusting, error message notification, event sched- When the projec-...
- Page 28 To install or unin- stall the program, the 1 Connect your computer to the Internet and download the updated PCCUP4 Windows user account exe file from our web site (http://www.nec-display.com/dl/en/index.html). must have [Admin- istrator] privilege (Windows 8, Windows 2 Double-click the PCCUP4. exe icon.
- Page 29 • Displaying the help file using the Start Menu. the menu, the projector Click “Start” -> “All programs” or “Programs” -> “NEC Projector User cannot be controlled Supportware” -> “PC Control Utility Pro 4” -> “PC Control Utility Pro 4 via the serial cable or Help”.
- Page 30 2. Put the configuration file of PC Control Utility Pro 5 to the Trash icon. • The configuration file of PC Control Utility Pro 5 is located in “/Users/ <your user name>/Application Data/NEC Projector User Supportware/ PC Control Utility Pro 5”.
-
Page 31: Viewing 3D Images
Introduction Viewing 3D Images The projector provides 3D images to a user wearing commercially available LCD shutter eyeglasses. CAUTION Health precautions Before viewing, be sure to read health care precautions that may be found in the user’s manual included with your LCD shutter eyeglasses or your 3D compatible content such as DVDs, video games, computer’s video files and the like. -
Page 32: Installation
Installation Connecting the Projector Connect to Computer/Notebook Server To the wall outlet Make sure that the power plug is fully inserted into both the projector AC inlet and the wall outlet. Audio Output The MONITOR OUT connector supports Separate sync signal only. -
Page 33: Connect To Video Sources
Installation Connect to Video Sources DVD Player, Blu-ray Player, Set-top Box, HDTV receiver S-Video Output Make sure that the power plug is fully inserted into both the projector AC inlet and the wall outlet. To the wall outlet Due to the differ- ence in applications for each country, some regions may have... -
Page 34: Powering On/Off The Projector
The Power indicator opportunity to select will flash blue. The startup screen (NEC logo) will be dis- the menu languages. To select the language, played. and the Power indicator will turn steady blue. -
Page 35: Powering Off The Projector
Installation Powering Off the Projector 1. Press the “POWER OFF” button on the remote control or the button on the control panel to turn off the projector lamp, you will see a message as below on the on-screen display. While the POWER indicator is blinking blue in short cycles, the power cannot be... -
Page 36: Warning Indicator
Installation Warning Indicator When the “STATUS” LED indicator fl ashes red, it indicates the projector has overheated. The projector will automati- cally shut itself down. For more information on STATUS LED, refer to page 58. When the “LAMP” LED indicator turns red and the message ... -
Page 37: Adjusting The Projected Image
Installation Adjusting the Projected Image Adjusting the Height of Projector Image The projector is equipped with tilt foot and rear feet to raise and lower the image to fill the screen. 1. Press the tilt foot release. Raise or lower the image to the desired height angle, then release the button to lock the tilt foot into position. -
Page 38: Adjusting The Projector Zoom/Focus
Installation Adjusting the Projector Zoom/Focus You may turn the zoom ring to zoom in or out. To focus the im- age, rotate the focus ring until the image is clear. The projector will focus at distances from 32 to 474 inch (0.82 to 12.0 meters) with mechanical travel. -
Page 39: Throw Angle
Installation Screen Size (α) Diagonal Width Height Wide Tele Wide Tele inch mm inch mm inch mm inch mm inch mm inch mm inch mm degree degree 1385 13.1 1063 1806 13.1 1016 1417 2409 13.1 1524 1328 2125 3613 13.1 1829 1594... -
Page 40: User Controls
User Controls On Screen Display The Projector has a multilingual On Screen Display that allows you to make image adjustments and change a variety of set- tings. How to operate To open the OSD, press the MENU button on the Remote Control. When OSD is displayed, use the buttons to select any item in the main menu. -
Page 41: Menu Tree
User Controls Menu Tree IMAGE GENERAL ADVANCED SCREEN GENERAL 3D SETTING SETTING ENGLISH / DEUTSCH / FRANÇAIS / ITALIANO / ESPAÑOL / PORTUGUÊS / POLSKI / / SVENSKA / NORSK / / MAGYAR / EŠTINA / TÜRKÇE / / INDONESIA GENERAL SIGNAL English ... - Page 42 User Controls SETTING ADVANCED OPTIONS GENERAL LAMP/FILTER SETTINGS INFORMATION ADVANCED ... English...
-
Page 43: Image | General
User Controls IMAGE | GENERAL PICTURE MODE There are many factory presets optimized for various types of images. Use the button to select the item. PRESENTATION: For computer or notebook. HIGH-BRIGHT: Maximum brightness from PC input. VIDEO: This mode is recommended for typical TV program ... - Page 44 User Controls CONTRAST The contrast controls the degree of difference between the lightest and darkest parts of the picture. Adjusting the contrast changes the amount of black and white in the image. Press the button to decrease the contrast. Press the button to increase the contrast.
-
Page 45: Image | Advanced
User Controls IMAGE | ADVANCED GAMMA This allows you to choose a gamma table that has been fi ne-tuned to bring out the best image quality for the input. FILM: for home theater. VIDEO: for video or TV source. ... - Page 46 User Controls RED GAIN/GREEN GAIN/BLUE GAIN/RED BIAS/GREEN BIAS/BLUE BIAS/CYAN GAIN/MAGENTA GAIN/ YELLOW GAIN: Use the button to select RED, GREEN, BLUE, CYAN, MAGENTA AND YELLOW COLORS. RESET: Choose “YES” to return the factory default settings for color adjustments. COLOR SPACE Select an appropriate color matrix type from AUTO, RGB or YUV.
-
Page 47: Screen | General
User Controls SCREEN | GENERAL ASPECT RATIO Use this function to choose your desired aspect ratio. 4:3: This format is for 4×3 input sources. 16:9: This format is for 16×9 input sources, like HDTV and DVD enhanced for Wide screen TV. 16:10: This format is for 16×10 input sources, like widescreen ... -
Page 48: Screen | 3D Setting
User Controls SCREEN | 3D SETTINGS “ ” 3D INVERT and “ Choose “ON” to turn this item on for 3D images. (default: OFF) ” STRUCTURE only 3D INVERT available when 3D is enabled. Choose “ON” to invert left and right frame contents. ... -
Page 49: Setting | General
User Controls SETTING | GENERAL LANGUAGE Choose the multilingual OSD menu. Press the button into the sub menu and then use the button to select your preferred language. Press ENTER to fi nalize the selection. DESKTOP-REAR and CEILING- REAR are to be used with a translucent screen. - Page 50 User Controls REMOTE SENSOR Choose the remote sensor location. HDMI SETTINGS Use this feature to set HDMI1/HDMI2 VIDEO LEVEL: Select “AUTO” to automatically detect video level. If automatic detection may not work well, select “NOR- MAL” to disable the “ENHANCED” feature of your HDMI equipment or select “ENHANCED”...
-
Page 51: Setting | Signal
User Controls SETTING | SIGNAL “SIGNAL” is only supported in Analog VGA (RGB) PHASE signal. Synchronize the signal timing of the display with the graphic card. If the image appears to be unstable or fl ickers, use this function to correct it. -
Page 52: Setting | Advanced
User Controls SETTING | ADVANCED LOGO Use this function to display the startup screen (NEC logo). ON: Displays the NEC logo. OFF: Not display the NEC logo. PC CONTROL MODE PC CONTROL: Allow PC control of an individual projector. -
Page 53: Setting | Advanced | Security
User Controls SECURITY OFF: Choose “OFF” to be able to switch on the projector with- out password verifi cation. ON: Choose “ON” to use security verifi cation when turning on the projector. ■ First Time: 1. The Password is 4 digits, default value is “1234”. (fi rst time) 2. -
Page 54: Change Password
User Controls CHANGE PASSWORD 1. Press ENTER to enter SECURITY KEYWORD setting. 2. The password has to be 4 digits. Current password Password default value is “1234” (fi rst time). 3. Use number buttons on the remote control, to enter your old password and then press ENTER to confi rm your password. -
Page 55: Setting | Advanced | Network
User Controls SETTING | ADVANCED | NETWORK NETWORK STATUS Display the network connection status. (default: DISCONNECT) DHCP Use this function to select your desired startup screen. If you change the setting from one to another, when you exit the OSD menu, the new setting will take effect on next open. -
Page 56: How To Use Web Browser To Control Your Projector
User Controls How to use web browser to control your projector 1. Turn on DHCP to allow the DHCP server to automatically assign When you used the an IP, or manually enter the required network information. projector IP address, you can not link to your service server. - Page 57 User Controls Step 2: Select apply and press the ENTER button on the remote control or the control panel to submit function or press the MENU button on the remote control or the control panel to exit. Step 3: To open Network Connections, click Start, click Control Panel, click Network and Internet Connections, and then click Network Connections.
-
Page 58: Options | General
User Controls OPTIONS | GENERAL INPUT SEARCH ON: The projector will search for other signals if the current input signal is lost. OFF: The projector will only search current input connection. INPUT Use this option to enable / disable input sources. Press ENTER to enter the sub menu and select which sources you require. -
Page 59: Options | Lamp/Filter Settings
User Controls OPTIONS | LAMP/FILTER SETTINGS LAMP LIFE REMAINING Showing the Lamp life. LAMP HOURS USED Display the projection time. FILTER HOURS USED Display the fi lter used time. ECO MODE Choose “ECO” to dim the projector lamp which will lower power consumption and extend the lamp life. -
Page 60: Options | Information
User Controls OPTIONS | INFORMATION INFORMATION To display the projector information for source, resolution, and software version on the screen..English... -
Page 61: Options | Advanced
User Controls OPTIONS | ADVANCED STANDBY MODE POWER-SAVING: Choose “POWER-SAVING” to save power dissipation further < 0.5W. Power-Saving mode NORMAL: Choose “NORMAL” to return to normal standby. will disable the fol- lowing connectors, DIRECT POWER ON buttons or functions Choose “ON”... -
Page 62: Appendices
Appendices Troubleshooting If you experience trouble with the projector, refer to the fol- lowing information. If the problem persists, please contact your local dealer or service center. Problem: No image appears on screen Ensure all the cables and power connections are correctly and ... - Page 63 2. Press the toggle output settings. example: [Fn]+[F4] Compaq=> [Fn]+[F4] Hewlett => [Fn]+[F4] Dell => [Fn]+[F8] Packard Gateway=> [Fn]+[F4] NEC=> [Fn]+[F3] IBM=> [Fn]+[F7] Toshiba => [Fn]+[F5] Macintosh Apple: System Preference-->Display-->Arrangement-->Mirror display If you experience difficulty changing resolutions or your monitor ...
- Page 64 Appendices Problem: Image has vertical flickering bar Use “CLOCK” to make an adjustment. Check and reconfigure the display mode of your graphic card to make it compatible with the product. Problem: Image is out of focus Adjust the Focus Lever on the projector lens. ...
-
Page 65: Led Lighting Message
Appendices Problem: LED lighting message Power Indicator Indicator Condition Projector Condition Note The main power is off Blinking light Blue 0.5 sec On, The projector is getting ready to turn on. Wait for a moment. 0.5 sec Off 2.5 sec On, Off Timer is enabled. - Page 66 Appendices Problem: Message Reminders Over temperature - the projector has exceeded its recommended operating temperature and must be allowed to cool down before it may be used. Replacing the lamp - the lamp is about to reach its maximum life- ...
-
Page 67: Cleaning The Filter
Appendices Cleaning the Filter The air-filter sponge keeps dust and dirt from getting inside the projector and should be frequently cleaned. If the filter is dirty or clogged, your projector may overheat. The message for filter CAUTION: cleaning will be dis- •... - Page 68 Appendices To replace the filter CAUTION: • Before replacing the filter, remove dust and dirt from the projector cabinet. • The projector contains high-precision parts. Keep out dust and dirt during filter replacement. • Do not wash the filter with water. Water will damage the filter membrane. •...
- Page 69 Appendices 5. Install the new filter by reversing the previous steps. 6 After replacing the filter, turn on the power, and press the [MENU] button -> OPTIONS |LAMP/FILTER SETTINGS -> CLEAR FILTER HOURS to reset the filter usage hours. Refer to page 52.
-
Page 70: Replacing The Lamp
Appendices Replacing the lamp optional lamp NP24LP The projector will detect the lamp life at 2500 hours in Eco Mode Off (3300 hours in Eco Mode On). When the “POWER” LED indicator fl ashes red and the message below displays on- screen, the projector has detected that the lamp is approaching its end of life. - Page 71 Appendices Warning: To reduce the risk of personal injury, do not drop the lamp module or touch the lamp bulb. The bulb may shatter and cause injury if it is dropped. Do not break the glass on the lamp module. Keep finger prints off the glass surface on the lamp module.
-
Page 72: Cleaning Procedure For The Lens
Appendices Cleaning procedure for the lens If the lens of projection lens is dusty or blemished, please clean it as following procedure: 1. Turn off the projector and cool projector down for a while. 2. Unplug the power cord from outlet. 3. -
Page 73: Specifications
Appendices Specifications Optical NP-PE401H Projection System Single DLP chip (0.65”, aspect ratio 16:9) ® Resolution 1920 × 1080 pixels (1080P) Lens Manual focus/manual zoom F2.4 (wide): F3.29 (tele) Lamp 330W AC (248W in ECO mode) Light Output 4000 lumens *2 *3 Approx. - Page 74 Appendices Electrical NP-PE401H Power Requirement 100 - 240V AC, 50/60 Hz Input Current 100 - 240V, 50-60Hz, 4.3-1.8A Power Consumption (Typical value) ECO Mode On 310W (100-130V)/295W (200-240V) ECO Mode Off 410W (100-130V)/388W (200-240V) Standby (Normal) 12W (100-130V/200-240V) Standby (Power-sav- 0.5W (100-130V/200-240V) ing) *4 HDMI...
-
Page 75: Compatibility Modes
Appendices Compatibility Modes VGA Analog (1) VGA Analog - PC Signal V.Frequency H.Frequency Modes Resolution (dots) [Hz] [KHz] 640x480 31.5 640x480 37.9 640x480 37.5 640x480 43.3 SVGA 800x600 35.1 SVGA 800x600 37.9 SVGA 800x600 48.1 SVGA 800x600 46.9 SVGA 800x600 53.7 1024x768... - Page 76 Appendices (2) VGA Analog - Extended Wide timing V.Frequency H.Frequency Modes Resolution (dots) [Hz] [KHz] 1280x720 44.8 WXGA 1280x768 47.8 WXGA 1280x800 49.6 WXGA+ 1440x900 55.9 Full HD 1920x1080(1080P) 67.5 (3) VGA Analog -Component Signal V.Frequency H.Frequency Modes Resolution (dots) [Hz] [KHz] 480i...
-
Page 77: Hdmi Digital
Appendices HDMI Digital (1) HDMI - PC Signal V.Frequency H.Frequency Modes Resolution (dots) [Hz] [KHz] 640x480 31.5 SVGA 800x600 37.9 1024x768 48.4 QuadVGA 60.0 1280x960 SXGA 1280x1024 64.0 SXGA+ 1400x1050 65.3 (2) HDMI - Extended Wide timing V.Frequency H.Frequency Modes Resolution (dots) [Hz]... - Page 78 Appendices (3) HDMI - Video Signal V.Frequency H.Frequency Modes Resolution (dots) [Hz] [KHz] 480i 720x480(1440x480) 59.94(29.97) 15.7 576i 720x576(1440x576) 50(25) 15.6 480p 640x480 59.94 31.5 480p 720x480 59.94 31.5 576p 720x576 31.3 720p 1280x720 45.0 720p 1280x720 37.5 1080i 1920x1080 60(30) 33.8 1080i...
- Page 79 Appendices TIP: • An image with higher or lower resolution than the projector’s native resolution ( ) will be displayed with scaling technology. 1920 × 1080 • Sync on Green and Composite sync signals are not supported. • Signals other than those specified in the table above may not be displayed correctly.
-
Page 80: Ceiling Mount Installation
Appendices Ceiling Mount Installation 1. To prevent damaging your projector, please use the ceil- ing mount package for installation. 2. If you buy a ceiling mount from another company, please ensure the screws used to attached a mount to the projec- tor met the following specifications: Screw type: M4 ... -
Page 81: Cabinet Dimensions
Appendices Cabinet Dimensions Unit: mm (inch) 173.1 (6.8) Lens center 49.5 (1.9) 67.0 (2.6) 281.3 (11.1) 49.5 (1.9) 68.5 (2.7) 376.0 (14.8) 144.55 (5.7) English ... -
Page 82: Pin Assignments Of D-Sub Computer Input Connector
Appendices Pin Assignments of D-Sub COMPUTER Input Connector Mini D-Sub 15 Pin Connector Pin No. RGB Signal (Analog) YCbCr Signal 11 12 13 14 15 Green 9 10 Blue Ground Ground Signal Level Red Ground Cr Ground Video signal : 0.7Vp-p (Analog) Green Gro Y Ground Sync signal : TTL level... -
Page 83: Pc Control Codes And Cable Connection
Appendices PC Control Codes and Cable Connection PC Control Codes Function Code Data POWER ON POWER OFF INPUT SELECT COMPUTER INPUT SELECT HDMI 1 INPUT SELECT HDMI 2 INPUT SELECT VIDEO INPUT SELECT S-VIDEO PICTURE MUTE ON PICTURE MUTE OFF SOUND MUTE ON SOUND MUTE OFF NOTE: Contact your local dealer for a full list of the PC Control Codes if needed. -
Page 84: Troubleshooting Check List
Troubleshooting Check List Before contacting your dealer or service personnel, check the following list to be sure repairs are needed also by referring to the “Troubleshooting” section in your user’s manual. This checklist below will help us solve your problem more efficiently. * Print the following pages. -
Page 85: Installation Environment
Native resolution: Refresh rate: Video adapter: Other: Projector DVD Player Signal cable Video equipment NEC standard or other manufacturer’s cable? VCR, DVD player, Video camera, Video game or other Model number: Length: inch/m Manufacturer: Distribution amplifier Model number: Model number:... -
Page 86: Register Your Projector
Upon receipt, we will send a confirmation letter with all the details you will need to take advantage of fast, reliable warranty and service programs from the industry leader, NEC Display Solutions of America, Inc. - Page 87 © NEC Display Solutions, Ltd. 2013 7N951941...
Need help?
Do you have a question about the PE401H and is the answer not in the manual?
Questions and answers