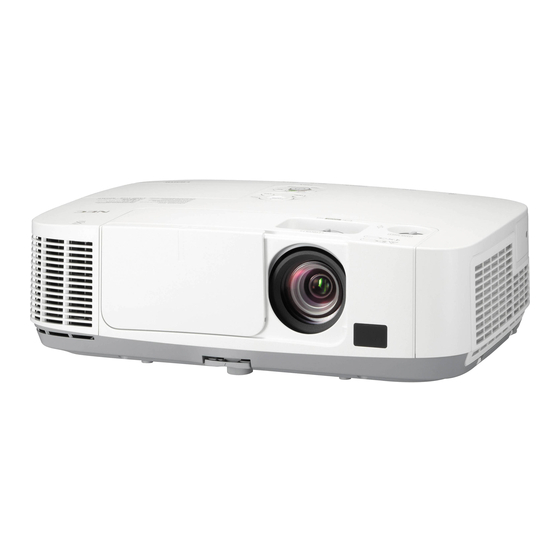
NEC NP-P401W User Manual
4000-lumen widescreen entry-level professional installation projector
Hide thumbs
Also See for NP-P401W:
- Installation manual (6 pages) ,
- Command manual (56 pages) ,
- Installation and assembly manual (10 pages)

Related Manuals for NEC NP-P401W


Summary of Contents for NEC NP-P401W
- Page 1 Projector P501X/P451X P451W/P401W PE501X User’s Manual The PE501X is not distributed in North America. Model No. NP-P501X, NP-P451X, NP-P451W, NP-P401W, NP-PE501X...
- Page 2 (3) Great care has been taken in the preparation of this user’s manual; however, should you notice any questionable points, errors or omissions, please contact us. (4) Notwithstanding article (3), NEC will not be responsible for any claims on loss of profit or other matters deemed to result from using the Projector.
-
Page 3: Important Information
Important Information Safety Cautions Precautions Please read this manual carefully before using your NEC projector and keep the manual handy for future reference. CAUTION To turn off main power, be sure to remove the plug from power outlet. The power outlet socket should be installed as near to the equipment as possible, and should be easily accessible. -
Page 4: Important Safeguards
The Federal Communications Commission does not allow any modifications or changes to the unit EXCEPT those specified by NEC Display Solutions of America, Inc. in this manual. Failure to comply with this government regu- lation could void your right to operate this equipment. This equipment has been tested and found to comply with the limits for a Class B digital device, pursuant to Part 15 of the FCC Rules. - Page 5 Important Information WARNING • Do not use any other object than the projector’s sliding lens cover to cover the lens while the projector is on. Doing so can cause the object to get extremely hot, and possibly resulting in a fire or damage due to the heat emitted from the light output.
- Page 6 Important Information • Handle the power cord carefully. A damaged or frayed power cord can cause electric shock or fire. - Do not use any power cord other than the one supplied with the projector. - Do not bend or tug the power cord excessively. - Do not place the power cord under the projector, or any heavy object.
-
Page 7: Lamp Replacement
Important Information Note for US Residents The lamp in this product contains mercury. Please dispose according to Local, State or Federal Laws. Lamp Replacement • Use the specified lamp for safety and performance. • To replace the lamp, follow all instructions provided on page 160. •... -
Page 8: Power Management Function
Important Information Power management function The projector has power management functions. To reduce power consumption, the power management functions (1 and 2) are factory preset as shown below. To control the projector from an external device via a LAN or serial cable connection, use the on-screen menu to change the settings for 1 and 2. -
Page 9: Table Of Contents
Table of Contents Important Information .................... i 1. Introduction ......................1 ❶ What’s in the Box? ......................1 ❷ Introduction to the Projector ...................2 Congratulations on Your Purchase of the Projector ..........2 Features you’ll enjoy: ....................2 About this user’s manual ...................3 ❸ Part Names of the Projector ...................4 Front/Top ........................4 Rear ..........................5 Top Features ......................6... - Page 10 Table of Contents ❻ Using 4-Point Corner to Correct Keystone Distortion [CORNERSTONE] ....36 Cornerstone ......................36 ❼ Operating Your Computer’s Mouse Functions from the Projector’s Remote Control via the USB Cable (Remote Mouse Function) ............39 ❽ Projecting Your Computer’s Screen Image from the Projector via the USB Cable (USB Display) ......................40 ❾...
- Page 11 Table of Contents [IMAGE OPTIONS] ....................96 [AUDIO] .........................100 ❻ Menu Descriptions & Functions [SETUP] ..............101 [GENERAL] ......................101 [MENU] .........................103 [INSTALLATION] ....................105 [OPTIONS(1)] .......................107 [OPTIONS(2)] .......................110 ❼ Menu Descriptions & Functions [INFO.] ..............113 [USAGE TIME] ......................113 [SOURCE(1)] ......................114 [SOURCE(2)] ......................114 [WIRED LAN] (not supported by PE501X) ............114 [WIRELESS LAN] (not supported by PE501X) .............115 [VERSION(1)] .......................115 [VERSION(2)] (not supported by PE501X) ............115...
- Page 12 Table of Contents 8. User Supportware ..................165 ❶ Installing Software Program ..................165 Installation for Windows software ................165 ❷ Using the Computer Cable (VGA) to Operate the Projector (Virtual Remote Tool) ..168 ❸ Projecting Your Computer’s Screen Image or Video from the Projector over a LAN (Image Express Utility Lite) (not supported by PE501X) ........173 Starting Image Express Utility Lite from a USB Memory or SD Card ....178 ❹...
-
Page 13: Introduction
(EU: 7N080022) For North America only Limited warranty For customers in Europe: You will find our current valid Guarantee Policy on our Web NEC Projector CD-ROM Site: User’s manual (PDF) and the utility www.nec-display-solutions.com software (7N951901) • Important Infomation (For North... -
Page 14: ❷ Introduction To The Projector
1. Introduction ❷ Introduction to the Projector This section introduces you to your new projector and describes the features and controls. Congratulations on Your Purchase of the Projector This projector is one of the very best projectors available today. The projector enables you to project precise images up to 300 inches across (measured diagonally) from your PC or Mac computer (desktop or notebook), VCR, DVD player, or document camera. -
Page 15: About This User's Manual
Software programs (User Supportware) contained in the supplied CD-ROM The supplied NEC Projector includes programs: Virtual Remote Tool, Image Express Utility Lite (for Windows/Mac OS), Image Express Utility 2.0 (for Windows only), Desktop Control Utility 1.0 (for Windows only), and PC Control Utility Pro 4 (for Windows)/5 (for Mac OS). -
Page 16: ❸ Part Names Of The Projector
1. Introduction ❸ Part Names of the Projector Front/Top Controls Zoom Lever (→ page 22) (→ page 6) Focus Lever (→ page 21) Lens Shift Dial (Vertical) (→ page 20) Exhaust Vent Heated air is exhausted from here. Intake Vent / Filter Cover Lens Cover (→... -
Page 17: Rear
1. Introduction Rear Port Cover for Optional USB Lamp Cover (→ page 161) Wireless LAN Unit* (not supported by PE501X) When using the optional USB Security chain opening Wireless LAN Unit, first remove Attach an anti-theft device. the cover. (→ page 152) The security chain opening accepts security wires or chains up to 0.18 inch/4.6 mm in diameter. -
Page 18: Top Features
1. Introduction Top Features (POWER) Button (→ page 15, 27) 2. POWER Indicator (→ page 14, 15, 27, 206) 3. STATUS Indicator (→ page 206) 4. LAMP Indicator (→ page 160, 206) 5. ECO Button (→ page 30) 6. SOURCE Button (→... -
Page 19: Terminal Panel Features
1. Introduction Terminal Panel Features 1. COMPUTER IN/ Component Input Connector (Mini D-Sub 15 Pin) (→ page 145, 149) 2. AUDIO IN Mini Jack (Stereo Mini) (→ page 145, 149) 3. HDMI 1 IN Connector (Type A) (→ page 145, 150) 4. -
Page 20: ❹ Part Names Of The Remote Control
1. Introduction ❹ Part Names of the Remote Control 11. VIEWER Button (→ page 17, 63) 12. NETWORK Button (→ page 17) 13. USB DISPLAY Button (→ page 17) 14. ID SET Button (→ page 106) 15. Numeric Keypad Button/CLEAR Button (→... -
Page 21: Battery Installation
1. Introduction Battery Installation Press firmly and slide the battery Install new batteries (AAA). Ensure Slip the cover back over the bat- cover off. that you have the batteries’ polarity teries until it snaps into place. Do (+/−) aligned correctly. not mix different types of batteries or new and old batteries. -
Page 22: ❺ Operating Environment For Software Included On Cd-Rom
• PC Control Utility Pro 5 (for Mac OS) is not supported by PE501X. NOTE: • Image Express Utility Lite does not support "Meeting Mode" in Image Express Utility 2.0 included with our other models. Download service For the update information about these software programs, visit our website: URL: http://www.nec-display.com/dl/en/index.html... -
Page 23: Operating Environment
1. Introduction Operating Environment The following is the operating environment for Image Express Utility Lite. For the operating environment of other soft- ware program, refer to the help function of each software program. [Windows] Supported OS Windows 8 (Core Edition) Windows 8 Pro Windows 8 Enterprise Windows 7 Home Basic... - Page 24 1. Introduction [Mac] Supported OS Mac OS X v10.6, v10.7, v10.8 Processor (CPU) Intel Core™ Duo processor 1.5 GHz or higher required ® Intel Core™ 2 Duo processor 1.6 GHz or higher recommended ® * PowerPC is not supported ® Memory 512 MB or higher required Network environment...
-
Page 25: Projecting An Image (Basic Operation)
2. Projecting an Image (Basic Operation) This section describes how to turn on the projector and to project a picture onto the screen. ❶ Flow of Projecting an Image Step 1 • Connecting your computer / Connecting the power cord (→ page 14) Step 2 •... -
Page 26: ❷ Connecting Your Computer/Connecting The Power Cord
2. Projecting an Image (Basic Operation) ❷ Connecting Your Computer/Connecting the Power Cord 1. Connect your computer to the projector. This section will show you a basic connection to a computer. For information about other connections, see “6. Installation and Connections” on page 145. Connect the computer cable (VGA) between the projector’s COMPUTER IN connector and the computer’s port (mini D-Sub 15 Pin). -
Page 27: ❸ Turning On The Projector
2. Projecting an Image (Basic Operation) ❸ Turning on the Projector 1. Slide the lens cover to the left to uncover the lens. 2. Press the (POWER) button on the projector cabinet or the POWER ON button on the remote control. The POWER indicator will turn to blue and the projector will become ready to use. -
Page 28: Note On Startup Screen (Menu Language Select Screen)
2. Projecting an Image (Basic Operation) Note on Startup screen (Menu Language Select screen) When you first turn on the projector, you will get the Startup menu. This menu gives you the opportunity to select one of the 29 menu languages. To select a menu language, follow these steps: 1. -
Page 29: ❹ Selecting A Source
2. Projecting an Image (Basic Operation) ❹ Selecting a Source Selecting the computer or video source NOTE: Turn on the computer or video source equipment connected to the projector. Detecting the Signal Automatically Press the SOURCE button once.The projector will search for the available [P501X/P451X/P451W/P401W] input source and display it. - Page 30 2. Projecting an Image (Basic Operation) Selecting Default Source You can set a source as the default source so that it will be displayed each time the projector is turned on. 1. Press the MENU button. The menu will be displayed. 2.
-
Page 31: ❺ Adjusting The Picture Size And Position
2. Projecting an Image (Basic Operation) ❺ Adjusting the Picture Size and Position Use the lens shift dial, the adjustable tilt foot lever, the zoom lever and the focus lever to adjust the picture size and position. In this chapter drawings and cables are omitted for clarity. Adjusting the vertical position of a projected image Adjusting the focus [Lens shift]... -
Page 32: Adjusting The Vertical Position Of A Projected Image (Lens Shift)
2. Projecting an Image (Basic Operation) Adjusting the vertical position of a projected image (Lens shift) Rotate the lens shift dial. Downward Upward Lens shift dial NOTE: The lens shift dial cannot be rotated beyond the maximum upward or downward shift. Forcibly rotating may cause damage to the projector. -
Page 33: Focus
2. Projecting an Image (Basic Operation) Ceiling front projection [P501X/P451X/PE501X] Vertical shift range (0 to 0.5V) Height of projected image [P451W/P401W] Vertical shift range (0 to 0.6V) Height of projected image Focus Use the FOCUS lever to obtain the best focus. Focus Lever... -
Page 34: Zoom
2. Projecting an Image (Basic Operation) Zoom Use the ZOOM lever to adjust the image size on the screen. Zoom Lever... -
Page 35: Adjust The Tilt Foot
2. Projecting an Image (Basic Operation) Adjust the Tilt Foot 1. Lift the front edge of the projector. CAUTION: Do not try to touch the ventilation outlet during Tilt Foot adjustment as it can become heated while the projector is turned on and after it is turned off. -
Page 36: ❻ Correcting Keystone Distortion [Keystone]
2. Projecting an Image (Basic Operation) ❻ Correcting Keystone Distortion [KEYSTONE] When the projector is not exactly perpendicular to the screen, keystone distortion occurs. To overcome it, you can use the “Keystone” function, a digital technology that can adjust for keystone-type distortion, resulting in a crisp, square image. - Page 37 2. Projecting an Image (Basic Operation) 4. Press the ▲ button to select [HORIZONTAL] and then use the ◀ or ▶ so that the top and bottom sides of the projected image are parallel. • Adjust the horizontal keystone distortion. 5.
-
Page 38: ❼ Optimizing Computer Signal Automatically
2. Projecting an Image (Basic Operation) ❼ Optimizing Computer Signal Automatically Adjusting the Image Using Auto Adjust Optimizing a computer image automatically. (COMPUTER) Press the AUTO ADJ. button to optimize a computer image automatically. This adjustment may be necessary when you connect your computer for the first time. [Poor picture] [Normal picture] NOTE:... -
Page 39: ❾ Turning Off The Projector
2. Projecting an Image (Basic Operation) ❾ Turning off the Projector To turn off the projector: 1. First, press the (POWER) button on the projector cabinet or the POWER OFF button on the remote con- trol. The confirmation message will be displayed. Power On Standby 2. -
Page 40: ❿ After Use
2. Projecting an Image (Basic Operation) ❿ After Use Preparation: Make sure that the projector is turned off. 1. Unplug the power cord. 2. Disconnect any other cables. • Remove the USB memory if it is inserted into the projector. 3. -
Page 41: Convenient Features
3. Convenient Features ❶ Turning off the Image and Sound Press the AV-MUTE button to turn off the image and sound for a short period of time. Press again to restore the image and sound. The projector’s power-saving function will work 10 seconds after the image is turned off. -
Page 42: ❹ Changing Eco Mode/Checking Energy-Saving Effect
3. Convenient Features 2. Press the ▲▼◀▶ button. The area of the magnified image will be moved 3. Press the D-ZOOM (−) button. Each time the D-ZOOM (−) button is pressed, the image is reduced. NOTE: • The image will be enlarged or reduced at the center of the screen. •... -
Page 43: Checking Energy-Saving Effect [Carbon Meter]
3. Convenient Features NOTE: • The [ECO MODE] can be changed by using the menu. Select [SETUP] → [GENERAL] → [ECO MODE]. • The lamp life remaining and lamp hours used can be checked in [USAGE TIME]. Select [INFO.] →[USAGE TIME]. •... - Page 44 3. Convenient Features TIP: • The formula as shown below is used to calculate the amount of CO emission reduction. Amount of CO emission reduction = (Power consumption in OFF for ECO MODE − Power consumption in AUTO ECO/NORMAL/ ECO for ECO MODE) × CO conversion factor.* When the image is turned off with the AV-MUTE button or with the lens cover closed, the amount of CO emmission reduction will also increase.
-
Page 45: ❺ Preventing The Unauthorized Use Of The Projector [Security]
3. Convenient Features ❺ Preventing the Unauthorized Use of the Projector [SECURITY] A keyword can be set for your projector using the Menu to avoid operation by an unauthorized user. When a keyword is set, turning on the projector will display the Keyword input screen. Unless the correct keyword is entered, the pro- jector cannot project an image. - Page 46 3. Convenient Features 7. Type in the same combination of ▲▼◀▶ buttons and press the ENTER button. The confirmation screen will be displayed. 8. Select [YES] and press the ENTER button. The SECURITY function has been enabled. To turn on the projector when [SECURITY] is enabled: 1.
- Page 47 3. Convenient Features To disable the SECURITY function: 1. Press the MENU button. The menu will be displayed. 2. Select [SETUP] → [INSTALLATION] → [SECURITY] and press the ENTER button. The OFF/ON menu will be displayed. 3. Select [OFF] and press the ENTER button. The SECURITY KEYWORD screen will be displayed.
-
Page 48: ❻ Using 4-Point Corner To Correct Keystone Distortion [Cornerstone]
3. Convenient Features ❻ Using 4-Point Corner to Correct Keystone Distortion [CORNERSTONE] Use the [CORNERSTONE] feature to correct keystone (trapezoidal) distortion to make the top or bottom and the left or right side of the screen longer or shorter so that the projected image is rectangular. Cornerstone 1. - Page 49 3. Convenient Features 7. Use the ▲▼◀▶ button to move the projected image frame as shown on the example. 8. Press the ENTER button. 9. Use the ▲▼◀▶ button to select another icon which points in the direction. On the Cornerstone adjustment screen, select [EXIT] or press the EXIT button on the remote control. The confirmation screen is displayed.
- Page 50 3. Convenient Features The adjustable ranges for 3D Reform are as follows: HORIZONTAL VERTICAL CORNERSTONE Max. +/− 30° approx. Max. +/− 30° approx. KEYSTONE * The following are conditions under which the maximum angle is achieved: • When the lens shift is set to the center When the lens shift is used and yet the image is not displayed in the center of the screen, the adjustable range will be increased or decreased.
-
Page 51: ❼ Operating Your Computer's Mouse Functions From The Projector's Remote Control
3. Convenient Features ❼ Operating Your Computer’s Mouse Functions from the Projector’s Remote Control via the USB Cable (Remote Mouse Function) The built-in remote mouse function enables you to operate your computer’s mouse functions from the supplied remote control when the projector is connected to a computer via a commercially available USB cable (compatible with USB 2.0 specifications). -
Page 52: (Usb Display)
• To make USB DISPLAY available on Windows XP, the Windows user account must have “Administrator” privilege. • USB Display uses functions of Image Express Utility Lite contained on NEC Projector CD-ROM (→ page 173). Starting USB Display, however, will not install Image Express Utility Lite on your computer. This is because USB Display executes the projector’s program only. - Page 53 3. Convenient Features 4. Click “Yes”. The projector will turn on and the message “The projector is getting ready. Please wait.” will be displayed on the computer screen. This message will disappear in a few seconds. 5. Operate the control window. (Source) �����...
-
Page 54: ❾ Controlling The Projector By Using An Http Browser (Not Supported By Pe501X)
• Start the Web browser on the computer via the network connected to the projector and enter the following URL : http://<the projector’s IP address> /index.html • Use Image Express Utility Lite contained on the supplied NEC Projector CD-ROM. TIP: The factory setting IP address is [DHCP ON]. NOTE: •... -
Page 55: Handling Of The Address For Operation Via A Browser
IP address of the projector has been set in the “HOSTS” file of the computer being used. Example 1: When the host name of the projector has been set to “pj.nec.co.jp”, access is gained to the network setting by specifying http://pj.nec.co.jp/index.html... - Page 56 3. Convenient Features PICTURE: Controls the video adjustment of the projector. BRIGHTNESS ▲ ���� Increases the brightness adjustment value� BRIGHTNESS ▼ ���� Decreases the brightness adjustment value� CONTRAST ▲ �������� Increases the contrast adjustment value� CONTRAST ▼ �������� Decreases the contrast adjustment value� COLOR ▲...
-
Page 57: Network Settings
3. Convenient Features NETWORK SETTINGS • SETTINGS WIRED or WIRELESS SETTING Set for wired LAN or for wireless LAN. APPLY Apply your settings to wired LAN or wireless LAN. DHCP ON Automatically assign IP address, subnet mask, and gateway to the projector from your DHCP server. - Page 58 3. Convenient Features PROFILE 1/PROFILE 2 Two settings can be set for wireless LAN connection. Select PROFILE 1 or PROFILE SSID Enter an identifier (SSID) for wireless LAN. Communication can be done only with equipment whose SSID matches SSID for your wireless LAN. SITE SURVEY Displays a list of available SSIDs for wireless LAN on site.
- Page 59 Sample of a message to be sent from the projector: The lamp and filters are at the end of its usable life. Please replace the lamp and filters. Projector Name: NEC Projector Lamp Hours Used: 100 [H] SENDER’S ADDRESS Enter sender’s address.
- Page 60 3. Convenient Features • NETWORK SERVICE PJLink PASSWORD Set a password for PJLink*. A password must be 32 characters or less. Do not forget your password. However, if you forget your password, consult with your dealer. HTTP PASSWORD Set a password for HTTP server. A password must be 10 characters or less. AMX BEACON Turn on or off for detection from AMX Device Discovery when connecting to the network supported by AMX’s NetLinx control system.
-
Page 61: ❿ Projecting Your Computer's Screen Image From The Projector Via A Network
3. Convenient Features ❿ Projecting Your Computer’s Screen Image from the Projector via a Network [NETWORK PROJECTOR] (not supported by PE501X) By selecting the projector connected to the same network as that of your PC, the PC screen image can be projected to the screen via network. - Page 62 3. Convenient Features 2. Press the SELECT ▼ or ▲ button to select [NETWORK] and press the ENTER button. In the screen, the [APPLICATION MENU] menu is displayed. 3. From the [APPLICATION MENU] menu, select [NETWORK PROJECTOR]. The [PROJECTOR NAME/DISPLAY RESOLUTION/PASSWORD/URL] will be displayed.
- Page 63 3. Convenient Features Projecting the Image with Network Projector 1. Click [Start] from the desktop of Windows 7. 2. Click [All Programs]. 3. Click [Accessories]. 4. Click [Connect to a Network Projector]. When the [Permission Connect to a Network Projector] window appears,click [Yes.]. The “Connect to a Network Projector”...
- Page 64 3. Convenient Features 7. Input the password to the password input box displayed by the operation at step 3 on page 50. 8. Click [Connect]. The network projector function works and the screen of Windows 7 is projected from the projector. •...
-
Page 65: ⓫ Using The Projector To Operate Your Computer Via A Network
3. Convenient Features ⓫ Using the Projector to Operate Your Computer via a Network [REMOTE DESKTOP] (not supported by PE501X) • By selecting the PC connected to the same network as that of the projector, the PC screen image can be projected to the screen via network. - Page 66 3. Convenient Features Setting the password to the user account of Windows 7 TIP: If a password has been set for an account, the steps 1 to 9 can be skipped. 1. Click [Start] from the desktop of Windows 7. 2.
- Page 67 3. Convenient Features 4. Click [View status] displayed in blue on the right of [Local Area Connection] in the window. The [Local Area Connection Status] window appears. 5. Click [Details...]. Write down the value for “IPv4 IP Address” (xxx.xxx.xxx.xxx) displayed. 6.
- Page 68 3. Convenient Features 2. Press the SELECT ▼ or ▲ button to select [NETWORK] and press the ENTER button. The [APPLICATION MENU] menu will be displayed. 3. From the [APPLICATION MENU] menu, use the wireless keyboard to select [REMOTE DESKTOP CONNEC- TION].
- Page 69 3. Convenient Features Exiting the Remote Desktop 1. Operate the wireless keyboard to click [Start] from the desktop screen projected by the projector. 2. Click [X] on the right of the start menu. The remote desktop function is stopped. 3. Press the SOURCE button of the projector to select an input terminal other than [NETWORK]. When using the remote control, press a button other than the NETWORK button.
-
Page 70: ⓬ Connecting Your Microphone
3. Convenient Features ⓬ Connecting Your Microphone Connecting a commercially available dynamic microphone to the MIC input jack allows you to output your mic sound from the built-in speaker. Sound from COMPUTER, VIDEO, S-VIDEO, and HDMI audio inputs or sound of VIEWER/NETWORK input will be heard from the speaker with your microphone voice. -
Page 71: Using The Viewer
4. Using the Viewer (not supported by PE501X) ❶ What you can do with the Viewer The Viewer feature allows you to view slides or movie files stored on a USB memory on the projector, or a shared folder in a computer connected to the network. The Viewer has the following features. -
Page 72: Supported Usb Memory Devices
4. Using the Viewer NOTE: • Movie files converted by using the video/audio format which is not supported by this projector cannot be played back. In this case, there will be no icon to show that playback is not possible. •... - Page 73 4. Using the Viewer Notices on shared folder and media server • Files from a shared folder or media server may not be projected if security or antivirus software is installed on your computer. • Open the following firewall ports: - Media server Port number Protocol...
-
Page 74: ❷ Preparing Presentation Materials
4. Using the Viewer ❷ Preparing presentation materials 1. Create your presentation materials and save them in a supported file format to your computer. • See page for supported file formats. • Make sure that PowerPoint file is displayed on the Viewer before giving your real presentation. •... -
Page 75: ❸ Projecting Images Stored In A Usb Memory Device
4. Using the Viewer ❸ Projecting images stored in a USB memory device This section explains the basic operation of the Viewer. The explanation provides the operational procedure when the Viewer toolbar is set to the factory default. Preparation: Before starting the Viewer, store images to the USB memory using your computer. Starting the Viewer 1. - Page 76 4. Using the Viewer 4. Press the ▶ button to select “USB1” and press the ENTER button. The “USB1” thumbnail screen will be displayed. TIP: • For more information about thumbnail screen, see page 71. 5. Use the ▲▼◀ or ▶ button to select an icon. •...
- Page 77 4. Using the Viewer • Movie file The movie file will start playing. After finishing the playback, the screen will turn to black. Press the EXIT button to return to the thumbnail screen. • Pressing the ENTER button will display the movie’s control bar with which you can pause or fastforward and some other operations.
- Page 78 4. Using the Viewer • Adobe PDF file The first page will be displayed. • The PDF file will fill the width of the screen. Pressing the ▼ or ▲ button will scroll the screen down or The PAGE ▼ or PAGE ▲ button will move the screen one page down or up.
- Page 79 • Viewer PPT Converter 3.0 can be downloaded from our XXXX Motors website. URL: http://www.nec-display.com/dl/en/index.html • To select slideshow of index files, open the [PRESENTA- TION] folder in the DRIVE LIST screen. However, index files will not appear. Only folders and JPEG files will appear.
-
Page 80: Exiting The Viewer
4. Using the Viewer Exiting the Viewer 1. Press the SOURCE button to select a source other than [VIEWER]. A press of the SOURCE button will display the source select screen. A few more presses of the SOURCE button will display another source. -
Page 81: Names And Functions Of Viewer Screen
4. Using the Viewer Names and functions of Viewer screen The Viewer has three screens: Drive list screen, Thumbnail screen, and Slide screen. Cursor (yellow) Cursor (yellow) Scroll bar Menu Menu Folder icon [Drive list screen] [Thumbnail screen] Path information Drive information/File information Operation button guide Menu guide... - Page 82 4. Using the Viewer Functions Name Description REFRESH Displays additional media servers in the drive list screen. OPTIONS Opens the OPTIONS menu. SLIDE SETTING Sets up slides. (→ page 74) MOVIE SETTING Sets up movie files. (→ page 75) AUTO PLAY SETTING Sets up auto play. (→ page 75) SHAREED FOLDER Sets up a shared folder.
- Page 83 4. Using the Viewer • Thumbnail screen Displays a list of folders, thumbnails, and icons in the drive selected on the drive list screen. Menu operation • Use the ▼ or ▲ button to move the cursor up or down. Select the menu item and press the ENTER button to display the menu or setting screen.
- Page 84 4. Using the Viewer • Slide screen (still image/movie) Plays a file selected from a list of thumbnails or icons. • For operating a Microsoft PowerPoint file and Adobe PDF file, see page 65, 66. Control bar operation • The control bar will be displayed only when a still image (or index file) and a movie file is selected. •...
- Page 85 4. Using the Viewer Functions of movie control bar Name Description PREV Goes back to the beginning of a movie file. • Goes back to the beginning of the previous movie file if executed immediately after being started playing. Fast-rewinds a movie file for about 7 seconds. PLAY/PAUSE PLAY Plays a movie file.
-
Page 86: Viewer Option Settings
4. Using the Viewer Viewer option settings • SLIDE SETTING Sets still images or slides. Name Options Description SCREEN SIZE BEST FIT Displays the image with its aspect ratio in the projector’s display- able maximum resolution. ACTUAL SIZE Displays the image in its actual size. PLAY MODE MANUAL Selects manual play. - Page 87 4. Using the Viewer • MOVIE SETTING Sets the functions for a movie file. Name Options Description SCREEN SIZE BEST FIT Displays the image with its aspect ratio in the projector’s display- able maximum resolution. ACTUAL SIZE Displays the image in its actual size. REPEAT Turns on or off the repeat function.
- Page 88 4. Using the Viewer • SORT SETTING Sets the order of displaying thumbnails or slides. Name Options Description SORT NAME (ABC..) Displays the files alphabetically by name in ascending order. NAME (ZYX..) Displays the files alphabetically by name in descending order. EXT.
-
Page 89: ❹ Projecting Data From Shared Folder
4. Using the Viewer ❹ Projecting data from shared folder Shared folder Wireless LAN Projector Shared folder Preparation For projector: Connect the projector to the network. For computer: Place files to be projected in a shared folder and note the folder’s path. Memorize or write down the path for later use. - Page 90 4. Using the Viewer 2. Displays the [OPTIONS] menu. Press the ▼ button to select the (OPTIONS) icon and press the ENTER button. • When the OPTIONS menu is displayed, the drive list will not be displayed. 3. Display the [SHARED FOLDER] screen. Press the ▼...
- Page 91 4. Using the Viewer 6. Exit the setting. Press the ▼ button to select [OK] and press the ENTER button. This will close the [SHARED FOLDER] screen. • If an error message appear, your settings are not correct. Try again.
-
Page 92: Disconnecting The Shared Folder From The Projector
4. Using the Viewer Disconnecting the shared folder from the projector • Disable the number of a shared folder you wish to disconnect Press the ▼ button to select [ENABLE] and press the ENTER button to clear it. NOTE: • When a PowerPoint file or PDF file is displayed, do not disconnect your LAN cable. If doing so, the Viewer will not work. TIP: •... -
Page 93: ❺ Projecting Data From Media Server
4. Using the Viewer ❺ Projecting data from media server Media server Wireless LAN Media server Projector Media server Preparation For projector: Connect the projector to the network. For computer: Prepare image files or movie files to be projected, and set up “Media Sharing” in Windows Media Player 11 or Windows Media Player 12. - Page 94 4. Using the Viewer 3. Select “Share my media” check box, and then select OK. A list of accessible devices will be displayed. 4. Select “P501 Series” and then “Allow”. A check mark will be added to the “P501 Series” icon. •...
-
Page 95: Setting Up "Media Sharing" In Windows Media Player 12
4. Using the Viewer Setting up “Media Sharing” in Windows Media Player 12 1. Start Windows Media Player 12. 2. Select “Stream”, and then select “Automatically allow devices to play my media”. The “Allow All Media Devices” windows will be displayed. 3. -
Page 96: Connecting The Projector To The Media Server
4. Using the Viewer Connecting the projector to the media server Press the VIEWER button on the remote control. The VIEWER will start. • Another way to start the VIEWER is to press the SOURCE button a few times on the projector cabinet. (→ page •... -
Page 97: Disconnecting The Projector From The Media Server
4. Using the Viewer Disconnecting the projector from the media server 1. Display the OPTIONS menu. Press the ▼ button to select the [OPTIONS] icon and select the ENTER button. 2. Display the MEDIA SERVER setting screen. Press the ▼ button to select the MEDIA SERVER icon and press the ENTER button. 3. -
Page 98: ❻ Restrictions On Displaying Files
4. Using the Viewer ❻ Restrictions on displaying files The Viewer allows you to give a simplified display of a PowerPoint file or PDF file. Due to simplified display, however, actual display may be different from the one on your computer application pro- gram. -
Page 99: Using On-Screen Menu
5. Using On-Screen Menu ❶ Using the Menus NOTE: The on-screen menu may not be displayed correctly while interlaced motion video image is projected. 1. Press the MENU button on the remote control or the projector cabinet to display the menu. NOTE: The commands such as ENTER, EXIT, ▲▼, ◀▶... -
Page 100: ❷ Menu Elements
5. Using On-Screen Menu ❷ Menu Elements Slide bar Solid triangle Available buttons Source Highlight Radio button Wireless symbol ECO mode symbol Off Timer remaining High Altitude symbol time Thermometer symbol Key Lock symbol Menu windows or dialog boxes typically have the following elements: Highlight �����������������������������Indicates the selected menu or item�... -
Page 101: ❸ List Of Menu Items
5. Using On-Screen Menu ❸ List of Menu Items Basic menu items are indicated by shaded area� Some menu items are not available depending on the input source. Menu Item Default Options COMPUTER HDMI1 HDMI2 VIDEO SOURCE S-VIDEO VIEWER (not supported by PE501X) NETWORK (not supported by PE501X) USB DISPLAY PRESET... - Page 102 5. Using On-Screen Menu Menu Item Default Options COLOR SELECT COLOR COLOR, MONOCHROME SOURCE DISPLAY OFF, ON ID DISPLAY OFF, ON MENU ECO MESSAGE OFF, ON DISPLAY TIME AUTO 45 SEC MANUAL, AUTO 5 SEC, AUTO 15 SEC, AUTO 45 SEC BACKGROUND BLUE BLUE, BLACK, LOGO...
- Page 103 5. Using On-Screen Menu Menu Item Default Options LAMP LIFE REMAINING LAMP HOURS USED USAGE TIME FILTER HOURS USED TOTAL CARBON SAVINGS TOTAL COST SAVINGS SOURCE NAME SOURCE INDEX HORIZONTAL FREQUENCY SOURCE(1) VERTICAL FREQUENCY SYNC TYPE SYNC POLARITY SCAN TYPE SIGNAL TYPE VIDEO TYPE SOURCE(2)
-
Page 104: ❹ Menu Descriptions & Functions [Source]
5. Using On-Screen Menu ❹ Menu Descriptions & Functions [SOURCE] COMPUTER Selects the computer connected to your COMPUTER input connector signal. NOTE: When the component input signal is connected to the COMPUTER IN connector, select [COMPUTER]. HDMI1 and 2 Selects the HDMI compatible equipment connected to your HDMI1 or 2 IN connector. VIDEO Selects what is connected to your VIDEO input-VCR, DVD player or document camera. -
Page 105: ❺ Menu Descriptions & Functions [Adjust]
5. Using On-Screen Menu ❺ Menu Descriptions & Functions [ADJUST] [PICTURE] [PRESET] This function allows you to select optimized settings for your projected image. You can adjust neutral tint for yellow, cyan or magenta. There are seven factory presets optimized for various types of images. You can also use [DETAIL SETTINGS] to set user adjustable settings to customize each gamma or color. - Page 106 5. Using On-Screen Menu [GENERAL] Storing Your Customized Settings [REFERENCE] This function allows you to store your customized settings in [PRESET 1] to [PRESET 7]. First, select a base preset mode from [REFERENCE], then set [GAMMA CORRECTION] and [COLOR TEMPERA- TURE].
- Page 107 5. Using On-Screen Menu Enhancing the Color [COLOR ENHANCEMENT] This function allows you to enhance the color of image. OFF ������������������������ Does not enhance the color ON ������������������������� Enhances the color� NOTE: This function is available only when [PRESENTATION] is selected [REFERENCE]. Adjusting White Balance [WHITE BALANCE] This allows you to adjust the white balance.
-
Page 108: [Image Options]
5. Using On-Screen Menu [IMAGE OPTIONS] Adjusting Clock and Phase [CLOCK/PHASE] This allows you to manually adjust CLOCK and PHASE. CLOCK ������������������� Use this item to fine tune the computer image or to remove any vertical banding that might appear� This function adjusts the clock frequencies that eliminate the horizontal banding in the image�... - Page 109 5. Using On-Screen Menu Adjusting Horizontal/Vertical Position [HORIZONTAL/VERTICAL] Adjusts the image location horizontally and vertically. NOTE: • The [HORIZONTAL] and [VERTICAL] items are not available for VIDEO, S-VIDEO, HDMI, VIEWER, NETWORK, and USB DIS- PLAY. • The HORIZONTAL and VERTICAL cannot be adjusted depending on the signal. - An image can be distorted during the adjustment of [CLOCK] and [PHASE].
- Page 110 5. Using On-Screen Menu Selecting Aspect Ratio [ASPECT RATIO] The term “aspect ratio” refers to the ratio of width to height of a projected image. The projector automatically determines the incoming signal and displays it in its appropriate aspect ratio. •...
- Page 111 5. Using On-Screen Menu Sample image when the appropriate aspect ratio is automatically determined P501X/P451X/PE501X [Computer signal] Aspect ratio of incoming signal 16:9 15:9 16:10 Sample image when the appro- priate aspect ratio is automati- cally determined [Video signal] Aspect ratio of incoming signal Letterbox Squeeze Sample image when the as-...
-
Page 112: [Audio]
5. Using On-Screen Menu [AUDIO] Turning Up or Down Sound Adjusts the volume of the projector speaker and AUDIO OUT (Stereo Mini Jack). TIP: • When no menus appear, the ◀ and ▶ buttons on the projector cabinet and the VOL. +/− buttons on the remote control work as a volume control. -
Page 113: ❻ Menu Descriptions & Functions [Setup]
5. Using On-Screen Menu ❻ Menu Descriptions & Functions [SETUP] [GENERAL] Correcting Keystone Distortion Manually [KEYSTONE] You can correct horizontal or vertical keystone, pincushion, or cornerstone distortion manually. NOTE: • Some items are not available when one item is activated. Unavailable items are shown in grey. •... - Page 114 5. Using On-Screen Menu Using the Wall Color Correction [WALL COLOR] This function allows for quick adaptive color correction in applications where the screen material is not white. NOTE: Selecting [WHITEBOARD] reduces lamp brightness. Setting Eco Mode [ECO MODE] The ECO MODE increases lamp life, while lowering power consumption and cutting down on CO emissions.
-
Page 115: [Menu]
5. Using On-Screen Menu Setting Closed Caption [CLOSED CAPTION] This option sets several closed caption modes that allow text to be superimposed on the projected image of Video or S-Video. OFF ������������������������ This exits the closed caption mode� CAPTION 1-4 ��������� Text is superimposed� TEXT 1-4 ����������������... - Page 116 5. Using On-Screen Menu Turning ON/OFF Control ID [ID DISPLAY] ID DISPLAY ����������� This option turns on or off the ID number which is displayed when the ID SET button on the remote control is pressed� Turning On / Off Eco Message [ECO MESSAGE] This option turns on or off the following messages when the projector is turned on.
-
Page 117: [Installation]
5. Using On-Screen Menu [INSTALLATION] Selecting Projector Orientation [ORIENTATION] This reorients your image for your type of projection. The options are: desktop front projection, ceiling rear projection, desktop rear projection, and ceiling front projection. DESKTOP FRONT CEILING REAR DESKTOP REAR CEILING FRONT Disabling the Cabinet Buttons [CONTROL PANEL LOCK] This option turns on or off the CONTROL PANEL LOCK function. - Page 118 5. Using On-Screen Menu Selecting Communication Speed [COMMUNICATION SPEED] This feature sets the baud rate of the PC Control port (D-Sub 9P). It supports data rates from 4800 to 38400 bps. The default is 38400 bps. Select the appropriate baud rate for your equipment to be connected (depending on the equip- ment, a lower baud rate may be recommended for long cable runs).
-
Page 119: [Options(1)]
5. Using On-Screen Menu 4. Release the ID SET button. The updated CONTROL ID screen will be displayed. NOTE: • The IDs can be cleared in a few days after the batteries are run down or removed. • Accidentally pressing any one of the buttons of the remote control will clear currently specified ID with batteries removed. - Page 120 5. Using On-Screen Menu NOTE: • It is recommended that you select High speed mode if you use the projector non-stop for consecutive days. • Set [FAN MODE] to [HIGH ALTITUDE] when using the projector at altitudes approximately 5500 feet/1700 meters or higher. •...
- Page 121 5. Using On-Screen Menu Setting HDMI1/2 [HDMI SETTINGS] Make the settings for each video level when connecting HDMI equipment such as a DVD player. VIDEO LEVEL ��������� Select [AUTO] to automatically detect video level� If automatic detection may not work well, select [NOR- MAL] to disable the [ENHANCED] feature of your HDMI equipment or select [ENHANCED] to improve image contrast and increase detail in the dark areas�...
-
Page 122: [Options(2)]
5. Using On-Screen Menu [OPTIONS(2)] Selecting Power-saving in [STANDBY MODE] The projector has three standby modes: [NORMAL], [POWER-SAVING], and [NETWORK STANDBY]. The POWER-SAVING mode is the mode that allows you to put the projector in the power-saving condition which consumes less power than the NORMAL mode. NORMAL ����������������... - Page 123 5. Using On-Screen Menu Turning On the Projector By Applying Computer Signal [AUTO POWER ON(COMP.)] When the projector is in Standby mode, applying a computer signal from a computer connected to the COMPUTER IN input will power on the projector and simultaneously project the computer’s image. This functionality eliminates the need to always use the POWER button on the remote control or the projector cabinet to power on the projector.
- Page 124 5. Using On-Screen Menu Setting carbon footprint factor [CARBON CONVERT] Adjusts the carbon footprint factor in the carbon saving calculation. The initial setting is 0.505[kg-CO2/kWh] based on the CO Emissions from Fuel Combustion (2008 Edition) published by OECD. Selecting your currency [CURRENCY] Displays electricity pricing (available in 4 currency units).
-
Page 125: ❼ Menu Descriptions & Functions [Info.]
5. Using On-Screen Menu ❼ Menu Descriptions & Functions [INFO.] Displays the status of the current signal and lamp usage. This item has eight pages. The information included is as follows: TIP: Pressing the HELP button on the remote control will show the [INFO.] menu items. [USAGE TIME] [LAMP LIFE REMAINING] (%)* [LAMP HOURS USED] (H) -
Page 126: [Source(1)]
5. Using On-Screen Menu [SOURCE(1)] [SOURCE NAME] [SOURCE INDEX] [HORIZONTAL FREQUENCY] [VERTICAL FREQUENCY] [SYNC TYPE] [SYNC POLARITY] [SCAN TYPE] [SOURCE(2)] [SIGNAL TYPE] [VIDEO TYPE] [BIT DEPTH] [VIDEO LEVEL] [WIRED LAN] (not supported by PE501X) [IP ADDRESS] [SUBNET MASK] [GATEWAY] [MAC ADDRESS]... -
Page 127: [Wireless Lan] (Not Supported By Pe501X)
5. Using On-Screen Menu [WIRELESS LAN] (not supported by PE501X) [IP ADDRESS] [SUBNET MASK] [GATEWAY] [MAC ADDRESS] [SSID] [NETWORK TYPE] [WEP/WPA] [CHANNEL] [SIGNAL LEVEL] [VERSION(1)] [FIRMWARE] Version [DATA] Version [VERSION(2)] (not supported by PE501X) [FIRMWARE2] Version... -
Page 128: [Others]
5. Using On-Screen Menu [OTHERS] [PROJECTOR NAME] [MODEL NO.] [SERIAL NUMBER] [LAN UNIT TYPE] [CONTROL ID] (when [CONTROL ID] is set) -
Page 129: ❽ Menu Descriptions & Functions [Reset]
5. Using On-Screen Menu ❽ Menu Descriptions & Functions [RESET] Returning to Factory Default [RESET] The RESET feature allows you to change adjustments and settings to the factory preset for a (all) source (s) except the following: [CURRENT SIGNAL] Resets the adjustments for the current signal to the factory preset levels. The items that can be reset are: [PRESET], [CONTRAST], [BRIGHTNESS], [COLOR], [HUE], [SHARPNESS], [ASPECT RATIO], [HORIZONTAL], [VERTICAL], [CLOCK], [PHASE], and [OVERSCAN]. -
Page 130: ❾ Application Menu (Not Supported By Pe501X)
The application menu allows you to set up the User Supportware, Network Settings (NETWORK SETTINGS) and Tools (TOOLS). The User Supportware is contained on the supplied NEC Projector CD-ROM. In [ADMINISTRATOR MODE], either [ADVANCED] menu or [BASIC] menu can be selected. (→ page 136) The [BASIC] menu contains minimum essentials of menus and commands. -
Page 131: Network Projector
5. Using On-Screen Menu NETWORK PROJECTOR This shows information for projector name, resolution, and network (wired/wireless) which are required to use Network Projector. Use this information to set up for your computer. REMOTE DESKTOP CONNECTION This allows you to set up for computer name entry and effects for Remote Desktop. NOTE: •... -
Page 132: Network Settings
The [EASY CONNECTION] is a mode that can abbreviate the troublesome LAN settings when using the Image Express Utility and connecting the PC and projector via a wireless LAN. The Image Express Utility Lite and Image Express Utility 2.0 are contained on the supplied NEC Projector CD- ROM. - Page 133 5. Using On-Screen Menu WIRED LAN or WIRELESS LAN (ADVANCED menu only) PROFILES • Up to two settings for the LAN port or USB wireless LAN unit — can be stored in memory of the projector. Total of four settings can be stored.
- Page 134 5. Using On-Screen Menu • When selecting [WPS], the network will be connected by using settings stored automatically with the WPS function. Selecting [WPS] will allow the projector to access the network by using the settings the WPS function automatically stored. DHCP Place a check mark to automatically assign an IP address to the —...
- Page 135 5. Using On-Screen Menu SITE SURVEY Displays a list of available SSIDs for wireless LAN on site. Select — an SSID which you can access. To select an SSID, highlight [SSID] and use the SELECT → to select [OK] and press the ENTER button. �����������������������...
- Page 136 5. Using On-Screen Menu When [WEP(64bit)] or [WEP(128bit)] is selected for [SECURITY TYPE] KEY SELECT Selects one WEP key from the four keys below. KEY1, KEY2, KEY3, Enter a WEP key. KEY4 • Maximum number of characters Option Alphanumeric (ASCII) Hexadecimal (HEX) WEP 64bit WEP 128bit...
- Page 137 5. Using On-Screen Menu [AUTHENTICATION] (required for wireless only) Setting is required for using WPA-EAP or WPA2-EAP. Preparation before setting Select a wireless LAN compliant WPA-EAP or WPA2-EAP authentication and install a digital certificate on the projec- tor. 1. Set [DATE AND TIME] on the projector. (→ page 140) 2.
- Page 138 5. Using On-Screen Menu 4. Select [SITE SURVEY] and press the ENTER button. The “SSID” list will be displayed. 5. Select a connecting SSID, and then select [OK]. Finally press the ENTER button. • Select the SSID for which WPA-PSK or WPA2-PSK is set. •...
- Page 139 5. Using On-Screen Menu 11.Select the [AUTHENTICATION] tab. The [AUTHENTICATION] page will be displayed. Select either [EAP-TLS] or [PEAP-MSCHAPv2] for [EAP TYPE]. The setting items vary depending on the EAP type. See the table below. EAP Type Setting Item Note EAP-TLS User Name 1 character or more and 32 characters or...
- Page 140 5. Using On-Screen Menu 13.Select [CLIENT CERTIFICATE] and press the ENTER button. A list of files ([FILES] screen) will be displayed. • For operating the [FILES] screen, see “4. Using the Viewer” in the “User’s Manual” (PDF). • To return to the [AUTHENTICATION] page, press the EXIT button. NOTE: Installing a digital certificate You can install each digital certificate (client certificate and CA certificate) for [PROFILE 1 (or 2)] on a file-by-file basis.
- Page 141 5. Using On-Screen Menu 17.On the [FILES] screen, select a digital certificate (DER format file) saved in your USB memory device and press the ENTER button. • Select your root CA certificate here. The selected digital certificate will be installed on the projector. 18.After completing required settings, select [OK] and press the ENTER button.
- Page 142 5. Using On-Screen Menu 15.After completing setting a user name, select the [PASSWORD] field and press the ENTER button. The character entry screen (software keyboard) will be displayed. Set a password. • A password must be 32 characters or less. 16.After completing setting the password, select [CA CERTIFICATE] field and press the ENTER button.
- Page 143 5. Using On-Screen Menu 18.After completing required settings, select [OK] and press the ENTER button. The [WIRELESS] page will be returned. 19.Select [RECONNECT] and press the ENTER button. 20.Select [OK] and press the ENTER button. This will complete setting [PEAP-MSCHAPv2] for [EAP TYPE] in [WPA-EAP] or [WPA2-EAP]. TIP: Clearing the digital certificate that is installed on the projector To clear the digital certificate installed on the projector, follow the steps below.
- Page 144 5. Using On-Screen Menu When the wireless LAN access point connected to the projector supports WPS (Wi-Fi Protected Setup™), you can use PIN method or push button method to set up the wireless LAN for the projector. PIN TYPE Set a 4-digit or 8 digit-PIN code of WPS for your access point to complete setting for the SSID security.
- Page 145 5. Using On-Screen Menu PROJECTOR NAME (ADVANCED menu only) PROJECTOR NAME Set a unique projector name. Up to 16 alphanu- meric characters and symbols DOMAIN (ADVANCED menu only) Set a host name and domain name of the projector. HOST NAME Set a host name of the projector.
- Page 146 Sample of a message to be sent from the projector: The lamp and filters are at the end of its usable life. Please replace the lamp and filters. Projector Name: NEC Projector Lamp Hours Used: 100 [H] HOST NAME Type in a host name.
- Page 147 5. Using On-Screen Menu NETWORK SERVICE (ADVANCED menu only) HTTP SERVER Set a password for your HTTP server. Up to 10 alphanumeric characters PJLink This option allows you to set a password when you use the Up to 32 alphanumeric PJLink feature.
-
Page 148: Tools
5. Using On-Screen Menu TOOLS ADMINISTRATOR MODE This allows you to select MENU MODE, save settings, and set a password for the administrator mode. MENU MODE Select either [BASIC] or [ADVANCED] menu. — (→ page 89) Placing a check mark will not save your projector settings� NOT SAVE SETTING —... - Page 149 5. Using On-Screen Menu PROGRAM TIMER This option turns on/off the projector and changes video signals, and selects ECO mode automatically at a specified time. NOTE: • Before using [PROGRAM TIMER], make sure that the [DATE AND TIME] feature is set. (→ page 140) •...
- Page 150 5. Using On-Screen Menu FRI]�To execute the program in everyday basis, select [EVERYDAY]� TIME ���������������������� Set the time to execute the program� Enter time in 24-hour format� FUNCTION ������������� Select a function to be executed� Selecting [POWER] will allow you to turn on or off the projector by setting [ADVANCED SETTINGS]�...
- Page 151 5. Using On-Screen Menu Activating the program timer 1. Select [ENABLE] on the [PROGRAM TIMER] screen and press the ENTER button. The [ENABLE] will be activated. 2. Select [OK] and press the ENTER button. The [PROGRAM TIMER] screen will be changed to the [TOOL] screen. NOTE: •...
-
Page 152: Date And Time
5. Using On-Screen Menu DATE AND TIME You can set the current time, month, date, and year. NOTE: The projector has a built-in clock. The clock will keep working for about 2 weeks after the main power is turned off. If the main power is off for 2 weeks or more, the built-in clock will cease. -
Page 153: Installation And Connections
6. Installation and Connections This section describes how to set up your projector and how to connect video and audio sources. Your projector is simple to set up and use. But before you get started, you must first: ① Set up a screen and the projector. ②... - Page 154 6. Installation and Connections [P451W/P401W] The further your projector is from the screen or wall, the larger the image. The minimum size the image can be is approximately 25" (0.64 m) measured diagonally when the projector is roughly 37 inches (0.9 m) from the wall or screen.
-
Page 155: Throw Distance And Screen Size
6. Installation and Connections Throw Distance and Screen Size The following shows the proper relative positions of the projector and screen. Refer to the table to determine the position of installation. Distance Chart B = Vertical distance between lens center and screen center C = Throw distance D = Vertical distance between lens center and... -
Page 156: Reflecting The Image
Contact your NEC dealer if you need a mirror * Do not attempt to install the projector yourself. system. If you’re using a mirror system and your image is inverted, use the MENU and ▲▼◀▶... -
Page 157: ❷ Making Connections
Usually, the combination of the “Fn” key along with one of the 12 function keys gets the external display to come on or off. For example, NEC laptops use Fn + F3, while Dell laptops use Fn + F8 key combinations to toggle through external display selections. - Page 158 USB DISPLAY (USB DISPLAY) NOTE: The projector is not compatible with video decoded outputs of the NEC ISS-6020 switcher. NOTE: An image may not be displayed correctly when a Video or S-Video source is played back via a commercially available scan converter.
-
Page 159: Connecting An External Monitor
6. Installation and Connections Connecting an External Monitor Computer cable (VGA) (not supplied) Stereo mini-plug audio cable (not supplied) Computer cable (VGA) (supplied) You can connect a separate, external monitor to your projector to simultaneously view on a monitor the computer analog image you’re projecting. -
Page 160: Connecting Your Dvd Player Or Other Av Equipment
6. Installation and Connections Connecting Your DVD Player or Other AV Equipment Connecting Video/S-Video Input S-Video cable (not supplied) Video cable (not supplied) Audio cable (not supplied) Audio equipment Audio cable (not supplied) • Select the source name for its appropriate input connector after turning on the projector. SOURCE button on the projector Input connector Button on the remote control... -
Page 161: Connecting Component Input
6. Installation and Connections Connecting Component Input 15-pin - to - RCA (female) Stereo mini plug - to - RCA audio × 3 cable adapter (ADP- cable (not supplied) CV1E) Audio Equipment Component video RCA × 3 cable (not supplied) DVD player Audio cable (not supplied) A component signal will be automatically displayed. -
Page 162: Connecting Hdmi Input
6. Installation and Connections Connecting HDMI Input You can connect the HDMI output of your DVD player, hard disk player, Blu-ray player, or notebook type PC to the HDMI IN connector of your projector. NOTE: The HDMI 1 IN/HDMI 2 IN connector supports Plug & Play (DDC2B). HDMI cable (not supplied) Use High Speed HDMI Cable. -
Page 163: Connecting To A Wired Lan (Not Supported By Pe501X)
6. Installation and Connections Connecting to a Wired LAN (not supported by PE501X) The projector comes standard with a LAN port (RJ-45) which provides a LAN connection using a LAN cable. To use a LAN connection, you are required to set the LAN on the projector menu. Select [SETUP] → [WIRED LAN]. (→... -
Page 164: Connecting To A Wireless Lan (Optional: Np02Lm Series) (Not Supported By Pe501X)
6. Installation and Connections Connecting to a Wireless LAN (Optional: NP02LM series) (not supported by PE501X) The USB Wireless LAN Unit also provides a wireless LAN connection. To use a wireless LAN connection, you are required to assign an IP address to the projector. Important: •... - Page 165 6. Installation and Connections Prepare a Phillips screw driver beforehand. 1. Press the POWER button to turn off the projector and set it into standby condition, and disconnect the power cord. 2. Remove the USB (LAN) port cover. Loosen the screw securing the port cover. •...
- Page 166 6. Installation and Connections Example of wireless LAN connection (Network Type → Infrastructure) PC with wireless PC with built-in wireless LAN card inserted LAN function USB Wireless LAN Unit Wireless access point Wired LAN Use the HTTP server function to make the settings. (→ page 42) Example of wireless LAN connection (Network Type →...
-
Page 167: Attaching The Optional Cable Cover (Np03Cv)
6. Installation and Connections Attaching the Optional Cable Cover (NP03CV) An optional cable cover (NP03CV) is available for hiding cables. The NP03CV cable cover is designed for use with the P series projectors. CAUTION: • Be sure to tighten the screws after attaching the cable cover. Failure to do so may cause the cable cover to come off and fall, resulting in injury or damage to the cable cover. -
Page 168: Maintenance
7. Maintenance This section describes the simple maintenance procedures you should follow to clean the filters, the lens, the cabinet, and to replace the lamp and the filters. ❶ Cleaning the Filters The air-filter sponge keeps dust and dirt from getting inside the projector and should be frequently cleaned. If the filter is dirty or clogged, your projector may overheat. - Page 169 7. Maintenance (2) Push the left end of each filter and remove the hard two honeycomb filters (large and small). • The large filter cannot be removed by pushing on its right end. 4. Use a vacuum cleaner to vacuum all the dust inside. Get rid of dust in the accordion filter NOTE: •...
- Page 170 7. Maintenance 7. Put the filter unit back to the projector cabinet. Make sure that the filter unit is placed in the correct orienta- tion. 8. Put the filter cover back to the projector cabinet. Insert two catches of the top side of the filter cover into the groove of the cabinet, and push the buttons on the left and right to close the filter cover.
-
Page 171: ❷ Cleaning The Lens
7. Maintenance ❷ Cleaning the Lens • Turn off the projector before cleaning. • The projector has a plastic lens. Use a commercially available plastic lens cleaner. • Do not scratch or mar the lens surface as a plastic lens is easily scratched. •... -
Page 172: ❹ Replacing The Lamp And The Filters
Do not touch them as the pieces of glass may cause injury. If this happens, contact your NEC dealer for lamp replacement. - Page 173 7. Maintenance To replace the lamp: 1. Remove the lamp cover. (1)Loosen the lamp cover screw • The lamp cover screw is not removable. (2)Push and slide the lamp cover off. 2. Remove the lamp housing. (1)Loosen the two screws securing the lamp housing until the phillips screwdriver goes into a freewheeling condi- tion.
- Page 174 7. Maintenance 3. Install a new lamp housing. (1)Insert a new lamp housing until the lamp housing is plugged into the socket. (2)Push the top center of the lamp housing to secure it. (3)Secure it in place with the two screws. •...
- Page 175 7. Maintenance To replace the filters: Four filters are packaged with the replacement lamp. Honeycomb filter (coarse mesh): Large and small sizes (attached to the outside of the filter unit) Accordion filter (fine mesh): Large and small sizes (attached to the inside of the filter unit) NOTE: •...
- Page 176 7. Maintenance (2) Push the left end of each filter and remove the hard two honeycomb filters (large and small). • The large filter cannot be removed by pushing on its right end. 4. Remove dust from the filter unit and the filter cover. Clean both outside and inside.
-
Page 177: User Supportware
If the message “There is not enough free space on destination” is displayed, free up enough space (about 100 MB) to install the program. 1 Insert the accompanying NEC Projector CD-ROM into your CD-ROM drive. The menu window will be displayed. - Page 178 8. User Supportware 2 Click a software program you wish to install on the menu window. The installation will start. • Follow the instructions on the installer screens to complete the installation. TIP: Uninstalling a Software Program Preparation: Exit the software program before uninstalling. To uninstall the software program, the Windows user account must have “Administrator”...
- Page 179 • The configuration file of Image Express Utility Lite is located in “/Users/<your user name>/Library/Preferences/ jp.necds.Image-Express-Utility-Lite.plist”. • The configuration file of PC Control Utility Pro 5 is located in “/Users/<your user name>/Application Data/NEC Projector User Supportware/PC Control Utility Pro 5”.
-
Page 180: ❷ Using The Computer Cable (Vga) To Operate The Projector (Virtual Remote Tool)
• Virtual Remote Tool can be used with a LAN and a serial connection. • For update information on Virtual Remote Tool, visit our website: http://www.nec-display.com/dl/en/index.html NOTE: • When [COMPUTER] is selected from your source selection, the Virtual Remote screen or the toolbar will be displayed as well as your computer screen. - Page 181 • Exit all running programs before installing Virtual Remote Tool. If another program is running, the installation may not be com- pleted. 1 Insert the accompanying NEC Projector CD-ROM into your CD-ROM drive. The menu window will be displayed. TIP: If the menu window will not be displayed, try the following procedure.
- Page 182 8. User Supportware TIP: Uninstalling Software Program Preparation: Exit the software program before uninstalling. To uninstall the software program, the Windows user account must have “Administrator” privilege (Windows 8, Windows 7 and Windows Vista) or “Computer Administrator” privilege (Windows XP). •...
- Page 183 Windows Desktop. Start from the Start menu • Click [Start] → [All Programs] or [Programs] → [NEC Projector User Supportware] → [Virtual Remote Tool] → [Virtual Remote Tool]. When Virtual Remote Tool starts for the first time, “Easy Setup” window will be displayed.
- Page 184 The Help screen will be displayed. • Displaying the help file using the Start Menu. 1. Click “Start”.“All programs” or “Programs”.“NEC Projector User Supportware”.“Virtual Remote Tool”. and then “Virtual Remote Tool Help” in this order. The Help screen will be displayed.
-
Page 185: (Image Express Utility Lite) (Not Supported By Pe501X)
Projector over a LAN (Image Express Utility Lite) (not supported by PE501X) Using Image Express Utility Lite contained on the supplied NEC Projector CD-ROM allows you to send the computer’s screen image to the projector over a USB cable or a wired or wireless LAN. - Page 186 If the message “There is not enough free space on destination” is displayed, free up enough space (about 100 MB) to install the program. 1. Insert the accompanying NEC Projector CD-ROM into your CD-ROM drive. The menu window will be displayed.
- Page 187 HTTP Browser” (→ page 42) Step 3: Start Image Express Utility Lite. 1. On Windows, click “Start” → “All programs” → “NEC Projector UserSupportware” → “Image Express Utility Lite” → “Image Express Utility Lite”. Image Express Utility Lite will start.
- Page 188 8. User Supportware 5. Operate the control window. (2) (3) (4) (5) (Streaming) Displays the streaming window� Movie files on the PC can be transferred to the projector via the network and played on the projector� Refer to “Movie streaming function” in the help file of Image Express Utility Lite�...
- Page 189 The Help screen will be displayed. • Displaying the help file using the Start Menu. Click “Start” → “All programs” or “Programs” → “NEC Projector User Supportware” → “Image Express Utility Lite” → “Image Express Utility Lite Help”. The Help screen will be displayed.
-
Page 190: Starting Image Express Utility Lite From A Usb Memory Or Sd Card
1. Copy Image Express Utility Lite to removable media. Copy all the folders and files (total size approx. 6MB) from the “IEU_Lite (removable-media)” folder in the supplied NEC Projector CD-ROM to the root directory of your removable media. 2. Insert your removable media into your computer. - Page 191 Using on Mac OS Step 1: Install Image Express Utility Lite for Mac OS on the computer 1. Insert the accompanying NEC Projector CD-ROM in your Mac CD-ROM drive. The CD-ROM icon will be displayed on the desktop. 2. Double-click the CD-ROM icon.
-
Page 192: ❹ Projecting An Image From An Angle
8. User Supportware ❹ Projecting an Image from an Angle (Geometric Correction Tool in Image Express Utility Lite) (not supported by PE501X) The Geometric Correction Tool (GCT) function allows you to correct distortion of images projected even from an angle. What you can do with GCT •... - Page 193 8. User Supportware 3. Use the mouse to click the [ • ] mark of which corner you wish to move. The currently selected [ • ] mark will turn red. (In the above example, Windows screens are omitted for clarification.) 4.
-
Page 194: ❺ Projecting Images From The Projector Over A Lan (Image Express Utility 2.0)
When “Meeting Mode” is used, projected images can be sent and received between two or more computers. • High-speed, high-quality image transmissions based on NEC’s original compression algorithm NEC’s original compression algorithm allows high-quality images to be sent over the network at high speed, from your computer to the projector. •... -
Page 195: Connecting The Projector To A Lan
8. User Supportware • Projected images can be transferred and saved to computers. When “Meeting Mode” is used, projected images can be sent to the computers of all the participants (attendants) of a “Meeting”. The received images can be saved to your computer with a memo (text data) attached. Attendant Attendant Presenter... -
Page 196: Basic Operation Of Image Express Utility 2.0
1 Turn on the power to the projector for which LAN has been set. 2 Click Windows [Start] → [All Programs] → [NEC Projector User Supportware] → [Image Express Utility 2.0] → [Image Express Utility 2.0 ], in that order. - Page 197 8. User Supportware 4 Check( ) the projector to connect and click [Connect]. If the name of the projector to connect is not on the list or if it is hidden, click [Update]. Click Click The screen of your computer will be projected from the projector. At this time, the input signal of the projector will automatically change to “NETWORK”.
- Page 198 8. User Supportware • Stopping or resuming the transmission of images The transmission of the screen of the computer to the projector can be temporarily stopped and then resumed. 1 Click the projector icon ( ) on the Windows taskbar. A pop-up menu will be displayed.
-
Page 199: Holding Conferences
8. User Supportware Holding Conferences • Holding conferences 1 Follow steps 1 through 4 in “Connecting projector” of “Sending Images to Projector” (→ page 184). The screen of your computer will be projected from the projector. • Disclose a file to the participants of the conference. NOTE: To disclose a file to the participants, selection can be made only in folder units. -
Page 200: Participating In Conference
Participating in Conference • Participating in conferences 1 Click Windows [Start] → [All Programs] → [NEC Projector User Supportware] → [Image Express Utility 2.0] → [Image Express Utility 2.0 ], in that order. The “Selection Of Network Connections” window will be displayed. - Page 201 8. User Supportware 3 Click the Meeting Name to participate, and click [Connect]. Click The computer will be connected to the selected conference and the attendant window will be displayed. If the presenter selects “Send to PC And Projector”, the image projected from the projector is displayed in the at- tendant window.
- Page 202 8. User Supportware • Saving received images 1 Click [Memo] in the attendant window. A memo pane will be displayed. Click Memo pane Click 2 Click [Save Image] in the attendant window. The image displayed in the attendant window will be saved. •...
- Page 203 8. User Supportware • Downloading disclosed file 1 Click [File Transfer] in the attendant window. The “File Transfer” window will be opened. Click 2 Select a file to download, and click [Download]. Downloading will begin. The progress of the downloading is displayed at the lower left of the window. 3 When downloading is complete, click [File] in the “File Transfer”...
- Page 204 8. User Supportware • Changing presenter Three types of settings may be made to change the presenter: “Not Approved”, “Approved”, and “Changing Prohibited” (these can be selected only by the presenter). In the following example, “Not Approved” is selected. • Click [Become A Presenter] in the attendant window. You will change from a participant to a presenter.
-
Page 205: ❻ Using The Projector To Operate Your Computer Over A Lan (Desktop Control Utility 1.0) (Not Supported By Pe501X)
Therefore, care must be exercised to prevent any third party from viewing the screen of your computer (important documents), copying files, or turning off the power. NEC assumes no liability for any loss or damages arising from information leak or system failure while you are using Desktop Control Utility 1.0. -
Page 206: Using The Projector To Operate Your Computer's Desktop Screen
8. User Supportware Using the projector to operate your computer’s desktop screen IMPORTANT: • In case of Windows 8/Windows 7/Windows Vista, disable the user account control before using Desktop Control Utility 1.0. Windows Vista has “User Account Control” function to protect the computer. The user account confirmation window may be displayed. - Page 207 8. User Supportware • Operation on computer 1 Click Windows [Start] → [All Programs] → [NEC Projector User Supportware] → [Desktop Control Utility 1.0] → [Desktop Control], in that order. The “Selection Of Network Connections” window is displayed. This displays a list of the network devices connected to the computer you are using.
- Page 208 8. User Supportware 3 Input the starting password of Desktop Control Utility 1.0, and click [OK]. The “Current password” window will be displayed. NOTE: The character string displayed in the password field varies each time Desktop Control Utility 1.0 is started. 4 Write down the character string displayed in the password field.
- Page 209 8. User Supportware • Operating the projector (connecting computer) 1 Connect a USB mouse that is commercially available to the projector. 2 Turn on the power to the projector. Set the LAN setting of the projector in advance. 3 Press the SOURCE button on the projector unit. The Source list will be displayed.
- Page 210 8. User Supportware 5 Click [DESKTOP CONTROL UTILITY]. The “DESKTOP CONTROL UTILITY menu” screen will be displayed. 6 Click “ENTRY”. A password input screen will be displayed. 7 Input the password you have written down in step 4 of “Operation on computer”. •...
- Page 211 8. User Supportware 10 Click the computer at the connection destination and then [OK]. The desktop screen of the computer at the connection destination will be displayed. • Operating the projector (manipulating desktop screen) The displayed desktop screen can be manipulated by using the USB mouse connected to the projector. If the EXIT button of the projector or remote control is pressed while the desktop screen is displayed, an auxiliary operation bar is displayed at the lower left of the screen.
- Page 212 8. User Supportware <1> <2> <3> <4> <1> (cut-off icon) �������Disconnects communication with the computer� <2> (Shift icon) ����������When the highlight is moved to this icon and the ENTER button is pressed, shift lock status is set� The shift lock is canceled if the highlight is moved to this icon and the ENTER button is pressed again�...
- Page 213 8. User Supportware • Operating the projector (exiting Desktop Control Utility 1.0) 1 Click the projector icon [ ] on the taskbar while the desktop screen is displayed. 2 Click [Exit]. Desktop Control Utility 1.0 will be terminated. 3 Press the EXIT button on the projector unit or on the remote control. The “network menu”...
-
Page 214: ❼ Controlling The Projector Over A Lan (Pc Control Utility Pro 4/Pro 5)
❼ Controlling the Projector over a LAN (PC Control Utility Pro 4/ Pro 5) Using the utility software “PC Control Utility Pro 4” or “PC Control Utility Pro 5” included on the companion NEC Pro- jector CD-ROM, the projector can be controlled from a computer over a LAN. - Page 215 8. User Supportware TIP: If the menu window will not be displayed, try the following procedure. For Windows 7: 1. Click “start” on Windows. 2. Click “All Programs” → “Accessories” → “Run”. 3. Type your CD-ROM drive name (example: “Q:\”) and “LAUNCHER.EXE” in “Name”. (example: Q:\ LAUNCHER.EXE) 4.
- Page 216 Wireless LAN (Optional: NP02LM series)” (→ page 152) and “9. Controlling the Projector by Using an HTTP Browser” (→ page 42) Step 3: Start PC Control Utility Pro 4 Click “Start” → “All programs” or “Programs” → “NEC Projector User Supportware” → “PC Control Utility Pro 4” → “PC Control Utility Pro 4”. NOTE: •...
- Page 217 Using on Mac OS Step 1: Install PC Control Utility Pro 5 on the computer 1. Insert the accompanying NEC Projector CD-ROM in your Mac CD-ROM drive. The CD-ROM icon will be displayed on the desktop. 2. Double-click the CD-ROM icon.
-
Page 218: Appendix
9. Appendix ❶ Troubleshooting This section helps you resolve problems you may encounter while setting up or using the projector. Indicator Messages Power Indicator Indicator Condition Projector Condition Note The main power is off – Blinking light Blue 0�5 sec On, The projector is getting ready to turn on�... -
Page 219: Common Problems & Solutions
9. Appendix Common Problems & Solutions (→ “Power/Status/Lamp Indicator” on page 206.) Problem Check These Items Does not turn on or • Check that the power cord is plugged in and that the power button on the projector cabinet or the remote control shut down is on�... -
Page 220: If There Is No Picture, Or The Picture Is Not Displayed Correctly
“Fn” key along with one of the 12 function keys gets the external display to come on or off. For example, NEC laptops use Fn + F3, while Dell laptops use Fn + F8 key combinations to toggle through external display selections. -
Page 221: ❷ Specifications
9. Appendix ❷ Specifications This section provides technical information about projector’s performance. Optical Model Number NP-P501X NP-PE501X NP-P451X NP-P451W NP-P401W LCD Panel 0.63 inch LCD with Micro Lens Array (Aspect Ratio 4:3) 0.59 inch LCD with Micro Lens Array (Aspect Ratio 16:10) Resolution* 1024 ×... - Page 222 Meets Low Voltage Directive (EN60950-1, TÜV GS Approved) For additional information visit: US : http://www.necdisplay.com/ Europe : http://www.nec-display-solutions.com/ Global : http://www.nec-display.com/global/index.html For information on our optional accessories, visit our website or see our brochure. The specifications are subject to change without notice.
-
Page 223: ❸ Cabinet Dimensions
9. Appendix ❸ Cabinet Dimensions NP-P501X/NP-P451X/NP-P451W/NP-P401W Unit: mm (inch) 398 (15.7) 134 (5.3) Lens center Lens center 24 (0.9) 175 (6.9) Holes for ceiling mount 200 (7.9) - Page 224 9. Appendix NP-PE501X Unit: mm (inch) 398 (15.7) 134 (5.3) Lens center Lens center 24 (0.9) 175 (6.9) Holes for ceiling mount 200 (7.9)
-
Page 225: ❹ Pin Assignments Of D-Sub Computer Input Connector
9. Appendix ❹ Pin Assignments of D-Sub COMPUTER Input Connector Mini D-Sub 15 Pin Connector Pin No. RGB Signal (Analog) YCbCr Signal 11 12 13 14 15 Green or Sync on Green Blue Ground Ground Signal Level Red Ground Cr Ground Video signal : 0.7Vp-p (Analog) Green Ground Y Ground... -
Page 226: ❺ Compatible Input Signal List
9. Appendix ❺ Compatible Input Signal List Analog RGB HDMI Resolution Refresh Rate Resolution Refresh Rate Signal Aspect Ratio Signal Aspect Ratio ( dots ) ( Hz ) ( dots ) ( Hz ) 640 × 60/72/75/85/ 640 × iMac SVGA 800 ×... -
Page 227: ❻ Pc Control Codes And Cable Connection
9. Appendix ❻ PC Control Codes and Cable Connection PC Control Codes Function Code Data POWER ON POWER OFF INPUT SELECT COMPUTER INPUT SELECT HDMI1 INPUT SELECT HDMI2 INPUT SELECT VIDEO INPUT SELECT S-VIDEO INPUT SELECT VIEWER INPUT SELECT NETWORK INPUT SELECT USB DISPLAY PICTURE MUTE ON PICTURE MUTE OFF... -
Page 228: ❼ Troubleshooting Check List
9. Appendix ❼ Troubleshooting Check List Before contacting your dealer or service personnel, check the following list to be sure repairs are needed also by referring to the “Troubleshooting” section in your user’s manual. This checklist below will help us solve your problem more efficiently. -
Page 229: Installation Environment
Refresh rate: Video adapter: Other: Projector DVD player Video equipment VCR, DVD player, Video camera, Video game or other Signal cable Manufacturer: NEC standard or other manufacturer’s cable? Model number: Length: inch/m Model number: Distribution amplifier Model number: Switcher Model number:... -
Page 230: ❽ Register Your Projector
Visit our web site at www.necdisplay.com, click on support center/register product and submit your completed form online. Upon receipt, we will send a confirmation letter with all the details you will need to take advantage of fast, reliable warranty and service programs from the industry leader, NEC Display Solutions of America, Inc. - Page 231 © NEC Display Solutions, Ltd. 2013 7N951901...
Need help?
Do you have a question about the NP-P401W and is the answer not in the manual?
Questions and answers