Brother BP2100 Operation Manual
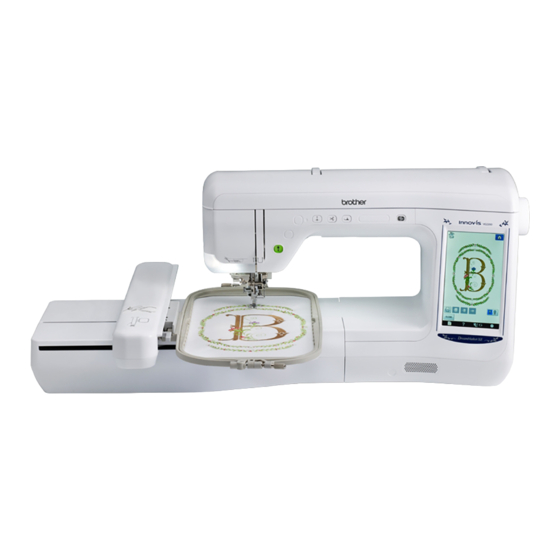
Embroidery machine
Hide thumbs
Also See for BP2100:
- Quick setup manual (32 pages) ,
- Manual de instrucciones (180 pages) ,
- Operation manual (180 pages)

Related Manuals for Brother BP2100


Summary of Contents for Brother BP2100
-
Page 1: Embroidery Machine
Operation Manual Embroidery Machine Product Code: 882-D80/D82 Be sure to read this document before using the machine. We recommend that you keep this document nearby for future reference. - Page 2 TRADEMARKS IMPORTANT: READ BEFORE DOWNLOADING, COPYING, INSTALLING OR USING. By downloading, copying, installing or using the software you agree to this license. If you do not agree to this license, do not download, install, copy or use the software. Intel License Agreement For Open Source Computer Vision Library Copyright ©...
-
Page 3: Introduction
INTRODUCTION INTRODUCTION Thank you for purchasing this machine. Before using this machine, carefully read the “IMPORTANT SAFETY INSTRUCTIONS”, and then study this manual for the correct operation of the various functions. In addition, after you have finished reading this manual, store it where it can quickly be accessed for future reference. - Page 4 IMPORTANT SAFETY INSTRUCTIONS Always keep your work area clear: • Never operate the machine with any air openings blocked. Keep ventilation openings of the machine and foot control free from the build up of lint, dust, and loose cloth. • Do not use extension cords. Plug the machine directly into the electrical outlet. •...
- Page 5 IMPORTANT SAFETY INSTRUCTIONS SAVE THESE INSTRUCTIONS This machine is intended for household use. This appliance is not intended for use by persons (including children) with reduced physical, sensory or mental capabilities, or lack of experience and knowledge, unless they have been given supervision or instruction concerning use of the appliance by a person responsible for their safety.
- Page 6 IMPORTANT SAFETY INSTRUCTIONS Federal Communications Commission (FCC) Declaration of Conformity (For USA Only) Responsible Party: Brother International Corporation 100 Somerset Corporate Boulevard Bridgewater, NJ 08807-0911 USA TEL : (908) 704-1700 declares that the product Product Name: Brother Sewing Machine Model Number: VE2200, BP2100 This device complies with Part 15 of the FCC Rules.
-
Page 7: What You Can Do With This Machine
WHAT YOU CAN DO WITH THIS MACHINE WHAT YOU CAN DO WITH THIS MACHINE Basic operations After purchasing your machine, be sure to read this section first. This section provides details on the initial setup procedures as well as descriptions of this machine’s more useful functions. Chapter 1 Chapter 2 Getting Ready... -
Page 8: Table Of Contents
CONTENTS CONTENTS TRADEMARKS Selecting Character Patterns........... 5 Selecting Frame Patterns ............7 INTRODUCTION ..........1 Selecting Patterns from Embroidery Cards ......7 IMPORTANT SAFETY INSTRUCTIONS ....1 Selecting Patterns from USB Media/Computer ....... 8 WHAT YOU CAN DO WITH THIS MACHINE ..5 VIEWING THE EMBROIDERING SCREEN ... - Page 9 CONTENTS Rotating the Pattern.............. 63 Changing the Size of the Pattern .......... 63 Deleting the Pattern ............. 63 Displaying Patterns in the Screen Magnified by 200% ..63 Changing the Configuration of Character Patterns ....64 Changing Character Spacing ..........64 Reducing Character Spacing ..........
-
Page 10: Names Of Machine Parts And Their Functions
NAMES OF MACHINE PARTS AND THEIR FUNCTIONS NAMES OF MACHINE PARTS AND THEIR FUNCTIONS The names of the various parts of the machine and their functions are described below. Before using the machine, carefully read these descriptions to learn the names of the machine parts. Machine ■... -
Page 11: Needle And Presser Foot Section
NAMES OF MACHINE PARTS AND THEIR FUNCTIONS Needle and Presser Foot Section Embroidery Unit a Carriage The carriage moves the embroidery frame automatically when embroidering. (page B-47) a Embroidery foot screw b Release button (located under the embroidery unit) Use the embroidery foot screw to hold the embroidery foot in Press the release button to remove the embroidery unit. -
Page 12: Operation Buttons
NAMES OF MACHINE PARTS AND THEIR FUNCTIONS Operation Buttons a “Start/Stop” button Press this button to begin embroidering. The button changes color according to the machine’s operation mode. Green: The machine is ready to embroider or is embroidering. Red: The machine cannot embroider. b “Needle Position”... -
Page 13: Included Accessories
NAMES OF MACHINE PARTS AND THEIR FUNCTIONS Included Accessories 75/11 75/11 3 needles 2 needles 90/14 1 needle *Included accessories vary depending on the countries or regions. B-11... - Page 14 NAMES OF MACHINE PARTS AND THEIR FUNCTIONS Part Code Memo Part Name Americas Others • Always use accessories recommended for Embroidery foot “W+” with FLED1: XF4168-001 (EU area) this machine. XF3124-001 (other area) LED pointer (on machine) • Placing bobbin clips on bobbins helps Embroidery foot “W”...
-
Page 15: Options
NAMES OF MACHINE PARTS AND THEIR FUNCTIONS Options The following are available as optional accessories to be purchased separately from your authorized Brother dealer. Part Code Part Name Note Americas Others • Embroidery cards purchased in foreign Square embroidery frame SA448 SEF150: H 15 cm x W 15 cm (H 6... - Page 16 NAMES OF MACHINE PARTS AND THEIR FUNCTIONS B-14...
-
Page 17: Basic Operations
Basic operations This section provides details on the initial setup procedures as well as descriptions of this machine’s more useful functions. Page number starts with “B” in this section. Chapter1 Getting Ready ............B-16 Chapter2 Sensor Functions (For models equipped with the sensor function)....B-52... - Page 18 BBasic operations Chapter Getting Ready TURNING THE MACHINE ON/OFF ......17 Setting Your Machine for the First Time ........18 LCD SCREEN............20 ■ Home Page Screen ..............20 ■ Key Functions................21 Using the Machine Setting Mode Key ........22 ■ Selecting the “Eco Mode” or “Shutoff Support Mode”..... 25 ■...
-
Page 19: Turning The Machine On/Off
TURNING THE MACHINE ON/OFF TURNING THE MACHINE ON/OFF WARNING • Use only regular household electricity for the power source. Using other power sources may result in fire, electric shock, or damage to the machine. • Make sure that the plugs on the power cord are firmly inserted into the electrical outlet and the power cord receptacle on the machine. -
Page 20: Setting Your Machine For The First Time
TURNING THE MACHINE ON/OFF Insert the power supply cord into the power Setting Your Machine for the First cord receptacle, then insert the plug into a wall outlet. Time When you first turn on the machine, set the language and time/date to your language and local time/date. - Page 21 TURNING THE MACHINE ON/OFF Press to set time/date. a Press to display the time on the screen. b Set the year (YYYY), month (MM) and date (DD). c Select whether 24h or 12h setting to display. d Set the current time. Press to start using your machine.
-
Page 22: Lcd Screen
LCD SCREEN LCD SCREEN CAUTION • Only touch the screen with your finger or the included touch pen. Do not use a sharp pencil, screwdriver, or other hard or sharp object. It is not necessary to press hard on the screen. Pressing too hard or using a sharp object may damage the screen. -
Page 23: Key Functions
LCD SCREEN ■ Key Functions Display Key Name Explanation Page Home page screen Press this key anytime it is displayed to return to the home page screen and B-20 select a different category - “Embroidery” or “Embroidery Edit”. Clock key Press this key to set the clock to your local time. -
Page 24: Using The Machine Setting Mode Key
LCD SCREEN Using the Machine Setting Mode Key Press to change the default machine settings (needle stop position, embroidery speed, opening display, etc.). Memo • Press next to the page numbers, to display a different settings screen. a Select the needle stop position (the needle position when the machine is not operating) to be up or down. Select the down position when using the pivot key. - Page 25 LCD SCREEN a Change the brightness of the needle area and work area lights. b Change the screen display brightness (see page A-18). c Calibrate the sensor function (For models equipped with the sensor function) (see page B-56). d Display the service count which is a reminder to take your machine in for regular servicing. (Contact your authorized dealer for details.) e Display the total number of stitches sewn on this machine.
- Page 26 LCD SCREEN a Select from among 16 embroidery frame displays (see page E-35). b Change the thread color display on the “Embroidery” screen; thread number, color name (see page E-34). c When the thread number “#123” is selected, select from six thread brands (see page E-34). d Adjust the maximum embroidery speed setting (see page E-33).
-
Page 27: Selecting The "Eco Mode" Or "Shutoff Support Mode
LCD SCREEN ■ Selecting the “Eco Mode” or ■ Changing the Pointer Shape When a “Shutoff Support Mode” USB Mouse Is Used You can save the machine power by setting the eco In the settings screen, the shape can be selected for mode or the shutoff support mode. -
Page 28: Choosing The Display Language
LCD SCREEN ■ Changing the Background Colors of to select the setting for the initial screen display. the Embroidery Patterns In the settings screen, the background colors can be changed for the embroidery pattern and pattern thumbnails. Depending on the pattern color, select the desired background color from the 66 settings available. -
Page 29: Specifying The Size Of Pattern Thumbnails
LCD SCREEN ■ Specifying the Size of Pattern Select the background color from the 66 settings available. Thumbnails The thumbnails for selecting an embroidery pattern can be set to be displayed at the smaller size or a larger size. The larger size is 1.5 times the smaller size. -
Page 30: Saving A Settings Screen Image To Usb Media
LCD SCREEN ■ Saving a Settings Screen Image to Press to select the desired thumbnail size. USB Media An image of the settings screen can be saved as a BMP file. A maximum of 100 images can be saved on a single USB media at one time. -
Page 31: Using The Machine Help Key
LCD SCREEN Using the Machine Help Key Press to open the machine help screen. Five categories are displayed at the top of the screen. Press a key to see more information about that category. displays information about displays information about displays information about the operation buttons. - Page 32 LCD SCREEN Example: Displaying information about upper threading Press Press → The lower half of the screen will change. Press (upper threading). → The screen shows instructions for threading the machine. Read the instructions. To view video, press of the displayed instructions.
-
Page 33: Lower Threading
LOWER THREADING LOWER THREADING ■ Using the Supplemental Spool Pin Winding the Bobbin With this machine, you can wind the bobbin without unthreading the machine. While using the main spool pin to sew, you can conveniently wind → → → Press the bobbin using the supplemental spool pin. - Page 34 LOWER THREADING Set the supplemental spool pin in the “up” Memo position. • When sewing with fine, cross-wound thread, use the small spool cap, and leave a small space between the cap and the thread spool. a Spool cap (small) a Supplemental spool pin b Thread spool (cross-wound thread) Place the spool of thread on the...
- Page 35 LOWER THREADING Pass the thread around the pre-tension disk Pass the end of the thread through the guide making sure that the thread is under the slit in the bobbin winder seat, and pull the pre-tension disk. thread to the right to cut the thread with the cutter.
-
Page 36: Using The Spool Pin
LOWER THREADING Press Cut the thread with scissors and remove the bobbin. → Bobbin winding starts automatically. The bobbin stops rotating when bobbin winding is completed. The bobbin winding switch will automatically return to its original position. Note • changes to while the bobbin Memo is winding. -
Page 37: Untangling Thread From Beneath The Bobbin Winder Seat
LOWER THREADING Turn the main power to ON and open the Pass the thread through the thread guide. top cover. Align the groove in the bobbin with the spring on the bobbin winder shaft, and set the bobbin on the shaft. a Thread guide Pass the thread around the pre-tension disk making sure that the thread is under the... -
Page 38: Setting The Bobbin
LOWER THREADING If the thread becomes tangled under the Setting the Bobbin bobbin winder seat, press once to stop the bobbin winding. → → → Press in this order to display a video example of the operation on the LCD (see page B-30). Follow the steps explained below to complete the operation. - Page 39 LOWER THREADING Slide the bobbin cover latch to the right. While lightly holding down bobbin with your right hand as shown, guide the thread through the slit (a and b). At this time, check that the bobbin easily rotates counterclockwise. Then, pull the thread toward you to cut it with the cutter (c).
-
Page 40: Upper Threading
UPPER THREADING UPPER THREADING Press the “Presser Foot Lifter” button to Upper Threading raise the presser foot. → → → Press in this order to display a video example of the operation on the LCD (see page B-30). Follow the steps explained below to complete the operation. - Page 41 UPPER THREADING Pivot the spool pin so that it angles upward. While holding the thread with both hands, Set the thread spool on the spool pin so that pull the thread up from under the thread the thread unwinds from the front of the guide plate.
- Page 42 UPPER THREADING Pass the thread through the needle bar Pull the thread up through the thread cutter thread guide (marked “6”) by holding the to cut the thread, as shown in the thread with both hands and guiding it as illustration.
-
Page 43: Using Threads That Unwind Quickly
UPPER THREADING Carefully pull the end of the thread that was passed through the eye of the needle. Note • Some needles cannot be threaded with the If a loop was formed in the thread passed through needle threader. In this case, instead of the eye of the needle, carefully pull on the loop of using the needle threader after passing the thread through to the back of the needle. -
Page 44: Changing The Embroidery Foot
CHANGING THE EMBROIDERY FOOT CHANGING THE EMBROIDERY FOOT Either embroidery foot “W+” with LED pointer or “W” is included depending on the countries or regions. The embroidery foot is attached to the machine when purchased, with the connector of the embroidery foot “W+”... -
Page 45: Checking The Needle Drop Point With The Embroidery
CHANGING THE EMBROIDERY FOOT Position the embroidery foot “W+” with Press to unlock all keys and LED pointer or “W” on the presser foot bar buttons. by aligning the notch of the presser foot to → All keys and operation buttons are unlocked, and the large screw. -
Page 46: With Led Pointer User Only)
CHANGING THE EMBROIDERY FOOT ■ Adjusting the LED Pointer (For Press Embroidery foot “W+” with LED → The Embroidery Foot “W+” with LED Pointer Adjustment screen appears. pointer user only) Adjust the LED pointer if it indicates a point different than the actual needle drop point. -
Page 47: Changing The Needle
CHANGING THE NEEDLE CHANGING THE NEEDLE Use the screwdriver to turn the screw toward the front of the machine and loosen CAUTION the screw. Remove the needle. • Always press on the screen before changing the needle. If is not pressed and the Start/Stop button or another operation button is pressed accidentally, the machine will start and injury may result. -
Page 48: About The Needle
BEFORE EMBROIDERING About the Needle The needle is probably the most important part of the machine. Choosing the proper needle for your embroidering project will result in a beautiful finish and fewer problems. Below are some things to keep in mind about needles. •... -
Page 49: About The Embroidery Unit
BEFORE EMBROIDERING About the Embroidery Unit CAUTION ■ Removing the Embroidery Unit • Do not carry the embroidery unit by holding the release button compartment. Press either (Embroidery) or (Embroidery Edit), then press → The carriage will move to the removal position. CAUTION ■... - Page 50 BEFORE EMBROIDERING Insert the embroidery unit connection into the machine connection port. The spring hinge on the connection port cover will allow easy access to the port. Push lightly on the connection port cover until the unit clicks into place. a Embroidery unit connection b Machine connection port Note...
-
Page 51: Using Functions By Connecting The Accessory To The Machine
USING FUNCTIONS BY CONNECTING THE ACCESSORY TO THE MACHINE USING FUNCTIONS BY CONNECTING THE ACCESSORY TO THE MACHINE Using USB Media or Embroidery Memo • USB media is widely used, however some Card Reader/USB Card Writer USB media may not be usable with this Module* machine. -
Page 52: Using A Usb Mouse
USING FUNCTIONS BY CONNECTING THE ACCESSORY TO THE MACHINE ■ Changing Pages Using a USB Mouse Rotate the mouse wheel to switch through the tabs of the pattern selection screens. The USB mouse, connected to the machine, can be used to perform a variety of operations in the Memo screens. - Page 53 USING FUNCTIONS BY CONNECTING THE ACCESSORY TO THE MACHINE Basic operations B-51...
-
Page 54: Chapter2 Sensor Functions (For Models Equipped With The Sensor Function)
BBasic operations Chapter Sensor Functions (For models equipped with the sensor function) You can activate this function after connecting the sensor pen to the machine. The sensor pen is included with the machine in some countries or regions. CONNECTING THE SENSOR PEN ......53 Using the Sensor Pen Holder ............53 USING THE SENSOR PEN........ -
Page 55: Connecting The Sensor Pen
CONNECTING THE SENSOR PEN CONNECTING THE SENSOR PEN When connecting the sensor pen to the machine, make sure that the arrow on the sensor pen connector faces up, lines up with the arrow on the machine, and that the connector is firmly inserted into the jack. Using the point end of the cleaning brush or the seam ripper point, remove the protective cap covering the hole on the... - Page 56 CONNECTING THE SENSOR PEN Set the sensor pen in the sensor pen holder with the pen tip pointing downward, and then connect the sensor pen to the machine. B-54...
-
Page 57: Using The Sensor Pen
USING THE SENSOR PEN USING THE SENSOR PEN Using the Sensor Pen Important Information about Sensor Pen Hold the sensor pen, and then touch the point to be specified. When the tip of the sensor pen is The sensor pen emits the signal to the machine, pushed in, the position information is sent to the and then the sensor pen receiver receives the machine. -
Page 58: Calibrating The Sensor Pen
USING THE SENSOR PEN First touch the green dot marking on the Calibrating the Sensor Pen needle plate cover using the sensor pen. Before using the sensor pen for the first time be sure to calibrate it to the screen. Doing so allows the machine to learn the position you usually hold a pen. - Page 59 USING THE SENSOR PEN Press to finish the calibration. To repeat the calibration touch the first point again using the sensor pen, and continue with step Press to return to the original screen without finishing the calibration. Press to reset the calibration. Basic operations B-57...
-
Page 60: Using Sensor Functions In "Embroidery"/"Embroidery Edit" Mode
USING SENSOR FUNCTIONS IN “EMBROIDERY”/“EMBROIDERY EDIT” MODE USING SENSOR FUNCTIONS IN “EMBROIDERY”/“EMBROIDERY EDIT” MODE Before using the sensor functions, carefully read the procedure in “Embroidery” and “Embroidery Edit” to familiarize yourself with the machine operations. Press Specifying the Embroidering Position With the Sensor Pen By using the sensor pen, the embroidering position can be adjusted to the desired location. -
Page 61: Selecting The Embroidering Position By The Pattern Edge
USING SENSOR FUNCTIONS IN “EMBROIDERY”/“EMBROIDERY EDIT” MODE Press With the sensor pen, touch the point on the fabric corresponding to corner a in the screen. → The embroidering position selection screen appears. Select the method for positioning the a Square of pattern edge embroidery pattern. -
Page 62: Selecting The Embroidering Position By The Pattern Center
USING SENSOR FUNCTIONS IN “EMBROIDERY”/“EMBROIDERY EDIT” MODE ■ Selecting the Embroidering Position by the Pattern Center Press to move the LED pointer Press in the following screen. on the fabric for adjusting the first position. Press to apply the setting. With the sensor pen, touch 2 points on the fabric corresponding to the numbers in the center of the embroidery pattern. - Page 63 USING SENSOR FUNCTIONS IN “EMBROIDERY”/“EMBROIDERY EDIT” MODE Press to move the LED pointer on the fabric for adjusting the first position. Press to apply the setting. Press to move the LED pointer on the fabric for adjusting the second position. Press to apply the setting.
- Page 64 USING SENSOR FUNCTIONS IN “EMBROIDERY”/“EMBROIDERY EDIT” MODE B-62...
-
Page 65: Embroidering
Embroidering This section provides instruction to embroider designs with this machine. Page number starts with “E” in this section. The screen display and machine illustration may vary slightly, depending on the countries or regions. Chapter1 Embroidery ............. E-2 Chapter2 Embroidery Edit ............ E-56... - Page 66 EEmbroidering Chapter Embroidery SELECTING PATTERNS ..........3 Changing the Thread Color Display ......... 34 Changing the “Embroidery Frame Display”......35 ■ Copyright Information .............. 3 REVISING THE PATTERN ........36 Selecting Embroidery Patterns/Brother “Exclusives”/Floral Alphabet/Bobbin Work Patterns ..........4 Moving the Pattern..............36 Selecting Character Patterns ............5 Aligning the Pattern and the Needle ........
-
Page 67: Selecting Patterns
SELECTING PATTERNS SELECTING PATTERNS ■ Copyright Information The patterns stored in the machine and embroidery cards are intended for private use only. Any public or commercial use of copyrighted patterns is an infringement of copyright law and is strictly prohibited. There are many character and decorative embroidery patterns stored in the machine’s memory (see the “Quick Reference Guide”... -
Page 68: Selecting Embroidery Patterns/Brother "Exclusives"/Floral Alphabet/Bobbin Work Patterns
SELECTING PATTERNS Press to create a mirror image of the Selecting Embroidery pattern as needed. Patterns/Brother If a mistake has been made when selecting the “Exclusives”/Floral pattern, press the key of the pattern you want to embroider and the new selection appears. Alphabet/Bobbin Work Patterns Touch the key of the category of the pattern you want to embroider. -
Page 69: Selecting Character Patterns
SELECTING PATTERNS If you want to change the size of a character, select Selecting Character Patterns the character and then press to change the size. The size changes each time you press the key, Example: Entering “We Fly”. from large to medium to small. If you make a mistake, press to erase the Press... - Page 70 SELECTING PATTERNS Press again and enter “F”. Press → The embroidery screen is displayed. Press and then enter “ly”. Proceed to “VIEWING THE EMBROIDERING SCREEN” on page E-9 to embroider the pattern. To return to the previous screen to select another pattern, press...
-
Page 71: Selecting Frame Patterns
SELECTING PATTERNS Proceed to “VIEWING THE Selecting Frame Patterns EMBROIDERING SCREEN” on page E-9 to embroider the pattern. To return to the previous screen to select another Press pattern, press Press the key of the frame shape you want to embroider in the top part of the screen. a Frame shapes b Frame patterns →... -
Page 72: Selecting Patterns From Usb Media/Computer
SELECTING PATTERNS Plug the optional embroidery card Press the key of the USB port. Reader/USB card writer module into the USB port on the machine. → The patterns on the embroidery card are displayed on the selection screen. a USB port b Embroidery card Reader/USB card writer module Follow the steps on page E-4 to select a pattern. -
Page 73: Viewing The Embroidering Screen
VIEWING THE EMBROIDERING SCREEN VIEWING THE EMBROIDERING SCREEN a Shows the presser foot code. Attach embroidery foot “W+” or “W” for all embroidery projects. When the foot presser symbol is displayed on the screen, you are able to sew. b Shows the boundary for embroidering with the extra large frame (30 cm × 18 cm (approx. 12 inches × 7 inches)). c Shows a preview of the selected pattern. -
Page 74: Key Functions
VIEWING THE EMBROIDERING SCREEN ■ Key Functions Using these keys, you can change the size of the pattern, rotate the pattern, etc. Note • Some operations or functions are not available for certain patterns. If the key display is light gray, you cannot use that function or operation with the selected pattern. -
Page 75: Preparing The Fabric
PREPARING THE FABRIC PREPARING THE FABRIC CAUTION • Use fabrics with a thickness of less than 3 mm (approx. 1/8 inch). Using fabrics thicker than 3 mm (approx. 1/8 inch) may cause the needle to break. • When using layers with thicker batting etc., you can sew more attractive embroidery by adjusting the embroidery presser foot height in the embroidery settings screen (see below). - Page 76 PREPARING THE FABRIC Iron the iron-on stabilizer material to the wrong side of the fabric. a Fusible side of stabilizer b Fabric (wrong side) Memo • When embroidering on thin fabrics such as organdy or lawn, or on napped fabrics such as towel or corduroy, use water soluble stabilizer (sold separately) for best results.
-
Page 77: Hooping The Fabric In The Embroidery Frame
PREPARING THE FABRIC Hooping the Fabric in the Embroidery Frame ■ Types of Embroidery Frames The types and numbers of supplied embroidery frame are differs depending on the countries and regions. Extra Large Large Medium Embroidery field Embroidery field Embroidery field 30 cm ×... -
Page 78: Inserting The Fabric
PREPARING THE FABRIC ■ Inserting the Fabric Slightly tighten the frame adjustment screw, and then remove the slack in the fabric by pulling on the edges and corners. Do not Note loosen the screw. • If the fabric is not securely held in the embroidery frame, the embroidery design will sew out poorly. -
Page 79: Using The Embroidery Sheet
PREPARING THE FABRIC Return the frame adjustment screw to its Place the embroidery sheet on the inner initial position. frame. Align the guide lines on the embroidery sheet with the mark you made on the fabric. Memo • You can use the included screwdriver when a Inner frame you loosen or tighten the frame adjustment b Guide line... -
Page 80: Embroidering Small Fabrics Or Fabric Edges
PREPARING THE FABRIC ■ Embroidering Ribbons or Tape Embroidering Small Fabrics or Secure with double-sided tape or a temporary spray Fabric Edges adhesive. Use an embroidery stabilizer to provide extra support. After embroidering, remove the stabilizer carefully. Attach the stabilizer as shown in the following examples. -
Page 81: Attaching The Embroidery Frame
ATTACHING THE EMBROIDERY FRAME ATTACHING THE EMBROIDERY FRAME Note • Wind and insert the bobbin before attaching the embroidery frame. Press the “Presser Foot Lifter” button to Lower the frame-securing lever to be level raise the presser foot. with the frame to secure the embroidery frame in the embroidery frame holder. - Page 82 ATTACHING THE EMBROIDERY FRAME Pull the embroidery frame toward you. E-18...
-
Page 83: Confirming The Pattern Position
CONFIRMING THE PATTERN POSITION CONFIRMING THE PATTERN POSITION The pattern is normally positioned in the center of the embroidery frame. If the pattern needs to be repositioned for better placement on the garment, you can check the layout before starting embroidery. Checking the Pattern Position From , press the key for the position... -
Page 84: Previewing The Completed Pattern
CONFIRMING THE PATTERN POSITION Previewing the Completed Pattern Press → An image of the pattern as it will be embroidered appears. Press to select the frame used in the preview. Frames displayed in light gray cannot be selected. Press to enlarge the image of the pattern. The pattern can be sewn as it appears in the following display. -
Page 85: Sewing An Embroidery Pattern
SEWING AN EMBROIDERY PATTERN SEWING AN EMBROIDERY PATTERN Embroidery Attractive Finishes There are many factors that go into beautiful embroidery. Using the appropriate stabilizer (see page E-11) and hooping the fabric in the frame (see page E-13) are two important factors mentioned earlier. Another important point is the appropriateness of the needle and thread being used. -
Page 86: Sewing Embroidery Patterns
SEWING AN EMBROIDERY PATTERN ■ Embroidery Needle Plate Cover Sewing Embroidery Patterns Under some conditions, based on the type of fabric, stabilizer, or thread being used, there may be some looping in the upper thread. In this case, attach the included embroidery needle plate cover to the needle plate. -
Page 87: Sewing Embroidery Patterns Which Use Appliqué
SEWING AN EMBROIDERY PATTERN Lower the presser foot, then press the Repeat the same steps for embroidering the “Start/Stop” button to start embroidering. remaining colors. After 5-6 stitches, press the “Start/Stop” button again to stop the machine. Trim the excess thread at the end of the seam. - Page 88 SEWING AN EMBROIDERY PATTERN Attach an iron-on stabilizer to the wrong Place the base material into the embroidery side of the appliqué material. frame. a Appliqué material (cotton, felt, etc.) b Iron-on stabilizer a Base material Place the appliqué material into the Press the “Start/Stop”...
- Page 89 SEWING AN EMBROIDERY PATTERN Press the “Start/Stop” button. Memo • Some patterns may not show all three appliqué steps. Sometimes the “APPLIQUE” step will be shown as a color. → The appliqué will then be completed. Change the upper thread and then carry out the rest of the embroidering.
-
Page 90: Adjustments During The Embroidery Process
ADJ USTMENTS DURING THE EMBROIDERY PROCESS ADJUSTMENTS DURING THE EMBROIDERY PROCESS Note • Be careful not to bump the embroidery unit carriage or the presser foot when removing or attaching the embroidery frame. Otherwise, the pattern will not embroider correctly. Unlock the frame-securing lever and If the Bobbin Runs Out of Thread remove the embroidery frame. -
Page 91: If The Thread Breaks During Sewing
ADJ USTMENTS DURING THE EMBROIDERY PROCESS Press , or to move If the Thread Breaks During the needle back the correct number of Sewing stitches before the spot where the thread broke. Press the “Start/Stop” button to stop the If you cannot move back to the spot where the machine. -
Page 92: Restarting From The Beginning
ADJ USTMENTS DURING THE EMBROIDERY PROCESS Restarting from the Beginning Resuming Embroidery After Turning Off the Power Press The current color and stitch number are saved when embroidery is stopped. The next time the machine is turned on, you have the option to continue or delete the pattern. - Page 93 ADJ USTMENTS DURING THE EMBROIDERY PROCESS Attach the embroidery frame and press → The previous embroidery screen displayed before the machine was turned off appears. Memo • If you want to start a new embroidery pattern, press so the pattern selection screen appears.
-
Page 94: Making Embroidery Adjustments
MAKING EMBROIDERY ADJUSTMENTS MAKING EMBROIDERY ADJUSTMENTS Press Adjusting Thread Tension When embroidering, the thread tension should be set so that the upper thread can slightly be seen on the wrong side of the fabric. ■ Correct Thread Tension The pattern can be seen from the wrong side of the fabric. -
Page 95: Adjusting The Bobbin Case (With No Color On The Screw)
MAKING EMBROIDERY ADJUSTMENTS To adjust the bobbin tension for embroidery Press to tighten the upper thread function, using the bobbin case (with no color on tension. (The tension number will increase.) the screw), turn the slotted-head screw (-) with a (small) screwdriver. -
Page 96: Using The Automatic Thread Cutting Function (End Color Trim)
MAKING EMBROIDERY ADJUSTMENTS ■ Bobbin Thread is Too Tight Press Upper thread on the right side of fabric seems to be lifting/looping and bobbin thread is not seen on the wrong side of fabric. a Right side b Wrong side If this occurs, turn the slotted-head screw (-) counterclockwise, being careful not to over-loosen the screw, approximately 30-45 degrees to decrease... -
Page 97: Adjusting The Embroidery Speed
MAKING EMBROIDERY ADJUSTMENTS ■ Selecting the Length of Jump Stitch Note Not to Trim • When this function is turned on, use the included ball point needle 75/11 for When the thread trimming function is turned embroidering patterns with short jump on, you can select the length of the jump stitch not stitches such as alphabet characters. -
Page 98: Changing The Thread Color Display
MAKING EMBROIDERY ADJUSTMENTS When the thread number #123 Memo • “spm” is the number of stitches sewn in one displayed, use to select from six minute. embroidery thread brands pictured below. • Decrease the sewing speed when embroidering on thin, thick, or heavy fabrics. -
Page 99: Changing The "Embroidery Frame Display
MAKING EMBROIDERY ADJUSTMENTS Changing the “Embroidery Frame Display” Press In the “Embroidery Frame Display”, use to change the embroidery frame display mode. There are 16 choices. For the optional embroidery frame. a Extra large frame embroidering area 30 cm × 18 cm (12 inches × 7 inches) b Center mark c Large frame embroidering area 18 cm ×... -
Page 100: Revising The Pattern
REVISING THE PATTERN REVISING THE PATTERN CAUTION • When you have revised the pattern, check the display of available embroidery frames and use an appropriate frame. If you use an embroidery frame not displayed as available for use, the presser foot may strike the frame and possibly cause injury. -
Page 101: Changing The Size Of The Pattern
REVISING THE PATTERN Mark the embroidery start position on the Press fabric, as shown. to align the needle and the mark on the fabric, and begin embroidering the pattern. Press Changing the Size of the Pattern Press Press Select the direction in which to change the size. -
Page 102: Rotating The Pattern
REVISING THE PATTERN Rotating the Pattern Press a Size of the pattern Select the angle of rotation for the pattern. Press to rotate the pattern 90 degrees to the Memo left. • Some patterns or characters can be enlarged more than others. Press to rotate the pattern 90 degrees to the •... -
Page 103: Creating A Horizontal Mirror Image
REVISING THE PATTERN Creating a Horizontal Mirror Image Press so it appears as to create a horizontal mirror image of the selected pattern. Press again to return the pattern to normal. a Degree of rotation 0° Memo • You can rotate the pattern by rotating the mouse wheel. -
Page 104: Changing The Density (Alphabet Character And Frame Patterns Only)
REVISING THE PATTERN Changing the Density (Alphabet Character and Frame Patterns Only) The thread density for some alphabet character and frame patterns can be changed. A setting between 80% and 120% in 5% a Normal increments can be specified. b Fine (stitches closer together) c Coarse (stitches farther apart) Press →... -
Page 105: Embroidering Linked Characters
REVISING THE PATTERN After a character is sewn, change the thread Press color, and then sew the next character. Press Embroidering Linked Characters Follow the procedure described below to embroider linked characters in a single row when the entire pattern extends beyond the embroidery frame. - Page 106 REVISING THE PATTERN After the characters are embroidered, cut Press the threads to a generous length, remove the embroidery frame, and then attach the Press embroidery frame again so that the remaining characters (“DEF”) can be embroidered. a End of the embroidering As in step , select the character patterns for “DEF”.
-
Page 107: Uninterrupted Embroidering (Monochrome - Using A Single Color)
REVISING THE PATTERN to align the needle with the end of embroidering for the previous pattern. Press the “Start/Stop” button to begin embroidering the remaining character patterns. → The thread color displayed on the screen will be grayed out. Uninterrupted Embroidering (Monochrome - Using a Single Color) A selected pattern can be stitched out in one color... -
Page 108: Using The Memory Function
USING THE MEMORY FUNCTION USING THE MEMORY FUNCTION Embroidery Data Precautions Memo • To create file folders, use a computer. • Letters and numerals can be used in the file Observe the following precautions when using names. In addition, if the file name contains embroidery data other than that created and saved no more than eight characters, the entire file in this machine. -
Page 109: Saving Embroidery Patterns In The Machine's Memory
USING THE MEMORY FUNCTION • Do not create folders in “Removable Disk” on a Press computer. If embroidery data is stored in a folder in “Removable Disk”, that embroidery data cannot be retrieved by the machine. Press to return to the original screen without •... -
Page 110: Saving Embroidery Patterns To Usb Media
USING THE MEMORY FUNCTION Select the pattern you want to delete. Saving Embroidery Patterns to USB Media When sending embroidery patterns from the machine to USB media, plug the USB media into the machine’s USB port. Memo • USB media is commercially available, but some USB media may not be usable with Press this machine. -
Page 111: Saving Embroidery Patterns In The Computer
USING THE MEMORY FUNCTION Insert the USB media into the USB port on Saving Embroidery Patterns in the the machine. Computer Using the included USB cable, the machine can be connected to your computer, and the embroidery patterns can be temporarily retrieved from and saved in the “Removable Disk”... -
Page 112: Retrieving Patterns From The Machine's Memory
USING THE MEMORY FUNCTION Press when the pattern you want to Retrieving Patterns from the save is in the embroidery screen. Machine’s Memory Press → The machine displays the patterns currently in the memory. Press Press the key of the pattern you want to Press to return to the original screen without retrieve. -
Page 113: Recalling From Usb Media
USING THE MEMORY FUNCTION Recalling from USB Media You can recall a specific embroidery pattern from either direct USB media or a folder in the USB media. If the pattern is in a folder, check each folder to find the embroidery pattern. Note •... -
Page 114: Recalling From The Computer
USING THE MEMORY FUNCTION Press Recalling from the Computer Plug the USB cable connector into the corresponding USB ports for the computer and for the machine (see page E-47). On the computer, open “Computer (My computer)” then go to “Removable Disk”. →... -
Page 115: Embroidery Applications
EMBROIDERY APPLICATIONS EMBROIDERY APPLICATIONS Apply a thin layer of fabric glue or a Using a Frame Pattern to Make temporary spray adhesive to the rear of the appliqué created in step . Attach the an Appliqué (1) appliqué to the base fabric matching the shapes. -
Page 116: Using A Frame Pattern To Make An Appliqué (2)
EMBROIDERY APPLICATIONS Remove the embroidery frame from the Using a Frame Pattern to Make embroidery unit, and cut around the outside of the stitches. an Appliqué (2) This is a second method to make appliqué using embroidery patterns. You do not have to change the fabric in the embroidery frame using this method. -
Page 117: Sewing Split Embroidery Patterns
EMBROIDERY APPLICATIONS Reattach the embroidery frame to the Connect to the machine the media embroidery unit, and embroider the satin containing the created split embroidery stitch pattern to create an appliqué. pattern, and then select the split embroidery pattern to be embroidered. For details on recalling patterns, refer to “Selecting Patterns from Embroidery Cards”... - Page 118 EMBROIDERY APPLICATIONS Press Press the “Start/Stop” button to embroider the pattern section. When embroidering is finished, the following screen appears. Press → A screen appears so that a section of the split embroidery pattern can be selected. Repeat steps through to embroider the remaining sections of the pattern.
- Page 119 EMBROIDERY APPLICATIONS Embroidering E-55...
-
Page 120: Chapter2 Embroidery Edit
EEmbroidering Chapter Embroidery Edit EXPLANATION OF FUNCTIONS......57 SELECTING PATTERNS TO EDIT ......58 Selecting Embroidery Patterns/Brother “Exclusives”/Floral Alphabet Patterns/Frame/Bobbin Work Patterns ......59 Selecting Alphabet Character Patterns........59 EDITING PATTERNS ..........61 ■ Key Functions................62 Moving the Pattern ..............63 Rotating the Pattern..............63 Changing the Size of the Pattern..........63 Deleting the Pattern ..............63 Displaying Patterns in the Screen Magnified by 200% .....63... -
Page 121: Explanation Of Functions
EXPLANATION OF FUNCTIONS EXPLANATION OF FUNCTIONS With the “Embroidery Edit” functions, you can combine embroidery patterns and character patterns, change the size of patterns, rotate patterns, and perform many other editing functions. This machine can perform the 9 functions listed below. ■... -
Page 122: Selecting Patterns To Edit
SELECTING PATTERNS TO EDIT SELECTING PATTERNS TO EDIT Prepare the machine for embroidery according to the instructions on “BEFORE EMBROIDERING” of “Basic operations”, and press , then to display the screen below. a Embroidery patterns b Brother “Exclusives” c Floral alphabet patterns d Frame patterns e Character patterns f Bobbin work patterns (see “Appendix”) -
Page 123: Selecting Embroidery Patterns/Brother "Exclusives"/Floral Alphabet Patterns/Frame/Bobbin Work Patterns
SELECTING PATTERNS TO EDIT Selecting Embroidery Selecting Alphabet Character Patterns/Brother Patterns “Exclusives”/Floral Alphabet When you select character patterns from the Patterns/Frame/Bobbin Work “Embroidery Edit” screen, you can edit the appearance of the pattern at the same time. Patterns Press Select the category of the pattern. Refer to “How to Create Bobbin Work”... - Page 124 SELECTING PATTERNS TO EDIT After you finish your selections, press Press to change the layout of the pattern. If the characters are too small to see, press view a display of all entered characters. → The “Embroidery Edit” screen will appear. Proceed to “EDITING PATTERNS”...
-
Page 125: Editing Patterns
EDITING PATTERNS EDITING PATTERNS a Shows the size of the entire combined pattern. b Shows the size of the pattern currently selected. c Shows the distance from the center of the frame. d Shows the color sequence and times of each step of the pattern currently selected. e Shows the degree of rotation for the pattern. -
Page 126: Key Functions
EDITING PATTERNS ■ Key Functions Display Key Name Explanation Page Magnify key Press this key to magnify the pattern by 200% in the screen. E-63 Thread palette key Press this key to change the colors of the displayed pattern. E-67 Rotate key Press this key to rotate the pattern. -
Page 127: Moving The Pattern
EDITING PATTERNS Moving the Pattern Displaying Patterns in the Screen Magnified by 200% For details on moving the pattern, refer to “Moving the Pattern” on page E-36. Press Rotating the Pattern For details on rotating the pattern, refer to “Rotating the Pattern” on page E-38. Changing the Size of the Pattern For details on changing the size of the pattern, refer to “Changing the Size of the Pattern”... -
Page 128: Changing The Configuration Of Character Patterns
EDITING PATTERNS Changing the Configuration of Changing Character Spacing Character Patterns Press Press to change the spacing. Press the key of the layout you want to embroider. Press to increase the character spacing. See page E-60 for more information about layout types. -
Page 129: Reducing Character Spacing
EDITING PATTERNS Reducing Character Spacing Separating Combined Character Patterns The spacing between characters can be reduced to 50% of the narrowest character in the group. Combined character patterns can be separated to adjust the character spacing or to separately edit Note the patterns after all characters have been entered. -
Page 130: Changing The Color Of Each Alphabet Character In A Pattern
EDITING PATTERNS to select where the pattern is Changing the Color of Each Alphabet Character in a Pattern to be separated, and then press separate it. For this example, the pattern will be separated between “T” and “a”. Press so you can assign a thread color to each character. -
Page 131: Embroidering Linked Characters
EDITING PATTERNS Press to choose a new Embroidering Linked Characters color from the color palette. You can embroider linked characters exampled To return to the original color, press . If below, in a single row when the pattern extends multiple colors have been changed, this command beyond the embroidery frame. -
Page 132: Creating A Custom Thread Table
EDITING PATTERNS to select one of the thread Creating a Custom Thread Table brands in the machine. You can create a custom thread table containing the thread colors that you most often use. You can select thread colors from the machine’s extensive list of thread colors from nine different thread brands. -
Page 133: Adding A Color To The Custom Thread Table From The List
EDITING PATTERNS Press Press to return to the original screen. ■ Adding a Color to the Custom a Thread brand b Entered thread color number Thread Table from the List → The selected thread color is set in the custom thread table. -
Page 134: Saving The Custom Thread Table To Usb Media
EDITING PATTERNS Repeat the previous steps until all desired thread colors are specified. Note • Two USB media cannot be used with this To delete a specified color from the palette, select machine at the same time. If two USB the color to be deleted, and then press media are inserted, only the USB media inserted first is detected. -
Page 135: Choosing A Color From The Custom Thread Table
EDITING PATTERNS Insert the USB media containing the custom The recalled custom thread table is thread table data into the USB port. displayed on the screen. Choosing a Color from the Custom Thread Table You can select a color from the up to 300 thread colors you have set in the custom thread table. -
Page 136: Designing Repeated Patterns
EDITING PATTERNS Press Designing Repeated Patterns ■ Sewing Repeated Patterns Using the border function, you can create stitches using repeated patterns. You can also adjust the spacing of the patterns within a repeated pattern stitch. Select a pattern, and then press Press a Custom thread change key →... - Page 137 EDITING PATTERNS Adjust the spacing of the repeated pattern. To widen spacing, press To tighten spacing, press a Vertical direction b Horizontal direction c Repeating and deleting vertical keys d Repeating and deleting horizontal keys e Spacing keys → The pattern direction indicator will change a Press to change a repeated pattern back to depending on the direction selected.
-
Page 138: Repeating One Element Of A Repeated Pattern
EDITING PATTERNS ■ Repeating One Element of a Press Repeated Pattern By using the Cut function, you can select one element of a repeated pattern and repeat only that single element. This function allows you to design complex repeated patterns. Choose the direction in which the repeated pattern will be cut. -
Page 139: Color Sorting Repeated Patterns
EDITING PATTERNS Press to finish repeating. Note • Once you have cut a repeated pattern into separate elements, you cannot return to the original repeated pattern. • Each element can be edited separately in the edit screen. See “Selecting combined embroidery patterns”... -
Page 140: Embroidering The Pattern Repeatedly
EDITING PATTERNS Press Press Press Embroidering the Pattern Repeatedly Press to select the thread mark to be After creating the repeated pattern, rehoop the embroidery frame and keep sewing for the next sewn. pattern. Memo • The optional border frame allows you to easily rehoop the fabric without removing the embroidery frame from the machine. - Page 141 EDITING PATTERNS Create the repeated pattern with the thread Rehoop the fabric in the embroidery frame. mark at the center of the end of the pattern. Refer to “Assigning Thread Marks” on page E-75. Note • Adjust the position of the fabric so that the embroidering area for the next pattern is within the embroidering area of the embroidery sheet.
-
Page 142: Duplicating A Pattern
EDITING PATTERNS Touch to set the starting point to the Duplicating a Pattern center top of the pattern. Press Touch → The duplicate is positioned over the original pattern. Press the positioning keys to move the embroidery frame until the starting point is aligned with the thread mark on the fabric. -
Page 143: After Editing
EDITING PATTERNS After Editing Press To combine the pattern with other patterns, select (see page E-80). See page E-21 for more information about sewing patterns. Memo • If you want to return to the edit screen after pressing , press Embroidering E-79... -
Page 144: Combining Patterns
COMBINING PATTERNS COMBINING PATTERNS Select Editing Combined Patterns Example: Combining alphabet characters with an embroidery pattern and editing Press to select an embroidery Press pattern. E-80... - Page 145 COMBINING PATTERNS Press Select and enter “Flower”. After selecting , press to change the character case, then enter the remaining characters. Press to enter the alphabet → The characters you enter will be displayed in the characters. center of the display. Press Press to return to the previous screen.
-
Page 146: Selecting Combined Embroidery Patterns
COMBINING PATTERNS Press to change the color of the characters. Memo See page E-67 for more information about changing • Use to select patterns that are the color. overlapping and cannot be selected by clicking them or by touching the screen. When all editing is finished, press ■... -
Page 147: Sewing Combined Patterns
COMBINING PATTERNS Sewing Combined Patterns Embroider Combined patterns will be embroidered in the order they were entered. In this example, the embroidery order will be as follows: → Note • Follow the directions in “Sewing Embroidery Patterns” on page E-22. Embroider by following the color order on the right side of the display. -
Page 148: Various Embroidering Functions
VARIOUS EMBROIDERING FUNCTIONS VARIOUS EMBROIDERING FUNCTIONS Press Uninterrupted Embroidering (Monochrome - Using a Single In the “Embroidery Basting Distance” Color) display, use to specify the distance from the pattern to the basting A selected pattern can be stitched out in one color stitching. -
Page 149: Using The Memory Function
USING THE MEMORY FUNCTION When embroidering is finished, remove the Memo basting stitching. • To cancel the setting, press → Basting is added to the beginning of the sewing order. Press the “Start/Stop” button to begin embroidering. USING THE MEMORY FUNCTION In the same way as embroidery patterns in Chapter 1, you can save and retrieve edited embroidery patterns to and from the machine’s memory, a personal computer, or USB media. - Page 150 USING THE MEMORY FUNCTION E-86...
-
Page 151: Appendix
Appendix This section provides important information for operating this machine. Please read this section to find troubleshooting tips and pointers as well as how to keep your machine in the best working order. Page number starts with “A” in this section. The screen display and machine illustration may vary slightly, depending on the countries or regions. -
Page 152: About Bobbin Work
Appendix Chapter How to Create Bobbin Work Included accessories vary depending on the countries or regions. ABOUT BOBBIN WORK..........3 PREPARING FOR BOBBIN WORK......3 Required Materials..............3 ■ Bobbin case and bobbin cover (option)........3 ■ Lower thread................3 ■ Upper thread ................4 ■... -
Page 153: About Bobbin Work
ABOUT BOBBIN WORK ABOUT BOBBIN WORK Beautiful embroidery work, with a three-dimensional appearance, can be created by winding the bobbin with medium to heavy weight thread or ribbon, which is too thick to be threaded through the machine’s needle. The decorative thread or ribbon will stitch out on the underneath side of fabric while embroidering with the fabric wrong side facing up. -
Page 154: Upper Threading
PREPARING FOR BOBBIN WORK ■ Upper thread Preparing the Bobbin Thread Embroidery thread (polyester thread) or monofilament (transparent nylon) thread. In order to create bobbin work, the bobbin case If you do not wish for the upper thread to be visible, must be replaced with the one for bobbin work. - Page 155 PREPARING FOR BOBBIN WORK Wipe the bobbin case (gray) with a soft lint Wind a decorative thread around the free cloth to clean it. bobbin by hand. After winding the bobbin so it is filled as shown below (about 80%), Insert the bobbin case so that the mark cut the thread.
-
Page 156: When Tension Is Applied To The Bobbin Thread
PREPARING FOR BOBBIN WORK ■ When tension is not applied to the Install the bobbin wound with thread. bobbin thread Whether or not tension should be applied to the bobbin thread depends on the type of thread being If the bobbin thread in the trial pattern is too tight used. - Page 157 PREPARING FOR BOBBIN WORK Gently pull the upper thread to bring the Install the needle plate cover and bobbin bobbin thread up through the needle plate. cover with tabs. For details on installing the needle plate cover, refer to “Cleaning the Race” on page A-15. →...
-
Page 158: Creating Bobbin Work
CREATING BOBBIN WORK CREATING BOBBIN WORK To select a bobbin work embroidery Selecting the Pattern pattern, press (Embroidery). Note Note • Prepare the machine for bobbin work as • Embroidery patterns for bobbin work “B” described in “PREPARING FOR BOBBIN cannot be used in the “Embroidery Edit”... - Page 159 CREATING BOBBIN WORK Note CAUTION • Since bobbin work is sewn from the wrong side of the fabric, the pattern shown in the • When sewing bobbin work, be sure to select an screen appears as a mirror image of the embroidery pattern for bobbin work.
-
Page 160: Start Embroidering
CREATING BOBBIN WORK As shown below, pull the upper thread to Start Embroidering pull the bobbin thread up through the fabric. Hoop the fabric so the right side of the fabric is facing down with the stabilizer lying on the top. Use an embroidery frame that fits the size of the pattern and then attach the frame to the machine. - Page 161 CREATING BOBBIN WORK Stop the machine, and then tie the upper Remove the fabric from the embroidery thread and the bobbin thread together to frame, and check the finished embroidery. secure the threads. a Right side of fabric b Wrong side of fabric Start sewing again to finish the pattern.
-
Page 162: Adjusting The Thread Tension
ADJUSTING THE THREAD TENSION ADJUSTING THE THREAD TENSION After embroidering trial patterns and checking the results, adjust the thread tensions if necessary. After adjusting the tensions, be sure to embroider trial patterns again in order to check the results. ■ Adjusting the upper thread tension Note We recommend a setting between 6 and 8 for the upper •... -
Page 163: Troubleshooting
TROUBLESHOOTING TROUBLESHOOTING Several solutions for minor problems are described below. If the problem persists, contact your dealer or nearest authorized Brother dealer. ■ The thread was accidentally cut ■ Correcting bobbin work tension automatically and the bobbin thread If the top thread shows on the bobbin side of the fabric, increase the upper tension (Refer to is caught inside the machine “ADJUSTING THE THREAD TENSION”... -
Page 164: Lcd Screen
Appendix Chapter Maintenance and Troubleshooting CARE AND MAINTENANCE ........15 Restrictions on oiling ..............15 Precautions on storing the machine ..........15 Cleaning the LCD Screen ............15 Cleaning the Machine Casing ...........15 Cleaning the Race ..............15 Cleaning the Cutter in the Bobbin Case Area......17 About the Maintenance Message ..........17 ADJUSTING THE SCREEN ........ -
Page 165: Care And Maintenance
CARE AND MAINTENANCE CARE AND MAINTENANCE CAUTION • Be sure to unplug the machine before cleaning it. Otherwise, electric shock or injury may result. Restrictions on oiling Cleaning the Machine Casing In order to prevent damaging this machine, it must If the surface of the machine is dirty, lightly soak a not be oiled by the user. - Page 166 CARE AND MAINTENANCE Use the cleaning brush or a vacuum cleaner Make sure that the indicated points are aligned before installing the bobbin case. to remove any lint and dust from the race and bobbin thread sensor and the CAUTION surrounding area.
-
Page 167: Cleaning The Cutter In The Bobbin Case Area
CARE AND MAINTENANCE Use the screwdriver included with the Cleaning the Cutter in the Bobbin machine to screw and attach the needle plate. Case Area The cutter below the needle plate should be cleaned. If dust or lint accumulate on the cutter, it will be difficult to cut the thread when the “Thread Cutter”... -
Page 168: Adjusting The Screen
ADJUSTING THE SCREEN ADJUSTING THE SCREEN Adjusting the Brightness of the Touch Panel is Malfunctioning Screen Display If the screen does not respond correctly when you touch a key (the machine does not perform the If the screen does not look very clear under certain operation or performs a different operation), follow situation, you can adjust the brightness of the the steps below to make the proper adjustments. -
Page 169: Troubleshooting
TROUBLESHOOTING TROUBLESHOOTING If the machine stops operating correctly, check the following possible problems before requesting service. You can solve most problems by yourself. If you need additional help, the Brother Solutions Center offers the latest FAQs and troubleshooting tips. Visit us at “ http://solutions.brother.com ”. If the problem persists, contact your dealer or the nearest authorized service center. - Page 170 TROUBLESHOOTING Problem Cause Solution Page Bobbin thread does The thread is not passed through the bobbin Correctly pass the thread through the bobbin B-32 not wind neatly on the winding thread guide correctly. winding thread guide. bobbin. Bobbin spins slowly. Press [+] in the bobbin winding window to B-34 increase the bobbin winding speed.
- Page 171 TROUBLESHOOTING Problem Cause Solution Page Machine does not There is no pattern selected. Select a pattern. E-3, E-58 operate “Start/Stop” button was not pushed. Press the “Start/Stop” button. B-10 Main power switch is not turned on. Turn the main power to ON. B-17 Presser foot is not lowered.
-
Page 172: Error Messages
ERROR MESSAGES Problem Cause Solution Page Specifying with The sensor pen has not been calibrated. Before using the sensor pen for the first time, B-56 sensor pen cannot be be sure to calibrate it. done accurately The pen is being held differently than when it When using the sensor pen, be sure to hold it B-56 was calibrated. - Page 173 ERROR MESSAGES Marks Error Messages Cause/Solution Not enough available memory to save the pattern. Delete This message is displayed when the memory is full and the another pattern? pattern cannot be saved. OK to automatically lower the presser foot? This message is displayed when is pressed (the presser foot is raised).
- Page 174 ERROR MESSAGES Marks Error Messages Cause/Solution This file exceeds the data capacity and cannot be used. Use a This message is displayed when the file size exceeds the data suitable size file. capacity of the machine. Confirm the file size and format. (see page E-45) This function cannot be used while in the sensor mode.
-
Page 175: Specifications
SPECIFICATIONS SPECIFICATIONS Item Specification Embroidery Machine and Accessories Dimensions of machine Approx. 57.1 cm (W) × 33.2 cm (H) × 28.4 cm (D) (approx. (Box 1 of 2) 22-1/2 inches (W) × 13-1/16 inches (H) × 11-3/16 inches (D)) Dimensions of box Approx. -
Page 176: Upgrading Your Machine's Software
UPGRADING YOUR MACHINE’S SOFTWARE UPGRADING YOUR MACHINE’S SOFTWARE You can use USB media or a computer to upgrade software for your machine. When an upgrade program is available on “ http://solutions.brother.com ”, please download the files following the instructions on the website and steps below. Note •... -
Page 177: Upgrade Procedure Using Computer
UPGRADING YOUR MACHINE’S SOFTWARE Upgrade Procedure Using Computer While pressing the “Automatic Threading” button, turn the main power to ON. → The following screen will appear on the LCD. When the message disappears, press Press Plug the USB cable connector into the corresponding USB ports for the computer and for the machine. -
Page 178: Index
INDEX INDEX Embroidery card ................. E-7 Embroidery card reader .............. E-7 Accessories Embroidery edit options ................. B-13 changing the thread color ............. E-67 Adjusting the LED pointer ............B-44 combined patterns ............E-80 E-83 Air vent ..................B-8 custom thread table ............ E-68 E-71 Aligning the position .............. -
Page 179: Changing The Needle
INDEX Start/Stop button ..............B-10 Starting point key ..............E-37 Machine help key ..............B-29 Supplemental spool pin ..........B-8 B-31 Machine operation mode key ........... A-19 Main power switch ............B-8 B-17 Mirror image key ..............E-39 Multi color key .............. E-40 E-66 Thread thread tension ............... - Page 180 http://solutions.brother.com Please visit us at where you can get product support and answers to frequently asked questions (FAQs). English 882-D80/D82 Printed in Taiwan XF3635-001...
Need help?
Do you have a question about the BP2100 and is the answer not in the manual?
Questions and answers