
Subscribe to Our Youtube Channel
Related Manuals for Speco M17LCBVH3


Summary of Contents for Speco M17LCBVH3
-
Page 1: User Manual
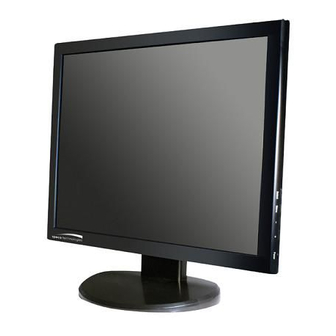
Thank you for purchasing our product. Please read this User’s Manual before using the product. Changes may be made without notice. M17LCBVH3 M19LCBVH3 LCD MONITOR User manual... -
Page 2: Table Of Contents
Table of Contents Safety Information Table of Contents ----------------------------------------------------------------------------- 2 The power supply cord is used as the main disconnect device. Ensure that Safety Information ------------------------------------------------------------------------- 3~5 an outlet is located near the monitor and is easily accessible. Connection ---------------------------------------------------------------------------------- 6~8 Controls ----------------------------------------------------------------------------------------- 9 ENVIRONMENT ●... - Page 3 MOUNTING ● Place the monitor on a secure table or have it properly mounted to the wall. CLEANING ● Unplug the unit from the wall outlet before cleaning. Do not hang anything on the monitor. ● Do not use liquid or aerosol cleaners. Use a dry soft lint-free cloth for Caution: The wall mount must bear a minimum of five times the monitor’s net cleaning.
-
Page 4: Connection
Connection 2. Connection under various signal input mode 1. Rear interface (Ⅰ)Connecting with PC, DVR at VGA This connection allows you to connect to a PC or DVR. Connect one end of a 15-pin monitor cable to the VGA VIDEO jack on the monitor and the other end to the PC or the DVR's video output jack. -
Page 5: Controls
Controls Viewing the Picture From the Connected Device Front Controls 1. Plug in the monitor and the device if they aren't already plugged in. 2. Turn on the monitor and the device you want to view, for example a (a) 5 Key Series camera. -
Page 6: Menu Setup
Menu Setup Controls LANGUAGE: Lets you select your preferred language for the menus: (English, Chinese, German, French, Spanish, Italian, Portuguese, and BASIC ON-SCREEN DISPLAY SETUP Russian) (1) Press the MENU button to see the menu. H-POSITION: Adjust the OSD image (2) Press +... -
Page 7: Av Input Mode
H-POSITION: Moves the image on screen 2. AV Input Mode either left (-) or right (+). CONTRAST: Adjusts the difference V-POSITION: Moves the image on screen between the light and dark areas of the picture. either up (+) or down (-). BRIGHTNESS: Adjusts the brightness of CLOCK: If the clock is not fine-tuned, you PICTURE... -
Page 8: Hdmi Input Mode
3. HDMI Input mode SLEEP-TIMER: Lets you set the monitor to CONTRAST: Adjusts the difference turn off after a given amount of time (OFF, between the light and dark areas of the 15min, 30min, 45min, 60min) picture. FUNCTION BRIGHTNESS: Adjusts the brightness of DLC: ON / OFF PICTURE the picture. - Page 9 SLEEP-TIMER: Lets you set the monitor BASS: Adjustment range:0-100 to turn off after a given amount of time TREBLE: Adjustment range:0-1 (OFF, 15min, 30min, 45min, 60min) BALANCE: Adjusts how much audio is sent to the left and right (-50 to +50). FUNCTION DLC: ON / OFF The intermediate value is 0.
-
Page 10: Specifications
Specifications Audio Inputs Stereo PC / Audio R and L Model M17LCBVH3 M19LCBVH3 Auto Adjustment Size 17 inch 19 inch Wall Hanging VESA Standard VESA Size 100 x 100 mm Aspect Ratio Stand Yes (Plastic) Resolution (H x V) 1280 x 1024 Bezel Plastic Colors... -
Page 11: Product Warranties And Information
WARRANTY Cameras 5 Years Monitors & IR LEDs 1 Year PRODUCT WARRANTIES AND INFORMATION DVRs / EZVR Series VDRs 3 Years EFFECTIVE JULY 8, 2008 PCPro/ PCL Series DVRs 2 Years Indoor Speakers Lifetime Outdoor/Weatherproof Speakers 5 Years POLICY, TERMS AND CONDITIONS OF SALE Amplifiers 5 Years This statement of policy is in lieu of any other policy, expressed or implied, and no... - Page 12 We now accept Visa/MasterCard/AMEX at time of order placement. (See terms of Payment & Credit Terms) For more information contact us at: Speco Technologies 200 New Highway • P.O. Box 726 • Amityville, N.Y. 11701-0726 Tel. 631-957-8700 Outside Metro N.Y. 1-800-645-5516 • Fax 631-957-9142 or 631-957-...
Need help?
Do you have a question about the M17LCBVH3 and is the answer not in the manual?
Questions and answers