
Related Manuals for Speco M17VLED


Summary of Contents for Speco M17VLED
- Page 1 M17VLED (17” CCTV LED Monitor) M19VLED (19” CCTV LED Monitor) USER MANUAL Speco Technologies 200 New Highway Amityville, NY 11701 800-645-5516 www.specotech.com...
-
Page 2: Warning
WARNING: TO REDUCE THE RISK OF FIRE OR ELECTRIC SHOCK, DO NOT EXPOSE THIS PRODUCT TO RAIN OR MOISTURE. DO NOT INSERT ANY METALLIC OBJECT THROUGH VENTILATION GRILLS. CAUTION: CAUTION Explanation of Graphical Symbols The lightning flash with arrowhead symbol, within an equilateral triangle, is intended to alert the user to the presence of uninsulated "dangerous voltage"... -
Page 3: Important Safeguards
Important Information IMPORTANT SAFEGUARDS 1. READ INSTRUCTIONS All the safety and operating instructions should be read before the unit is operated. 2. RETAIN INSTRUCTIONS The safety and operating instructions should be retained for future reference. 3. HEED WARNINGS All warnings on the unit and in the operating instructions should be adhered to. 4. - Page 4 placing the unit on a bed, sofa, rug, or other similar surface. This unit should never be placed near or over a radiator or heat source. This unit should not be placed in a built-in installation such as a bookcase or rack unless proper ventilation is provided or the manufacturer’s instructions have been adhered to.
-
Page 5: Safety Precautions
instructions when making any connections. 18. LCD Do not press on or jolt the LCD panel. Doing so may cause the LCD panel glass to break and injury may occur. Should the LCD panel be broken and liquid leaks out, do not inhale or swallow it. Doing so may cause poisoning. If you have got it into your mouth, wash it out and consult your doctor. - Page 6 FCC STATEMENT This LCD AV complies with part 15 FCC Rules. Operation is subject to the following two conditions (1) This device may not cause harmful interference. (2) This LCD AV must accept and interference received, including interference that may cause undesired operation. Canada Regulatory compliance statements This LCD AV does not exceed the Class B limits for radio noise emissions from digital apparatus as set out in the radio interference regulations of Industry Canada.
-
Page 7: Table Of Contents
-Reorient or relocate the receiving antenna. -Increase the separation between the equipment and receiver. -Connect the equipment into an outlet on a circuit different from that to which the receiver is connected. -Consult the dealer or an experienced radio/TV technician for help. ... - Page 8 Function Keys Instruction for AV……………………………………………………………………………9 Connection………………………………………………………………………………………………10 OSD (On Screen Display)…………………………………………………………………………………10 AV/S-Video OSD-Image……………………………………………………………………………………11 AV/S-Video OSD-Audio……………………………………………………………………………………12 AV/S-Video OSD-Setup……………………………………………………………………………………13 OSD-Image……………………………………………………………………………………………14 OSD-Audio……………………………………………………………………………………………15 OSD-Setup……………………………………………………………………………………………16 Applicable Timing……………………………………………………………………………………………17 Specification…….……………………………………………………………………………………………18 Wall Mountable………………………………………………………………………………………………19 Dimension…………………………………………………………………………………………………….20 LCD Color Monitor Accessories (a) Power cord (b) User Manual (c) VGA Cord (d) Mounting base (e) PC audio cord (f) Adaptor...
-
Page 9: Feature
Feature ★ Bright, flick-free image ★ Accurate color processing ★ Multi-Scan support ★ Built-in internal amplifier and speakers ★ 1280*1024 SVGA support for computer input (17”/19”) -
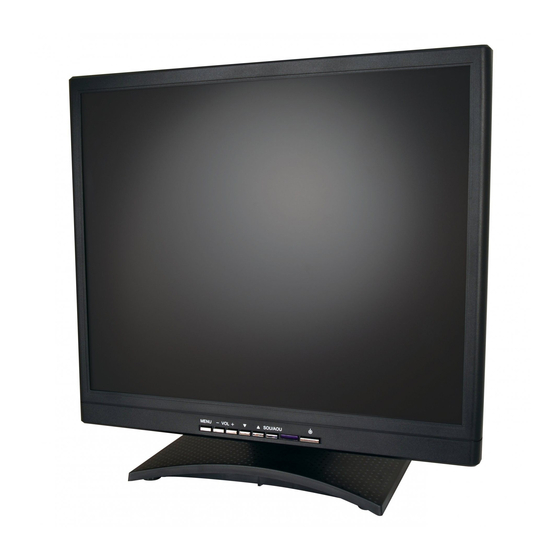
Page 10: Exploring Your New Monitor
Exploring Your New Monitor You can operate your monitor by using the buttons on the front panel. Front Panel... - Page 11 Back Side...
-
Page 12: Function Keys Instruction For Av
Function Keys Instruction for AV... -
Page 13: I/O Connection
Up: Select menu item Down: Select menu item MENU Menu: Push this button to display the main OSD menu / select item of next level Right : Increase the setting of selected item Left : Decrease the setting of selected item SOU/AOU Source: Change input source / to return to last OSD control level Power: Turn on or off the monitor power... -
Page 14: Osd (On Screen Display)
●PC Audio In is present “PC audio in” ●Audio In 1 is present “AV audio in” ●Audio In 2 is present “S-Video audio in” ●S-Video In is present “S-Video video in” ●VGA In is present “PC - VGA signal in” ●Power In is present “Power in”... -
Page 15: Av/S-Video Osd-Audio
Brightness: Picture brightness adjustment Min. ~ Max.:0~100 / Default:70 Contrast: Picture Contrast adjustment Min. ~ Max.:0~100 / Default:80 Hue: To adjust the color tint value Min. ~ Max.:0~100 / Default:50 Saturation: Adjusts the saturation of the color Min. ~ Max.:0~100 / Default:50 Sharpness: Sets the desired sharpening enhancement to the picture Min. -
Page 16: Av/S-Video Osd-Setup
Min. ~ Max.:0~20 / Default:10 Mute: To disable the audio function AV / S-Video OSD – Setup Auto Source: The monitor will auto detect the input source when the signal is not present Color Temp: Selects color temperature of either 6500°K or 9300°K Key Lock: The Key-Lock function is provided to prevent tempering. -
Page 17: Vga Osd-Image
To unlock, press “+” and “MENU” button together Source Display: This function is to allow the channel title to be displayed on the monitor Power On CH: This function is to assign a specific input source when turn the monitor ON None / AV / S-VIDEO / VGA Language: English / Dutch / Spanish / Italian / German / French... -
Page 18: Vga Osd-Audio
Min. ~ Max.:0~100 / Default:80 Advanced: ●Auto Adjust: VGA signal auto detection and adjustment ●Image Pos: Image position adjustment include H. V. ●Phase: It adjusts the sampling phase across one pixel time. When the phase is not adjusted properly, the picture will be unclear Therefore this value should be carefully adjusted Note: improper adjustment will cause image failure ●Clock: It adjusts the numbers of the pixel clock across one line time... -
Page 19: Vga Osd-Setup
Min. ~ Max.:0~20 / Default:10 Mute: To disable the audio function VGA OSD - Setup Auto Source: The monitor will auto detect the input source when the signal is not present Color Temp: Selects color temperature of either 6500°K or 9300°K... -
Page 20: Applicable Timing
Key Lock: The Key-Lock function is provided to prevent tempering. To unlock, press “+” and “MENU” button together Source Display: This function is to allow the channel title to be displayed on the monitor Power On CH: This function is to assign a specific input source when turn the monitor ON None / AV / S-VIDEO / VGA Language: English... - Page 21 PC RGB Input Input Signal Analog RGB 0.7Vp-p Input Impedance 75 Ohm ± 2% Polarity Positive, Negative Amplitude 0 ~0.7 ± 0.05Vp Multi-mode Supported Horizontal Frequency: 30~80KHz Vertical Frequency: 50~75Hz Power Supply Input Voltage 100~240VAC, 50/60Hz Output Voltage +12V DC, 5A Power Consumption Power Management On: 25W max.
-
Page 22: Specification
Specification Model 17” 19” Display Resolution 1280 x 1024@75Hz 1280 x 1024@75Hz (Panel) Active Area (mm) 337.920 (H) x 270.336 (V)mm 376.32(H) x 301.056 (V)mm Pixel Pitch 0.264mm 0.294mm LCD Profile Ratio Display Color 16.7M colors Brightness (Central) 250 cd/㎡ Typ. Contrast Ratio 800 : 1 typ. -
Page 23: Wall Mountable
M4 x 16L Wall Mountable Wall mountable User please use the correct screw type when installation. -
Page 24: Dimension
The desktop bracket and mount type bracket can use the same screw Dimension... - Page 25 17” LCD 19” LCD...
Need help?
Do you have a question about the M17VLED and is the answer not in the manual?
Questions and answers