Table of Contents
Advertisement
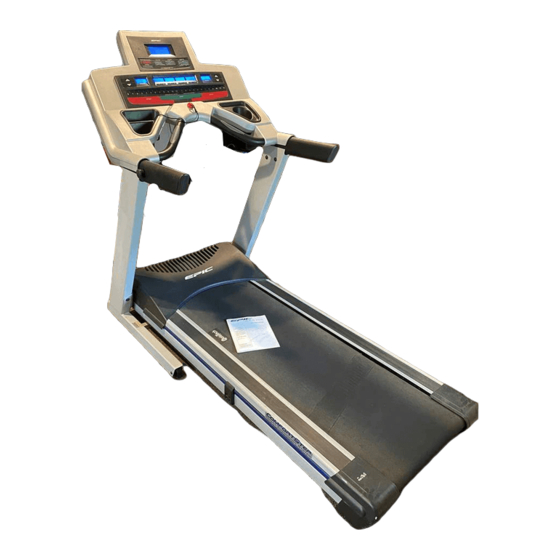
Model No. EPTL88105.0
Serial No.
USER'S MANUAL
Write the serial number in the space
above for future reference.
Serial Number Decal
QUESTIONS?
As a manufacturer, we are com-
mitted to providing complete
customer satisfaction. If you
have questions, or if parts are
damaged or missing, PLEASE
CONTACT OUR CUSTOMER
SERVICE DEPARTMENT
DIRECTLY.
CALL TOLL-FREE:
1-866-997-6999
Mon.–Fri., 6 a.m.–6 p.m. MST
ON THE WEB:
www.iconservice.com
CAUTION
Read all precautions and instruc-
tions in this manual before using
this equipment. Save this man-
ual for future reference.
Advertisement
Table of Contents

Related Manuals for Epic 425 MX EPTL88105.0


Summary of Contents for Epic 425 MX EPTL88105.0
- Page 1 Model No. EPTL88105.0 Serial No. USER'S MANUAL Write the serial number in the space above for future reference. Serial Number Decal QUESTIONS? As a manufacturer, we are com- mitted to providing complete customer satisfaction. If you have questions, or if parts are damaged or missing, PLEASE CONTACT OUR CUSTOMER SERVICE DEPARTMENT...
-
Page 2: Table Of Contents
HOW TO FOLD AND MOVE THE TREADMILL ........ -
Page 3: Important Precautions
2. Use the treadmill only as described in this manual. 3. Place the treadmill on a level surface, with at least eight feet of clearance behind it, two feet on each side, and six inches in front. Do not place the treadmill on any surface that blocks air openings. - Page 4 SAVE THESE INSTRUCTIONS The decals shown here have been placed on the treadmill. If a decal is missing, or if it is not legible, call the toll-free telephone number on the front cover of this manual and order a free replacement decal.
-
Page 5: Before You Begin
EPTL88105.0. The serial number can be found on a decal attached to the treadmill (see the front cover of this manual for the lo- cation). To avoid a registration fee for any service needed under warranty, you must register the treadmill at www.iconservice.com/registration. -
Page 6: Assembly
During shipping, a small amount of lubricant may be transferred to the top of the walking belt or the shipping carton. This is a normal condition and does not affect treadmill perfor- mance. If there is lubricant on top of the walking belt, simply wipe off the lubricant with a soft cloth and a mild, non-abrasive cleaner. - Page 7 2. Insert the Right Upright (74) into the indicated bracket on the Base (83); be careful not to dislodge the Cage Nuts (76) from the Right Upright (see the inset draw- ing). In addition, be careful not to pinch the Upright Wire Harness (75).
- Page 8 5. Attach the Catch (5) to the left side of the Frame (48) with two 3/4” Screws (4). With the help of a second person, raise the Frame (48) to a vertical position. Be careful not to raise the Frame past the vertical position.
- Page 9 8. Remove the elastic band holding the Upright Wire Harness (75). Have two people hold the console assem- bly near the Left Upright (73) and the Right Upright (74). Connect the Upright Wire Harness to the console wire. Make sure to connect the connectors properly (see the inset drawing);...
- Page 10 Uprights (73, 74). 12. Make sure that all parts are properly tightened before you use the treadmill. Note: Extra hardware may be included. Keep the included allen wrench in a secure place; the allen wrench is used to adjust the walking belt (see page 26).
-
Page 11: Treadmill Operation
Failure to use a properly functioning surge suppressor could result in damage to the control system of the treadmill. If the control system is damaged, the walking belt may change speed, accelerate, or stop unexpect- edly, which may result in a fall and serious injury. - Page 12 Two heart rate programs are also offered. Each program automatically adjusts the speed and in- cline of the treadmill to keep your heart rate within a tar- get range while you exercise. The console even allows you to create your own programs and save them in memory for future use.
- Page 13 Stop buttons. The Time display will begin to flash. To restart the walking belt, press the Start button or the Speed increase button. Change the incline of the treadmill as desired. To change the incline of the treadmill, press the Incline increase and de- crease buttons.
- Page 14 Follow your progress with the matrix and the displays. The matrix—When the manual mode is se- lected, the matrix will show a track that repre- sents 1/4 mile. As you exercise, the indicators around the track will light in succession until the entire track is lit.
- Page 15 When you are finished exercising, remove the key from the console. Step onto the foot rails, press either of the Stop but- tons, and adjust the incline of the treadmill to the Contacts lowest setting. The incline must be at the lowest...
- Page 16 If the speed and/or in- cline of the treadmill is about to change, the Speed display and/or the Incline display will flash to alert you.
- Page 17 When the program ends, make sure that the in- cline of the treadmill is at the lowest setting. Next, remove the key from the console and put it in a secure place. Note: If the displays and various indicators on the console remain lit after the key is removed, the console is in the “demo”...
- Page 18 Speed and Incline increase and decrease buttons. Every few times a Speed button is pressed, an additional indicator will light or darken in the Current Segment column.
- Page 19 . The speed setting for the sec- ond segment will then be shown in the flashing Current Segment column and the treadmill will au- tomatically adjust to the second speed and incline settings that you programmed.
- Page 20 HOW TO USE A HEART RATE PROGRAM CAUTION: If you have heart prob- lems, or if you are over 60 years of age and have been inactive, do not use the heart rate programs. If you are taking medication regu- larly, consult your physician to find whether the medication will affect your exercise heart rate.
- Page 21 Speed or Incline increase or de- crease buttons. However, when the console com- pares your heart rate to the target heart rate set- ting, the speed of the treadmill may automatically change to bring your heart rate closer to the target heart rate setting.
- Page 22 THE INFORMATION MODE/DEMO MODE The console features an information mode that keeps track of the total number of hours that the treadmill has been used and the total number of miles that the walk- ing belt has moved. The information mode also allows you to select miles or kilometers as the unit of mea- surement for speed and distance.
-
Page 23: How To Fold And Move The Treadmill
2. Move your right hand to the position shown and hold the treadmill firmly. Using your left hand, pull the latch knob to the left and hold it. Raise the treadmill until the catch is aligned with the latch pin. Slowly release the latch knob. - Page 24 HOW TO LOWER THE TREADMILL FOR USE 1. Hold the upper end of the treadmill with your right hand as shown. Using your left hand, pull the latch knob to the left and hold it. Pivot the treadmill down until the frame is past the latch pin.
-
Page 25: Troubleshooting
PROBLEM: The displays of the console do not function properly SOLUTION: a. Remove the key from the console and UNPLUG THE POWER CORD. Place the treadmill in the storage position (see HOW TO FOLD AND MOVE THE TREADMILL on page 23). - Page 26 1/8”. If necessary, loosen the indicated Screw (13), move the Reed Switch slightly, and then retighten the Screw. Reattach the hood and run the treadmill for a few minutes to check for a correct speed reading. PROBLEM: The walking belt slows when walked on SOLUTION: a.
-
Page 27: Exercise Guidelines
For maximum fat burning, adjust the speed or incline of the treadmill until your heart rate is near the middle number in your training zone. Aerobic Exercise If your goal is to strengthen your cardiovascular sys- tem, your exercise must be “aerobic.”... - Page 28 SUGGESTED STRETCHES The correct form for several basic stretches is shown at the right. Move slowly as you stretch—never bounce. 1. Toe Touch Stretch Stand with your knees bent slightly and slowly bend forward from your hips. Allow your back and shoulders to relax as you reach down toward your toes as far as possible.
- Page 29 NOTES...
-
Page 30: Part List
PART LIST—Model No. EPTL88105.0 To locate the parts listed below, see the EXPLODED DRAWING attached in the center of this manual. Key No. Qty. Description Foot Rail Cover Foot Rail Platform Cushion 3/4” Screw Latch Catch Walking Platform Belt Guide Belt Guide Screw Front Isolator Platform Bolt, Front... - Page 31 Key No. Qty. Description Handrail Latch Assembly Latch Warning Decal Shock Pin Filter Wire Right Foam Grip Right Incline Rod Bushing Key No. Qty. Description Incline/Controller Wire 4” Green Wire, M/Ring 6” Blue Wire, 2 F User’s Manual #These parts are not illustrated...
-
Page 34: How To Order Replacement Parts
• the MODEL NUMBER of the product (EPTL88105.0) • the NAME of the product (EPIC 425 MX treadmill) • the SERIAL NUMBER of the product (see the front cover of this manual) • the KEY NUMBER and DESCRIPTION of the part(s) (see the PART LIST on pages 30 and 31) ICON Health &...
Need help?
Do you have a question about the 425 MX EPTL88105.0 and is the answer not in the manual?
Questions and answers
Tread mill has gotten much louder. Seems like something needs to be lubricated.
The underside of the treadmill walking belt is already coated with high-performance lubricant. If noise is due to lack of lubrication, check if the belt needs additional lubricant. However, the manual does not provide specific instructions for applying more lubricant. If lubricant has transferred to the top of the belt, wipe it off with a soft cloth and mild, non-abrasive cleaner. For further lubrication steps, follow standard treadmill maintenance procedures or consult a qualified technician.
This answer is automatically generated