Table of Contents
Advertisement
Model No. EPTL09706.1
Serial No.
Find the serial number in the location
shown below. Write the serial number
in the space above for reference.
Serial Number Decal
QUESTIONS?
As a manufacturer, we are com-
mitted to providing complete
customer satisfaction. If you
have questions, or if parts are
damaged or missing, PLEASE
CONTACT OUR CUSTOMER
SERVICE DEPARTMENT
DIRECTLY.
CALL TOLL-FREE:
1-866-997-6999
Mon.–Fri., 6 a.m.–6 p.m. MST
ON THE WEB:
www.iconservice.com
CAUTION
Read all precautions and instruc-
tions in this manual before using
this equipment. Save this manual
for future reference.
USER'S MANUAL
Advertisement
Table of Contents

Related Manuals for Epic VIEW 550 EPTL09706.1


Summary of Contents for Epic VIEW 550 EPTL09706.1
- Page 1 Model No. EPTL09706.1 Serial No. Find the serial number in the location shown below. Write the serial number in the space above for reference. Serial Number Decal QUESTIONS? As a manufacturer, we are com- mitted to providing complete customer satisfaction. If you have questions, or if parts are damaged or missing, PLEASE CONTACT OUR CUSTOMER...
-
Page 2: Table Of Contents
HOW TO FOLD AND MOVE THE TREADMILL ........ -
Page 3: Important Precautions
2. Use the treadmill only as described. 3. Place the treadmill on a level surface, with at least eight feet of clearance behind it and two feet on each side. Do not place the treadmill on any surface that blocks air openings. - Page 4 21. Do not change the incline of the treadmill by placing objects under the treadmill. 22. When folding or moving the treadmill, make sure that the frame is held securely by the pin on the latch knob. 23. Inspect and properly tighten all parts of the treadmill regularly.
- Page 5 Codes). See NEC Section 810–21 (f). The decals shown here have been placed on the treadmill. If a decal is missing or illegible, call the toll-free telephone number on the front cover of this manual and order a free replace- ment decal.
-
Page 6: Before You Begin
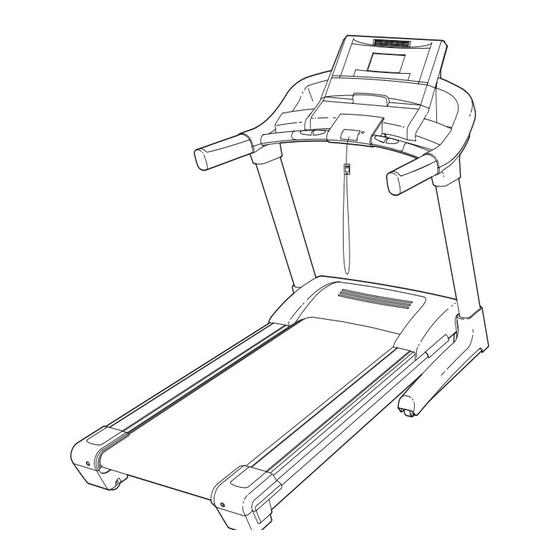
The model number of the treadmill is EPTL09706.1. The serial number can be found on a decal attached to the treadmill (see the front cover of this manual for the location). Before reading further, please familiarize yourself with the parts that are labeled in the drawing below. -
Page 7: Assembly
This is a normal condition and does not affect treadmill performance. If there is lubricant on top of the walking belt, simply wipe off the lubricant with a soft cloth and a mild, non-abrasive cleaner. - Page 8 Base (83) with two Upright Bolts and two Star Washers (not shown). With the help of a second person, lower the treadmill off the cardboard stand. 3. Identify the Right Upright Sleeve (96) and the Left Upright Sleeve (95). Slide the Right Upright Sleeve onto the Right Upright (74) and the Left Upright Sleeve onto the Left Upright (73).
- Page 9 4. With the help of a second person, hold the con- sole assembly near the Uprights (73, 74). Connect the Upright Wire Harness (75) to the Console Wire Harness (71). Make sure to con- nect the connectors properly (see the inset drawing).
- Page 10 75 ohm antenna terminal (see page 12). 9. Make sure that all parts are properly tightened before you use the treadmill. Keep the included hex key in a secure place; the hex key is used to adjust the walking belt (see page 23). To protect the floor or carpet from damage, place a mat under the treadmill.
- Page 11 If you purchase the optional chest pulse sensor (see page 20), follow the steps below to install the re- ceiver included with the chest pulse sensor. 1. Make sure that the power cord is unplugged. Remove the indicated 3/4” Screws (4) from the Pulse Receiver Cover (70) on the back of the Console Assembly (A).
- Page 12 Before the personal television can be used, you must connect an antenna, a 75 ohm CATV cable, or a VCR to the 75 ohm antenna terminal on the treadmill frame. Note: No antenna, cable, or adapter is included. HOW TO CONNECT AN ANTENNA Indoor Antenna 1.
-
Page 13: Operation And Adjustment
Failure to use a properly functioning surge suppressor could result in damage to the control system of the treadmill. If the control system is damaged, the walking belt may change speed, accelerate, or stop unexpect- edly, which may result in a fall and serious injury. -
Page 14: Console Diagram
Loss programs, seven Aerobic Fitness programs, and Clip seven Performance programs. Each program automati- cally controls the speed and incline of the treadmill as it guides you through an effective workout. Whether you select the manual mode or a preset pro- gram, you can enjoy the shows of your choice on the personal television while you get in shape. -
Page 15: How To Turn On The Power
Make sure that the circuit breaker is in the reset position. Stand on the foot rails of the treadmill. Find the clip attached to the key (see the drawing on page 14), and slide the clip securely onto the waistband of your clothes. - Page 16 Select a display mode and follow your progress with the exercise information on the screen. As you walk or run on the treadmill, the screen can display the following exercise information: • The elapsed time. Note: When a program is se- lected, the screen will show the time remaining in the program instead of the elapsed time.
-
Page 17: How To Use A Preset Program
When only three seconds remain in the first seg- ment of the program, a series of tones will sound. If the speed and/or the incline of the treadmill is about to change, the new speed setting and/or in- cline setting will appear on the screen to alert you. - Page 18 If you have connected an antenna, a 75 ohm CATV cable, or a VCR to the 75 ohm antenna ter- minal on the treadmill, select the Tuner source. If you have plugged a DVD player or VCR into the three audio/video RCA jacks, select the Input 1 source.
-
Page 19: Information Mode
“demo” mode is se- lected. This mode is intended to be used only when a treadmill is displayed in a store. When the demo mode is selected, the power cord can be plugged in, the key can be removed from the con- sole, and the displays on the console will automati- cally light in a preset sequence. - Page 20 THE OPTIONAL CHEST PULSE SENSOR An optional chest pulse sensor offers hands-free oper- ation as it monitors your heart rate during your work- outs. To purchase the optional chest pulse sensor, call the toll-free telephone number on the front cover of this manual.
-
Page 21: How To Fold And Move The Treadmill
HOW TO LOWER THE TREADMILL FOR USE 1. Hold the upper end of the treadmill with your left hand. Pull the latch knob to the left and hold it. Pivot the frame downward and release the latch knob. Note: To release the latch knob, it may be necessary to push the frame forward as you pull the latch knob to the left. -
Page 22: Troubleshooting
TROUBLESHOOTING Most treadmill problems can be solved by following the steps below. Find the symptom that applies, and follow the steps listed. If further assistance is needed, please see the front cover of this manual. PROBLEM: The power does not turn on SOLUTION: a. - Page 23 Screw (29), move the Reed Switch slightly, and then retighten the Screw. Then, reattach the hood, and run the treadmill for a few minutes to check for a correct speed reading. PROBLEM: The walking belt slows when walked on SOLUTION: a.
- Page 24 SOLUTION: a. With the key in the console, press one of the Incline buttons. While the incline is changing, re- move the key. After a few seconds, re-insert the key. The treadmill will automatically rise to the maximum incline level and then return to the minimum level. This will recalibrate the incline system.
-
Page 25: Conditioning Guidelines
For maximum fat burning, adjust the speed and incline of the treadmill until your heart rate is near the middle number in your training zone. Aerobic Exercise If your goal is to strengthen your cardiovascular sys- tem, your exercise must be “aerobic.”... -
Page 26: Part List
PART LIST—Model No. EPTL09706.1 To locate the parts listed below, see the EXPLODED DRAWING attached in the center of this manual. Key No. Qty. Description Foot Rail Cover Foot Rail Isolator Screw 3/4” Screw 3/4” Tek Screw Walking Platform Belt Guide Belt Guide Screw Front Isolator Platform Bolt, Front... - Page 27 Key No. Qty. Description Handrail Latch Assembly Latch Warning Decal AV Wire Nut Filter Wire Lift Motor Bolt Rear Roller Washer Incline/Controller Wire Incline Stop Bracket Stop Bracket Spacer Static Decal Console Plate TV Cable Nut TV Cable Star Washer Lower Latch Bolt Handrail Cover Fastener Audio/Video Wire Harness...
- Page 28 EXPLODED DRAWING—Model No. EPTL09706.1 R0107A To identify the parts shown on this EXPLODED DRAWING, see the PART LIST on pages 26 and 27.
- Page 29 EXPLODED DRAWING—Model No. EPTL09706.1 R0107A...
-
Page 30: Ordering Replacement Parts
• the MODEL NUMBER of the product (EPTL09706.1) • the NAME of the product (EPIC VIEW 550 treadmill) • the SERIAL NUMBER of the product (see the front cover of this manual) • the KEY NUMBER and DESCRIPTION of the part(s) (see the PART LIST on pages 26 and 27 and the EX- PLODED DRAWING attached in the center of this manual) ICON Health &...
Need help?
Do you have a question about the VIEW 550 EPTL09706.1 and is the answer not in the manual?
Questions and answers