HearthStone 8470 Owner's Manual
Wood-burning fireplace insert
Hide thumbs
Also See for HEARTHSTONE 8470:
- Owner's manual (31 pages) ,
- Installation manual (9 pages) ,
- Assembly instructions (3 pages)
Table of Contents
Advertisement
Quick Links
PLEASE READ THIS ENTIRE OWNER'S MANUAL BEFORE YOU INSTALL AND USE
YOUR NEW Morgan WOOD FIREPLACE INSERT. To reduce the risk of fire, follow the
installation instructions. Failure to follow these instructions may result in property
SAVE THESE INSTRUCTIONS FOR FUTURE REFERENCE!
damage, bodily injury, or even death.
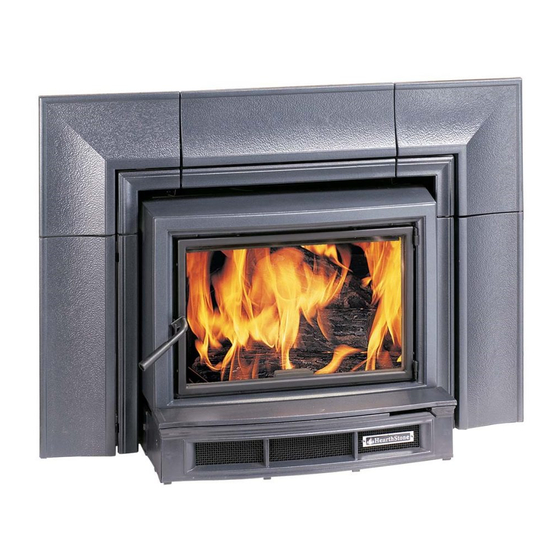
Morgan
Wood-burning Fireplace Insert
OWNER'S MANUAL
INSTALLATION &
OPERATING INSTRUCTIONS
(Model 8470)
Morgan: Model 8470
Manual: 6400-40445
Revised: 7/28/11
Advertisement
Table of Contents
Troubleshooting

Related Manuals for HearthStone HEARTHSTONE 8470


Summary of Contents for HearthStone HEARTHSTONE 8470
- Page 1 Morgan (Model 8470) Wood-burning Fireplace Insert OWNER'S MANUAL INSTALLATION & OPERATING INSTRUCTIONS PLEASE READ THIS ENTIRE OWNER’S MANUAL BEFORE YOU INSTALL AND USE YOUR NEW Morgan WOOD FIREPLACE INSERT. To reduce the risk of fire, follow the installation instructions. Failure to follow these instructions may result in property damage, bodily injury, or even death.
-
Page 2: Table Of Contents
TABLE OF CONTENTS INTRODUCTION ..........................1 ..............................2 ODES ........................... 2 AFETY NFORMATION Periodic Checklist......................... 2 Emergency Procedures ......................... 3 ............................. 4 PECIFICATIONS SETTING UP YOUR MORGAN WOOD FIREPLACE INSERT............ 5 ............................5 NPACKING ....................5 NSTALLING IREPLACE NSERT ................5 EARTH EQUIREMENTS LOOR... -
Page 3: Introduction
Introduction Congratulations! You have just invested in a most unique install the Fireplace Insert in a location where gasoline, wood burning Fireplace Insert – the Morgan Wood kerosene, charcoal lighter fluid or other flammable liquids Burning Fireplace Insert from Hearthstone Quality Home are used or stored. -
Page 4: Codes
Never use gasoline type fuel, kerosene, charcoal ODES lighter fluid, or other liquid fuels or solid fire starters When you install your Morgan wood Fireplace Insert, it is to start or invigorate the fire. These fuels can imperative that you adhere to all local codes, which can possibly generate carbon monoxide, which can sap be obtained from either of the following two National the supply of oxygen. -
Page 5: Emergency Procedures
dollar bill. If the bill pulls out without any resistance, WARNING then your stove’s door isn't sealed properly. DO NOT ATTEMPT TO PUT OUT A STOVEPIPE tighten the seal, change the door gasket OR CHIMNEY FIRE BY THROWING WATER ONTO STOVE, STOVEPIPE, At the End of Every Season:... -
Page 6: Specifications
Width 24.88” (63.2 cm) PECIFICATIONS Maximum Heat Output. 40,000 BTU per hour of Depth 14.25”(36 cm) cordwood (based on independent laboratory test Front Door Size 18" wide x 11.25" high results). (45.7 x 28.5 cm) 1,000 to 1,200 square feet. Size of Heated Area. -
Page 7: Setting Up Your Morgan Wood Fireplace Insert
Setting up Your Morgan Wood Fireplace Insert NPACKING Hearthstone Stoves packages your Morgan Fireplace Insert with the greatest care, so that it ships safely. Under certain circumstances, however, damage can occur during transit and handling. When you receive your Fireplace Insert, unpack it carefully, inspecting your Fireplace Insert and all parts for damage. - Page 8 Floor protector’s come with various types of specifications. To convert a floor protector’s specification to an R-value, do one of the following: If the R-value is given, use that value—no conversion is needed. If a K-factor is given with a required thickness (T) in inches, use this formula: R-value = 1/K x ...
- Page 9 INSTALLING THE SURROUND Figure 4 Morgan Surround Assembly To complete the assembly, you will need a Phillips 1. Position the Center Top Inner and Outer screwdriver and a 7/16” wrench. The Morgan surround Sections (3+4) of the surround into position as assembly will come in four sections, with a hardware illustrated in Figure 4.
-
Page 10: Venting Components And Configuration
1. Lift the front of the baffle. This relieves the Clearances to NFPA 211 Protected Surfaces weight from, and unlocks the shelf tabs. 2. Pull forward to free the baffle. You can reduce the clearances to combustible surfaces by 3. The baffle should now be free to drop down and using any National Fire Protection Agency (NFPA) pull out of the front door, or rest on the floor of approved wall protection system. -
Page 11: Installing A Venting System
factory-built fireplace, the fireplace must have the following characteristics: It is very important to follow minimum clearances for Listed per UL 127 or ULC S610. chimney connectors to combustibles such as walls and Include a full height listed chimney liner meeting ceilings when installing the stove near non- type HT requirements (2100°... -
Page 12: Chimney Cap
needed), insulation shield, roof flashing, chimney cap, and any other needed accessories. Follow the Whenever possible, choose an interior chimney. manufacturer’s instructions when installing the chimney interior chimney heats up more quickly and retains its and accessories. In addition, be sure to maintain all heat;... -
Page 13: Connection To A Masonry Chimney
tile size for best results. An oversized flue will contribute to the accumulation of creosote. Use the following checklist to ensure that your masonry chimney meets these minimum requirements: Chimney wall construction: Brick or modular block at least 4" (102 mm) thick. ... -
Page 14: Operating Your Morgan Wood Fireplace Insert
Operating Your Morgan Wood Fireplace Insert ▌ WARNING: HOT WHILE IN OPERATION. KEEP CHILDREN, CLOTHING AND FURNITURE AWAY. CONTACT MAY CAUSE SKIN BURNS. Please read this entire chapter before lighting your first fire. It explains the controls and features of your wood Fireplace Insert, how to choose firewood, and how to break-in your Fireplace Insert and use it on a daily basis. -
Page 15: Buildinga Fire
The quality of your firewood affects heat output, duration soapstone must be driven out slowly to minimize the of burn and performance of your Fireplace Insert. “shock” to the stone of its first exposure to high firebox Softwoods generally burn hotter and faster, while temperatures. -
Page 16: Normal Operation
in the center of the firebox. Arrange kindling in a crisscross pattern over the UILDING VERYDAY newspaper. Kindling should approximately ten pieces, 1/2" (13 mm) in 1) Open the front door and place five or six double diameter and 10" to 18" (254 mm to 457 sheets of tightly twisted newspaper in the center mm) long. -
Page 17: Maintenance
EXCESSIVE DRAFT: Contact your dealer to have a draft reading taken. Any draft in excess of 0.1 wc The stovepipe connector and chimney should be inspected requires a damper in the stovepipe. Some installations at least monthly during the heating season to determine if may require more than one damper. -
Page 18: Cast Iron
are available from your local dealer. Never attempt to clean the glass while the fire is burning or the glass is hot. TAPE GASKET (3160-080) Most deposits can be cleaned by following the DOOR, INNER FRAME (5470-040) instructions provided with the cleaner. To clean heavier GLASS (3030-039) deposits, remove the top hinge and lift the door straight up and off the Fireplace Insert (take care to save hardware... - Page 19 (200 degree C) stovepipe confirms the Fireplace Insert is stovepipe joints, a poor stovepipe-to-thimble connection, supplying sufficient heat. Keep in mind that your house or a leaky chimney may cause inadequate draft. itself will regulate room/house temperatures. How well SEASONAL FACTORS: Early fall and late spring are the walls, floors and ceilings are insulated, the number generally difficult seasons in which to establish proper and size of glass windows, the tightness of outside doors,...
-
Page 20: Troubleshooting Guide
ROUBLESHOOTING UIDE PROBLEM POSSIBLE CAUSE SOLUTIONS STOVE SMOKES Operating Technique Fully open the primary air control one minute before opening doors. Cold Chimney Preheat the chimney when first starting a fire. Blocked Chimney Examine the chimney and stovepipe for blockage or creosote accumulations. -
Page 21: Replacement Parts & Optional Accessories
& O EPLACEMENT ARTS PTIONAL CCESSORIES PART NUMBER: DESCRIPTION: PART NUMBER: DESCRIPTION: CASTINGS: STEEL PARTS: 5470-005 LEVELING SKID 2410-700 BOTTOM (REAR SECTION) 5470-010 LEVELING CHANNEL 2410-705 BOTTOM (FRONT SECTION) 5470-015 BOTTOM AIR SHROUD 2410-710 PRIMARY AIR SLIDER 5470-020 PRIMARY AIR HANDLE 2410-715 BACK 2410-720... -
Page 22: Afety Abel
AFETY ABEL CONTACT YOUR LOCAL BUILDING OFFICIALS ABOUT RESTRICTIONS AND INSTALLATION INSPECTION IN YOUR AREA Listed Room Heater, Solid Fuel Type Manufactured by: Intertek Testing Services NA, inc. WN 04380 “PREVENT HOUSE FIRES” 317 Stafford Ave. Morrisville VT 05661 Install and use only in accordance with SERIAL # manufacture’s installation instructions and your local building codes. -
Page 23: Warranty Registration
WARRANTY REGISTRATION The Original Purchaser may send a completed and signed Warranty Registration Form, which is enclosed in the Woodstove warranty packet, to the following address: Hearthstone Quality Home Heating Products, Inc. Warranty Department 317 Stafford Avenue Morrisville, VT 05661 NOTE: SENDING IN THE SIGNED WARRANTY REGISTRATION FORM IS NOT A CONDITION OF WARRANTY COVERAGE OR HEARTHSTONE’S PERFORMANCE. -
Page 24: Preparing The Morgan Wood Insert For Installation
Preparing the Morgan Wood Insert for installation (Refer to Owner’s Manual for the complete installation instructions) . Remove the contents within the firebox (owner’s manual, baffle and soapstone refractory box) Remove the hang tag on the front door and place in the owners manual) . - Page 25 Front facade . Open the large cardboard box Surround bracket (Right) containing the surround kit. Locate the left and right surround brackets. Start the ¼-20 bolt through the slotted opening on the surround brackets, and attach to the sides of the unit.
-
Page 26: Leveling Bolts
. Level the unit using a 9/16” and 7/16” wrench or ratchet on the three leveling bolts. (To level the rear bolt, you must first loosen the jam nut at the base of the bolt) Leveling bolts . Attach the liner (See Owner’s Manual for complete instructions) Pull the flue liner into the firebox through the flue opening on top of the insert and attach to the flue collar. - Page 27 . Attach the surround to the unit. (The Owner’s Manual contains full instructions on how to install) . Mount the baffle in place Note: The baffle material is a high temperature ceramic. It will last for years under normal use, however it can be easily damaged by impact or force.
- Page 28 . Locate and mount the front door handle using the 3” bolt and lock washers provided. . Install the soapstone firebrick BEFORE INSTALLING ANY SOAPSTONE, USE A 7/16” WRENCH TO REMOVE THE THREE STONE RETAINER CLIPS. (The rear clip is not shown below) b.
- Page 29 NOTE: If you plan on installing a blower, now is the time to install it, prior to reassembling the unit. . The door to the Morgan is reversible. It can be opened from the left hand side, or the right. It will be shipped from Hearthstone opening on the left hand side.
Need help?
Do you have a question about the HEARTHSTONE 8470 and is the answer not in the manual?
Questions and answers