Table of Contents
Advertisement
Quick Links
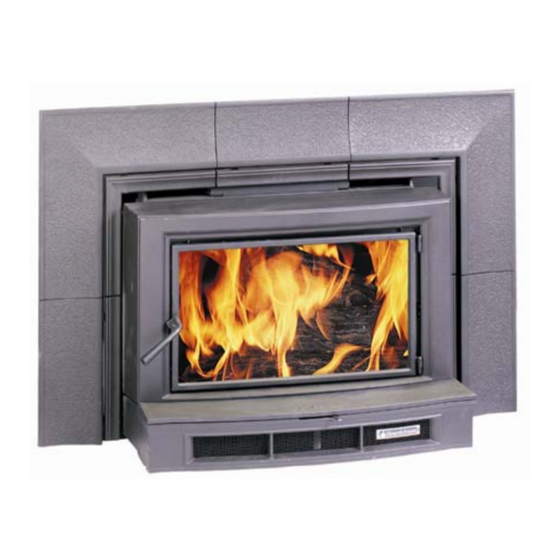
Clydesdale
(Model 8490)
Non-Catalytic Wood
Fireplace Insert
OWNER'S MANUAL
INSTALLATION AND OPERATING
INSTRUCTIONS
PLEASE READ THIS ENTIRE OWNER'S MANUAL BEFORE YOU INSTALL AND USE
YOUR NEW Clydesdale WOOD FIREPLACE INSERT. To reduce the risk of fire, follow
the installation instructions. Failure to follow these instructions may result in property
damage, bodily injury, or even death.
SAVE THESE INSTRUCTIONS FOR FUTURE REFERENCE!
CONTACT LOCAL AUTHORITIES HAVING JURISDICTION (BUILDING DEPARTMENT
or FIRE OFFICIALS) ABOUT PERMITS REQUIRED, RESTRICTIONS AND
INSTALLATION INSPECTION IN YOUR AREA.
Hearthstone Quality Home Heating Products Inc ®
Clydesdale Model 8490
Manual: 6400-40446
Revised: 9/26/2008
Advertisement
Table of Contents

Related Manuals for HearthStone Hergom Clydesdale


Summary of Contents for HearthStone Hergom Clydesdale
- Page 1 SAVE THESE INSTRUCTIONS FOR FUTURE REFERENCE! CONTACT LOCAL AUTHORITIES HAVING JURISDICTION (BUILDING DEPARTMENT or FIRE OFFICIALS) ABOUT PERMITS REQUIRED, RESTRICTIONS AND INSTALLATION INSPECTION IN YOUR AREA. Hearthstone Quality Home Heating Products Inc ® Clydesdale Model 8490 Manual: 6400-40446 Revised: 9/26/2008...
-
Page 2: Table Of Contents
TABLE OF CONTENTS INTRODUCING YOUR CLYDESDALE WOOD FIREPLACE INSERT ........2 ..............................3 ODES ..........................3 AFETY NFORMATION ............................5 PECIFICATIONS SETTING UP YOUR CLYDESDALE WOOD FIREPLACE INSERT ..........6 ............................. 6 NPACKING ..................... 6 NSTALLING IREPLACE NSERT ................6 EARTH EQUIREMENTS LOOR... -
Page 3: Introducing Your Clydesdale Wood Fireplace Insert
Validate your warranty - return your warranty registration card to HearthStone within 30 days of purchase. Once Use these instructions as well as national, state, and local your warranty has been validated by returning your building codes to install your Fireplace Insert. -
Page 4: Codes
Follow these safety precautions: ODES Never modify this Fireplace Insert in any way, When you install your Clydesdale wood Fireplace Insert, especially the primary air control system. it is imperative that you adhere to all local codes, which can be obtained from either of the following two National Never burn kiln dried wood, painted or treated wood, sources: solvents, trash, plywood, colored or glossy paper,... - Page 5 MERGENCY ROCEDURES ERIODIC HECKLIST If you have a stovepipe or chimney fire, follow these instructions: Perform each of these tasks at the specified intervals. 1. If the fire is too threatening, leave the area and call At the End of Every Week: the fire department immediately! If not, perform the •...
-
Page 6: Specifications
Height 22.5" (57.2 cm) PECIFICATIONS Width 31.08” (78.9 cm) Maximum Heat Output. 60,000 btus per hour of cordwood (based on independent laboratory test Depth 17.56”(44.6 cm) results). Front Door Size 22" wide x 11.5" high 1,800 square feet. Size of Heated Area. (55.9 x 29.2 cm) 2.4 cubic feet or 48 pounds of Firebox Capacity. -
Page 7: Setting Up Your Clydesdale Wood Fireplace Insert
Setting up Your Wood Fireplace Insert NPACKING HearthStone Stoves packages your Clydesdale Fireplace Insert with the greatest care, so that it ships safely. Under certain circumstances, however, damage can occur during transit and handling. When you receive your Fireplace Insert, unpack it carefully, inspecting your Fireplace Insert and all parts for damage. - Page 8 Horizontal still air HearthStone’s Thermo-Ceramic Baffle System To enhance the combustion efficiency and reduce the emissions of the fire in your stove HearthStone QHHP, Inc. has developed an advanced THERMO-CERAMIC baffle system. This system uses a lightweight, durable ceramic material above the burner tubes to maintain the high temperatures in the secondary combustion area and maintain the low emission –...
- Page 9 INSTALLING THE SURROUND Figure 4 Clydesdale Surround Assembly To complete the assembly, you will need a Phillips panel using the fasteners provide in the zip lock screwdriver and a 7/16” wrench. The Clydesdale surround bag – proper placement of the screws is called assembly will come in four sections, with a hardware out in Figure 4 package.
-
Page 10: Venting Components And Configuration
211 for specifications and complete details. You can NSTALLING A ENTING YSTEM obtain this information directly from NFPA. DO NOT CONNECT THIS UNIT TO ANY AIR Clearances to combustible surfaces can be reduced by DISTRIBUTION DUCT OR SYSTEM using any NFPA approved wall protection system. Secure all joints, including attaching the stovepipe to the REFER NFPA... - Page 11 Not be altered in any way, except for the Make sure the size of the chimney’s flue is appropriate for following: the Clydesdale. The Clydesdale requires a 6" (152 mm) External trim pieces which do not affect the inside diameter flue for new installations. A 6” diameter operation of the fireplace can be removed, providing they flue provides adequate draft and performance.
- Page 12 Figure 6 Connecting to a chimney...
-
Page 13: Connection To A Masonry Chimney
6” off the hearth or floor. In order to finish At least 3 feet (0.9 m) higher than the highest part of the surrounds, HearthStone offers a surround cap kit. See the roof opening through which it passes. the illustration in figure 8 to see the placement of the At least 2 feet (0.6 m) higher than any part of the roof... -
Page 14: Operating Your Clydesdale Wood Fireplace Insert
MUST USE THE ACCESSORY SCREEN AVAILIBLE conversely, less air creates a slower burn. To fully open THROUGH YOUR HEARTHSTONE DEALER the primary air intake, push the handle as far as it will go If operating with the door open, some fuels may create to the left toward the firebox;... -
Page 15: Buildinga Fire
The quality of your firewood affects heat output, duration Fireplace Insert may cause castings to crack or may of burn and performance of your Fireplace Insert. damage other Fireplace Insert parts. Moisture in the Softwoods generally burn hotter and faster, while soapstone must be driven out slowly to minimize the hardwoods burn longer and produce more coals. - Page 16 on a cold Fireplace Insert before proceeding with normal UILDING REAK operation. We recommend one break-in fire at the start of each heating season. 1) Open the front door and place five or six double sheets of tightly twisted newspaper in the center of the firebox.
-
Page 17: Maintenance
Over-firing caused excessive draft, when engaged, minimizes creosote buildup in the inappropriate fuel, and operator error. Correct an over- chimney. fire situation as follows: EXCESSIVE DRAFT: Contact your dealer to The stovepipe connector and chimney should be inspected have a draft reading taken. at least monthly during the heating season to determine if INAPPROPRIATE FUEL: Do not burn coal, a creosote build-up has occurred. - Page 18 WARNING Do not use substitute materials when replacing the glass or any door components. Only LASS authorized HearthStone components should be used. Do not operate the Fireplace Insert with a broken door Glass specifications 12-5/16” x 22-7/8” x5mm neoceram glass.
-
Page 19: Troubleshooting
Generally, the stronger and WIND VELOCITY: steadier a wind, the stronger (better) the draft. However, TROUBLESHOOTING "gusty" wind conditions may cause erratic downdrafts. Your Heating Needs Chimney drafts are BAROMETRIC PRESSURE: typically sluggish on balmy, wet or muggy days. This is a Virtually all woodstove operators experience basic weather-related phenomenon, which generally is self- common problems at one time or another. - Page 20 ROUBLESHOOTING UIDE PROBLEM POSSIBLE CAUSE SOLUTIONS STOVE SMOKES Operating Technique Fully open the primary air control one minute before opening doors. Cold Chimney Preheat the chimney when first starting a fire. Blocked Chimney Examine the chimney and stovepipe for blockage or creosote accumulations.
- Page 21 SECONDARY AIR TUBE #3 3030-041 CLYDESDALE GLASS 5490-074 SECONDARY AIR TUBE #4 3120-490 BAFFLE FIBERBOARD, CLYDESDALE 5490-080 BAFFLE SUPPORT S.S. 3400-101 HEARTHSTONE NAMETAG 5490-085 AIR SHROUD, TOP LEFT 3300-617 RATING LABEL 5490-087 AIR SHROUD, TOP RIGHT 3300-618 EPA HANG TAG, CLYDESDALE 5490-090...
-
Page 22: Safety Label
AFETY ABEL... - Page 23 CONTACT YOUR LOCAL BUILDING OFFICIALS ABOUT RESTRICTIONS AND INSTALLATION INSPECTION IN YOUR AREA Listed Room Heater, Solid Fuel Type Manufactured by: Intertek Testing Services NA, inc. WN 04380 “PREVENT HOUSE FIRES” 317 Stafford Ave. Morrisville VT 05661 Install and use only in accordance with SERIAL # manufacture’s installation instructions and your local building codes.
- Page 24 “Original Purchaser”) the new woodstove manufactured by HearthStone and purchased by the Original Purchaser (the “Woodstove”) against any of the occurrences listed in this document that result from defects in material or workmanship. All obligations of HearthStone under this document commence on the date the Original Purchaser purchases the Woodstove (the “Purchase Date”).
- Page 25 12. A defect in any part of the Woodstove if the Original Purchaser fails to comply with HearthStone’s or a Dealer’s request to ship the part or the Woodstove to HearthStone or a Dealer, as the case may be.
- Page 26 Woodstove is located. In the event the Original Purchaser refuses to allow a Dealer to make a service call, HearthStone or a Dealer, as the case may be, will request that the Original Owner return the defective part, or the entire Woodstove (if needed), with shipping prepaid, to HearthStone or a Dealer.
- Page 27 Technical Data Sheet REPARING THE LYDESDALE NSERT FOR NSTALLATION Guide for Installing the Clydesdale Model 8490 (Refer to the Owner’s Manual for the complete installation instructions.) Page:26 of 10 Date: 9/26/2008 Front Facade Front Door Ash Lip #1 - T HOTO LYDESDALE ATTACHED TO THE SHIPPING PALLET Step One: Remove the contents of the firebox.
- Page 28 HOTO removable baffle assembly inside Clydesdale firebox. (Shown looking straight into firebox through the front door.) DO NOT REMOVE from the firebox unless required (see note in step one). Loosen these socket head screws to allow baffle to come out of the firebox Step Two: Remove the Clydesdale from the pallet.
- Page 29 Page: 3 of 10 Step Three: Install the door handle onto the latch. The wooden handle, ¼” x 2-3/4” bolt, and ¼” lock washer are located in a plastic zip back removed from the firebox in step one. Place the washer onto the bolt and then push the bolt through the handle.
- Page 30 HOTO Reversible door catch HOTO Phillips screw in hinge Place the façade back onto the unit and tighten the clips with the phillips screwdriver. Step Four: Measure the opening of the fireplace. By measuring the fireplace cavity, you will need to determine the following: 1.
- Page 31 be dropped into the firebox for attachment to the flue collar. If the baffle and flue do not need to be removed, you can skip to step 7. Step Five: Change the position of the flue collar if necessary. Locate the four bolts in the back of the stove on the corners of the flue collar.
- Page 32 With the baffle out of the firebox, remove the flue collar as described in step five. Place the flue collar in the firebox and insert the Clydesdale unit into the fireplace opening. Drop the flue liner (meeting UL 1777) into the firebox through the flue collar opening. Attach the flue liner to the collar, push the collar and flue up to the top of the firebox, making sure the collar slips onto the four bolts, and secure it by turning the nuts back onto the bolts and tighten with a 7/16”...
- Page 33 Step Eight: Install the soapstone refractor pieces in the firebox. The Clydesdale refractory stone set includes the following stones: I.D. # I UANTITY LLUSTRATION 4-1/2” x 9” 4-1/2” X 4-1/2” ______ 4-1/2” X 12” Angled Cut ______ 4-1/2” x 11-1/4” Angled Cut HOTO Installation of the stones on the floor.
- Page 34 HOTO Secure the rear stone with the rear stone- retaining clip. Slide retaining clip down onto bolt heads and tighten. HOTO Install the left and right side stones and secure with the shorter side stone retaining clips. Step Nine: Remove the surround components from the large cardboard box that accompanied the Clydesdale.
- Page 35 Figure #2 – The Assembled Surround Step Ten: Attach the surround bracket to the firebox. Remove the two bolts on the top of the firebox indicated by the arrows below. Place the bracket onto the top of stove and secure it by finger-tightening the screws.
- Page 36 HOTO Looking down on the firebox top, the surround bracket is fully pushed in toward the firebox. Retaining bolts can be seen through access holes. Step Fourteen: Finish steps HOTO Side view of the ash lip showing phillips screw that must be tighten when ash lip is placed back on the unit.
Need help?
Do you have a question about the Hergom Clydesdale and is the answer not in the manual?
Questions and answers