Table of Contents
Advertisement
Quick Links
Download this manual
See also:
User Manual
Advertisement
Table of Contents

Subscribe to Our Youtube Channel
Related Manuals for Globalsat GH-601


Summary of Contents for Globalsat GH-601
- Page 1 Wrist Type GPS for Outdoor Training / GPS Receiver GH-601 _______________________________________ User Manual Version 1.1...
-
Page 2: Table Of Contents
Table of Content Introduction …………………………………………………………………………. Features ...…………………………………………………………………………… Application Software ………………………………………………………... Accessories …..…..….……………………………………………………………... Front panel description …………………………………….…………………….. Charging the GH-601 ……...……………………………….……………………… Starting up your GH-601 ………………………………………………………….. GH-601 main functions ……………………………………………………………. Sport Record. ………………………………………………………………………. Navigation …………………………………………………………………………… GPS Mouse ………………………………………………………………………….. Configuration ……………………………………………………………………….. -
Page 3: Introduction
Introduction ◆ Globalsat GH-601 provides a fully-sealed, waterproof, large LCD wrist-watch device, as well as a GPS navigation function that locates and tracks points from start to stop. It is adopted for people who exercise for broad kinds of outdoor sports, such as Jogging, Running, Biking, Snow Skiing, etc. -
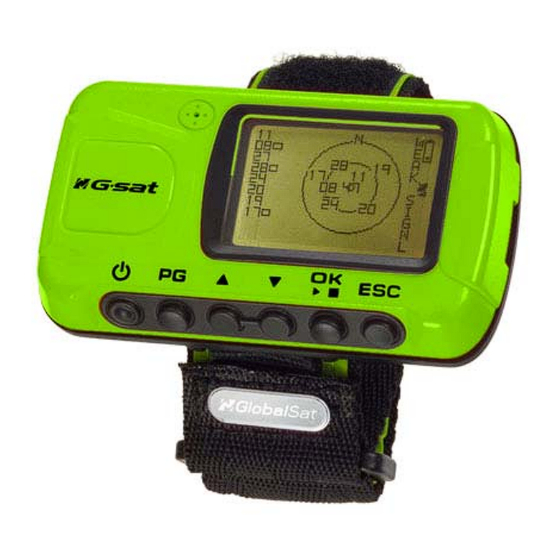
Page 4: Front Panel Description
Front panel description... -
Page 5: Charging The Gh-601
Charging the GH-601 The GH-601 operates on a built-in Li-ion battery. You must charge the internal battery when the battery runs out. 1. To charge the battery, please connect one end of mini-USB cable to PC USB port and the other end to the mini-USB port of GH-601. 2. -
Page 6: Starting Up Your Gh-601
3. When the GH-601 is fully charged, the battery icon scale will be filled. GH-601 can operate up to 16 hours on one battery charge. 4. GH-601 icons Battery: The battery icon indicates how much battery power is left. A full battery icon indicates a fully-charged battery. Timer icon: When speedometer feature of GH-601 is being used, the timer icon displays just below battery icon. - Page 7 Welcome screen Changing the Mode 1. Press the PG button to cycle through the various modes of the GH-601. The three default modes: Speedometer, Menu and Location modes can be cycled through by pressing PG button. If the Map mode is enabled, then this mode will also be cycled through.
- Page 8 Location mode Map mode (If enabled) 2. Speedometer Mode: The Speedometer mode allows you to start or stop the timer, reset the timer and split a lap. It also provides access to two screens: The Timer screen displays “TIME OF DAY”, “SPEED” and “ELEVATION” of you workout.
- Page 9 4. Use UP/DOWN buttons to select time offset from GMT as +12,+11…-11,-12 and press OK. Using the GH-601 Buttons EXIT POWER MODE DOWN START/ STOP /RESET 1. The POWER button: Press and hold continuously 4 seconds to turn the unit on or off. When the unit is on, press and release to turn the backlight on or off.
-
Page 10: Gh-601 Main Functions
GH-601 Main functions 1. Sport Record Run file info Delete All 2. Navigation Add/Remove Map Mode GPS on/off Save location Search location Return to Orig (return to original location) GPS info GPS Mouse Turn on/off GPS ms Configuratio Setup time zone(time zone ,such as +12、+11…-11、-12 ) Setup GPS Set units User name... -
Page 11: Sport Record
Sport Record Review your performance record 1. Press PG to display the Menu Mode. 2. Select ‘Sport Record’ and press OK. 3. Select ‘Run File Info’ to review the history record. Record screen 4. Select ‘Delete All’ to erase the all history files. 5. -
Page 12: Navigation
Navigation Show your location and record the route where you run 1. Press PG to display the Menu Mode. 2. Select ‘Navigation’ and press OK. 3. Press ‘Add Map Mode’ to track and record your route. Or press ‘Remove Map Mode’ to disable the map function. 4. - Page 13 Save Location 1. In Navigation Mode, press ‘Save Location’ to save the position where you want. 2. Then the review location appears. (Flagged with symbol, name, and location) 3. Press ENTER and scroll through the available location symbols using DOWN and UP buttons. Then press ENTER to decide what you want.
- Page 14 Search Location 1. In Navigation mode, press ‘Search Location’ to search the position where you want. 2. Press ‘List All’ to list the location marks and use UP/ Location mark screen DOWN buttons to select the location mark. Or press ‘Delete all’...
-
Page 15: Gps Mouse
GPS info 1. In Navigation mode, press ‘GPS info’ to see the GPS performance in your GH-601. GPS info screen GPS Mouse To use your GH-601 as a GPS Receiver 1. Press PG to display the Menu Mode. 2. Select ‘GPS Mouse’ and press OK. 3. -
Page 16: Configuration
Configuration Configure your system 1. Press PG to display the Menu Mode. 2. Select ‘Configuration’ and press OK. 3. Press ‘Setup Time Zone’ to setup your local time. Configuration screen 4. Press ‘Setup GPS’ to enable or disable WAAS/ EGBOS for GPS. 5. - Page 17 Upload your performance record to PC 1. In Configuration Mode, press ‘Upload to PC’ to prepare for data uploading. 2. To upload the data from GH-601to PC, please connect one end of mini-USB cable to PC USB port and the other end to the mini-USB port of GH-601.
- Page 18 Update your firmware in GH-601 1. In Configuration Mode, press ‘Update From PC’ to prepare for firmware update. 2. To update the firmware in GH-601, please connect one end of mini-USB cable to PC USB port and the other end to the mini-USB port of Ensure screen GH-601.
Need help?
Do you have a question about the GH-601 and is the answer not in the manual?
Questions and answers